The Fresh Loaf

A Community of Amateur Bakers and Artisan Bread Enthusiasts.

miche

dmsnyder's picture
dmsnyder

This 2+ kg miche is for an upcoming family gathering. Eighteen of us - most of 3 generations - will be getting together at the Central California beach town where my generation vacationed with our parents in the 1960's and '70's. There are lot's of wonderful memories of those Summers.

The formula for the miche is from the SFBI Artisan II workshop I took last December. I have described the formula and methods here: This miche is a hit! Since then, many TFL members have made this bread and seem to have enjoyed it as much as I. That includes brother Glenn, who has promised to bring along a matching miche.

The only modification of the original formula for this bake was to use half WFM Organic AP flour and half CM Organic Type 85 flour.

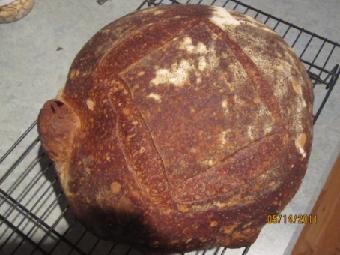
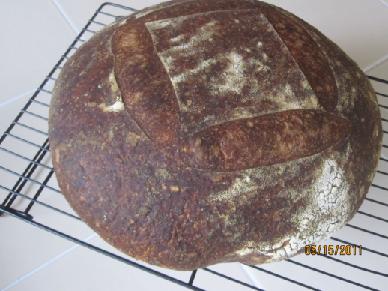
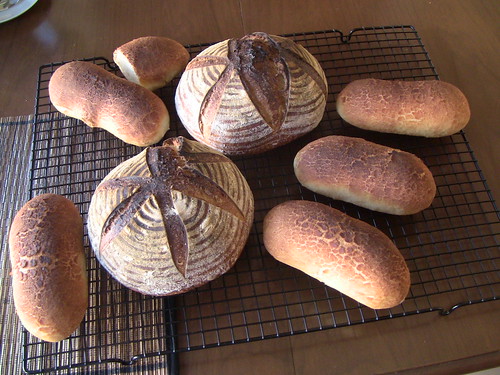
 The crust has lots of lovely crackles.

No crumb photos, since I'm taking it intact to the gathering.

I also baked a couple 1 pound loaves of the San Francisco Sourdough from AB&P today. The formula can be found here: Crackly Crust & Shiny Crumb: San Francisco Sourdough from AB&P

I think the "group photo" puts things in better perspective.

David

Ryan Sandler's picture
Ryan Sandler

A collection of my recent bakes:

Poolish Baguettes

Cut for BLT's

Ciabatta (Craig Ponsford formula)

Somewhat disappointing crumb.  Another batch made the following week looked similar

Miche, shaped as a large batard.

With baby for (largely uninformative) scale

Crumb

More Ponsford Ciabatta, made without the final letter fold "shaping"

Crumb, still disappointing

Happy baking, everyone,

-Ryan 

Elagins's picture

A big thank you SanFran sourdough miche

May 22, 2011 - 9:42am -- Elagins

Not too long ago, my SanFran sourdough starter died (of unknown causes) and one of TFL's Bay Area stalwarts, who shall remain nameless (you know who you are!) was kind enough to send me a beautiful blob of starter, which was extraordinarily robust and flavorful.

Herewith, my first results, a rustic flour sourdough miche that weighed in at about 3 pounds post-bake.

Dough:
Starter (70%) hydration 200g (27%)
KA Sir Galahad (11.7% protein) 645g (86%)
Dark rye flour 105g (14%)
Water 525g (70%)
Brittany gray sea salt 15g (2%)

teketeke's picture
teketeke

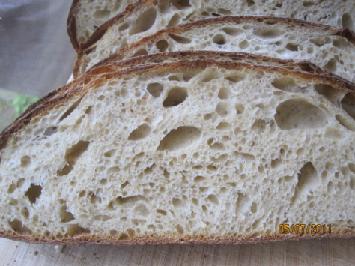
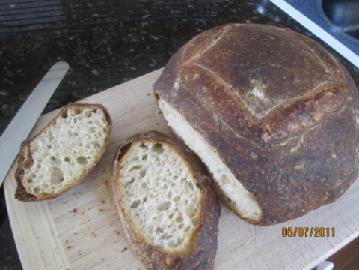
Here are my experiments of David's miche that is absolutely delicious and became my most favorite hard bread. I, who was not a big fan of sour flavor in the bread look for sourer taste in this miche now. I think because of my raisin yeast water doesn't get so sour like acetic acid, it is more like malic acid when I retard it.

 David's miche here: http://www.thefreshloaf.com/node/21644/miche-hit

How I made these miche:

No 1. 4/19( Started at 8 AM) to 4/21:

  1. Step1 Mixed 26g KA AP/3g raisin yeast water +23g water → fermented for 10 hours at 76F.
  2. Step2 Mixed the step1/94g KA AP/94g water → Refrigerated(42.8F) as soon as I mixed them and fermented for 24 hours until doubled.
  3. Final dough: 586g KA bread flour/398g water/18g toasted wheat germ/15g salt


Method:

  1. Autolyzed for 40 minutes 
  2. Added salt and knead until passed a window pane 
  3.  Bulk fermentation 10 hours ( S&F 2 times interval 45 minutes)
  4.  Shape→ Proof in a refrigerator( 42.8F) for 12 hours 
  5. Next morning: Proof at 72-74 F for 1 hours 45 minutes-
  6. Bake I used the 2 pans like Dutch oven method.   
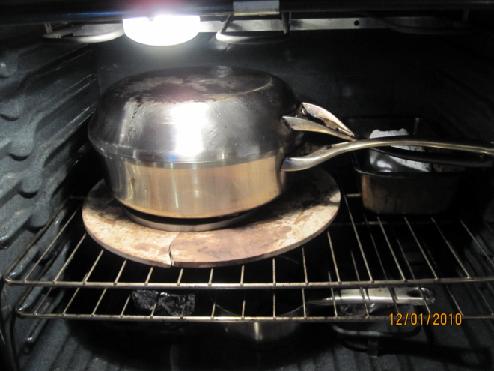
baked 20 minutes at 450F with steam, took the 2 pans and transfer the bread in the rack on the baking stone to bake more 40 minutes at 420F.
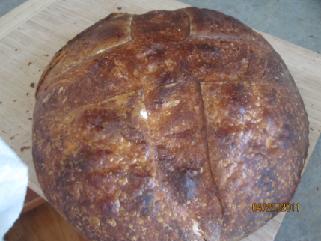
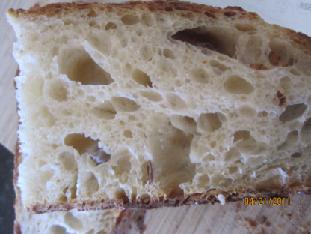
 It was little bit sour ( fruity) in 12 hours , but I did taste sour ( fruity) in 24 hours. It was a shocking moment to taste this wonderful bread. After we ate all this bread,I wanted to make more of this bread.

-------------------------------------------------------------

Then I did!

No.2  4/22( Start at 8:15am)-4/24:

  1. Step1 : Mixed 22g raisin yeast water/ 22g KA AP--- That was a mistake. I was about to make 26g KA AP/ 26g raisin yeast water.--Fermented it for 6 hours at 76F until doubled. I should have waited until tripled.
  2. Step2 Mixed the step1/94g KA AP/94g water- refrigerated as soon as I mixed them and fermented for 88 hours (4/26  6:12 AM) until doubled. I had to wait for long hours...
  3. Final dough: 586g KA bread flour/398g water/18g toasted wheat germ/15g salt.

Method:

  1. Autolyzed for 40 minutes
  2. Added salt and knead until passed a window pane.
  3.  Bulk fermentation 11 hours ( S&F Once after 45 minutes)
  4. Shape
  5. Proof in a refrigerator for 12 hours ( I put the shaped dough in a back pack and then kept in the refrigerator (50F) after I stored the dough in the refrigerator (42.8F) for several hours)
  6. Bake 20 minutes at 446F with steam, took the 2 pans and transfer the bread in the rack on the baking stone to bake more 40 minutes at 400F.
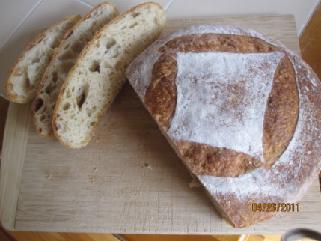
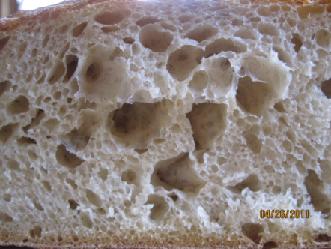
The taste was sweeter. When I tasted it in 12 hours, I didn't taste any sour from the raisins. 24 hours later, I tasted fruity sourness slightly.  I rather sourer for this bread. I baked at lower temperature to get brown crust, but I found out that I liked darker crust for this miche.

---------------------------------------------------------------------------------------------------------------------

No.3  and No. 4

5/2 (Started at 7pm)-5/7: I made 2 miche: One (R)- Retarded , the other one (NR)--not retarded.

1. Step1 Mixed 26g KA AP/26g raisin yeast water x2 ---

                  (R) Fermented it in the refrigerator for 59 hours(  5/5   6 am) until doubled.

                   ( NR) Fermented it at room temperature ( 68-70F) for 12 hours until tripled.

2. Step2 mixed the step1/71g KA AP, 23g KA whole wheat/94g water x2

            (R) Fermented it in the refrigerator for 47 hours until doubled.

            (NR)Fermented it for 4 hours at room temperature (70F) until tripled

3. Final dough: 586g KA bread flour/398g water/18g toasted wheat germ/15g salt


No.3 (NR)

  1. Autolyzed for 40 minutes
  2. Added salt and knead until passed a window pane
  3.  Bulk fermentation 11.5 hours at 68F ( S&F 1 time after 45 minutes)
  4. Shape
  5. Proof for 1 hour at 68F 
  6. Continute to proof for 3 hours at 60F
  7.  Bake 12 minutes at 465F with steam, took the top pan and bake 8 more minutes at 465F, took the bottom pan and trasfered the bread on the camp stove toaster  and continute to bake more 40 minutes.

24 hours later, The taste was sour ( fruity) slightly. I also tasted more flavor from the whole wheat that I put in the 2nd levain.  The crumb was not as moist as the others that I retarded, however it was delicious.


No.4 (R)

  1. Autolyzed for 40 minutes
  2. Added salt and knead until passed a window pane
  3. Bulk fermentation 10 hours at 70F ( S&F 1 time after 45 minutes)
  4. Shape 
  5.  Proof for 1 hours at76F
  6. Retarded (42.8F) for 6 hours, decreased the temperature to (50F) and continue to retard for 7hours.
  7. Bake 12 minutes at 465F with steam, took the top pan and bake 8 more minutes at 465F, took the bottom pan and trasfered the bread on the camp stove toaster and continute to bake more 40 minutes. 

I didn't degas much before I shaped.   24 hours later, I tasted sour ( fruity) like the first one. but I tasted more flavor from the whole wheat that I put it in the 2nd levain.

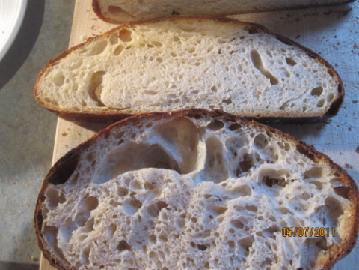
 The top (NR) : The bottom (R)

I liked (R) more than (NR). Retarding over night gives the crumb moist very well. 

---------------------------------------------------------------------------------------------------

No.5(5/12-5/14)

1. Step1 Mixed 26g KA AP/10g raisin yeast water +16g water for 12 hours.

2. Step2 mixed the step1/71g KA AP, 23g KA whole wheat/50g water+44g raisin yeast water.

    Fermented it at room temperature for 4 hours at 70F , decrease the temperature to 68F and fermented it more 6 hours .

   ( Yes, it became really sour ( acetic) !)

3. Final dough: 586g KA bread flour/ 190g raisin yeast water +208g water /18g toasted wheat germ/15g salt  I added 2 tbsp homemade rum syrup that I have kept alcoholic raisins which in my raisin yeast water with sugar.  I hoped that this yeasts which I used more raisin yeast water in the final dough and the rum syrup overcome the acetic bacteria...


Method:

  1. Autolyzed for 40 minutes
  2. Added salt and knead until passed a window pane
  3. Bulk fermentation 6 hours at 68F ( S&F 1 time after 45 minutes) until doubled
  4. Shape
  5. Proof for 6 hour at 68F
  6. Bake 12 minutes at 465F with steam, took the top pan and bake 8 more minutes at 465F, took the bottom pan and trasfered the bread on the camp stove toaster and continute to bake more 40 minutes.
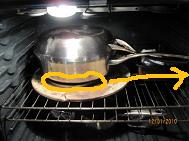

It turned out pretty good. I only tasted fruity sourness ( sweet and sour) which was stronger than others above. but it was really good bread.

----------------------------------------------------------------------------------------------------

No.6 ( 5/11-5/15)

1. Step1 Mixed 26g KA AP/10g raisin yeast water +16g water for 11 hours until 2.5 tims in bulk.

2. Step2 mixed the step1/71g KA AP, 23g KA whole wheat/25g water+ 42g raisin yeast water.

             Fermented it in the refrigerator for 12 hours until doubled.

3. Final dough: 586g KA bread flour/398g water/18g toasted wheat germ/15g salt .


Method:

  1. Autolyzed for 40 minutes
  2. Added salt and knead until passed a window pane
  3. Bulk fermentation 9 hours at 68F ( S&F 1 time after 45 minutes) until doubled
  4. Shape
  5. Proof for 1 hour at 72F.
  6. Retarded (42.8F) it for 11 hours.
  7. Bake 12 minutes at 465F with steam, took the top pan and bake 8 more minutes at 465F, took the bottom pan and trasfered the bread on the camp stove toaster and continute to bake more 40 minutes.
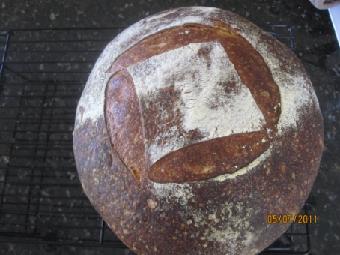
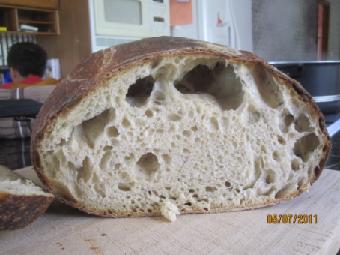
24 hours later, The taste was very cloese to the one that I baked in 5/14.   But I like this better because the crumb had more moist.  

I still continue to play with this bread. :)

Thank you for sharing your wonderful miche, David!!  Thank you so much!

I also thank you everbody to read such a long story.

Best wishes,

Akiko
freerk's picture

Miche Poilâne

May 12, 2011 - 1:57pm -- freerk

Tomorrow, Friday the 13th, my sis is celebrating her  50th... go figure :-)


Showing up without bread on my family's doorstep just isn't an option any more.


Since there's a big crowd expected for the birthday bash, I figured I needed something... substantial. And what is more substantial than a Miche Poilâne that can actually stand on its own :-)


I proofed this heavy-weight in my creuset and when I was about to transfer it to the peel decided to leave it right where it was, sort of liking the "push up" the skillet gave the boule.


varda's picture
varda

I'm so excited - I just can't hide it - I'm about to lose control and I think I like it.

Until today, I had no idea the Pointer Sisters were bakers.  

Finally, on my sixth attempt at making the Gérard Rubaud Miche which Shiao Ping so memorably demonstrated, I have something that looks like bread.   I don't know why this bread is so difficult.   I adapted it, and adapted it some more to get to this point.   I was motivated by the fact that it is really just completely delicious even when it looks like something the cat dragged in.   My husband (who claims he only likes white bread) says everytime I make this, "This is really good.   Have you ever made it before?"   This bread even contains its own ether of forgetfulness.    I won't cut it until tomorrow, so who knows, but... Proth5's comment on DavidG618's  recent post on whole wheat sourdoughs, was what led to the latest adaptations.   Shiao Ping mentions fermenting this for around 3 hours in quite warm conditions before cold retarding overnight.   This is what I tried to do for several of my tries.   This time I cut the bulk ferment to less than two hours, with total fermentation including proofing at 4 hours and 15 minutes.   Earlier I had given up on the mixed grain starter with three stages and tiny amounts of rye and spelt added at each stage, and just started using my own regular starter.   That also helped a lot.   Maybe with the shorter ferment times, I could go back to the  Rubaud starter.   I am curious as to whether or not it would make a difference (in a positive way that is.)

Here is the formula:   I also scaled down from the original quantity of around 3.5 pounds to 2.5 pounds.   But I'm not going to call it a mini-miche - just a miche that is slightly smaller than regulation.


Final

Starter


WW

127


127

18%

Spelt

64


64

9%

Rye

17

5


22

3%

White

405

95


500

70%

Water

508

62


570

80%

Salt

13


1.9%

Starter

162


14%


1296


2.6


(Even though I used my own starter, I adjusted all the numbers so they came out with the same percentages as Shiao Ping's version.) 

 And the crumb with spelt-induced sheen:

Azazello's picture

A miche

March 8, 2011 - 2:34am -- Azazello

Hello everyone.

Great community here - I've been lurking for a little while and have learned a great deal from people's posts, so thanks - many people on here have (unwittingly) helped me improve my bread.

I thought I'd post a couple of pictures of a miche I baked last night and cut open this morning. I followed the Reinhart formula in BBA, although I think I used a mix of brown and wholemeal flours and did a couple of stretch and folds instead of kneading for a more open crumb.

I could lose the rye flour coating, but I think it looks good.

GSnyde's picture
GSnyde


IMG_2199

I generally follow trends slavishly, but I can’t get into the nine-pound-miche thing that seems to have taken TFL by storm.  In fact my one and only complaint about miches is they are too large for my small (albeit voracious) family of only two carbovores.  I know they can be divided and a piece frozen, but they’re never as good thawed as fresh.

So what does one do if one loves the flavor and texture of a miche but wants smaller loaves???  I pondered this for several long minutes, and then I settled on the idea of trying a radical experiment.  What if one made a miche dough, and then (gasp!) divided it into two boules!!??   Though I risk the disapproval of the Mega-Miche adherents, I took the risk in the spirit of bread science and the quest for the perfect loaf. 

I am among the seeming thousands of TFLers who have tried and admired the SFBI Miche my Big Brother David posted about five weeks ago (http://www.thefreshloaf.com/node/21644/miche-hit).   It has a magnificent caramel flavor and an admirably chewy crumb.  My favorite variation on that formula is to use 50% Central Milling Organic Type 85 high extraction flour and 50% Central Milling Organic Artisan Baker’s Craft (Malted) white flour, as described in my 1/30/11 blog post (http://www.thefreshloaf.com/node/21900/bay-area-miche-sfbi-formulacentral-milling-flours).

So this week, I used the SFBI formula but with that flour combination (and no wheat germ), and then after primary fermentation I divided the 1250 gram dough ball into two boules and plunked them into small brotforms.  After a night in the fridge and 150 minutes on the counter, they were baked with Sylvia’s magic steam towels for 20 minutes at 450F, and then dry for 35 minutes more at 430F.

IMG_2192

Besides having loaves of a size we can eat, the shorter bake time produced a rich dark crust with no burned spots.  And who can complain about the higher crust ratio of a mini-miche?

The flavor is more-or-less the same as the full-sized version, wheaty and moderately sour.  And the crust is similarly crunchy.  The crumb may be a bit more airy. 

IMG_2203

A successful experiment. 

And here’s my day’s baking output, the mini-miches with the Vienna Bread Dutch Crunch rolls.

IMG_2194

A good baking day.

Glenn


dmsnyder's picture
dmsnyder

The “Miche, Pointe-à-Callière” from Jeffrey Hamelman's Bread has been one of my favorite breads and was my favorite miche for a long time. It's been quite a while since I last baked it. Since then, I've been doing more hand mixing of doughs I formerly machine mixed. I've found a new and wonderful high-extraction flour, Central Milling's “Organic Type 85.” And last, but my no means least, I've baked miches according to the formula we used in the SFBI Artisan II workshop last December. Many TFL members have baked this marvelous miche since I posted the formula, and they know what a wonderful bread this can be.

After these months of enjoying the SFBI miche, as well as Chad Robertson's somewhat similar “Basic Country Bread” from Tartine Bread, it seemed time to revisit the “Miche, Pointe-à-Callière.” I made it using Central Milling's “Organic Type 85” flour. I followed Hamelman's formula. I altered his procedures only by mixing the dough entirely by hand.


Overall Formula

Wt.

Baker's %

High-extraction whole-wheat flour

2 lbs

100.00%

Water

1 lb, 10.2 oz

82.00%

Salt

0.6 oz

1.80%

Total

3 lb, 10.8 oz

183.80%


Levain Build

Wt.

Baker's %

High-extraction whole-wheat flour

6.4 oz

100.00%

Water

3.8 oz

60.00%

Mature culture (stiff)

1.3 oz (3 T)

20.00%

Total

11.5 oz


Final Dough

Wt.


High-extraction whole-wheat flour

1 lb, 9.6 oz


Water

1 lb, 6.4 oz


Salt

0.6 oz


Levain

10.2 oz (all less 3 T)

Total

3 lb, 10.8 oz

Procedure

  1. Make the levain about 12 hours before you want to mix the dough. Dissolve the mature culture in the water, then mix in the flour.

  2. On the day of the bake, mix the Final Dough flour and water to a shaggy mass and autolyse in a large covered bowl for 20-60 minutes.

  3. Sprinkle the salt over the dough and add the Levain in several chunks. Mix thoroughly.

  4. Transfer the dough to a clean, lightly oiled bowl and cover tightly.

  5. Ferment the dough for 150 minutes, with stretch and folds on a floured board at 50 and 100 minutes.

  6. Form the dough into a tight boule and transfer it, seam side up, to a floured banneton. Place the banneton in a large plastic bag or cover with a towel or plasti-crap. (Note: Hamelman recommends the usual pre-shaping and resting before the final shaping. I did not do this, since the dough was rather slack, and the gluten did not require “relaxing,” in my judgement.)

  7. Proof for 2-2 ½ hours.

  8. One hour before baking, pre-heat the oven to 500ºF with a baking stone and steaming apparatus in place.

  9. Transfer the miche to a peel. Score it with a single square, “tic-tac-toe” pattern or diamond pattern. Load the miche onto the baking stone.

  10. Steam the oven and turn it down to 440ºF. After 15 minutes, turn the oven down to 420ºF, and bake for about another 45 minutes.

  11. When the miche is fully baked (internal temperature is 205ºF), turn off the oven. Leave the miche on the baking stone with the oven door ajar for another 10-20 minutes to dry the crust.

  12. Transfer the miche to a cooling rack and cool thoroughly. Then wrap it in baker's linen and let it rest for at least 12 hours before slicing.

Note: All times are approximate. Watch the dough, not the clock.

Miche, Pointe-à-Callière: Profile

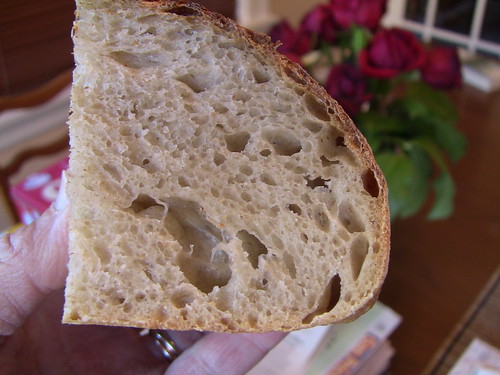
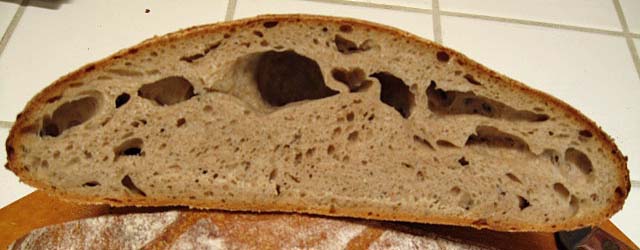
Miche, Pointe-à-Callière: crumb

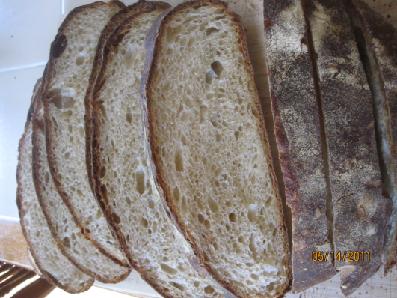
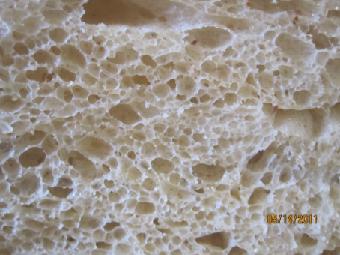
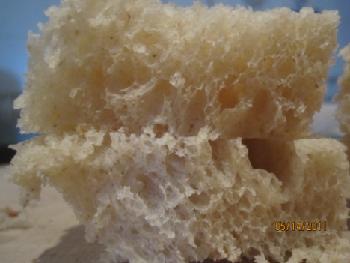
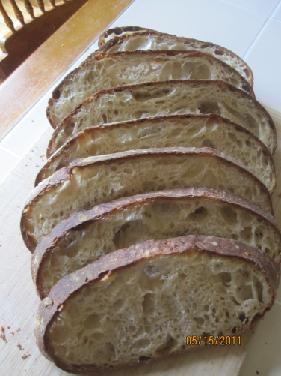
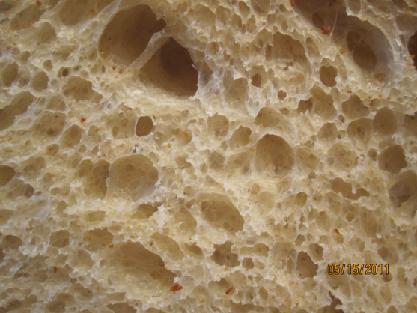
I rested the loaf for about 18 hours before slicing. The crumb structure was similar to that pictured in “Bread,” but I think I slightly under-fermented the dough and over-proofed the loaf.The crust was chewy. The crumb was rather dense and chewy. The flavor was not really sour but was very wheaty – more intense than I recall from other bakes with this flour.

Next time I make this miche, if I hand mix it, I'll add some S&F's in the bowl during the first part of the bulk fermentation and lengthen the fermentation, hoping to increase flavor complexity.

David


Pages

Subscribe to RSS - miche