The Fresh Loaf

A Community of Amateur Bakers and Artisan Bread Enthusiasts.

miche

varda's picture
varda

When I first joined TFL over a year ago, I was completely blown away by a post by Shiao Ping.   Perhaps you remember it - a Gérard Rubaud miche stenciled with his initials and photographed with Japanese maple leaves floating around in the frame:  http://www.thefreshloaf.com/node/15778/g%C3%A9rard-rubaud-miche. I read the post over several times and just shook my head.   Maybe in another life...  That other life may be closer but it isn't here yet.    A few weeks ago I suddenly remembered this post and looked it up and tried it.   I tried to follow Shiao Ping's instructions to the letter.   I added tiny amounts of spelt and rye to the starter - in fact so tiny that they are not really measurable in my kitchen.   I mixed up the dough, and religiously did the 5 in the bowl stretch and folds every half hour.   I retarded overnight because she did even though she said that GR doesn't do it that way.   And what did I find the next morning?   Soup.   I poured it out onto my peel and it flowed over the edge.   I flipped up the overflow and slid it as best as I could onto the stone and it flowed over the edges of the stone.   Not a happy thing.   But I baked it, and pulled it out and cooled it down and cut off the overflow lips, and tasted, and oh man.   Ugly but delicious.   Here is the ugly.  

I can't show you the delicious.  I tried to figure out what I could do differently.   I decided to do away with some of the tiny measurements by only adding rye to one elaboration and spelt to another (it's a three stage starter) and I decided not to retard overnight, and to do two stretch and folds on the counter every 50 minutes a la Hamelman.   I also cut the total from around 4 pounds to 2.5 (is it still a miche?) And finally I moved around the times of the starter stages.   Instead of having the first tiny amount ferment overnight which I thought would just dry out since it was so small, I had the first stage go for 3 hours, and the second overnight.   So again.   This time the dough seemed a bit more manageable, but even when it would come together on a stretch and fold, it would seem to liquify immediately thereafter.   This is an 80% hydration loaf, and that's high, but I've made other formulas at 80% and something else seemed to be going on than high hydration.    Here is outcome number 2.   Not much better.  

but still really delicious and motivating me to figure out how to make this thing properly.    On my third attempt, I decided the main issue is that the starter was the culprit that was causing severe liquification of the dough.    This is a crazy starter.   You start out with a tiny amount and build up the flour by a factor of 40 over three stages.   It has a high percentage of whole grains which I thought might be the problem.   You also add such tiny amounts of rye and spelt in the first two elaborations that you end up asking yourself, why am I doing this?   So I decided that in the hands of an artist like Shiao Ping this might be doable but for a peasant like me, no way.   I decided to take my regular starter and build it up as I normally do in two stages, building up the flour by a factor of around 5 rather than 40 with white flour only leaving out the whole grains.   I compensated for this by adding the whole grains to the final dough and kept all the percentages the same as the original formula.   I felt that only by working with a starter that I understood could I have any chance of getting this bread made properly.   Here is the starter build and formula that I ended up using:

             
        First take half         Second    
  70%    10:15pm plus 9.5 hours plus 5 hours
Ripe Starter 132          
WW            
Spelt            
Rye 10   5      
White 68 100 84 100    
Water 54 67 61 46 56%  
Expansion         4.9  
Total / % used in final dough     296 52%  
             
  Final Starter        
WW 127 0     18%  
Spelt 64 0     9%  
Rye 19 3     3%  
White 405 95     70%  
Water 515 55     80%  
Salt 13       1.9%  
Starter   153     14%  
             
Total grams/Estimated pounds 1296 2.57        


This seemed a lot better behaved in the bowl coming together on the stretch and folds and not liquifying immediately thereafter.   Imagine my surprise when I tried to remove it from the bowl it was proofing in when it again flowed over the edges of the peel.   Again I quickly flipped up the overflow so the whole thing looked like a bialy and slid it into the oven without slashing (as if you can slash liquid.)   In the oven it expanded nicely and the sunken center filled out.   Again not a thing of beauty.   The crumb this time seemed more or less proper without the big caves of the first two at the top of the loaf.   But now I'm feeling tapped out.   I don't know where to go from here.   I don't understand the tendency of this dough to liquify at a moments notice.   Any ideas?   In other words - help!

The third try:

Ryan Sandler's picture
Ryan Sandler

My family is not so much in to football, but we are into bread.  This post will give you an idea how much.  You see, my mom taught me the basics of making bread when I was a kid.  However, she never went much beyond a basic white bread pan loaf (although these were always excellent).  Although I got her The Bread Baker's Apprentice for Christmas a couple years back, she never got into the artisan baking thing, with pre-ferments and all, and found the whole process a little intimidating.  But this year, for Christmas, she asked for a baking lesson from me.  Today was the day.

The plan: to bake three types of bread in one day, making two batches of each so that I could make one and demonstrate, and then she could make one.  Limitted to her standard (but quite good, as I discovered) home oven, this required staggering the batches over the course of the day.

On the roster: Italian Bread (from BBA), Potato Rosemary Bread (also from BBA), and French-style rustic bread (Pain Rustique from Hamelman's Bread). All solid players that I can do in my sleep at home, and felt like ought to go fairly smoothly, while showcasing different flavors, shaping and slashing styles.

Let the games begin!

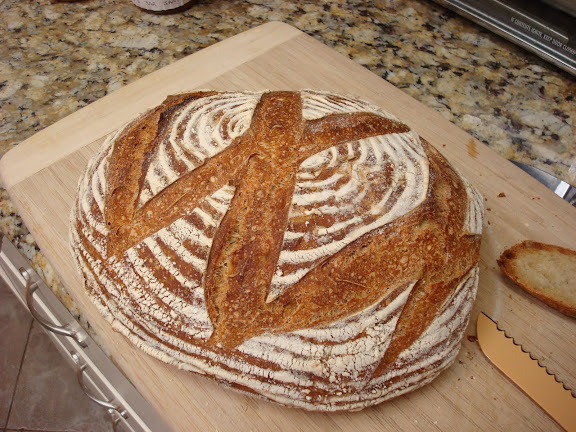
We showed up at my parents' place at 9am, bringing with us a pre-game miche:

Another Mighty Miche, ready for toasting
At 9:30 my dad took the baby, my wife went out shopping with her mom and sister, and my mom and I got to work.  First up was mixing Italian Bread--not much teaching there, although I demonstrated the power of the 5-minute rest for helping along gluten development

Italian Bread #1, in between the remaining biga and the poolish
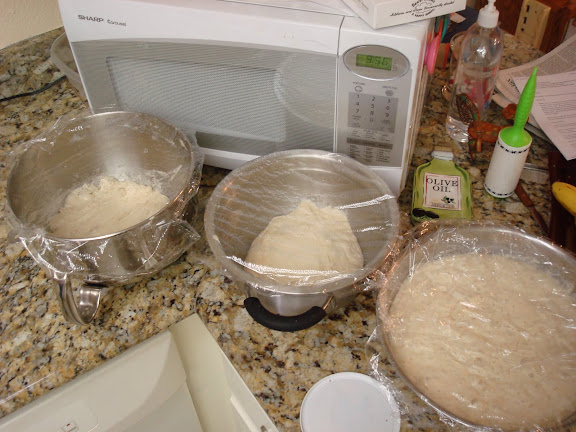
From there, the day proceeded in an almost-orderly fashion, alternating mixing, stretch-and-folding, dividing, and shaping with one bread and then another.  Mostly things proceeded smoothly, although there was a moment of panic when we realized that I'd dumped out, pre-shaped and final shaped Potato-Rosemary Bread #2 instead of #1, while #1 sat happily bulk fermenting for an extra half an hour.  Some improvisation was required (we pretended batch #2 had never been shaped, quickly shaped batch #1 without a pre-shape and pretended it had already been proofing for 10 minutes.  It worked.)

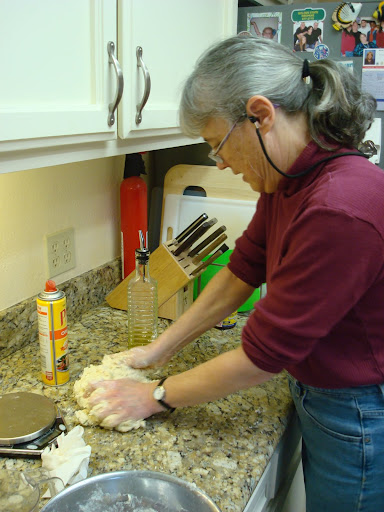
Mom kneading Potato Rosemary Dough
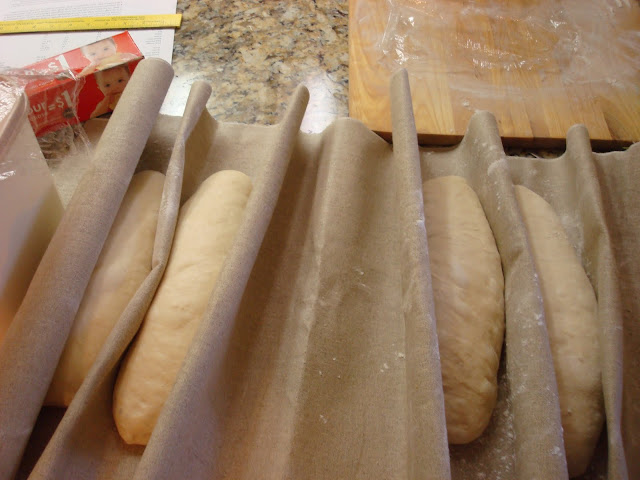
Italian Breads Proofing - "Mine" are on the left. (All on my new TMB/SFBI couche!)
 

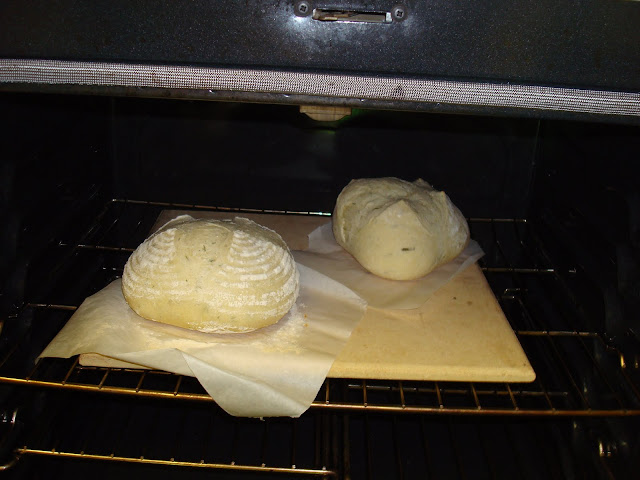
Potato Rosemary Breads in the Oven
 

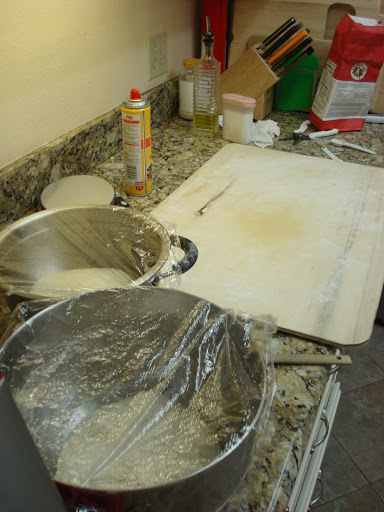
Rustic Breads in Bulk Fermentation - "Mine" is on top (Also my lovely SFBI/TMB proofing board)
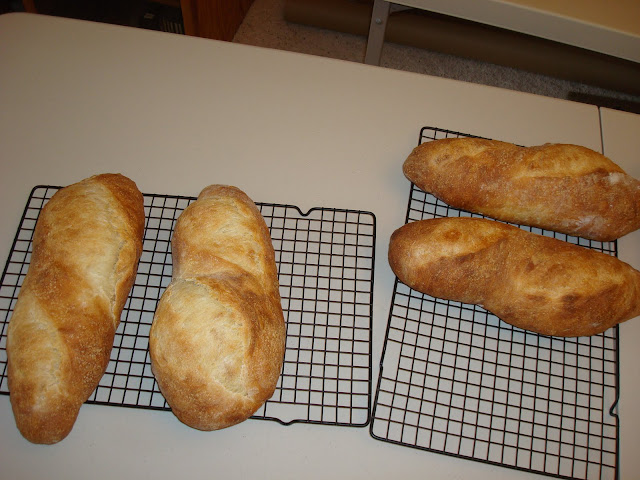
Italian Breads, Finished. Mine on the left (clearly under proofed!)
 

Rosemary Potato Breads (I don't even know whose are mine!)
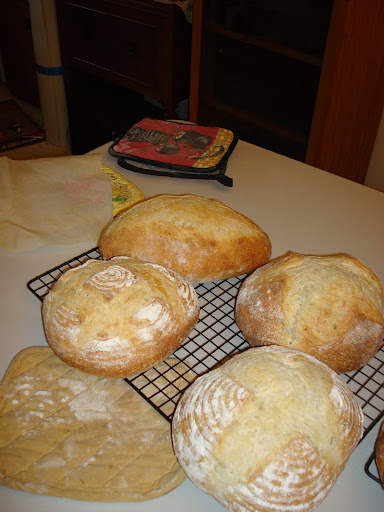
Rustic Breads  (Mine on the Right)
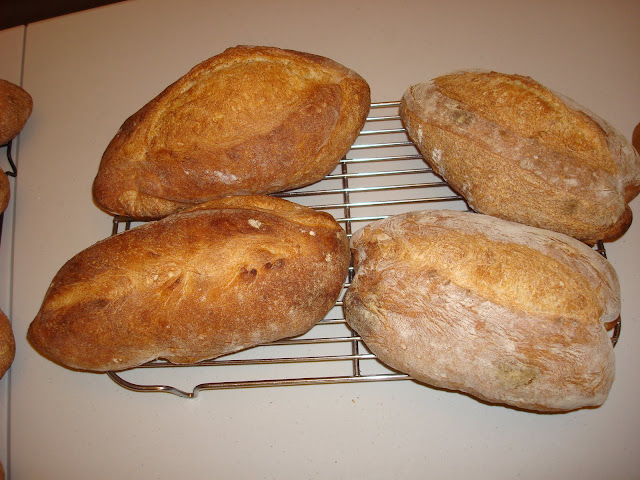
The hardest part of the whole business (besides being up on our feet all day baking), was teaching the shaping techniques.  I had the principles clear in my head (surface tension, surface tension, surface tension), but conveying the actual physical motions (which are just plain tricky anyhow) was quite difficult.  Practice was useful -- except on the Italian bread, I had my mom shape and slash one of "my" breads after I demonstrated the technique so she'd have an extra chance to get the hang of it.  What proved invaluable, however, was employing a dish towel a la Mark of Back Home Bakery to demonstrate.  I already thought that video was great when it was posted, but now I'm really grateful to Mark for making posting it! I only wish I'd thought to do that before we'd already shaped the Italian breads, rather than after.

The other main challenge was the oven--it was just too good!  My parent's gas oven held it's heat remarkably well, which meant that turning the temperature up before was actually unnecessary, and indeed counter-productive since amidst the chaos I forgot to turn it down after loading the breads.

The fruits of our labors
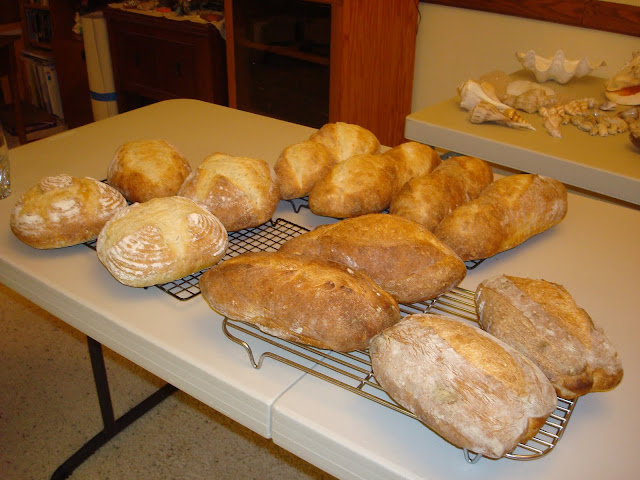
The bakers and their breads
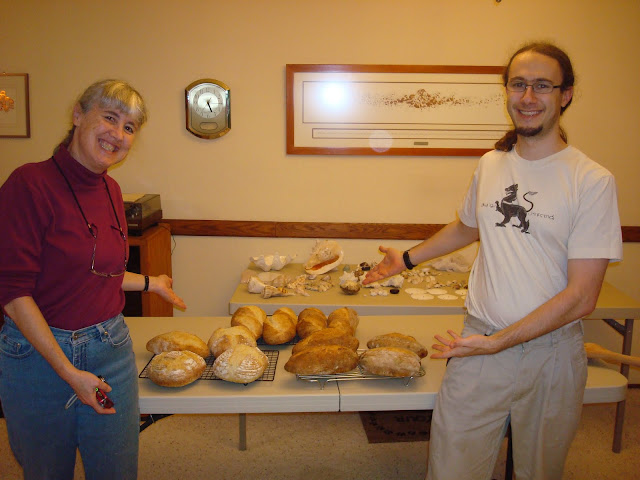
 

After we were done baking, we brought three choice loaves over to my in-laws for dinner (it was my father-in-law's birthday, by coincidence), and had a lovely meal.

Clockwise from left, Rustic Bread, Italian Bread, and Potato Rosemary Bread
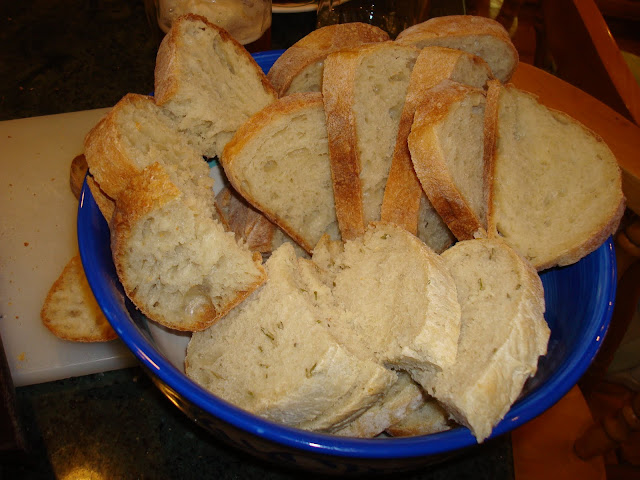


It was a fun, busy, bread-ful day.  I'd do some things differently if I were to do this again (like use a bigger oven and do three batches instead of six!), but my mom and I had a great time.

Happy baking, everyone,

-Ryan

dmsnyder's picture
dmsnyder


One of the breads we baked at the SFBI Artisan II Workshop last month was a miche. Everyone thought it was one of the best breads we baked. I made it at home for the first time two weeks ago, but used “Organic Type 85” high-extraction flour from Central Milling rather than the mix of white and whole wheat with the addition of toasted wheat germ we had used at SFBI. (See This miche is a hit!)

This bread was delicious, but I did want to make it at least once using the formula we had used at the SFBI, just to see how it turned out at home compared to baked in a commercial steam injected deck oven. Certainly the several TFL members who have baked this miche in their home ovens since I posted the formula have found it to be good. Also, at the SFBI, we had found that miches scaled at 2.5 to 3 kg somehow had an even better flavor than those scaled at 1.25 kg. So, today I baked a 2 kg miche using the original SFBI Artisan II formula.

For those who would like to make this larger version, here is the formula for a 2 kg miche:


Total Dough

Bakers %

Weight (g)

AP Flour

96.67

1087

WW Flour

3.33

38

Water

73.33

824

Salt

2

23

Wheat germ toasted

2.5

28

Total

177.83

2000


Pre-ferment

Bakers %

Weight (g)

AP Flour

75

112

WW Flour

25

38

Water

100

150

Salt

0

0

Liquid starter

50

75

Total

250

375


Final Dough

Bakers %

Weight (g)

AP Flour

100

975

Water

69

675

Salt

2

23

Wheat germ toasted

2.5

28

Levain

31

299

Total

204.5

2000

The procedure used was the same as in my previous blog entry about this bread with one exception – shooting for a slightly lighter crust, I baked with steam for 20 minutes at 450ºF, then turned the oven to convection bake at 425ºF for another 40 minutes. I did not leave the miche in the turned off oven to dry out before removing it to the cooling rack. I did leave it in the oven while I heated the oven back up to 460ºF conventional bake for the next loaves (about 5 minutes).

I was concerned about over-proofing this loaf, and it was lined up ahead of a couple San Joaquin Sourdough breads waiting to bake.

Miche after baking 20 minutes with steam at 450ºF

The blowout I got suggests the loaf was a bit under-proofed. I also shaped the boule really tight, which may well have been a second factor.

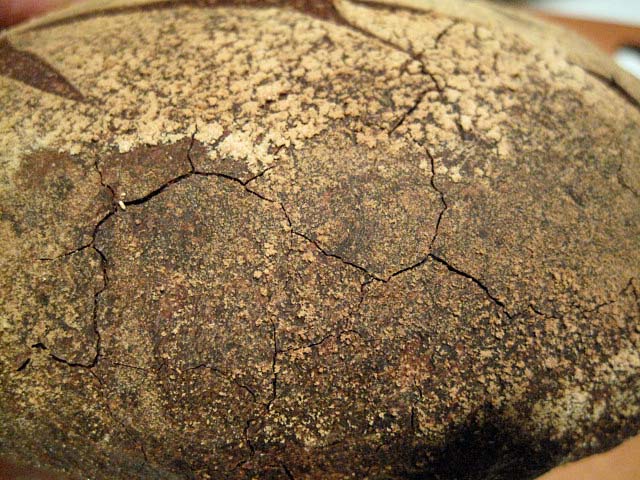
The miche sang loud and long while cooling. The crust had some crackles, but not like the last miche.

Crust crackles

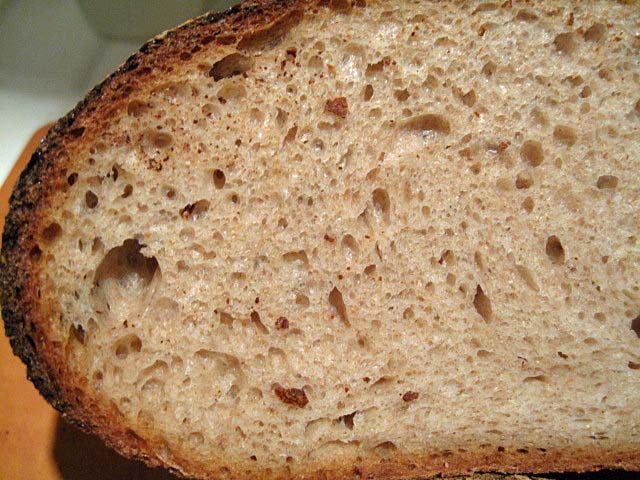
Loaf profile, cut through the middle

Crumb

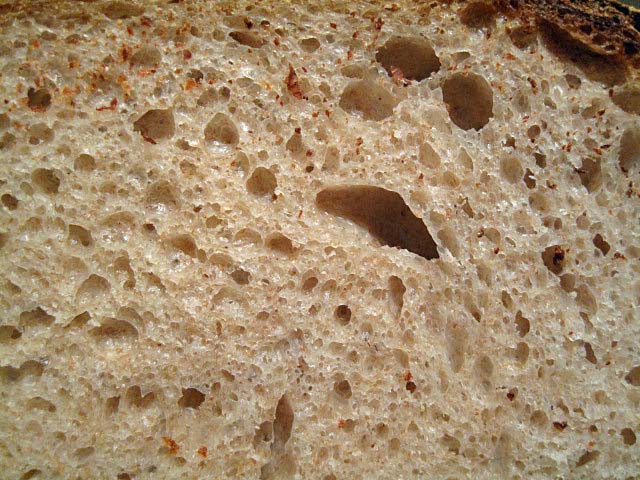
Crumb close-up

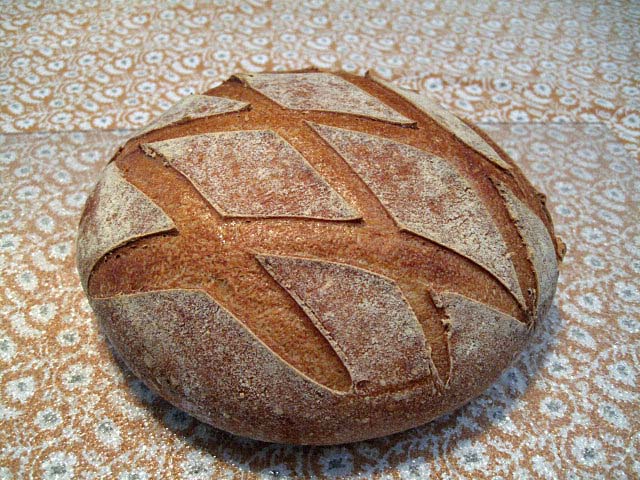
2 kg miche beside 514 g San Joaquin Sourdough bâtards

The crust was crunchy-chewy - much thinner than the last bake. It was much less caramelized, and this was apparent in the less wonderful crunch and flavor. The crumb was nice. It was quite noticeably denser in the center of the loaf. I think this is expectable with a miche of this size. I thought the crumb structure was pretty consistent from the center of a slice to the crust.

6 hours after baking: The aroma of the crumb had a pronounced whole wheat grassiness. The crumb was moderately chewy. From past experience, I expect it to be softer tomorrow. The flavor was good - mildly sour with a nice wheaty flavor - but I didn't enjoy it quite as much as the miche made with Central Milling's "Type 85" flour. I think the flavor would have been better had I used fresh-milled whole wheat. That's what I will do the next time I bake this miche.

24 hours after baking: The aroma and flavor have mellowed and melded. The grassy aroma is gone. It just smells like a good sourdough country bread. The flavor is now delightful - very complex - nuttier and sweeter. A very thin smear of unsalted butter makes this bread ambrosial.

I froze half the miche. The other half will be croutons for onion soup gratiné tonight, breakfast toast with almond butter and crostini with ribollita for dinner tomorrow. (The ribollitta was my wife's all-morning project.) That should leave another quarter loaf for sandwiches, panini, French toast ... 

David

Submitted to YeastSpotting


Ryan Sandler's picture
Ryan Sandler

With all this talk on the forum about miche lately, I've been itching to give it a try.  So when the excellent dmsnyder posted the formula for the miche he made in the SFBI Artisan II workshop, I decided that the time was now and the bread should be here!

I followed the very nicely written formula at the link, using a small amount of whole wheat flour in the Levain and toasted wheat germ in the final build, as I've no good source for high-extraction whole wheat flour.  I made the levain with 25% whole wheat flour, 75% KAF AP (and my starter had been fed the same mix), to get approximately 3.33% whole wheat in the final dough (it actually ends up being a bit more, but I didn't worry about it).

I must say, this is an excellent formula, and an excellent bread.  Incredible oven spring.  Wonderful alliterative potential too: My massive mighty miche makes mastication memorable.

Anyway, pictures:

From the top


Another external view


Miriam meets miche


Not a bad crumb either.


We sliced it 7 hours after it came out of the oven.  Lovely flavor and texture, lots of character.  Looking forward to snacking on the remaining three quarters of a loaf  I'd definitely make it again, although unlike dmsnyder, the notion of upgrading to a 2kg loaf sounds intimidating!  If nothing else, there's no way that would fit in my poor little banetons.  I guess there's always the "napkin in a bowl" trick, eh?

dmsnyder's picture
dmsnyder


We baked a miche the last day of the SFBI Artisan II (sourdough baking) workshop. This was one of the breads we mixed entirely by hand. The students' miches were scaled to 1 kg, as I recall, but our instructor baked a couple larger ones, using the same dough.

These miches were among the favorites of all the students for the wonderful texture of their crust and crumb and their flavor. I gave one of mine to brother Glenn, who has stopped reminding me in the past few days that I promised him the formula.

This formula is substantially different from the miche formula in Advanced Bread and Pastry. I blogged about the background of that miche last month. This one is more similar to contemporary versions such as that of James McGuire, Hamelman's adaptation of which is found in Bread.

The formula we used at the SFBI calls for mostly white flour, with a little whole wheat in the levain refreshment and a little toasted wheat germ in the final dough. From my reading, a high-extraction flour is preferred for miches. I had some of Central Milling's “Organic Type 85” high-extraction flour on hand, so that is what I used.


Total formula


Ingredients

Wt (g)

Baker's %

High-extraction flour

702

100

Water

515

73.33

Wheat germ (toasted)

18

2.5

Salt

15

2.08

Total

1250

177.91

Notes

  • The SFBI formula used 96.67% “Bread flour” and 3.33% Whole wheat flour. All the whole wheat flour is used in the levain. I used Central Milling's “Organic Type 85 Flour” for both the levain and the final dough

  • I did not use wheat germ since I was using high-extraction flour, but this ingredient did contribute to the great flavor of this bread as we made it in Artisan II.


Levain


Ingredients

Wt (g)

Baker's %

High-extraction flour

93.7

100

Water

93.7

100

Liquid starter

50

46.8

Total

237.4

246.8

  1. Dissolve the starter in the water and mix in the flour. Desired Dough Temperature: 78ºF.

  2. Ferment for 8-12 hours.


Final Dough


Ingredients

Wt (g)

Baker's %

High-extraction flour

586

100

Water

398

68

Wheat germ (toasted)

18

3

Salt

15

2.5

Levain

234

40

Total

1251

213.5

Procedure

  1. Dissolve the levain in the water. Add the other ingredients and mix thoroughly by hand. DDT: 75-78ºF.

  2. Transfer the dough to a clean, lightly oiled bowl.

  3. Ferment for 3-4 hours with 4 folds at 50 minute intervals. (I did this by the “stretch and fold in the bowl” technique.)

  4. Transfer the dough to a lightly floured board. Pre-shape as a tight boule.

  5. Cover and let rest for 20-30 minutes to relax the gluten.

  6. Shape as a tight boule and place, seam side up, in a floured banneton.

  7. Cover with plastic and retard overnight in refrigerator.

  8. Remove the boule from the refrigerator and allow to warm and complete proofing for 1-3 hours. (Watch the dough, not the clock!)

  9. 45-60 minutes before baking, pre-heat the over to 500ºF with baking stone and steaming apparatus in place.

  10. When the loaf is proofed, transfer the boule to a peel. Slash the boule as desired, and transfer it to the baking stone. Steam the oven and reduce the temperature to 450ºF.

  11. Bake for 20 minutes, then remove any water remaining in your steaming apparatus.

  12. Continue baking for another 40-50 minutes. (If you have a convection oven, switch to “Convection Bake” and reduce the oven temperature to 430ºF at this point. But see my tasting notes.)

  13. Remove the boule to a cooling rack, and cool thoroughly before slicing.

Notes on procedure

  • Traditionally, we were told, this bread is scored in a diamond pattern, but any scoring pattern that pleases you is fine. Just be aware that the diamond pattern tends to yield a flatter profile loaf than a simple square or cross.

  • This bread benefits from a very bold bake. The crust should be quite dark. It may look almost burned, but the flavor and crunchiness that is desired requires this.

  • This type of bread often improves in flavor very substantially 24 hours after baking.

    Crust

    Crumb


    Crumb close-up

Tasting notes

I sliced and tasted the bread about 4 hours after removing it from the oven. The crust had crackled nicely and was very thick and crunchy – the kind that results in crust flying everywhere when you slice it. The crumb was well-aerated, but without any really large holes. The crumb structure is similar to that I got with the miche from BBA made with this flour, but a bit more open. The crumb is chewy-tender.

The flavor of the crust is very dark – caramelized-sweet but with a bitter overtone where it is almost black. The crumb is sweet, wheaty, nutty and absolutely delicious. My note above notwithstanding, it's hard to imagine the flavor getting any better in another day.

I am enormously impressed with the flavor of the breads I have baked with Central Milling's “Organic Type 85” flour. I want more of it, and I want to try some of their other specialty flours, including those they mill for baguettes.

I will definitely be baking this bread again. I would like to make it as a larger miche, say 2 kg. Next time, I will lower the oven temperature to 420 or 425ºF when I switch to convection bake for the crust to be slightly less dark.

David

Submitted to YeastSpotting

dmsnyder's picture
dmsnyder


This is the Miche from Peter Reinhart's “The Bread Baker's Apprentice” (BBA). I followed the instructions Reinhart provides, with the following modifications:


  1.  I used “Organic Type 85”flour from Central Milling as the high-extraction flour.
  2.  Rather than using 100% high-extraction flour, I substituted 10% Whole Spelt flour in the final dough.
  3.  I did two S &F's at 1 and 2 hours into a 3 1/2 hour bulk fermentation  
  4.  I pre-heated the oven to 500ºF with a baking stone and the oven steaming apparatus recommended by the San Francisco Baking Institute. I bake with steam at 450ºF for 25 minutes, then turned the oven to convection bake, set the temperature to 425ºF and baked for another 40 minutes. (This is a higher effective temperature than Reinhart calls for, because of the convection setting.)


It produced a boldly baked, high risen loaf with a dark, crackled crust. It has a wonderful aroma.

The crust stayed crunchy as the bread cooled. The crumb was dense, which was not surprising at this hydration level, but it was not as well aerated as I had hoped. The crumb was somewhat chewy, and the flavor was wheaty and moderately sour. There was no grassy-bitter flavor.

Poilâne said that the flavor of his bread was best on the third day after baking. I'm taking some of this loaf to San Francisco for a taste comparison to the Miche that brother Glenn baked today, and we'll see how the flavor develops over a day.

David

Submitted to YeastSpotting


dmsnyder's picture
dmsnyder


I have made miches from Peter Reinhart's BBA, from Daniel Leader's “Local Breads” and the Miche, “Pointe-à-Callière” from Jeffrey Hamelman's “Bread.” All were good breads. Reinhart's was the closest to the Pain Poilâne I remember from my single tasting in Paris some 25 years ago.

This weekend, I baked the miche from Michel Suas' “Advanced Bread and Pastry” for the first time. Suas references Pain Poilâne as the best known miche, but he does not say his formula is an attempt to replicate it. His “miche” is a 2 lb boule. This is smaller than my notion of a miche, but what do I know? I'll ask M. Suas the week after next when I'm at the SFBI for the Artisan II class and report back.

Suas' formula and procedures are quite unusual in several respects. It uses 3 builds and specifies a mixture of high-extraction, bread and medium rye flours. The final dough has 50% pre-fermented flour from the levain, and almost all the water comes from the 120% hydration levain. Even more remarkable is the very brief bulk fermentation of 15 minutes. I assume this works because of the very high percentage of pre-fermented flour. After shaping, the miche is retarded overnight before baking.


First levain feeding

Wt.

Baker's %

High-extraction flour

1 3/8 oz

100

Water

1 ¾ oz

120

Salt

1/8 tsp

0.6

Starter (stiff)

1/8 oz

10

Total

3 ¼ oz

230.6

  1. Mix all ingredients well with a DDT of 70ºF

  2. Ferment 16 hrs at room temperature.


Levain formula

Wt.

Baker's %

High-extraction flour

8 1/4 oz

100

Water

9 7/8 oz

120

Salt

1/4 tsp

0.6

First feeding

3 1/4 oz

40

Total

21 5/8 oz

260.6

  1. Mix all ingredients well with a DDT of 70ºF

  2. Ferment 8 hours at room temperature.

Note: I fermented at room temperature for 6 hours, then refrigerated overnight. I allowed the levain to warm up and ferment another 2 hours before mixing the final dough


Final dough formula

Wt.

Baker's %

Bread flour

5 5/8 oz

60

High-extraction flour

1 7/8 oz

20

Medium rye flour

1 7/8 oz

20

Water

7/8 oz

10

Salt

3/8 oz

3.8

Levain

21 5/8 oz

230.6

Total

21 5/8 oz

344.4

Note on ingredients: I used "Organic Type 85" flour from Central Milling for the high-extraction flour, KAF Bread Flour and KAF Medium Rye flour.

Process

  1. Mix water and Levain

  2. Mix flours and salt. Add to water/levain mixture and mix to medium gluten development. (I mixed this dough in a Bosch Universal Plus for 3 minutes at first speed and 6 minutes at second speed.)

  3. Transfer to a lightly oiled bowl and ferment for 15 minutes.

  4. Pre-shape the dough into a light ball and rest it for 20-30 minutes.

  5. Shape into a boule. Place it in a banneton and cover well with plastic or place in a food grade plastic bag.

  6. Retard overnight in the refrigerator. (Suas specifies a temperature of 48ºF, actually.)

  7. The next morning, pre-heat your oven to 500ºF with baking stone and steaming apparatus in place.

  8. Pre-steam the oven. Transfer the miche to a peel. Score the miche. (Suas specifies a diamond pattern.) Transfer it to the baking stone. Stem the oven. Turn the oven down to 440ºF. (See Note, below.)

  9. Bake for 45 to 50 minutes or until the internal temperature is 205ºF and the bottom gives a hollow sound when thumped. (Note: I baked this in a Lodge Combo Cooker – Convection bake for 20 minutes covered at 460ºF, covered then 25 minutes at 440ºF, uncovered.)

  10. Transfer to a cooling rack and cool thoroughly before slicing.

Suas doesn't mention it, but most authors recommend waiting 12 to 24 hours before slicing this type of bread.

The miche

Miche crumb

I sliced and tasted the bread after it had cooled for about 4 hours. The crust was crunchy. The crumb was chewy. The aroma and flavor were unlike any bread I've ever tasted. It did have a mild sourdough tang, but the flavor was uniquely wonderful. It had some nuttiness I associate with wheat germ and sweetness I've only tasted before in some baguettes that have had a long, slow fermentation or were made with pâte fermentée. I assume the wonderful flavor can be credited to the combination of the "Type 85" flour and the unusual process commented on above.

I'm looking forward to baking some other miches using this flour. It's wonderful.

David

Submitted to YeastSpotting


Przytulanka's picture
Przytulanka

 I'm sure that many of TFL members remember the recipe -http://www.thefreshloaf.com/node/15778/g%C3%A9rard-rubaud-miche submitted by Shiao-Ping. 

On November I was experimenting with the recipe-changing flours, adjusting time of proofing and fermentation.

Whole Grain Miche

 Recipe: http://bochenkowo.blogspot.com/2010/11/whole-grain-miche-wiejski-razowy.html

Second-Pine Nut Rye Bread with  pâte fermentée

Recipe: http://bochenkowo.blogspot.com/2010/11/pine-nuts-rye-bread-with-pate-fermentee.html

Third Miche with Chestnuts


Recipe :http://bochenkowo.blogspot.com/2010/11/miche-with-chestnutschleb-z-kasztanami.html

houstonwong's picture

A visit to Poilane in Paris

November 21, 2010 - 9:57am -- houstonwong

Hi,


On my trip to Paris last month, I got a chance to visit the famous Poilane bakery. I've been wanting to visit it since reading about it in BBA as well as hearing what others have said about it. And finally, I had the chance so I thought I'd share with everyone.

I arrived in the neighbourhood at around 11AM on a Thursday, so it wasn't very crowded. Nice neighbourhood, btw:

rue du Cherche Midi


Pages

Subscribe to RSS - miche