Dear All, I don’t know whether you have time for reading and considering this, but if you do, it would help me to know how to make Susan's Norwich Sourdough from Wild Yeast Blog a second time.
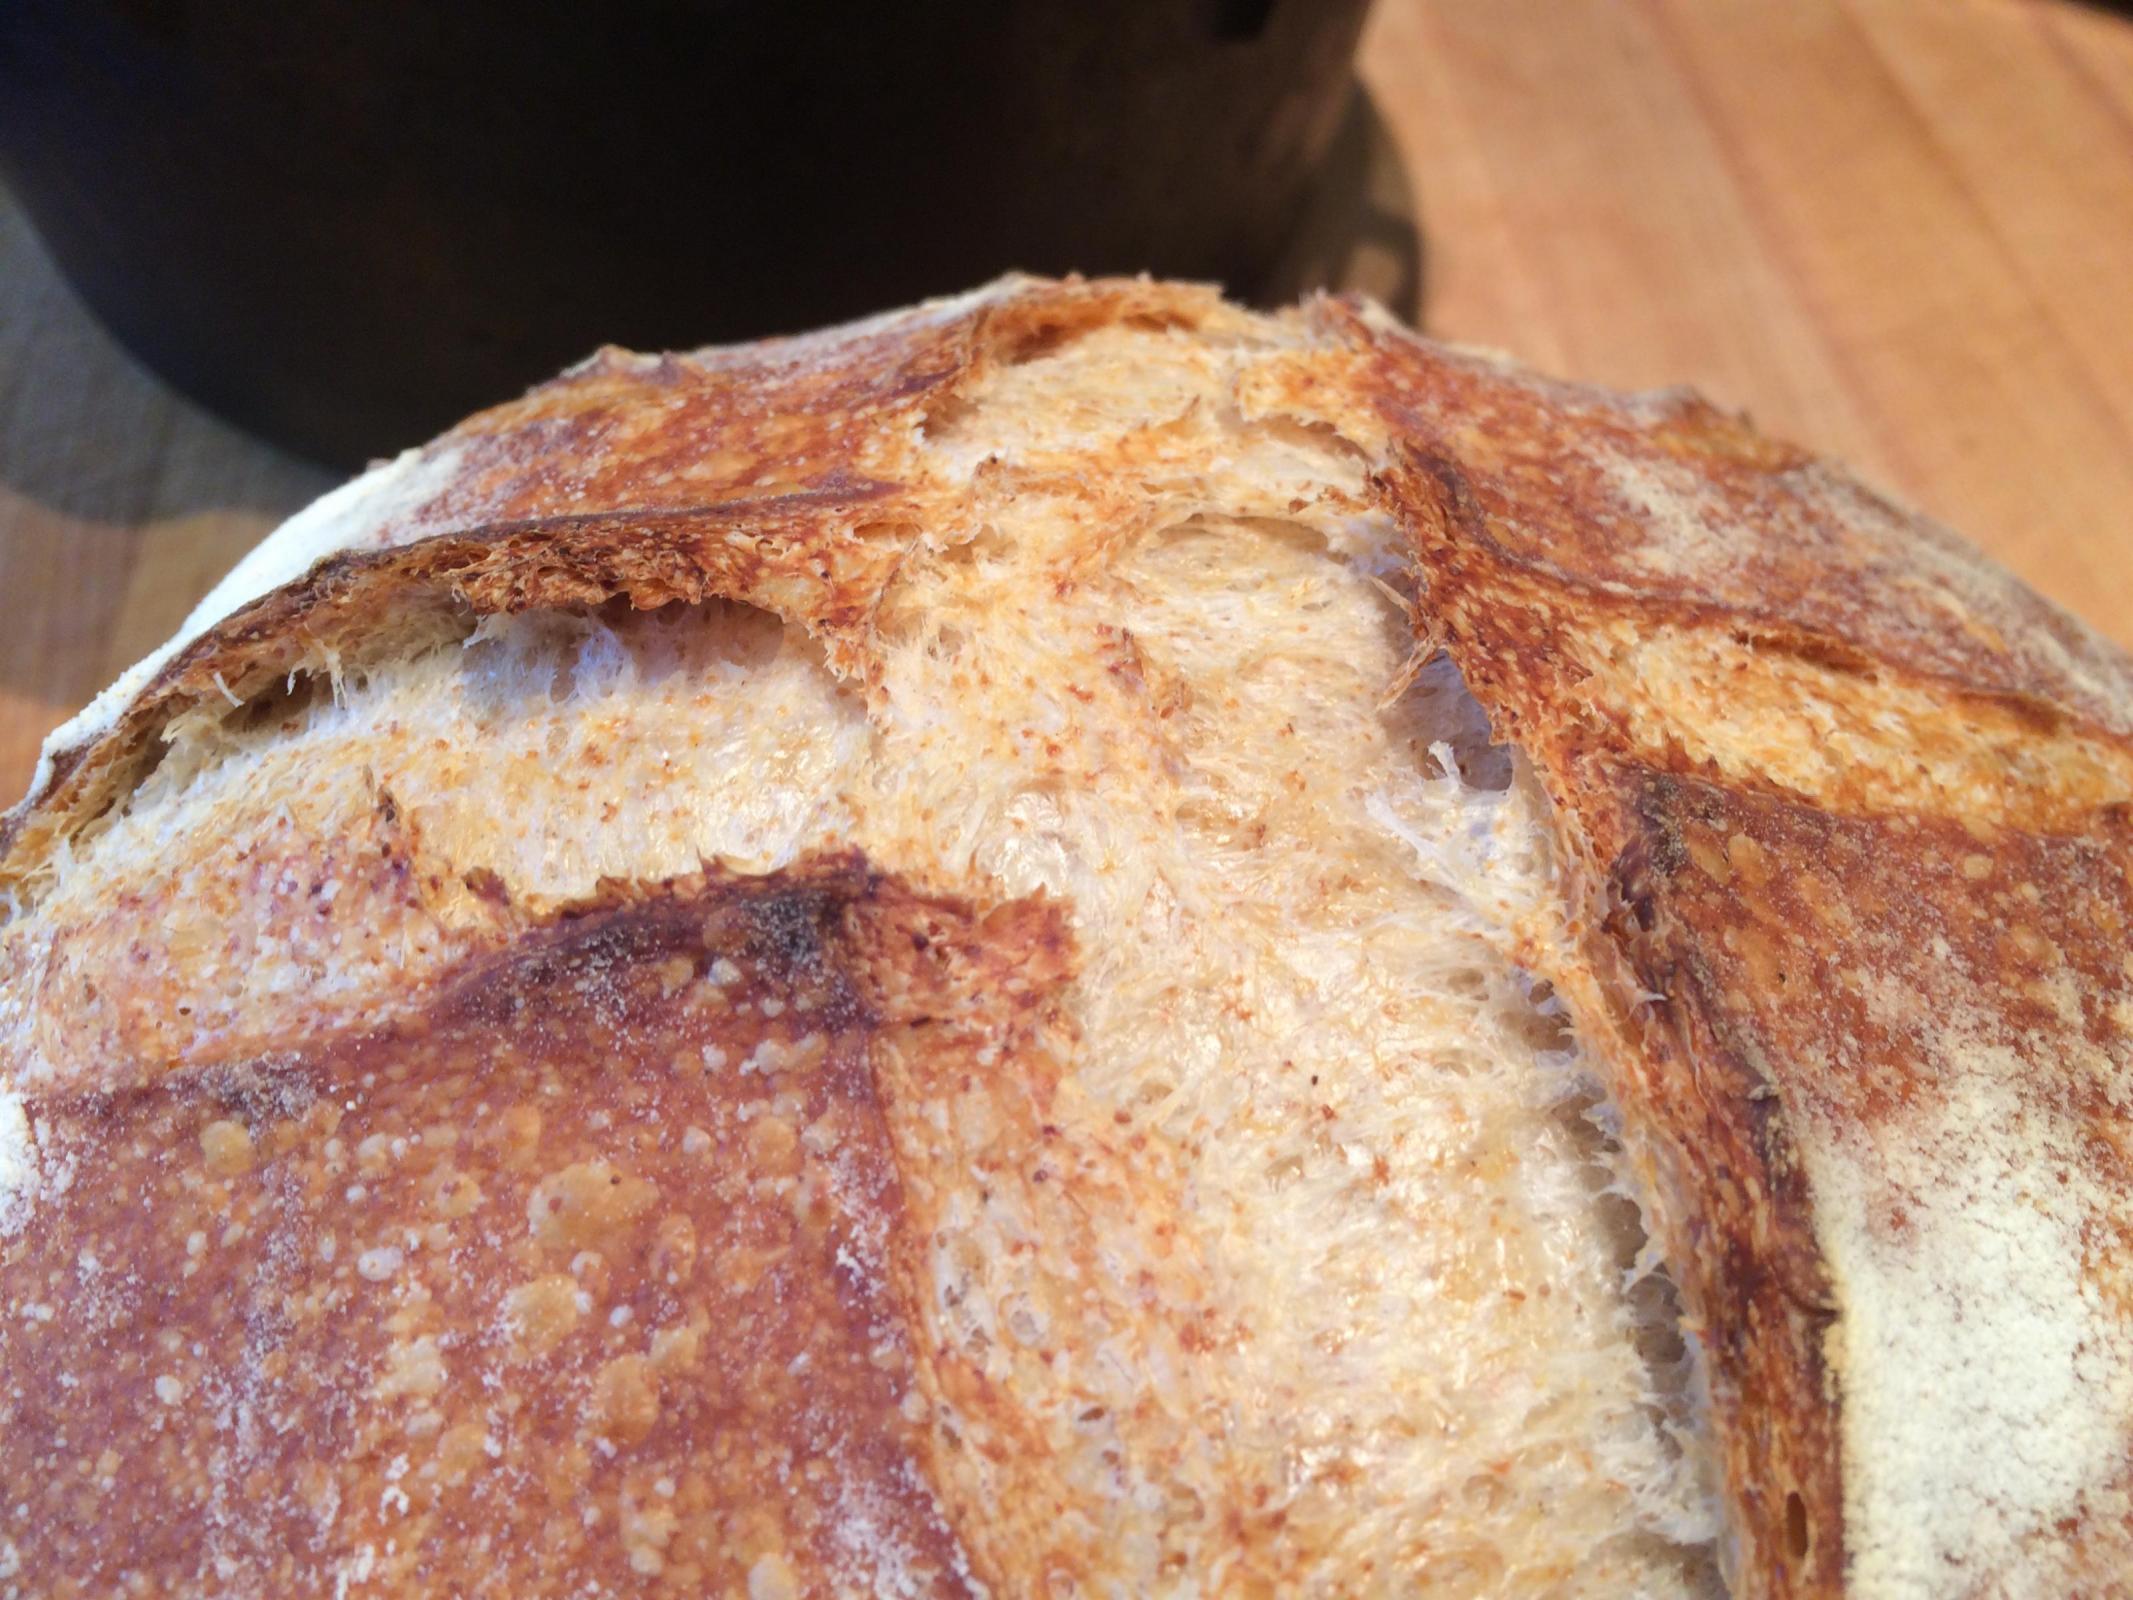
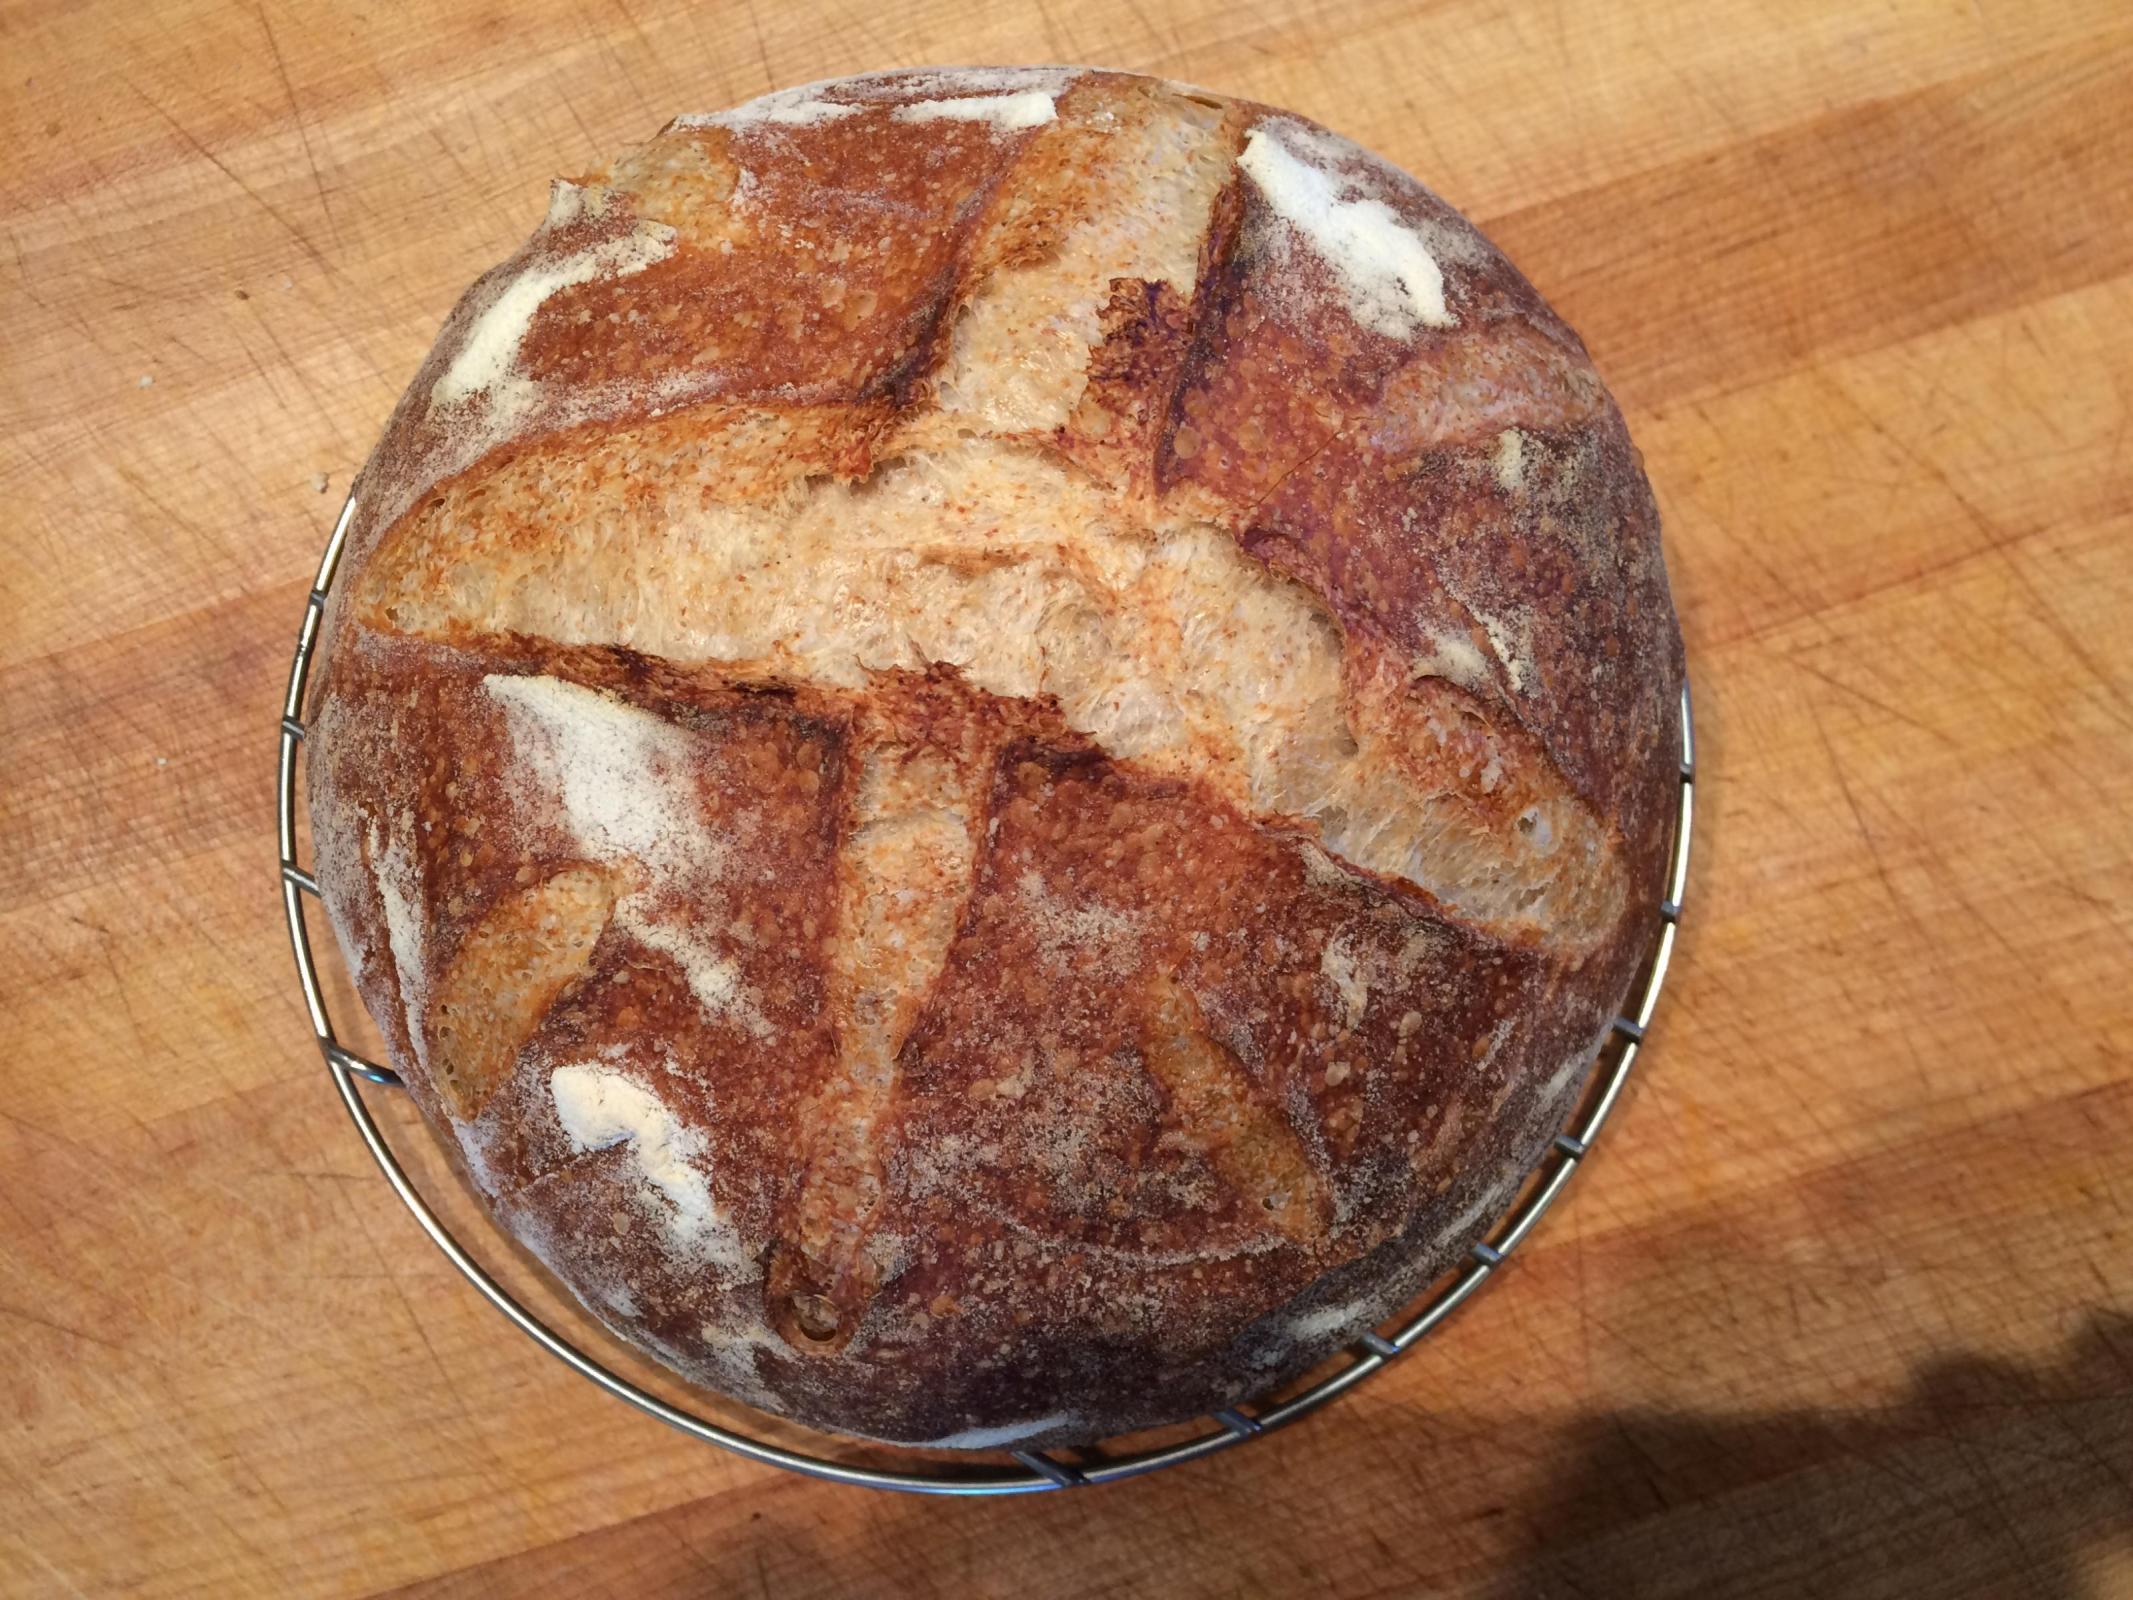
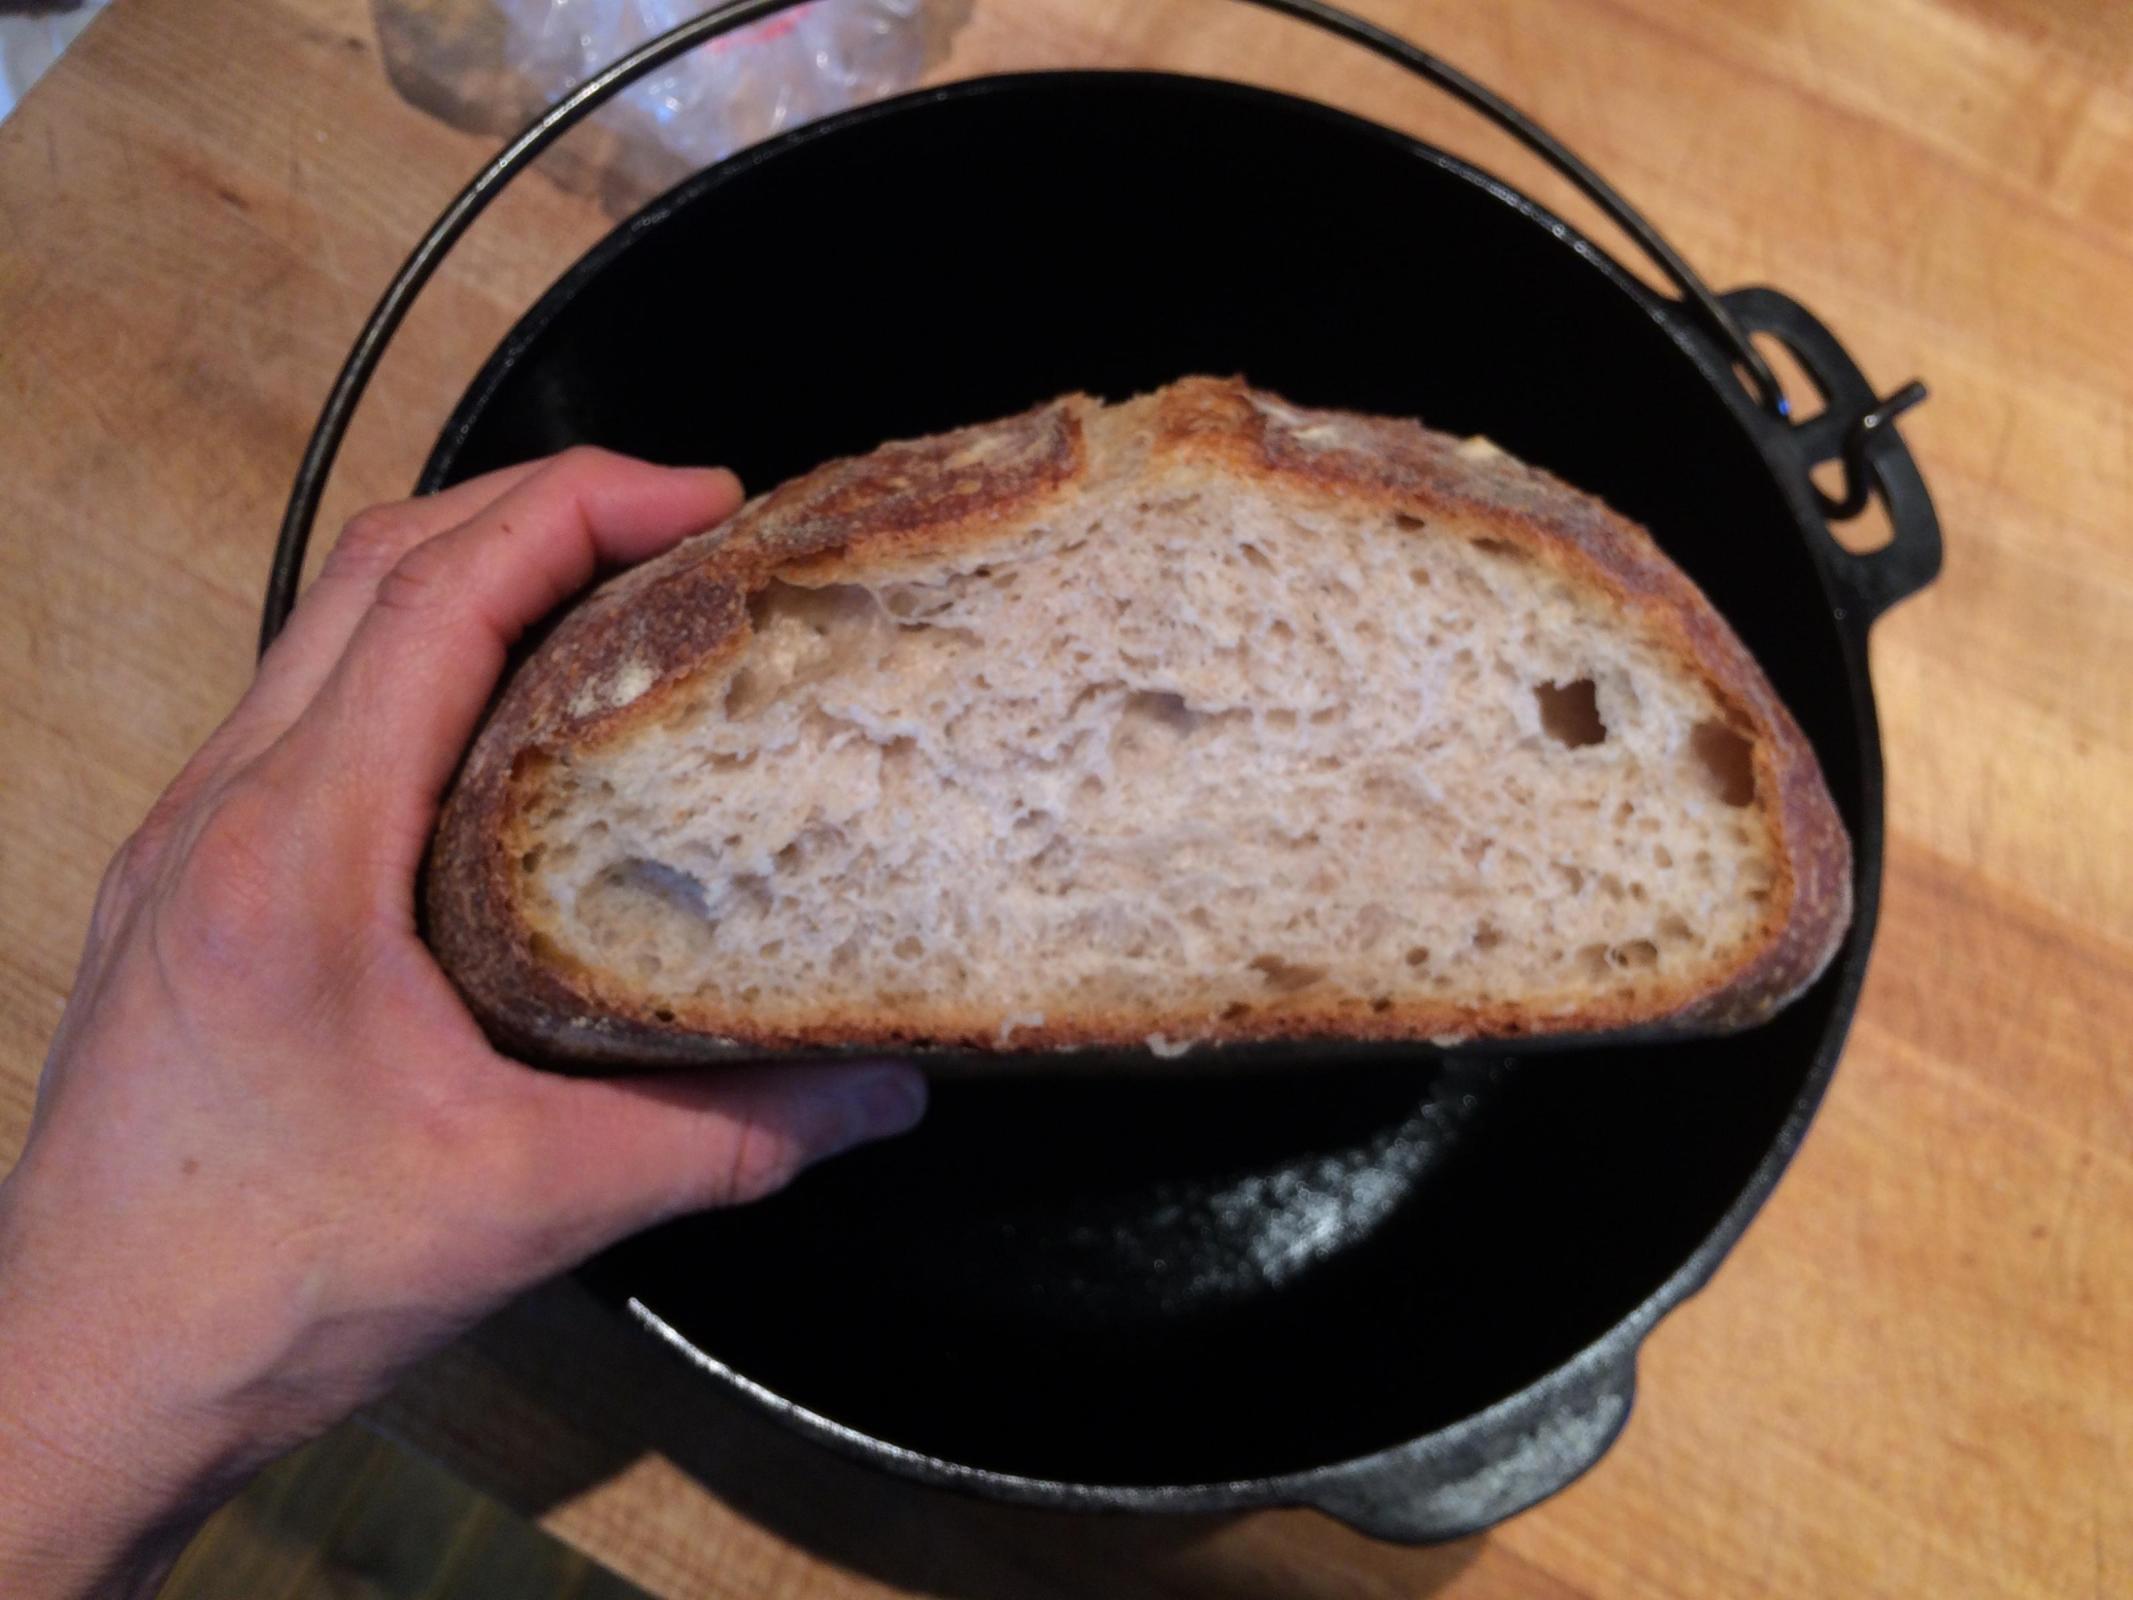
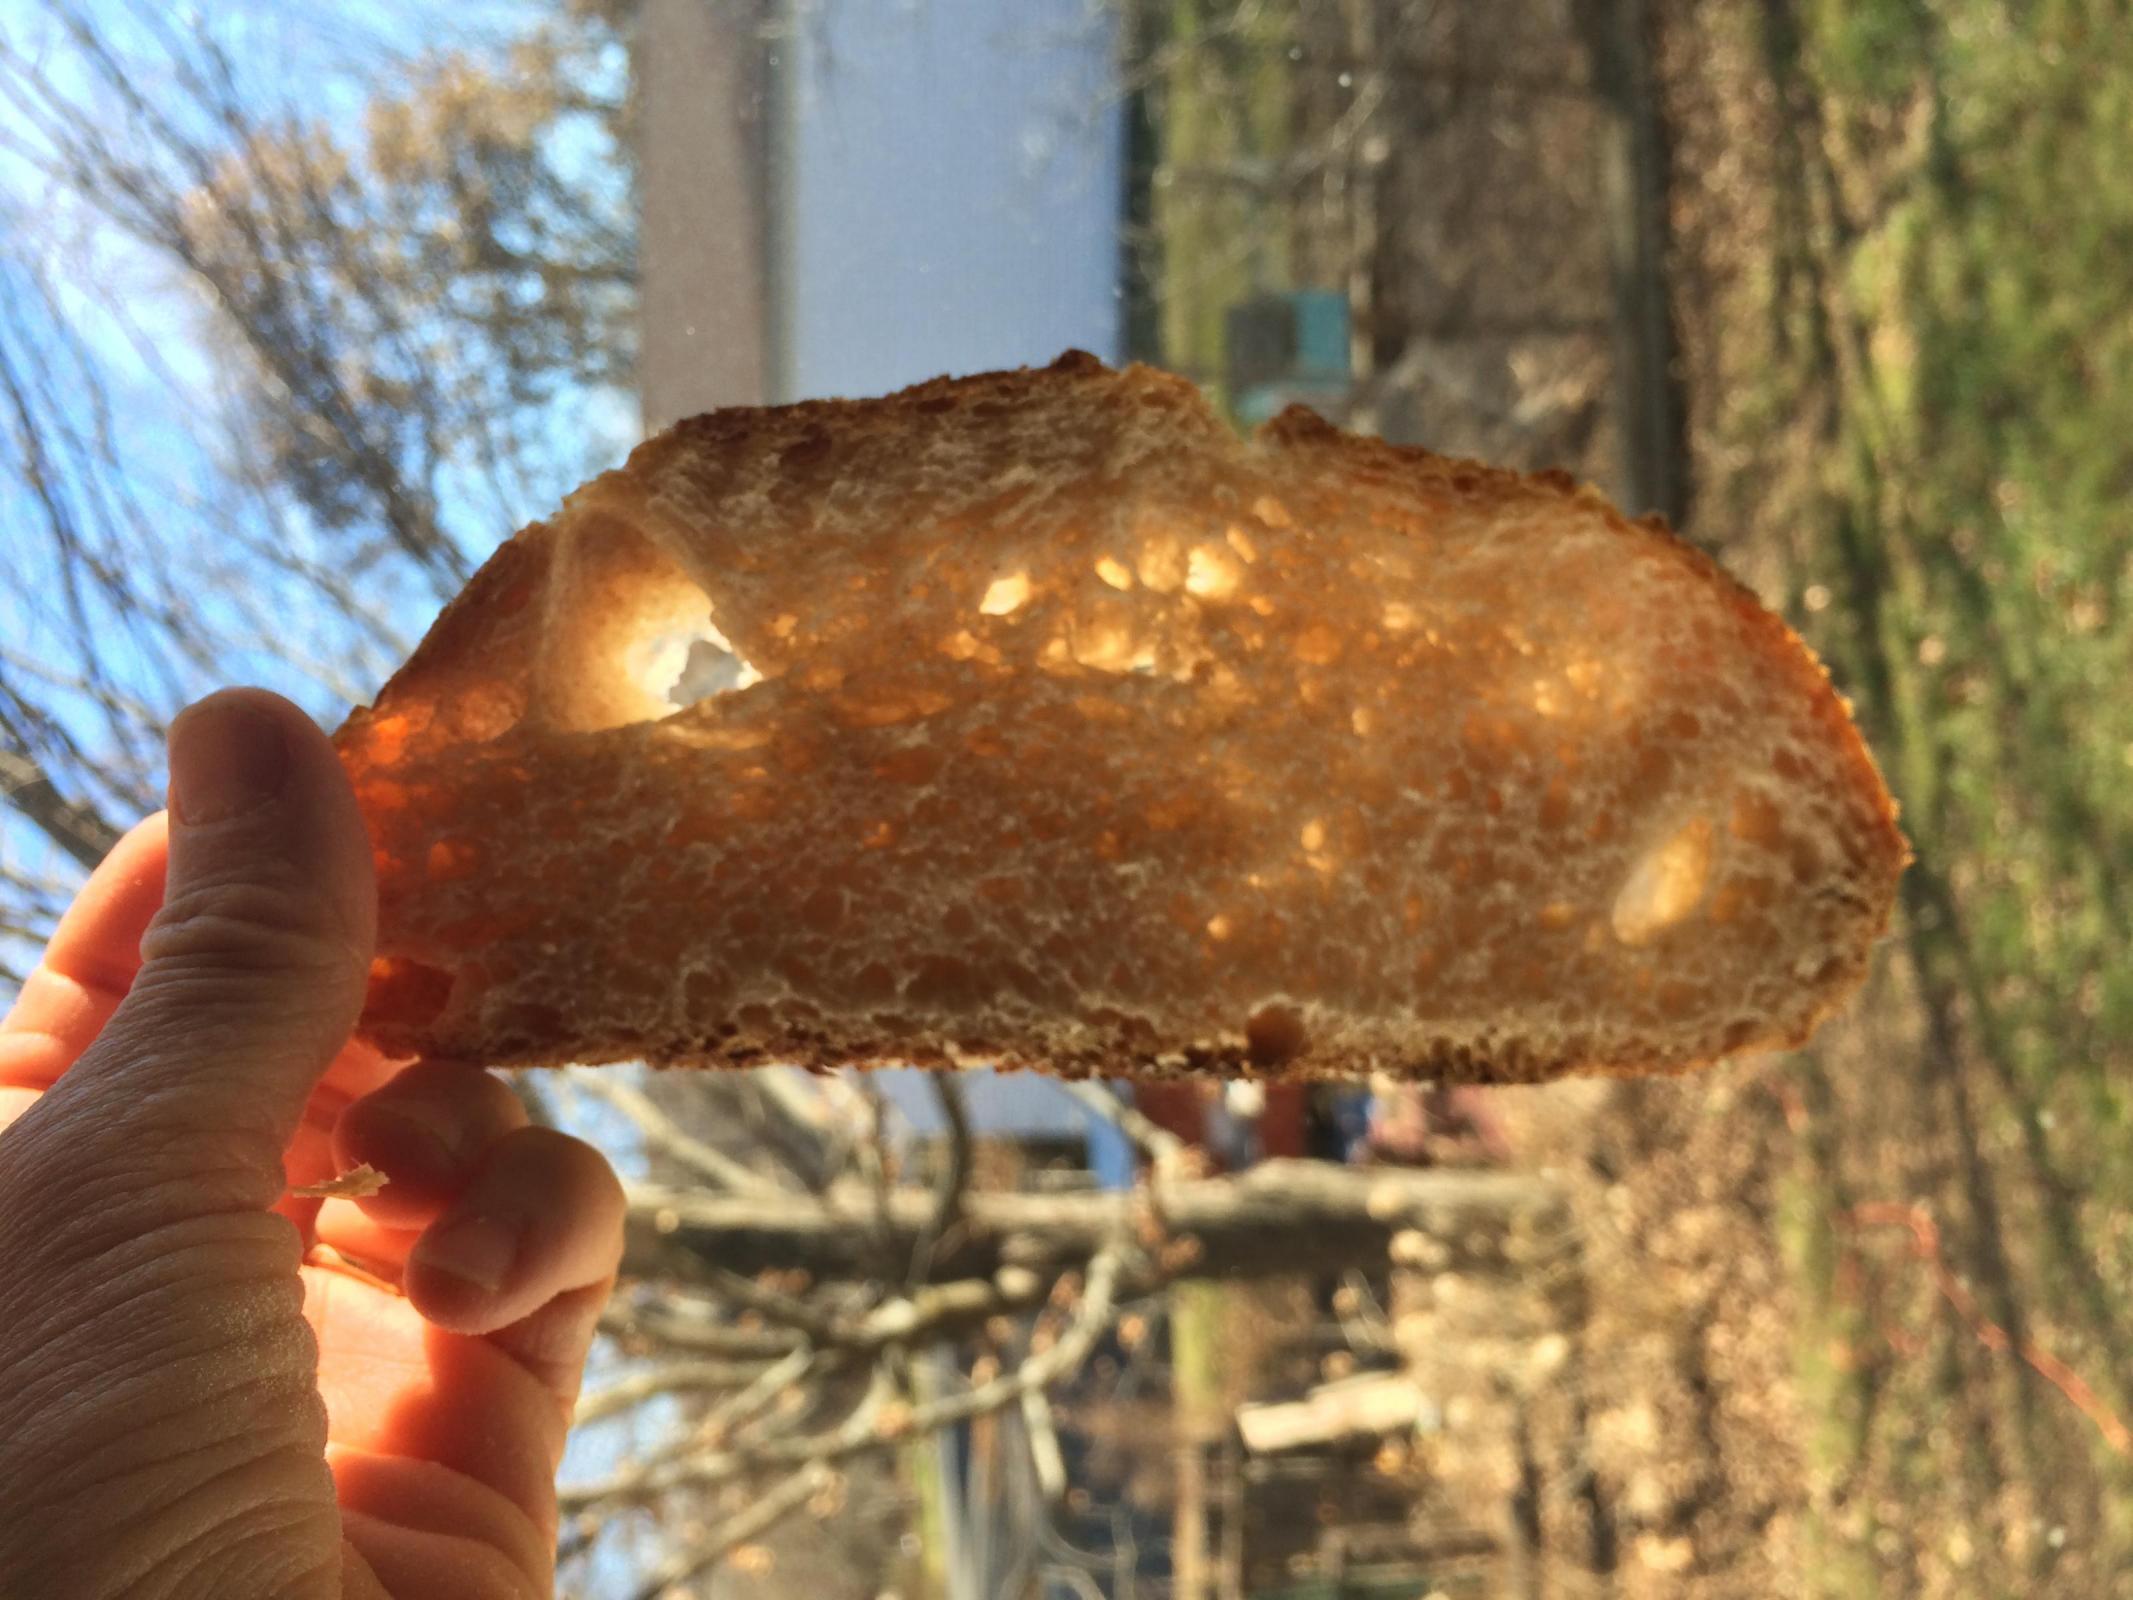
http://www.wildyeastblog.com/my-new-favorite-sourdough/ I liked the result, but I know it could improve in organization of the crumb and in the proofing. I made an 833 kg-sized batch, scaling everything down, to the 150 g of starter I had going. The starter had at least tripled within a few hours at a warm room temperature after a 1:5:5 feeding. It had had a week of lots of use and feeding. It was at its most vigorous it has been in awhile. It was 90% bread flour, 10% rye, 100% hydration. It passed the float test from the time it doubled until past the time it tripled, holding its peak for at least an hour or two. Maybe it would have maintained the peak even longer. I accidentally used bread flour instead of all purpose in this recipe. I used what my co-op calls “dark rye;" it’s pretty finely ground. The flours are from Champlain Valley Milling. I also mixed by hand, though Susan uses the mixer, since my mixer does better with bigger batches. I was wondering why it was a bit hard to get to the shaggy dough stage quickly and without overworking, I stopped and realized it was dry, but I didn’t want to overwork it or add more water, this being my first time to make the recipe, so I rested it. After the 35-minute autolyse she indicates (is it an autolyse with starter added?), I mixed in the salt by gently dimpling the dough, pinching gently, then rolling it up and turning, rolling and turning, all in the bowl, then kneaded on the wooden counter with gentle slap and folds and scrapes. It still wasn’t at the medium stage of windowpaning she calls for, so I used gentle traditional kneading. It took a long time to get to the medium development stage--maybe 15 minutes of working the dough total? The dough was not sticking to the board much and was not tearing. The temperature seemed fine, going from 75-ish to 76-ish from initial mix to windowpane. The dough was extensible but not overly so, though it was slightly putty-like, and it took an impression. I do think it had some life but with all that bread flour I'd think it would have been more springy. I wondered whether it was beginning to lose elasticity. (I was going to pause during kneading to let time work the gluten, but that wasn’t mentioned in the recipe.) The dough was 76.6 degrees when mixed. I chose a top side and formed it into a ball. I bulked the very round stand-up ball at 78-81 degrees ambient up on a high place in the kitchen in a square Pyrex pan under a shower cap, and the surface of the dough remained at 76 degrees throughout (I used an infrared thermometer). Susan calls for an oiled container; I only brushed a tiny bit of oil on the container as I found that too oily a container makes it hard to fold.The dough relaxed somewhat. At 50 minutes and 100 minutes as she writes, I letter-folded it with full folds, 1 circle each time (usually I do 2 circles around, but this dough was firmer, so 1 cycle around seemed enough) and the dough was extensible and plumping, though the folds did not integrate all the way into the dough like with wetter doughs. I kept the top on the bottom throughout the folding. After the recipe-indicated time for the bulk, the dough seemed plumper and extensible but not bubbly or puffy. That seemed right. I used no flour in shaping—other than the tiniest bit on my fingers. I pre-shaped a boule, putting the top down and stretching sections of the bottom gently, bringing each section partway up and over the ball all the way around, till it didn’t want to stretch much. It wasn’t extensible enough to stretch all the way up and over the dough ball for a really tight ball and I was concerned I’d deflate the gasses by trying. I flipped it over, spun it a bit to tighten and bench rested for 30 mins (misread the recipe, which says 15 mins, so too long?). Then I neatened and gently tension-pulled the boule once around, benched it 5 mins to seal the seams; it spread only very slightly and so I spun it once to neaten. No big bubbles during shaping like with the wet doughs I have been working with or the very high proportion starter doughs. I proofed it seam side up, coming about just under halfway up an 11 cup 7.5 inch-wide stainless bowl lined with a flour sack towel, towel well-dusted with flour, for 1.5 hours at the same warm room temperature, whereupon it was still elastic but rising. She says to room temp-proof for longer if not retarding. Then I retarded it in my home fridge (39-40 degrees) overnight for 10-11 hours. She says 2-16. Two or three hours into that, it had risen more and seemed not quite domed (should this formula dome in the center? or merely have a curve at the sides?). I removed the shower cap covering it, dried the condensation on it and put it back on before bed. I wondered whether it was ready to bake right then but an impression sprang back quickly, and it was bedtime as I said. In the morning, the poke sprang back quickly again, but the dough had risen significantly, nearly to the top of the bowl, which was definitely more than doubled in height, and it was doming in places except for where the folds had come together in the center. The surface wasn’t wet like I get with the really wet doughs. The seams were closed and not visible. There was one tiny hole in the gluten sheath. The dough seemed puffy rather than plump as though if I poked it too far it might feel overrisen. Not jiggly--should this formula be jiggly? It just moved very slightly when shaken gently. It stuck quite a bit on the bottom to what I had considered a well-floured towel. (I didn’t use rice flour—wasn’t sure if that would work with a flour sack towel—it would have rolled right off.) I had to hold it upside down over the super-hot Dutch oven and let gravity peel the towel slowly off as it lowered into the pan. Thankfully it did not rip. I feared scoring would prove difficult with the puffy dough, the deep DO, and the now stretched and relaxing top, so I used scissors to make a cross and then little slashes in between (does anyone use scissors? I read Robertson does) and it began deflating with the last cut. I baked it lid on 15 mins and lid off 30 mins, as I found that longer covered baking oversteams my crusts, and then removed it from the pot as it sounded hollow and seemed dark enough, and let it dry out directly on the rack with the oven cracked for another 5-7 mins. I let it cool at least 1.5 hours. Here’s what it looked like after the bake. There’s one dent in a softer area of the crust where I felt it when warm. You can see how the skin of the loaf stretched way out when it stuck to the towel. Some of the snips spread. The longer snips opened up, though not extensively. There was oven spring. The crumb had a slight sheen in places and was fluffy and pleasing, not overly moist or dry. Slicing it was tricky as it was so fluffy despite the sharpened bread knitfe. The crumb, when sliced across the largest slash, did not look organized after all my care with the folding and shaping. There was a slight tang but it was also sweet. The crust was singing and firm after baking as it cooled, but areas of it softened a little and it was crunchy in places and chewy in others. The snipped areas were paler than I would like—that’s been happening with many doughs. How proofed should it be before going into the fridge for an overnight retarded proof? Should I have reduced the 1.5 hour proof at 76 degrees to maybe 45 minutes if I wanted to retard it overnight given the excitability of my starter? Should I have reduced the proportion of starter to dough? Or reduced the proofing temperature to maybe 65 or 70 before going into the fridge? Or put it into the fridge immediately after shaping? Many thanksCindy
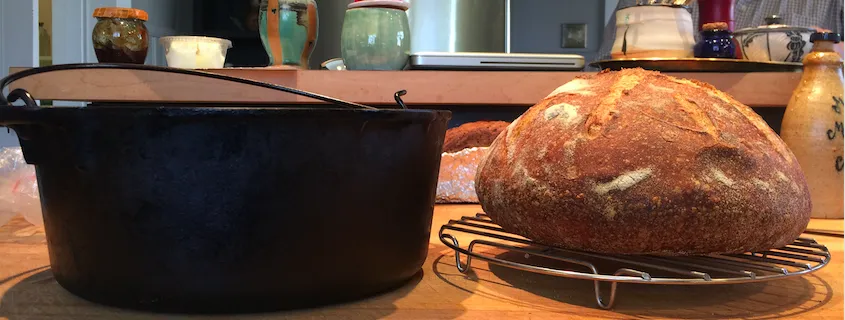


 Dear All, I don’t know whether you have time for reading and considering this, but if you do, it would help me to know how to make Susan's Norwich Sourdough from Wild Yeast Blog a second time. http://www.wildyeastblog.com/my-new-favorite-sourdough/ I liked the result, but I know it could improve in organization of the crumb and in the proofing. I made an 833 kg-sized batch, scaling everything down, to the 150 g of starter I had going. The starter had at least tripled within a few hours at a warm room temperature after a 1:5:5 feeding. It had had a week of lots of use and feeding. It was at its most vigorous it has been in awhile. It was 90% bread flour, 10% rye, 100% hydration. It passed the float test from the time it doubled until past the time it tripled, holding its peak for at least an hour or two. Maybe it would have maintained the peak even longer. I accidentally used bread flour instead of all purpose in this recipe. I used what my co-op calls “dark rye;" it’s pretty finely ground. The flours are from Champlain Valley Milling. I also mixed by hand, though Susan uses the mixer, since my mixer does better with bigger batches. I was wondering why it was a bit hard to get to the shaggy dough stage quickly and without overworking, I stopped and realized it was dry, but I didn’t want to overwork it or add more water, this being my first time to make the recipe, so I rested it. After the 35-minute autolyse she indicates (is it an autolyse with starter added?), I mixed in the salt by gently dimpling the dough, pinching gently, then rolling it up and turning, rolling and turning, all in the bowl, then kneaded on the wooden counter with gentle slap and folds and scrapes. It still wasn’t at the medium stage of windowpaning she calls for, so I used gentle traditional kneading. It took a long time to get to the medium development stage--maybe 15 minutes of working the dough total? The dough was not sticking to the board much and was not tearing. The temperature seemed fine, going from 75-ish to 76-ish from initial mix to windowpane. The dough was extensible but not overly so, though it was slightly putty-like, and it took an impression. I do think it had some life but with all that bread flour I'd think it would have been more springy. I wondered whether it was beginning to lose elasticity. (I was going to pause during kneading to let time work the gluten, but that wasn’t mentioned in the recipe.) The dough was 76.6 degrees when mixed. I chose a top side and formed it into a ball. I bulked the very round stand-up ball at 78-81 degrees ambient up on a high place in the kitchen in a square Pyrex pan under a shower cap, and the surface of the dough remained at 76 degrees throughout (I used an infrared thermometer). Susan calls for an oiled container; I only brushed a tiny bit of oil on the container as I found that too oily a container makes it hard to fold.The dough relaxed somewhat. At 50 minutes and 100 minutes as she writes, I letter-folded it with full folds, 1 circle each time (usually I do 2 circles around, but this dough was firmer, so 1 cycle around seemed enough) and the dough was extensible and plumping, though the folds did not integrate all the way into the dough like with wetter doughs. I kept the top on the bottom throughout the folding. After the recipe-indicated time for the bulk, the dough seemed plumper and extensible but not bubbly or puffy. That seemed right. I used no flour in shaping—other than the tiniest bit on my fingers. I pre-shaped a boule, putting the top down and stretching sections of the bottom gently, bringing each section partway up and over the ball all the way around, till it didn’t want to stretch much. It wasn’t extensible enough to stretch all the way up and over the dough ball for a really tight ball and I was concerned I’d deflate the gasses by trying. I flipped it over, spun it a bit to tighten and bench rested for 30 mins (misread the recipe, which says 15 mins, so too long?). Then I neatened and gently tension-pulled the boule once around, benched it 5 mins to seal the seams; it spread only very slightly and so I spun it once to neaten. No big bubbles during shaping like with the wet doughs I have been working with or the very high proportion starter doughs. I proofed it seam side up, coming about just under halfway up an 11 cup 7.5 inch-wide stainless bowl lined with a flour sack towel, towel well-dusted with flour, for 1.5 hours at the same warm room temperature, whereupon it was still elastic but rising. She says to room temp-proof for longer if not retarding. Then I retarded it in my home fridge (39-40 degrees) overnight for 10-11 hours. She says 2-16. Two or three hours into that, it had risen more and seemed not quite domed (should this formula dome in the center? or merely have a curve at the sides?). I removed the shower cap covering it, dried the condensation on it and put it back on before bed. I wondered whether it was ready to bake right then but an impression sprang back quickly, and it was bedtime as I said. In the morning, the poke sprang back quickly again, but the dough had risen significantly, nearly to the top of the bowl, which was definitely more than doubled in height, and it was doming in places except for where the folds had come together in the center. The surface wasn’t wet like I get with the really wet doughs. The seams were closed and not visible. There was one tiny hole in the gluten sheath. The dough seemed puffy rather than plump as though if I poked it too far it might feel overrisen. Not jiggly--should this formula be jiggly? It just moved very slightly when shaken gently. It stuck quite a bit on the bottom to what I had considered a well-floured towel. (I didn’t use rice flour—wasn’t sure if that would work with a flour sack towel—it would have rolled right off.) I had to hold it upside down over the super-hot Dutch oven and let gravity peel the towel slowly off as it lowered into the pan. Thankfully it did not rip. I feared scoring would prove difficult with the puffy dough, the deep DO, and the now stretched and relaxing top, so I used scissors to make a cross and then little slashes in between (does anyone use scissors? I read Robertson does) and it began deflating with the last cut. I baked it lid on 15 mins and lid off 30 mins, as I found that longer covered baking oversteams my crusts, and then removed it from the pot as it sounded hollow and seemed dark enough, and let it dry out directly on the rack with the oven cracked for another 5-7 mins. I let it cool at least 1.5 hours. Here’s what it looked like after the bake. There’s one dent in a softer area of the crust where I felt it when warm. You can see how the skin of the loaf stretched way out when it stuck to the towel. Some of the snips spread. The longer snips opened up, though not extensively. There was oven spring. The crumb had a slight sheen in places and was fluffy and pleasing, not overly moist or dry. Slicing it was tricky as it was so fluffy despite the sharpened bread knitfe. The crumb, when sliced across the largest slash, did not look organized after all my care with the folding and shaping. There was a slight tang but it was also sweet. The crust was singing and firm after baking as it cooled, but areas of it softened a little and it was crunchy in places and chewy in others. The snipped areas were paler than I would like—that’s been happening with many doughs. How proofed should it be before going into the fridge for an overnight retarded proof? Should I have reduced the 1.5 hour proof at 76 degrees to maybe 45 minutes if I wanted to retard it overnight given the excitability of my starter? Should I have reduced the proportion of starter to dough? Or reduced the proofing temperature to maybe 65 or 70 before going into the fridge? Or put it into the fridge immediately after shaping? Many thanksCindy
And I like your bread. Give me time to reread through it again and try to answer all your points. Probably tomorrow now as it's late and I've just arrived home.
Most importantly how do you like the taste?
Very salty. Might back down to 1.75% salt. Pleasant otherwise as a basic bread. Toasty tasting crusting. Toasts very well. Thanks!
Things I am learning from Teresa Greenway's (free this weekend on Perfect Sourdough) basic sourdough online class:
https://www.facebook.com/groups/perfectsourdough/
Perhaps the bulk wasn't long enough and there should have been more folds, and the dough should have become more extensible and bubbly, so I could make it even tighter and it would proof better? And perhaps overnight proofing doesn't provide an opportunity to supervise the proof. And I could have mixed the grittier flour into the white flour to make a better proofing surface on the towel.
It's a big step getting a feeling for the dough and knowing when it's done. You'll here descriptions like aerated, billowy, etc. You will feel a change in the dough and there will be visible signs of fermentation of bubbles just beneath the surface. It takes practice. Instead of just doing the stretch and folds also be aware of how the dough is changing.
When it comes to shaping I advise you to watch videos. A more gentle pre-shape and then a tightening up in the final shape.
I do find the timing of this recipe to be a very good guide but make sure your levain build is fully active and allow for discrepancies with differing temperatures.
Browse through the videos at www.breadwerx.com as they are very well done and you can learn many techniques. Trevor is a fellow TFL'er and a well respected baker. His website is excellent.