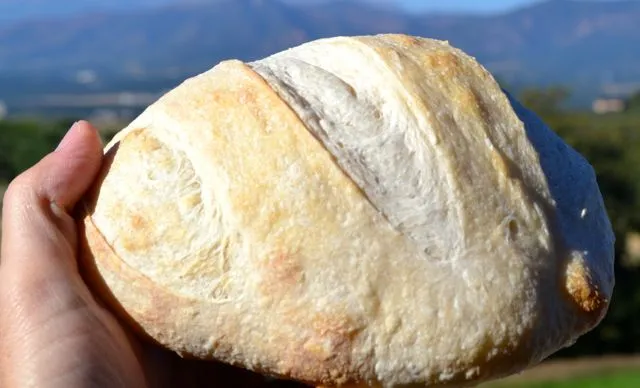
Real Sourdough Bread, Simpler
I love love love to cook and bake, and try to keep it simple (or it would quickly consume my life). Here's what I've come up with to make authentic sourdough bread…simpler.
Making sourdough is a bit different than other types of bread. Some encouragement: the way I make sourdough uses the same usual ingredients, but is tweaked to be simpler and easier, by combining some of the steps of traditional methods—and all with the same authentic, wonderful results.
Note to beginners: If any part of this recipe is confusing (especially the underlined words) do not despair. Detailed definitions and explanations follow below.
Recipe:
Preheat oven and baking stone to 450 degrees.
One cup (refrigerated) fed starter (250 grams)
3 cups white flour (420 grams)
1 cup or more of water
1.5 tsp salt (11 grams).
Combine ingredients and knead for 10 minutes. Then, stretch and fold dough every 10 minutes of so for about an hour. Place dough in a well-oiled plastic bowl with plenty of room to rise. Spritz the top with water, and cover with plastic cling wrap. Eight to 24 hours later (when the dough has at least doubled, let it go longer for more rise), turn your bowl of dough upside down onto an oiled countertop, cut into smaller portions if desired and gently shape into loaves (keep in all the rise you can!), let rest on parchment paper for 20 minutes or so, score the tops, spritz again with water and bake on a pan or stone and parchment paper for 22 or so minutes at 450°.
Primer on Sourdough Bread
Sourdough bread is said to be the holy grail of bread, harder to make then normal baker’s bread (or bread that uses yeast and sugar). It’s really not that hard, though, if you follow the method I’ve developed. You can do it, and it’s fun to make something historic, rustic looking, full of that tangy flavor, chewy texture, and amazing aroma. You’ll only get all that by using what sourdough bread makers have used for eons. There’s simply no satisfactory substitute.
From what I understand, sourdough came about hundreds and hundreds of years ago when flour and water were mixed and sat in the heat, fermenting. Yeast and bacteria began to grow, and the mixture consequently bubbled slowly (this batter-like stuff is what bakers today call “starter” when making sourdough bread).
When starter is exposed to the cold (like overnight in ancient homes without much heat), yeast grows more slowly at those low temperatures. However, the bacteria grow via fermentation when it’s cold, which produces as byproducts both sugar and lactic acid. The lactic acid is what makes the sourdough sour.
When the next day dawns and warmth returns, the sugar is metabolized (eaten) by the warming (and therefore more active) yeast, which creates carbon dioxide as another byproduct (a gas). This causes leavening (rising of the dough, hence the little air spaces in bread). So, as you can surmise, when some of the starter is mixed with additional water, flour, and salt, and a dough is formed, the dough has the potential to rise because of the sugar and yeast which are present naturally, without being added separately by the baker. Back in the day, keeping a starter that had this culture of bacteria and yeast was essential to make leavened bread.
Learn to do this simple process, and you’ll impress your friends and enjoy the sourdough bread on your own. But, you’ll also feel a bit like you’re doing something that hearkens way, way back—a mystical, tangy, almost magical connection to those early bread makers.
You can buy starter online if you want. I think you’ll enjoy making your own, though. It’s easy and more satisfying.
To begin, here’s how to create your own starter from scratch:
Get a glass jar with a very wide mouth and a way to cover it, but leave a small crack for air. I use an Anchor brand ½ gallon jar like this: 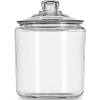
You can buy one at Wal-Mart or Amazon for about $10.
Put 1/2 cup white flour and 1/3 cup water in the jar and mix it. Some bakers recommend a Dutch whisk, but I prefer a butter knife to mix the starter because it’s so easy to clean (scrape) off with another butter knife. Easy to clean up and almost no wasted starter. Win-win! As the days pass, adjust the daily added amounts of water and flour if necessary so that the combination is about the consistency of thick pancake batter. Repeat in 12 hours, then in another 12 hours, and do this for about a week, maybe two. Over that period of time you ‘ll notice the starter begins to bubble and smell yeasty. After a couple of weeks, you can feed the starter once a day instead of twice. Keep the starter covered with the lid slightly cracked open between feedings.
When you have a good strong starter, you can keep it in the fridge and feed it less often (more on that below).
When you read about making sourdough bread, crackers, biscuits, and so forth, the recipe will often call for “fed starter.” This simply means the starter has recently (within an hour or so) had its daily dose of water and flour (hence, it’s been fed, or in other words, it’s had its food, and can stay alive--bubbling away). The starter is not fed (called “unfed” starter in recipes) if it’s been sitting for maybe 12 or more hours without the addition of new flour and water.
Let’s address the question, “Which flour and water to use when making starter?” Answer: Use white flour only. I don’t think it matters much if it’s all purpose or bread flour. Don’t use self-rising flour. You can use whole-grain wheat, or oat or other grain flours, but the odor of the starter will begin to be less than pleasant, euphemistically speaking. Some call the odor produced by whole grain starter, “skunky.”
Also, avoid water that has chlorine or metal. Some city water will be chlorinated, and the chlorine can reportedly interfere with the growth of the bacteria and yeast. I do know several people use city tap water, however, and have plenty of success with their starter, so don’t be overly afraid of tap water. Just a point of info if your starter isn’t bubbling and healthy and you don’t know why.
The caution about metal in the water is mostly aimed at those who use well water, like me. Metals can also inhibit the growth of bacteria and yeast. Some bakers will recommend filtered water or distilled water. Although we have lots of iron in our well water here in Colorado, we have some kind of a system set up in the basement that supposedly takes the iron out, but I know it’s not perfect. Even still, I’ve never had any problem with my water inhibiting the growth of the starter. I do get my water from the dispenser on the refrigerator because that water goes through one additional carbon filter.
Because it’s convenient, if you can use your own tap water, you are much more likely to find success making sourdough, especially over time. Few will want the inconvenience of buying gallons of distilled water to keep their starter going. Of course, for others, getting water that works is a small price to pay to be able to make this wonderful goodness.
A word of warning: making sourdough bread is a small commitment…and addictive. To the commitment point, starter needs to be taken care about once a week. It’s easy--it only takes a few minutes--and you can even take a break (more on that below). Still, it’s like having fish to feed or some other little mundane task that adds to your weekly duties.
But, don’t worry, when you go on vacation, you can put your starter in the refrigerator and when you get home it will be fine. You can do this for weeks at a time if you decide you’re tired of making sourdough for a while. I know of someone who put his starter in the fridge for the entire winter and it was still usable in the spring.
I have found that starter is very forgiving. The fridge helps discourage growth of mold. And, if some mold grows on the top, scrape it off, discard, and use what’s below. I’ve done this and have had no ill effects.
Here is one way I depart with some bakers. I’ve never seen this advocated, but I keep my starter in the fridge, not on the counter. The reasons are several.
First, it works. I can see some arguing that the starter needs to be at room temperature to keep the yeast going. In my experience, the fridge works just fine. The dough rises well, the starter keeps on bubbling along. Second, no fruit flies. One summer I had a fruit fly problem, and the little guys seemed to like the starter. Third, the starter is always ready, always sour. Most sourdough recipes have you keep the starter on the counter, make a dough, and refrigerate the dough to make it sour. No need for this step if you keep the starter in the fridge. Fourth, it’s easier to maintain. With the slower rate of growth cold temperatures require, there is less tendency toward undesirable mold growth on the starter. In fact, since I’ve been keeping the starter in the fridge, I haven’t seen any mold growth at all, unlike when the starter was kept at room temp.
Here are a few more ways my method departs from the traditional. Many of the recipes out there require you to measure the water and flour and salt very carefully, to the gram. There are (in my view) many too-strict guidelines in terms of exact technique and of how long you stretch and fold the dough, how long you put it in the refrigerator, and how long you let it rise. Some want to tell you your starter needs to be a certain percent moist (how do you measure that?!?) Such advice is for me confusing and discouraging. Sourdough is easier to make than quick rise/sweet bread in at least this one way—it’s way more flexible and forbearing (keep reading for the how to!). And, the product I get is very consistent in texture, shape, aroma, taste, and color.
The way I’ve learned to make it seems closer to how it would have been made hundreds of years ago. Back then, they didn’t have scales that measured the amount of starter and flour and water to the gram. They just made it. They were trying to survive. They needed the process to be simple and flexible. That’s what the following method is.
If you have a Kitchen Aid or Bosch mixer, the next step will be much easier than if you don’t. You can power through kneading the dough of course, because that’s how it’s been made for centuries. If you don’t have a mixer, I refer you to this video for tips on how to knead bread dough.
https://www.youtube.com/watch?v=ySOj0fFWo1U
I’m hoping my experience with a Bosch translates well to other bread mixers that use a dough hook.
Enough of this--let’s get to the details of how.
To begin you’ll need:
(approximately)
1 cup fed starter
1 cup water
1.5 tsp salt
3 cups flour
Mix about a cup of fed starter, a cup of water, and 1.5 tsp of salt. Add flour a couple of tablespoons at a time until you have a nice dough that pulls away from the edges of the mixer. I prefer to use this method instead of measuring the flour, because everyone measures flour a little differently (unless it’s weighed). Allow the bread to knead for about 10 minutes.
Now, stretch and fold the dough, which will stiffen it up. This part requires you to be around for about an hour. Here’s a video that gives good instruction on how to stretch and fold dough.
https://www.youtube.com/watch?v=1timJlCT3PM
Now, place the dough into an over-large plastic oiled bowl, spritz the top with water, and place cling wrap over the top to keep the air out and moisture in. Let it rise from 8-24 hours. It will more than double in size. You can bake it anytime, after it’s at least doubled in size.
I’ve never seen sourdough rise so much that it fell. This ruinous event can happen when you make typical yeast bread, which has sugar and “fast-rise” yeast added. Here we find another way sourdough is easier and more flexible. I have let my sourdough rise for 24+ hours. It just keeps rising. The one thing you have to do is remember to keep the top moist so the dough doesn’t get crusty on top, as happens in dry climates like Colorado. This is not a problem if the bowl is covered with cling wrap. You also have to make sure your dough isn’t rising so much that it spills out of your bowl. This has happened to me several times. I have often seen sourdough rise to 5X it’s original size.
After 24 hours or so, preheat your oven (with a baking stone in the oven, or if you don’t have one, with a cookie sheet turned upside down) to 450 degrees F and turn your bowl over onto a greased countertop. The dough will slowly separate from the bowl and fall to the counter. I use olive oil to grease the countertop, because it seems kind of rustic and it’s the oil recommended by sourdough bread experts. You can use any type of cooking oil, though, and I often use canola without any change in outcome or flavor. Gently cut it into the size of the loaves you want. It will deflate a bit. Don’t worry—it’ll pop back up in the oven. Pull the ends of the dough pieces to the middle and pinch them to the dough in the center until it becomes something of a ball. Here’s a video that helps you learn how to make this type of loaf (a boule).
https://www.youtube.com/watch?v=pmTPL2J8OZk
Place the dough on parchment paper that is on an upside down cookie sheet. You will have 1-2 boules 5 to 10 inches across. Let them “rest” for 20 or so minutes while the oven preheats.
Before you put the dough in the oven, score the top. This simply means to cut a line or two across the top, maybe a quarter or half inch deep, so that the dough will expand into that cutline while cooking and not break open in some other unsightly place.
To score the dough, simply use a serrated bread knife, running it back and forth over the top until it cuts a nice straight line. There are lots of videos about how to score dough. People will recommend you buy razors, fancy instruments, and so forth. If you’re making bread, you probably have a serrated bread knife. That will work just fine, even if it’s dull. It’s what I use. In fact, I prefer it over razor blades and such things. Just go slow with the scoring, back and forth until the crust starts to cut, then down into the dough a bit.
Then, slide your dough, leaving it on the parchment paper, off the cookie sheet and onto a cooking stone if you have one, or just onto another upside down cookie sheet if you don’t. Bake for about 22 minutes.
You don’t really need a cooking stone. It just makes you feel like an Italian baker from the 13th century. And, that’s a cool feeling, sí?
The bread will rise significantly while in the oven. This is called oven bloom. You may want to spritz the loaves with water just before you put them in, then again at 10 minutes, and then again just before you take out the bread. The moisture will help the oven bloom, because it will keep the top from cooking and becoming hard and allow the dough to rise a bit more. I’m not sure this is necessary, because I have done it without spritzing and haven’t noticed much of a difference. This will also soften the crust on top. If for no other reason, spritzing also makes you feel cool, the baking stone, so it’s well worth doing. :)
One interesting thing about sourdough is that there are so few ingredients. It’s made out of water, white flour, and salt. That’s it. Of course, the starter does have bacteria, lactic acid, sugar, and yeast, which it has obtained from the air or the flour and the process itself, but you do not add these separately. The only ingredients you’ve used in making the sourdough are flour, water, and salt. So cool.
Because there are essentially no sugars or oil, sourdough is traditionally light on top when it’s done baking. Bread with sugar-added caramelizes, which makes a brown crust. Breads with oil-added will toast the top and create a brown crust. If you prefer to have a crust that’s brown on top, brush your bread with olive or canola oil before you put it in the oven. The bottom of the bread will turn brown no matter what you do, simply because the starch itself is toasting. I do not recommend brushing with sugar water to get a brown crust because it will take away some of the tanginess of the sourdough.
By the way, only use white flour in the starter, but feel free to use whole grain flour in your bread when you’re making sourdough. It gives a nutty taste, and adds some nice variety and some fiber.
A couple parting thoughts:
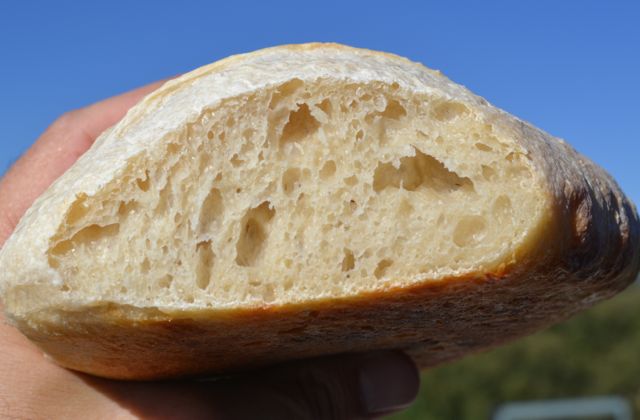
The more flour you add when making the dough, the drier and easier to work with the dough will be. The wetter you allow the dough to be, the larger the holes will be in your bread. (This is called the “crumb” in baker’s parlance. For example, an open crumb has large holes).
Maybe you wonder, “If I vary the amount of flour and starter, how do I know how much salt to put in?” If you’re not keeping track of how much flour you’re putting in, you probably don’t know how much salt you need to put it. For the recipe above, 1.5 teaspoons of salt seems about right. A good rule of thumb is one and one quarter teaspoon of salt for every 3 cups of flour.
Happy baking! Mark Lyman
- breadmd's Blog
- Log in or register to post comments
I'm new to this blogging stuff, and I hadn't put the whole thing in. It's there now!
for some reason.
I think it's there now.
I really enjoy the "primal", flexible aspect of sourdough. Yet I see a value for feedback and learning, and that is most measurable when you know grams. Eg is my dough spilling all over the table because it's 80% hydration or because my starter has weird stuff happening to it? I don't weigh ingredients for most of my loaves, because I'm usually too busy doing something else, but if I want to try something new, or troubleshoot a problem, at least the measuring helps me keep track of some of the variables.
I never figured out keeping the sourdough in the fridge. It was less brain for me just to feed morning and night, every day, without having to remember to reactivate it in advance with a few feedings before making a loaf. Also, unlike you, I've only ever had mold in my starters when they got put in the fridge - but never when they were on the counter! It also means I'm forced to make bread daily. That's a good thing for us (we save money) but maybe it's not for everyone.
@ccsdg Thanks so much for your thoughts. I truly value your experience and opinion. One of the reasons I have been reading this blog (and finally decided to blog something myself) is because I often feel a bit alone in the baking world, and this opens up a whole community.
I completely agree with the measuring for many recipes and for most baking. I think the difference in 1 cup of flour from person to person, from scoop to sift, etc. is about 4oz to 6oz. And, that's a huge difference in the outcome of almost any recipe. Measuring in grams helps get the feel for what works in the recipe you're reading about. I noticed with sourdough, (when I'm in the mood to experiment or too busy to measure accurately) that the recipe is quite forgiving, and gives pretty consistent results almost no matter what I do (ie. If the dough is high or low hydration, still not much difference--even in the crumb--although the crumb is more open with greater hydration for sure).
I don't activate my starter with a few feedings before I made bread. I just take it out of the fridge, feed it, use some to make a dough, and put the starter back in the fridge. I do wonder if keeping it in the fridge will eventually weaken it. So far though, it's strong as can be.
I love that you make bread daily. I do, too, at least almost, about half sourdough and half regular (is there a good name for non-sourdough bread--maybe baker's bread?
All the best, Mark
Yes it really is quite remarkable how little difference high and low hydrations have on the final product isn't it? Within limits of course - I made a 50% or lower hydration loaf once and I struggled even to shape that. I also tried a 100%+ hydration AP flour pizza and in parts the crust was so crisp it was like attempting to bite into glass. But the difference between a 60% and 65% hydration loaf my family would have no clue. Of course other factors like steam and oven temp come into play. If I'm not bothering to control those, it's just a matter of covering longer, baking longer, or being ok with it staling a little faster, etc... I might as well skip the scale too. Not a big deal when it's just bread for the family and the family isn't picky.
Hm, it's good that the way you keep your starter works for you. I'm sure if I really wanted to I could figure out the fridge... I haven't had my hand forced yet, though.
Thanks for the blog post. Looking forward to reading more.
So true about bread for the family--they're just grateful for something warm and aromatic, and almost all bread is good when it's warm! :)
I put more pictures on twitter. If you're on twitter, follow me @Marklyman1
I'm new to this online stuff, and am enjoying getting to know like minded people.
I think my next posts will be on sourdough biscuits and maybe one in the off-topic section on making your own spreadable butter.
All the best bread to you and yours!
First - you are doing a good thing for the sourdough community by making it more accessible, through your simplifications.
Here are a few of my tricks:
Chill it: I also have been storing sourdough in the fridge for a few years... for weeks at a time in between loaves - I am the only one who eats my bread in my family... so a loaf can last a while. As for the counter, it just consumes its flour faster at room temp... and I have left it out for too many days/a week one time, without feeding it, and I got an orange mold on top, and it smelled like feet. I recovered though: online blogs said if I scraped off the foul smelling stuff on top, and dumped 90% of it, and started feeding it again, all would be well, and it is. Just don't tell your family/customers about this unseemly side of old sourdough :)
Freeze it: To help the loaf last, I let the loaf cool, and freeze it - since (as I mentioned) I am the only one who eats my bread, so 1 loaf can last for a while. I cut it in half, and then cut just 1 half into slices. I put the slices in 1 freezer bag, and the half loaf in another bag... Then I freeze both. Then when needed, I take out a few slices, stick em in the toaster, and voila! I freeze whole loaves as well, with no issue. Just let the loaves cool all the way first.
Bake it in a dutch oven: your recommendation to spritz with water is a good one. If you bake it in a pre-heated dutch oven, with or without a spritz, you will get a naturally more steamy environment, which is closer to professional ovens. I have tried all kinds of ways to make my oven steamier - the Julia Childs baguette recipe talked about putting a baking dish on a lower tray, and filling it with boiling water... I think spritzing and / or dutch oven are WAY simpler.
Brown it: Crust finish is personal - I am able to get a brown crust with no additional sugar: after I bake in the Dutch oven for 20-25 mins (half my required baking time at 425), I take the lid off, and cook it exposed for another 20 mins... by that time the bread is at 190-200+ degrees inside = done.
Do it outside: The dutch oven also allows me to cook bread outside: on the BBQ in the summer, so the oven doesn't heat up the house, or even on a campfire - that time i used charcoal briquettes, 10-15 under the dutch oven, and 10-15 on top, with a few unlit ones added later to keep the heat on... Didn't get at brown as in my oven, but it was done, with a great "oven"bloom.
I think I just gave away most of my secrets :)