Today I began Field Blend #2 (from Forkish's FWSY). Kitchen temp was a nice 74 F, and dough temp after initial mixing was 78 F. I included the instant yeast along with my levain and kept an eye on the dough (as so often advised and after naively following Forkish's lengthy bulk fermentation time estimate with a previous bake). Four S&F sessions spaced through the first two-plus hours tightened up the dough, and then I let the process continue. After a little under four hours I had a nice billowy dough, which I then divided, pre-shaped, paused for a bench rest, final shaped, put into bannetons, and then put into the refrigerator (where the loaves now sit for baking tomorrow).
Baking from FWSY has definitely forced me to pay attention to time and temperature, but as a newbie I also lack the experience to recognize signs that others who post here would notice. Watching the dough rise got me thinking about the aim to achieve billowy dough versus the aim to avoid overfermenting.
What are the things the rest of you look for in sensing that your dough is not yet overfermented? The finger (or poke) test works nicely for proofing, but is there an equivalent for the bulk fermentation? Is billowy the point at which to divide and pre-shape? In Tartine, Chad Robertson writes about looking for a cohesive mass, bubbles on the side of the container, ridges that hold their shape a bit after a S&F (among other things).
Thanks for any helpful hints.
Ted
bubbles. As the dough moves along the time line from mixed to baked, the gas cell bubbles change not only their size but their shape. They go from tiny round little bubbles to a variety of larger bubbles that eventually push and can break against each other.
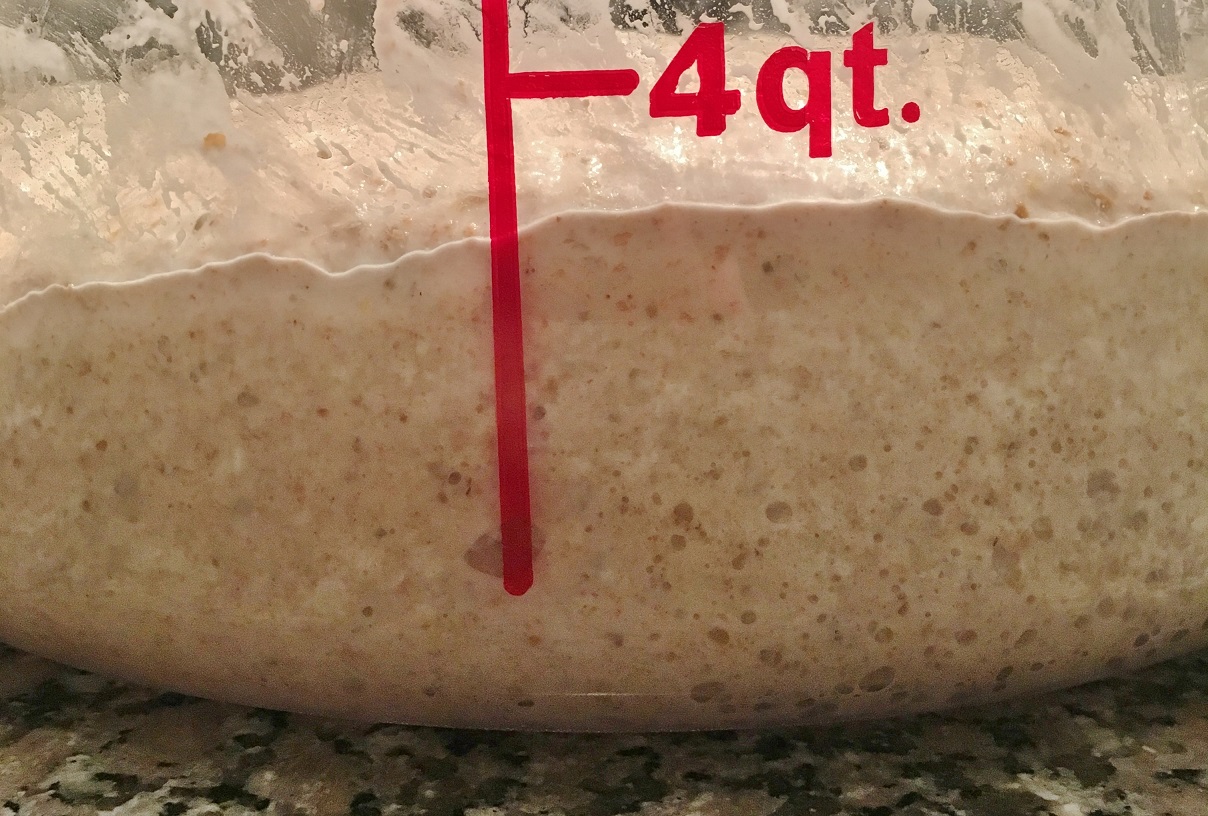
Just to be sure that I understand your comment, should I conclude that the bulk fermentation is near its end when the large bubbles appear? And not before then? Included is a photo of my dough just before I removed it from the tub last night. Note several large bubbles (and there were many smaller ones visible through the side of the container). In retrospect it seeems that I did not overferment or underferment, and the loaves turned out nicely (see photo of the pair, one baked in a Dutch oven and the other on a stone). Also, as I know you are a fan of cracks in the crust, included are two close-ups of the crust from the loaf baked on the stone. They are still cooling, so I do not yet know what the crumb looks like, but the smell is fine.
Thanks again for sharing your expertise.
Ted
Your observations seem to be right on with this recipe and type of bread (holding out for the crumb shot.) Beautiful bold bake. Did the inside bake through?
Bulk fermentations will vary with the recipe and desired outcome. I have run into enough recipes where the bulking was strictly dough temp & time and had I waited for larger bubbles (small ones breaking into larger ones) would have ended up with over proof dough further down the time line. Those tend to be doughs where some extra shaping and playing with the dough is required and have multiple rises.
I tend to look at the smaller bubbles. The ones that form when water hits flour from the beginning. You can always pop the bigger ones but if you don't see enough of the tiny ones scattered about replacing the dense areas, the dough is going nowhere fast with its fermentation. Great for slow doughs and keep an eye on them, those bubbles that make up most of the dough. They are very easy to see if you take a fast sharp cut into the dough, cutting across the matrix. Clearer and more obvious than looking at the sides of the container. Cut and compare what you observe. You can slap the cut edges back together after your quick photo. (light source from the side)
The speed at which those occasional larger bubbles form and move toward the surface will also give you some idea on how fast the dough is breaking down. There will always be a few to pop as you shape and form loaves. Up to you if you want them or not. I have a stick pin or a toothpick and usually a pointy knife nearby. Popping them with fingers tips tends to lump the dough around the edges so if the palm of your hand isn't popping them (more fun than bubble wrap) try something pointy.
Retarding tends to let the gas cells grow slower and more separate, or more evenly as chilling thickens the gas cell walls. The dough stiffens with the cold. Some flours are more affected by temperature than others. Wheat is the "norm" so most observations are based on sifted wheat, rye is stiffer than wheat and tends to crack at the same low temps as wheat letting gas escape. A small portion of rye with wheat is not a problem but when the dough is predominantly rye, retarding at wheat temps proposes a problem letting too much gas escape. A few degrees warmer makes all the difference with high rye doughs over 50% rye.
I've been thinly working my way through a stick of black peppered salami. The crust pictures look almost like my salami! :)
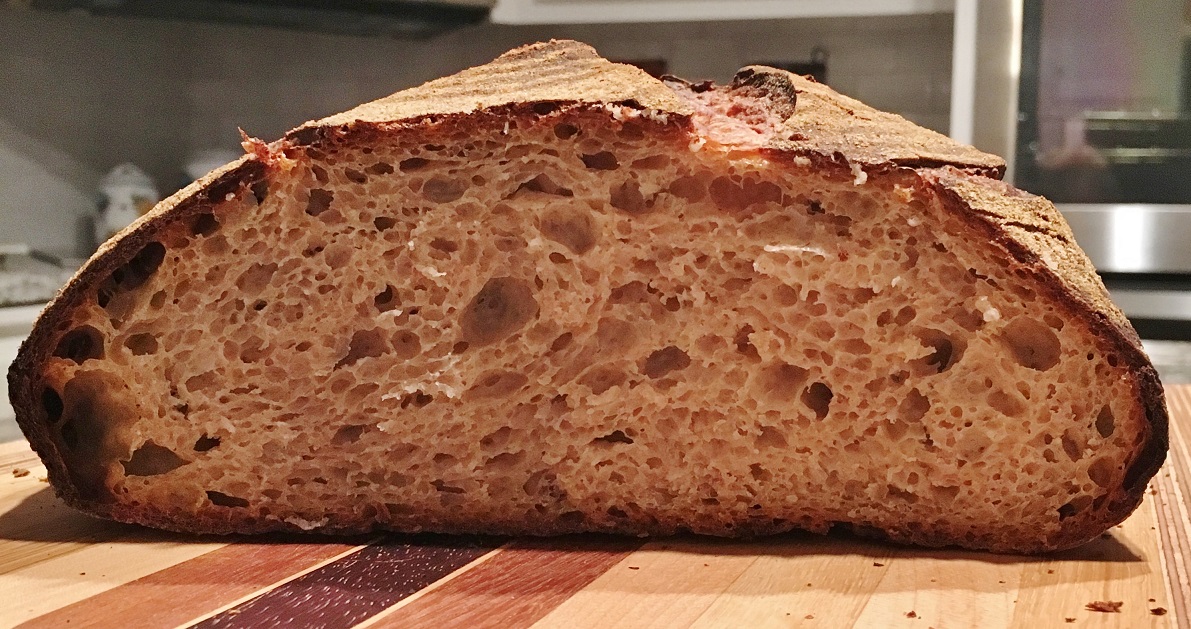
Thanks, Mini Oven, for your explanation of how to observe the formation of bubbles. You asked for a photo of the crumb. This one is from the loaf baked on the stone. The other (Dutch oven) loaf is still intact and will be sliced open perhaps tomorrow or the next day (and in the meantime sits in a paper sack in a bread cupboard). The inside appears to be evenly baked. I always check the temperature with a Thermapen, and it was 210 F.
Here is a side view taken at the same time as the overhead photo of the bubbles (i.e., just before removal from the tub).
One of the things I generally watch is the top surface of the dough ball. When it's perfectly fermented (well, relatively perfect :)) it has a nice smooth dome on the top. If it is over-fermented the dome will start to collapse, eventually losing volume and leaving wet sticky dough residue on the sides of the fermenting container above the current level of the dough (particularly if it is a clear straight sided container as yours is). This is a bit more difficult to determine when you mix and ferment in the same container, unless you wipe the clinging dough bits off the side after your last stretch & fold. And this is why I also turn the dough ball after the last stretch and fold, and tuck it into a smooth ball (if you haven't watched Trevor Wilson's video (Rubaud method here on Breadwerx) you might find it interesting). I use a modified version of this to ensure the dough ball is smooth and rounded at the end of the stretch & fold so I can watch the top surface during the ferment.
Looks to me like you caught it just in time; the bread looks wonderful!
Thanks, Lazy Loafer, for adding to this discussion. I have watched some of Trevor Wilson's videos and find them very helpful. His method of initially mixing dough has improved the gluten development in my loaves. Next time I will try to tuck the dough into a ball.
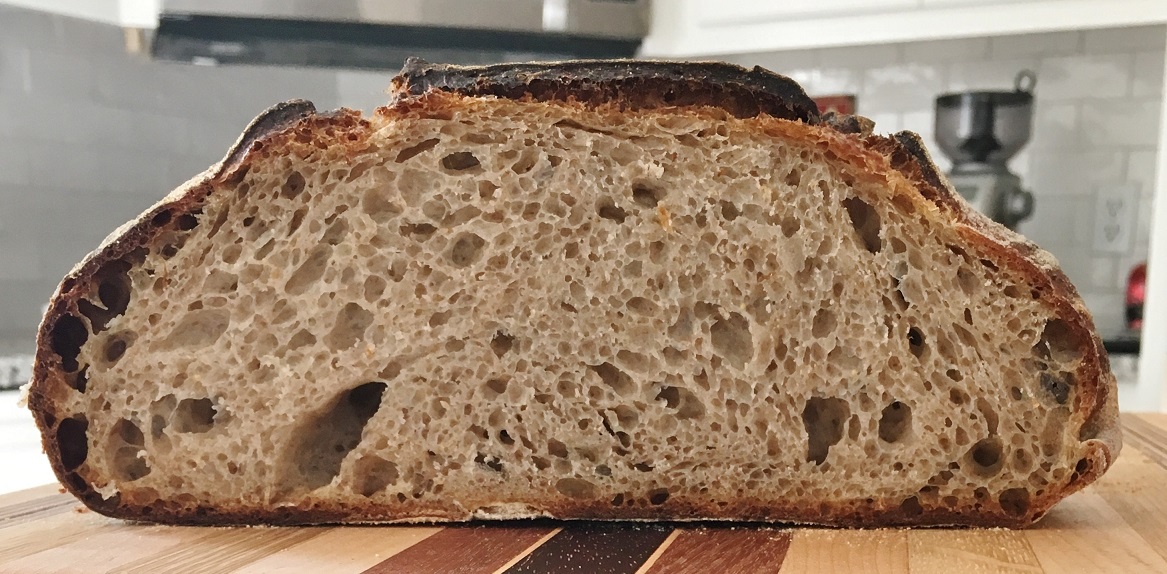
Here is the crumb from the loaf baked in the Dutch oven (which limits the oven spring -- there is always some residue on the underside of the lid where the dough contacted sometime during the covered portion of the bake).
I really like that recipe; make it fairly often. Have you tried it without the extra yeast?
Thanks for the compliments. This was my first bake of Field Blend #2, so I went with the given recipe (except for the lengths of bulk fermentation and proofing times, which I know only too well from experience will differ in my kitchen from those in Forkish's book). Aside from affecting the timing, does omitting the commercial yeast affect the taste or texture?
"Aside from affecting the timing, does omitting the commercial yeast affect the taste or texture?"
Yes Sourdough works with Bacteria and there will be more of their influence with a longer fermentation.