
... a bowl of cherry peppers, grilled.
Every summer, my husband buys pepper plants, even though I have never had any success growing them. Eggplants, zucchini, cucumbers, Chinese long beans- no problem, but peppers- just can't grow them. So, this year B. says maybe you'll have better luck with cherry peppers, and proceeds to buy 3 plants.
Coming back from a month-long vacation in Asia, I find the cherry peppers ripe for picking. Excited, I grilled, peeled and deseeded them- visions of cheese-stuffed, batter-dipped, fried torpedoes dancing in my head. Better imagined than done! After an hour of prepping, I quickly realized it would be a daunting task to batter and fry each one of what was left of the starting vegetable, let alone stuffed them with cheese. Thus was Plan B born. I would use the peppers judiciously in a sourdough bread.
For my sourdough bread, I turned to a recipe from Janedo (http://aulevain.canalblog.com/archives/a_propos_du_blog___/index.html) which was her interpretation of Leader's Pane di Genzano, and made my own loose version. (Sorry, Janedo, I can't find the exact page to insert here for reference.)
Two days prior to bake, build your sourdough starter. You would need 368g of SD. I chose to make 480g of a target 60% hydration preferment because that is what I had on hand and I already have the calculation from a previous bake.
Day 1:
- 17.78g 60% hydration starter
- 22.22g AP flour
- 13.33g water
12 hrs. later:
- all of the above
- 66.67g AP flour
- 40.0 g water
Day 2:
- all of the above
- 200g AP flour
- 120g water
When the starter is active, about 4 hours...
- 370g of the active starter (refrigerate the rest for future bakes)
- 400g water, room temp
- 500g flour (I used 300g bread flour, 120g First Clear flour, 75g AP flour, 6g vital wheat gluten. No particular reason for the amounts; I had run out of bread flour)
- 4 g instant yeast
- 8 g of Kosher salt (reduced from original 15g amount in anticipation of dry cheese addition)
Making:
- Combine the above in the bowl of a mixer and mix with a pastry blade until a wet dough forms. Now comes the cautionary part. You may choose not try this at home with your regular benchtop mixers as the procedure calls for cranking the speed to settings above manufacturer recommendations.
- Turn on the mixer to medium-high speed and let knead for 10 minutes. Here I switched to the dough hook and placed my Hobart N50 to the 2nd setting (the model only has 3). Be careful as Janedo cautions as the mixer can start to move and fall off the counter.
- Now increase the speed to high for 8-10 minutes. The dough is expected to form stringy strands and then thinner ones, and will eventually pull away from the sides of the bowl to form a ball, but slide down when the mixer is stopped. Here was when I got really nervous as the mixer jiggled and made loud noises. I was perhaps lucky this time that nothing got blown up.
- Do a windowpane test to make sure gluten has formed.
- Transfer the dough to an oiled bowl, cover, and let ferment for 1.5 hrs.
- Then punch dough down, and do a couple of folds (I used my scraper since the dough is sufficiently wet); cover and again let rise for 1-1.5 hrs.
- When doubled, take dough, degas and shape tightly. (I made 2 boules).
- On one of the boule, I added cherry peppers and grated Parmegiano Reggiano).

9. Cover and let rise until doubled, about 1.5-2 hrs. (I did mine on parchment). In the meantime, with an hour to go, preheat oven to 500F.
10. Score bread and slide onto hot stone, while reducing oven temp to 450F. (I also took the hot water on cast iron pan + misting-the-oven strategies).
11. After 30 minutes, turn the oven down to 410F and bake for another 20 or so minutes until very dark. (I skipped this step because I prefer my bread lighter in color. I also typically mist my bread right after the bake to get a softer crust if I'm not going to consume the bread immediately).
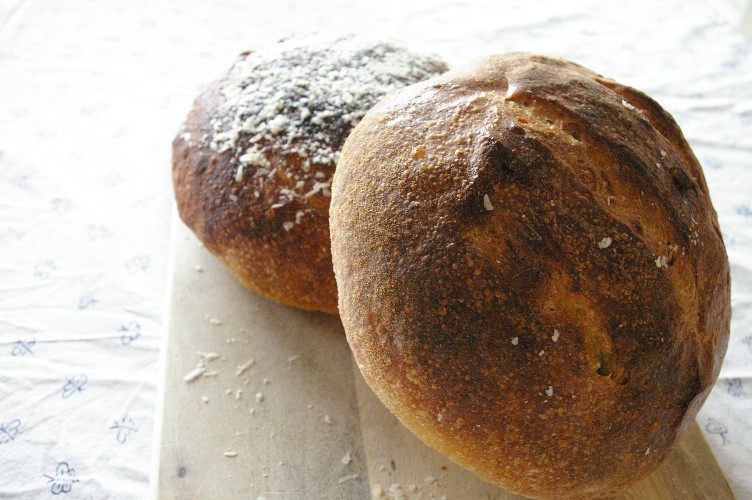
I know, my scoring remains a weakness. These I scored using sanitized wallpaper knife.
Results:
Crumb was satisfactory with enough holes. The flavor of the bread is just as I like it- with moderate tang. Now for the Cherry Pepper Parmesan bread- wheww! It was hot! I didn't know cherry peppers were that hot. (Now mind you, I only go as high as 3 on a scale of 0-10 in Thai restaurants). The dried cheese was, needless to say, fantastic and probably would have been more so had it been left on its own.
Cherry pepper cheese bread is being sent away to K. who can appreciate the heat, but daugher #1 and I, we're keeping the unflavored one. She's having her slice, as I write this, right off the panini grill, to be topped with fresh goat cheese. Me- I'm having mine grilled and topped with good old-fashioned peanut butter. I love the simpler things in life.

- cake diva's Blog
- Log in or register to post comments
Hey Cake Diva
This bread and crumb is definitely not a dive.......
Thomas
Cake Diva,
It's hard to comprehend just how hot those small peppers can be. I like hot spices and searched out a source for Peri-Peri peppers and sauce. I have incorporated it in bread a couple times and I'm the only one who will eat it so it's a rare occasion. This stuff is so hot that when I marinade chicken with the sauce, when I clean the baking pan, the aroma that comes off the sink and hot water is like battery acid fumes. Tastes good though:>)
Your Parmesan cheese loaf looks great. I'll bet those little chili peppers are delicious!
Eric
Thomas and Eric,
Yes, I'll make the SD bread again, but this time no cherry peppers, only good authentic Parmesan cheese. I've only had good results with this recipe (thanks, janedo!), but I have to find a way to get the gluten without subjecting my mixer to torture.--- cake diva
cake diva,
A little secret about gluten development is that time and folding work just as well or better than beating the dough with a machine. If you increase the hydration of just about any recipe by just a few percent, and lower the yeast, you can arrive at a fully developed dough simply by folding.
I have gotten to love this method of low impact development mainly because the dough does not get oxidized. The crumb will retain it's creamy yellow color and will taste better and not tough. I was surprised that even with seeded multigrain mixes I was able to get good development and good rises which mean well aerated crumb.
Works for me.
Eric
Thanks, Eric. I'll give the Bertinet slap-stretch-fold technique a try with this recipe. I'll keep the first 10 min. mix at medium-high, then substitute the manual method for the last 10-min. mix at high speed. It's time I give the old arms a workout.