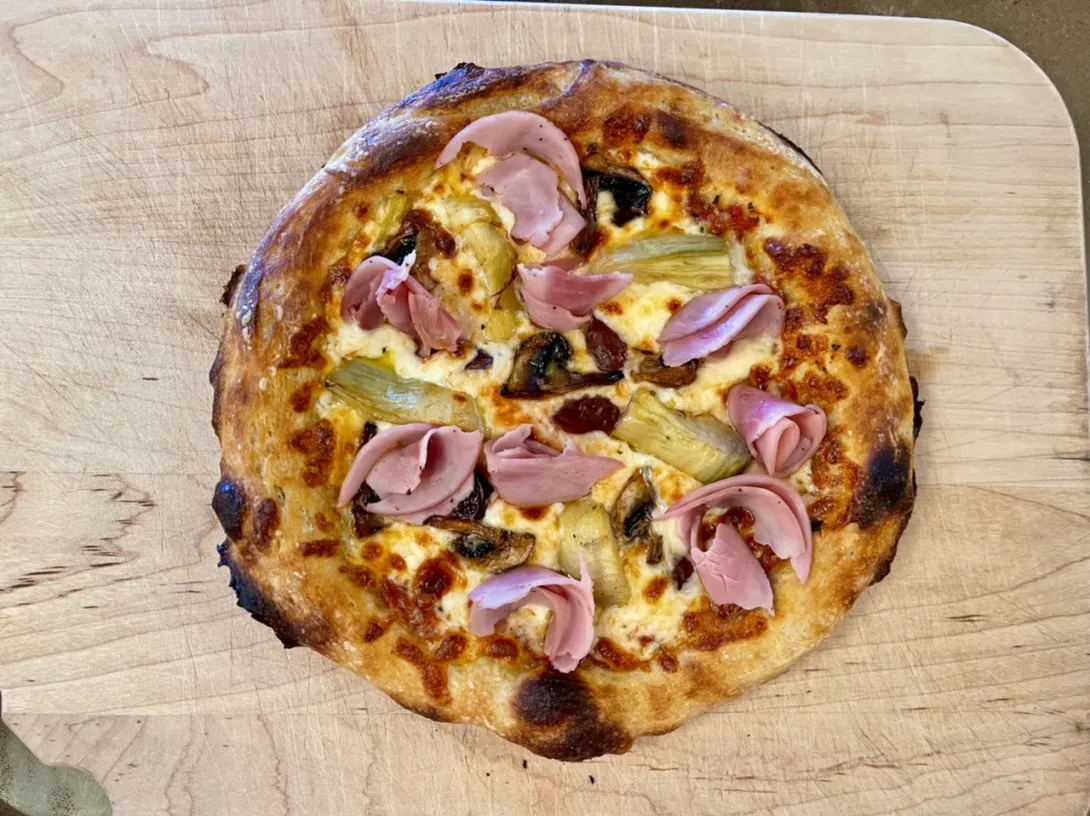
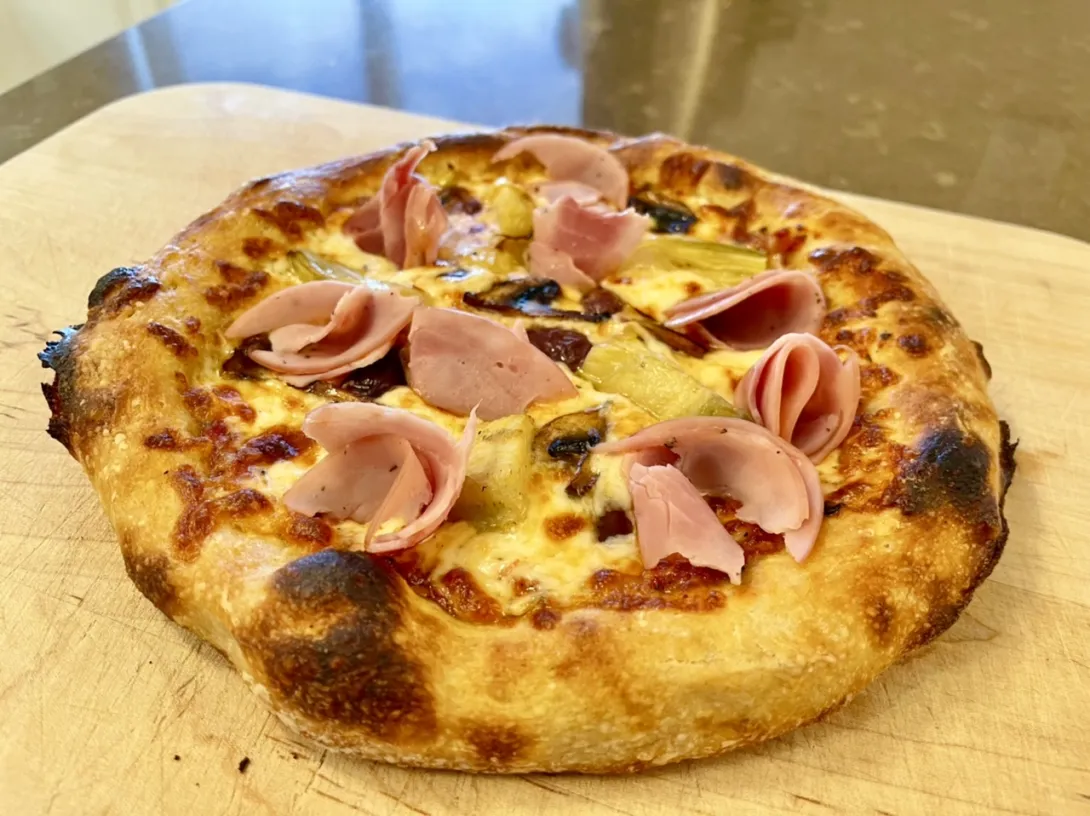
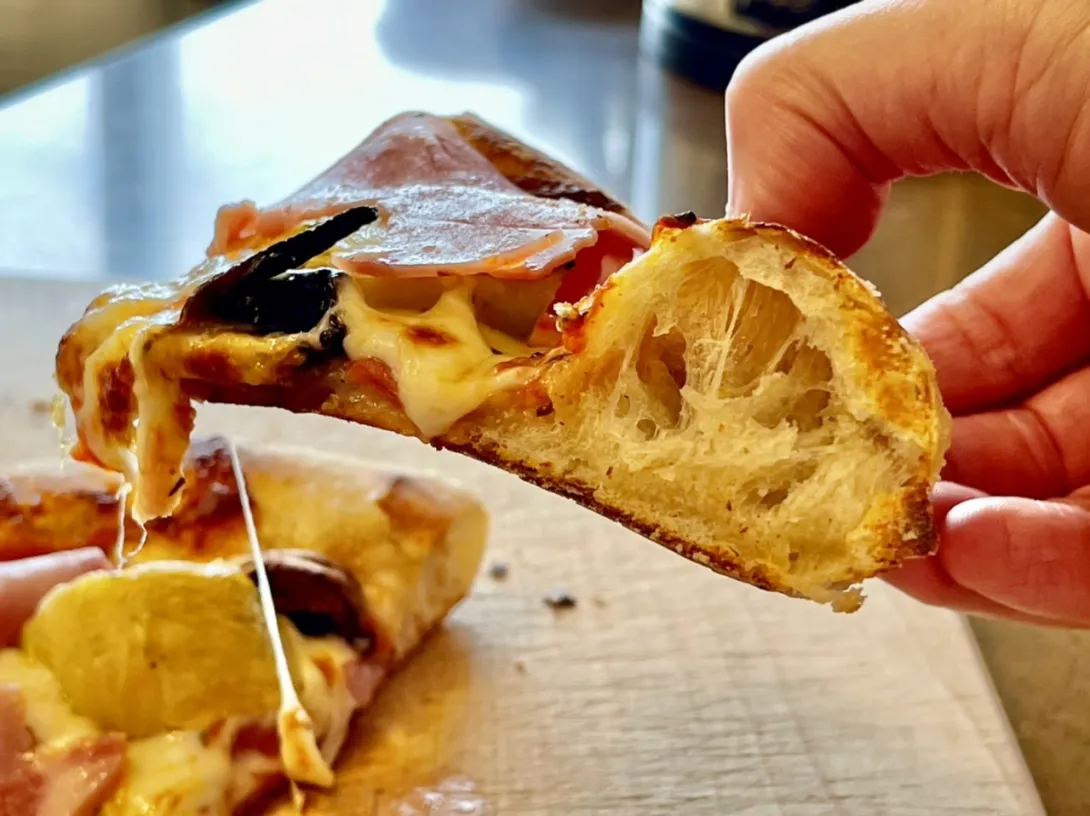
I hadn’t made a pizza in half year so it was high time that we had pizza. I decided to try baking another Capricciosa pizza (capocollo, mushrooms, olives artichokes and tomato sauce) and ensured that the mushrooms were pre-cooked so that they didn’t flood the pizza with their liquid during baking. To that end I dry sautéed the mushrooms after slicing them in sixths until they were nicely browned. The artichokes I allowed to drain in a sieve so that they didn’t too much liquid to the pizza. Finally, for the pizza sauce, I used a can of San Marzano tomatoes removing the tomatoes. I squeezed them open to remove the tomato water and then drained them in a sieve. After they dried for some time, I added some homemade red wine vinegar, garlic powder, salt, pepper, oregano and basil and squeezed it all to mix and breakdown the tomatoes.


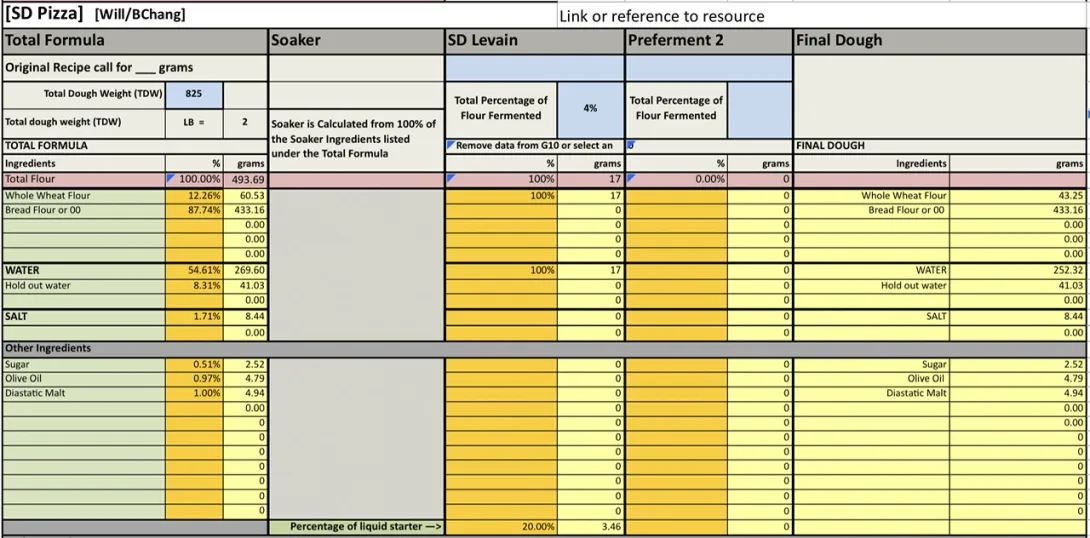
(1) In your mixer bowl(or by hand) dissolve the levain and diastatic malt in all of the Final Dough Water except the HOLD OUT Water.
(2) Mix in the flours until well hydrated
(3) Allow to fermentolyse for 1hr
(4) Mix in the remaining HOLD OUT Water, salt, and sugar mix until well-incorporated.
(5) Slowly drizzle in the oil until well combined.
(6) Beat or knead by hand until dough is moderately developed. The dough will be sticky and elastic. If kneading by hand, use slightly wet hands and avoid adding more flour.
(6a) Allow to ferment for 1 hour before proceeding to (7)
(7) Oil your hands and a suitable container.
(8) Shape into a tight ball. I divide the ball into four smaller ones each for one 9” pizza at this point. Each goes into a small oiled bowl and allowed to proof for 1 hour before starting cold fermentation.
(9) Cold ferment in the refrigerator for 48-96hrs.
(10) Remove to warm up to room temp for at 3-6hr or so before use at room temperature, or you can ferment 2-3 hours at 80ºF. One hour before the dough is ready, pre-heat your oven on roast setting at 550°F or as high as it will go.
(11) Stretch the balls into your desired size. Top your pizzas, brush the cornicione with water then roast at 550F (as high as your oven will go) until the crust is browned and the cheese has melted. Spin the pie at least once to avoid burning due to oven hot spots.
(12) I bake in a preheat cast iron skillet that heats in the oven while it is pre-heating. I set the oven to roast and bake the pizzas in the cast iron skillet on my baking steel so that the skillet is quite close to the top of the oven. It only takes 6 mins to fully bake my pizzas.
Heat oven to 550ºF roasting setting, with skillet in oven on baking steel on the second highest rack about 1 hour. My set up with the baking steel on the roasting rack that set up is on the third highest rack because of the added height from the roasting rack so it essentially makes the skillet on the second highest rack.
Place stretched dough into skillet and top with sauce and toppings.
Brushing water on the cornicione prior to baking in oven, gives better oven spring and leopard spots to the cornicione.


- Benito's Blog
- Log in or register to post comments
Here’s a video showing how I stretch my pizza dough and transfer it into the scorching hot cast iron skillet I use for baking the pizzas in my home oven.
Nice shaping video as well. You got some great color on your crust for a home oven so fantastic job. Curious why you put the sauce on top of the cheese. I always put the sauce on first.
Best,
Ian
Thank you Ian, since I’ve been applying water to the crust I’ve been getting better browning. The time I was set up to film I decided to try cheese then sauce to see if it would make any difference to how well the crust stayed crisp. In the end, the crust stayed crisp regardless of the order of the cheese and sauce.
Benny
Nice video, thank you so much, might make me feel confident enough to try a cornicione, my pizza shaping could do with some work!
The flour that you dip into at the start of the video, is that semolina?
Jon
Thank you Jon, that is nice of you to say. Shaping and stretching pizza dough is very therapeutic and enjoyable. I've actually simplified my process for it, I used to have an intermediate step of stretching on the counter which I skipped this time without any negative results.
The flour I use to flour the dough at the beginning is just all purpose or bread flour, nothing special, used just so the dough doesn't stick to my hands or the counter.
Benny
No pizza making for 6 months! I don’t think so. I can’t go six days! The video is a little scary but good and the crust looks like it was nice to work with. I prefer the traditional pizza toppings like yours instead of the new age combos. Your coppa looks more like what we refer to down here as Canadian bacon. Our capicola (gobagool) has more ribbons of lard through it and it is smoked so it is much darker.
I was wondering why you assemble the pizza in a hot skillet and then bake on a steel versus assembled on a peel and loaded directly onto the steel? I’m worried that you might burn yourself like I know I would if I tried that. That is what I meant by scary. Sorry to sound like your mother.
Don
Thank you Don, I have to admit that I like all kinds of even non traditional toppings on my pizzas, but I was in the mood for traditional when I made this. The capocollo I purchased was said to be lean, perhaps that explains some of the difference between what I used and what you’re used to.
I’ve only tried making my pizzas using my skillet so it is totally out of habit. I really should challenge myself and try making them on my baking steel. I guess I could stretch the dough and place it on parchment paper on my cookie tray and use that to transfer it onto the baking steel. So really it is just laziness and fear that switching to a new method I’d have to figure out the bake times and things once again and have poorly baked pizzas until I figured that out that has kept me from trying so far.
You do sound a bit like my mother except that she would add that I’m not eating enough and that I’m too skinny LOL.
Benny
I think the baking adjustments required would be minor compared to sliding them off the peel which can be tricky at first. A little semolina lets them slide right off. You would also be able to stretch them more to make them larger with more toppings and thus please your mother by eating more. ;-)
I like to honor tradition but still experiment as well. I brought my Ooni pizza oven to a family gathering last weekend and we made 10 pizzas.
2 Margaritas 3 pepperoni 2 barbecued chicken 1 ham and pineapple!? and 2 fig jam/prosciutto with arugula on top. The last 2 were new for me but quite good.
I am thinking that I might bake it on the parchment that I would place the stretched dough onto. This would avoid excessive mess of semolina or other flour in the oven and kitchen.
Nice variety of pizza toppings at your gathering, something for everyone!
Benny