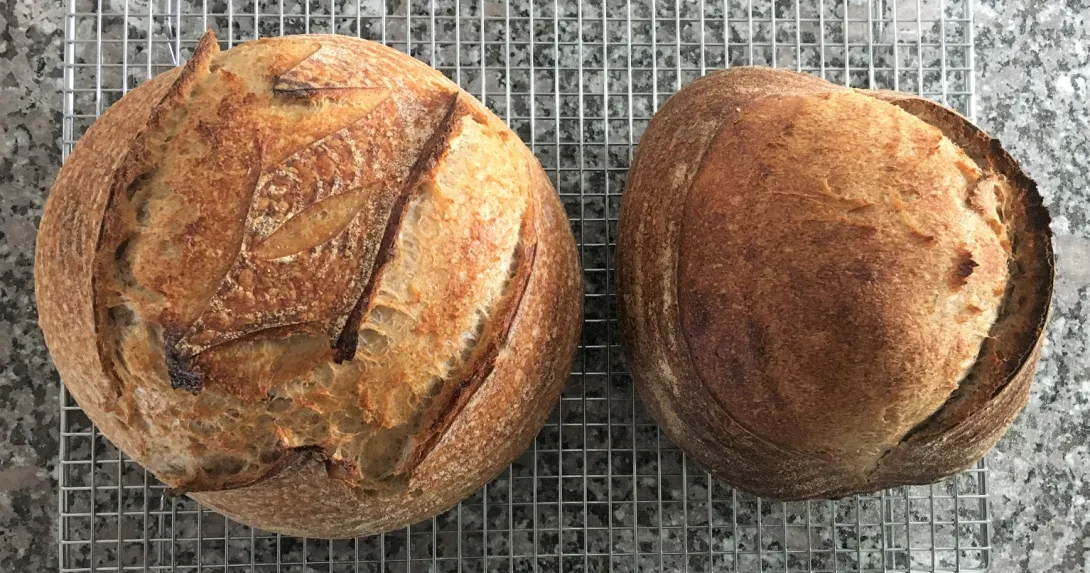
From the number of recent postings about sourdough starters, it appears that many have taken up bread baking. This seemed a good opportunity to illustrate various steps during my preparation of Country Rye from the Tartine book. I always benefit from seeing what something is supposed to look like, which is why I have included so many photos.
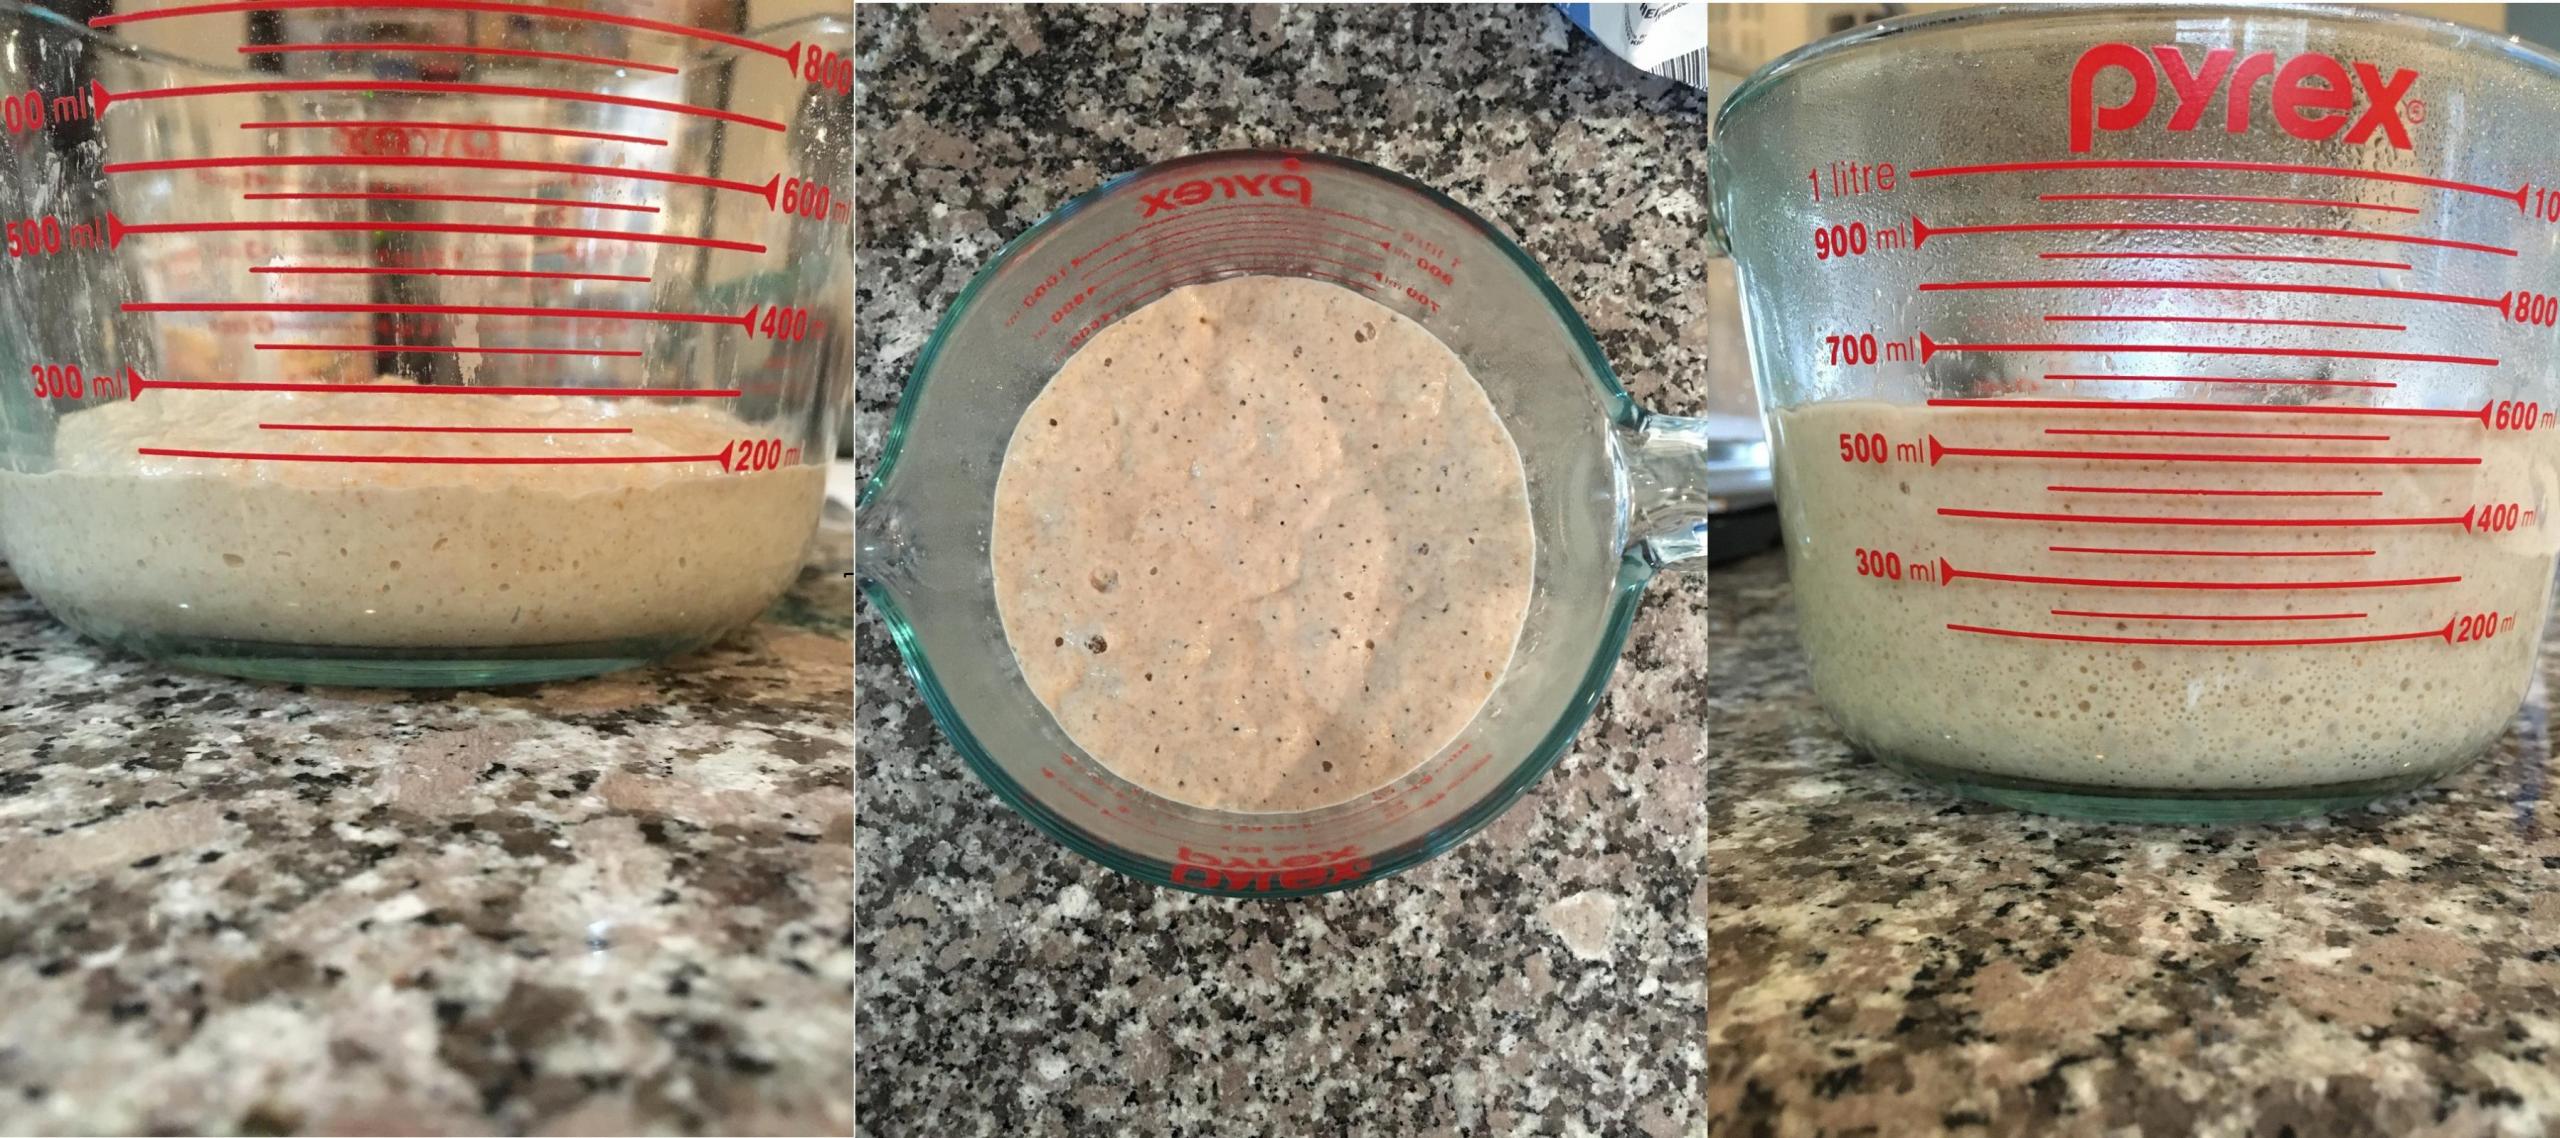
My starter is fed with a 50/50 blend of all-purpose and whole wheat flours (as described in Tartine, and I like the results, so I have stuck with this approach) and an equal amount of water in a 1:2:2 ratio. For the levain I scaled the ingredients to 30 g of starter, 150 grams of the 50/50 blend, and 150 grams of water so that I would have 200 grams of levain available. So little starter is needed, but it provides so much lift.

When all mixed together, the levain initially has much less volume than it does the following morning. This composite photo shows the levain just after being mixed and then top and side views a little less than twelve hours later.
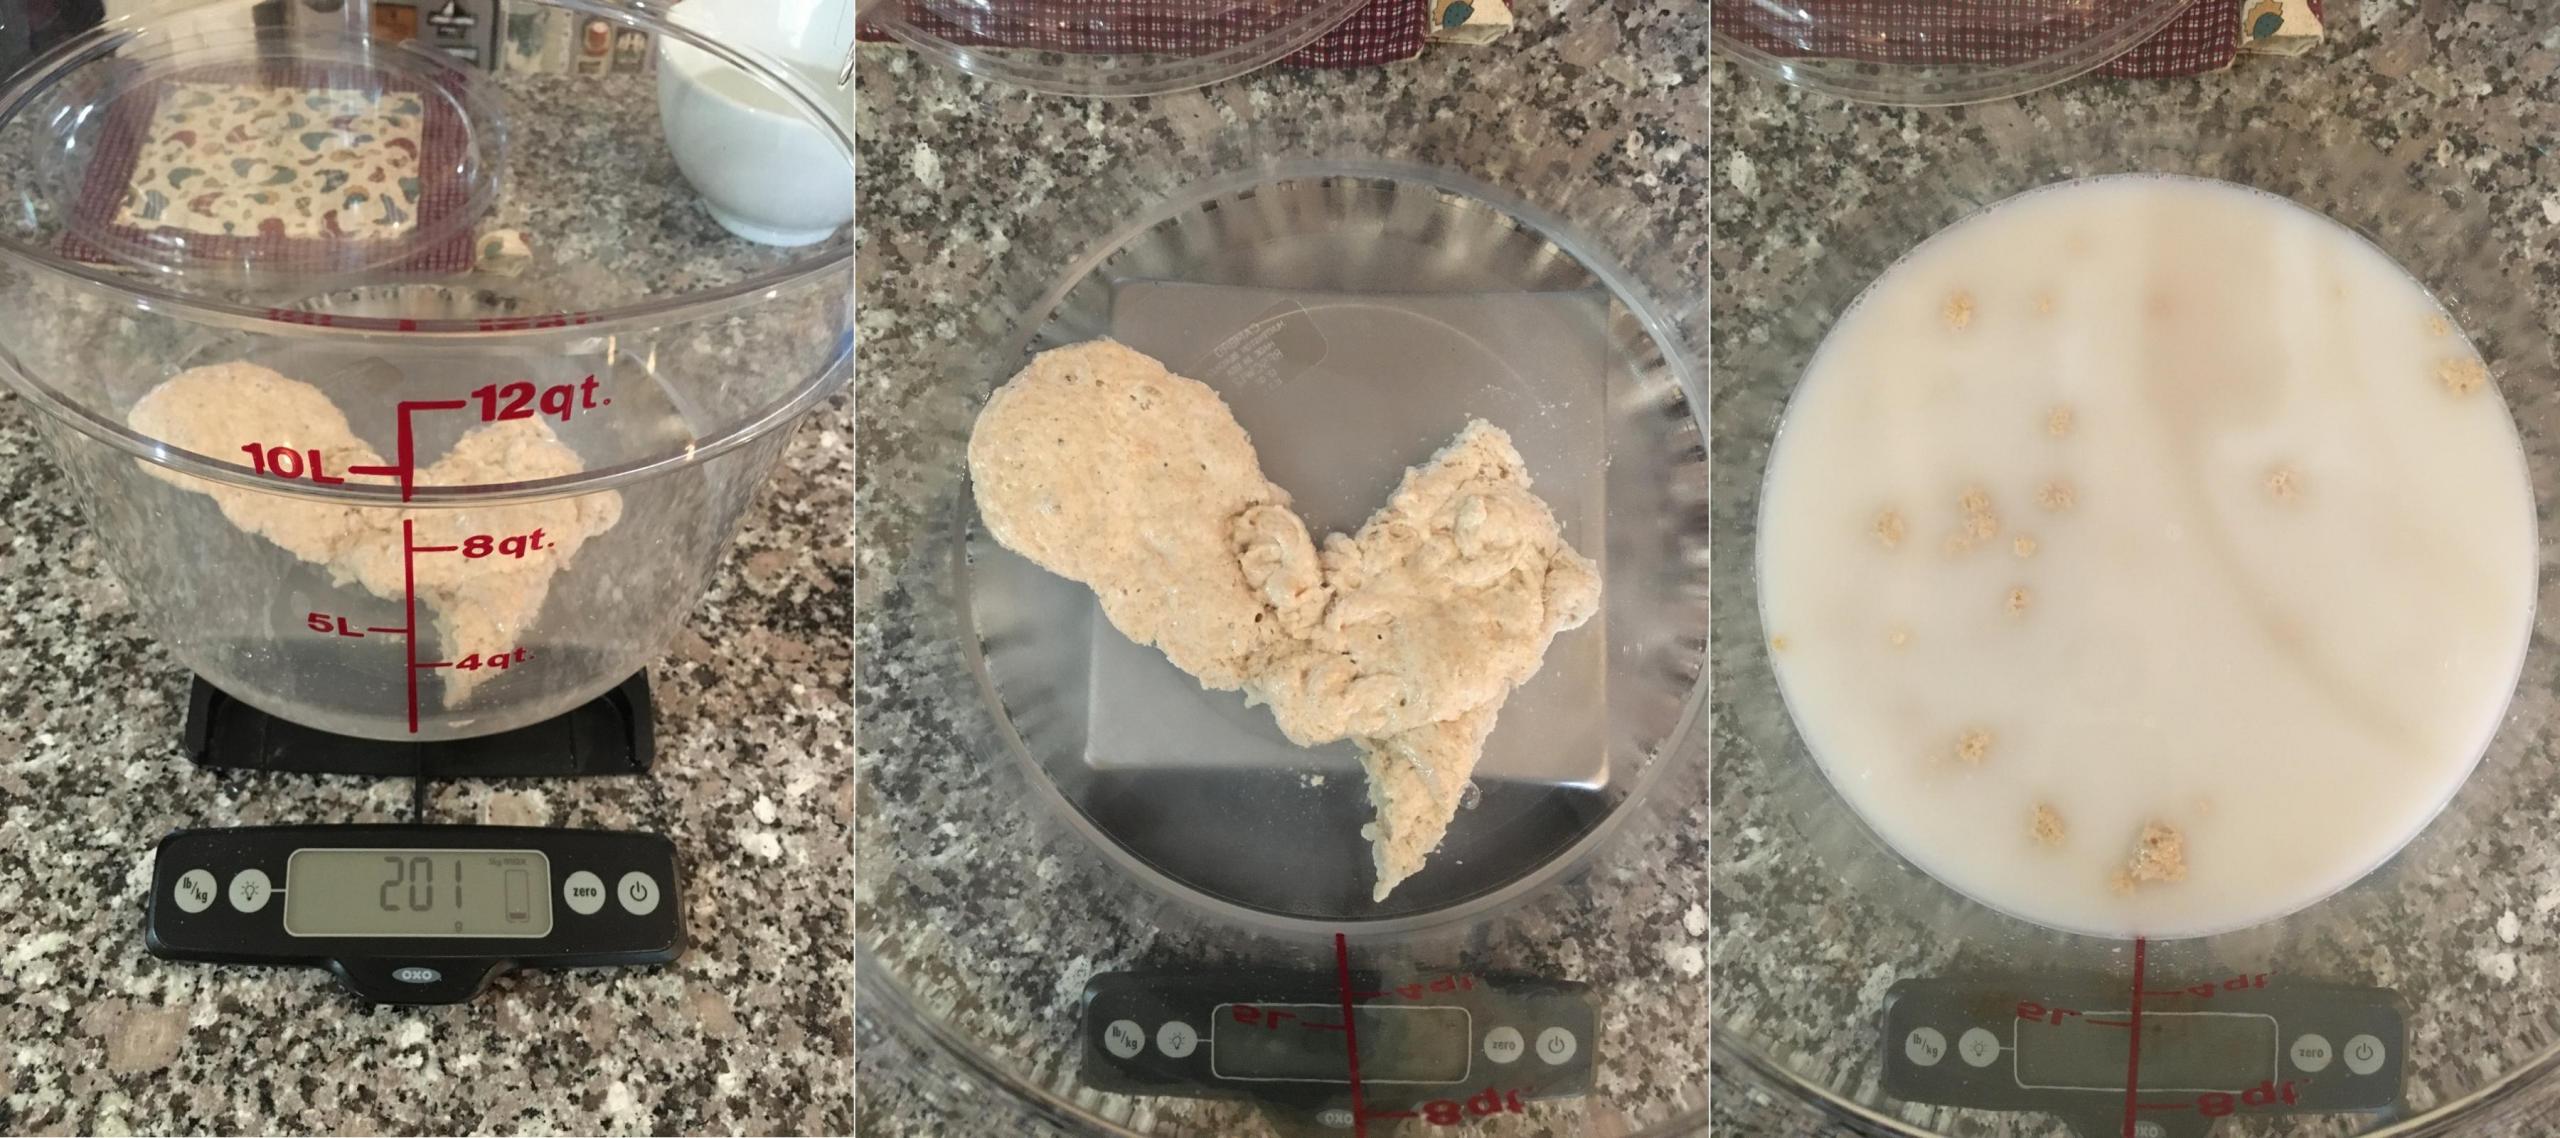
The Tartine method mixes the levain in the water before adding the flour. Here is the levain going in and after being dissolved a bit in the water.
The flours are then added. This bread is 83% bread flour and 17% whole rye. The key at this stage is to get all of the flour wet, and a scraper helps to reach the dry flour at the bottom of my Cambro tub and distribute the water.

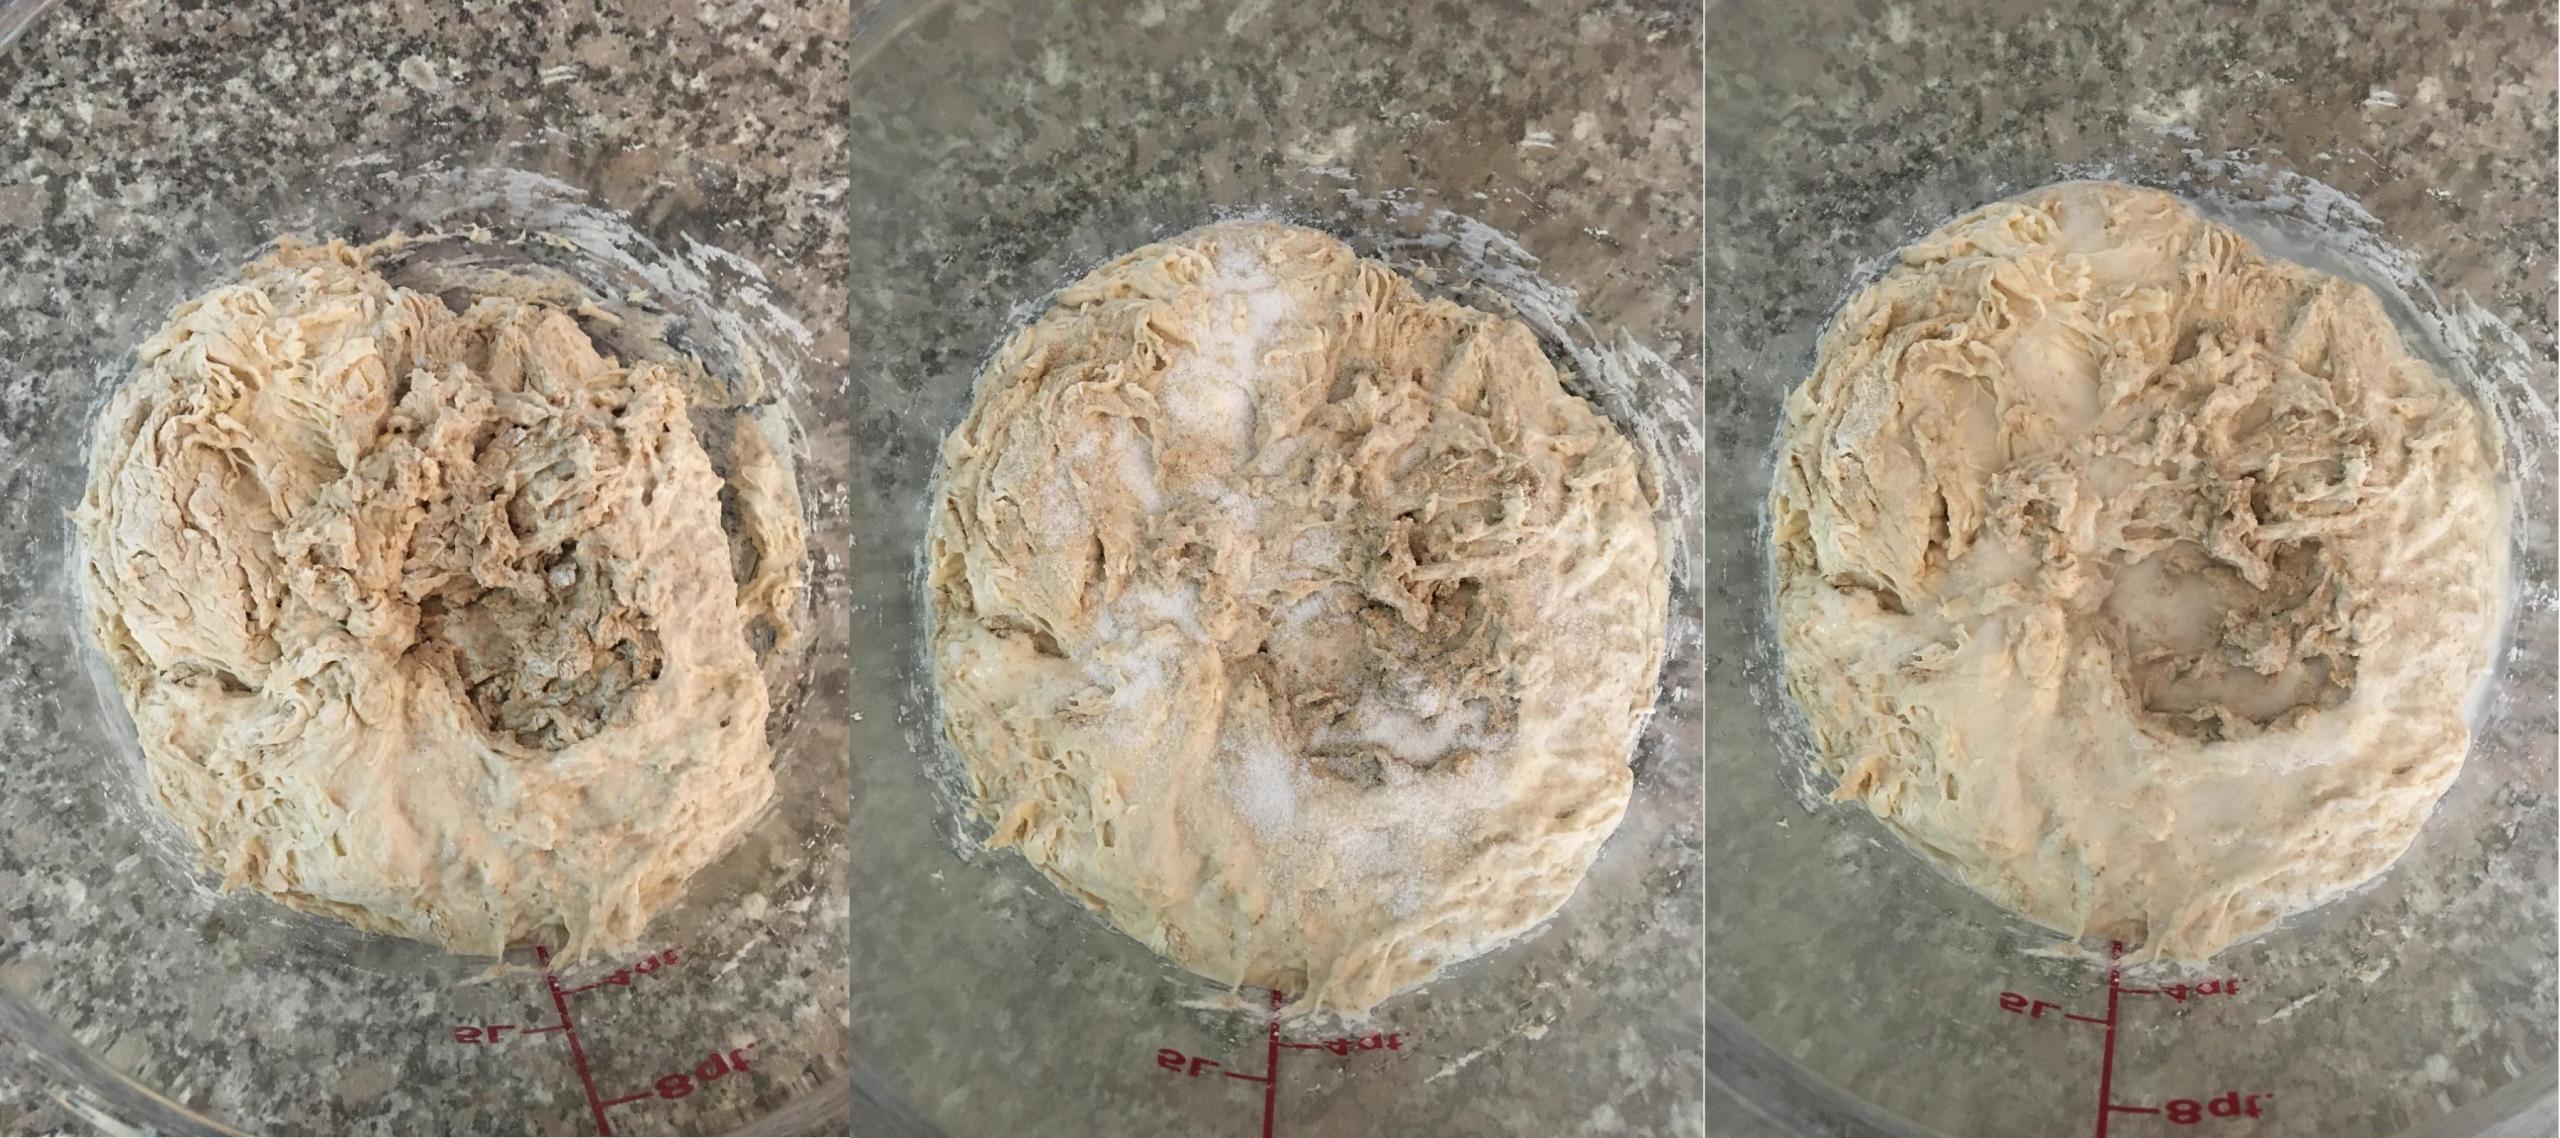
With no remaining dry flour, the mixture is ready for the autolyse stage. I went for sixty minutes to give the gluten a chance to begin its formation. This composite photo shows the dough mass at the beginning of the autolyse, at the end, and after the addition of the salt (20 g) and held-back water (50 g).
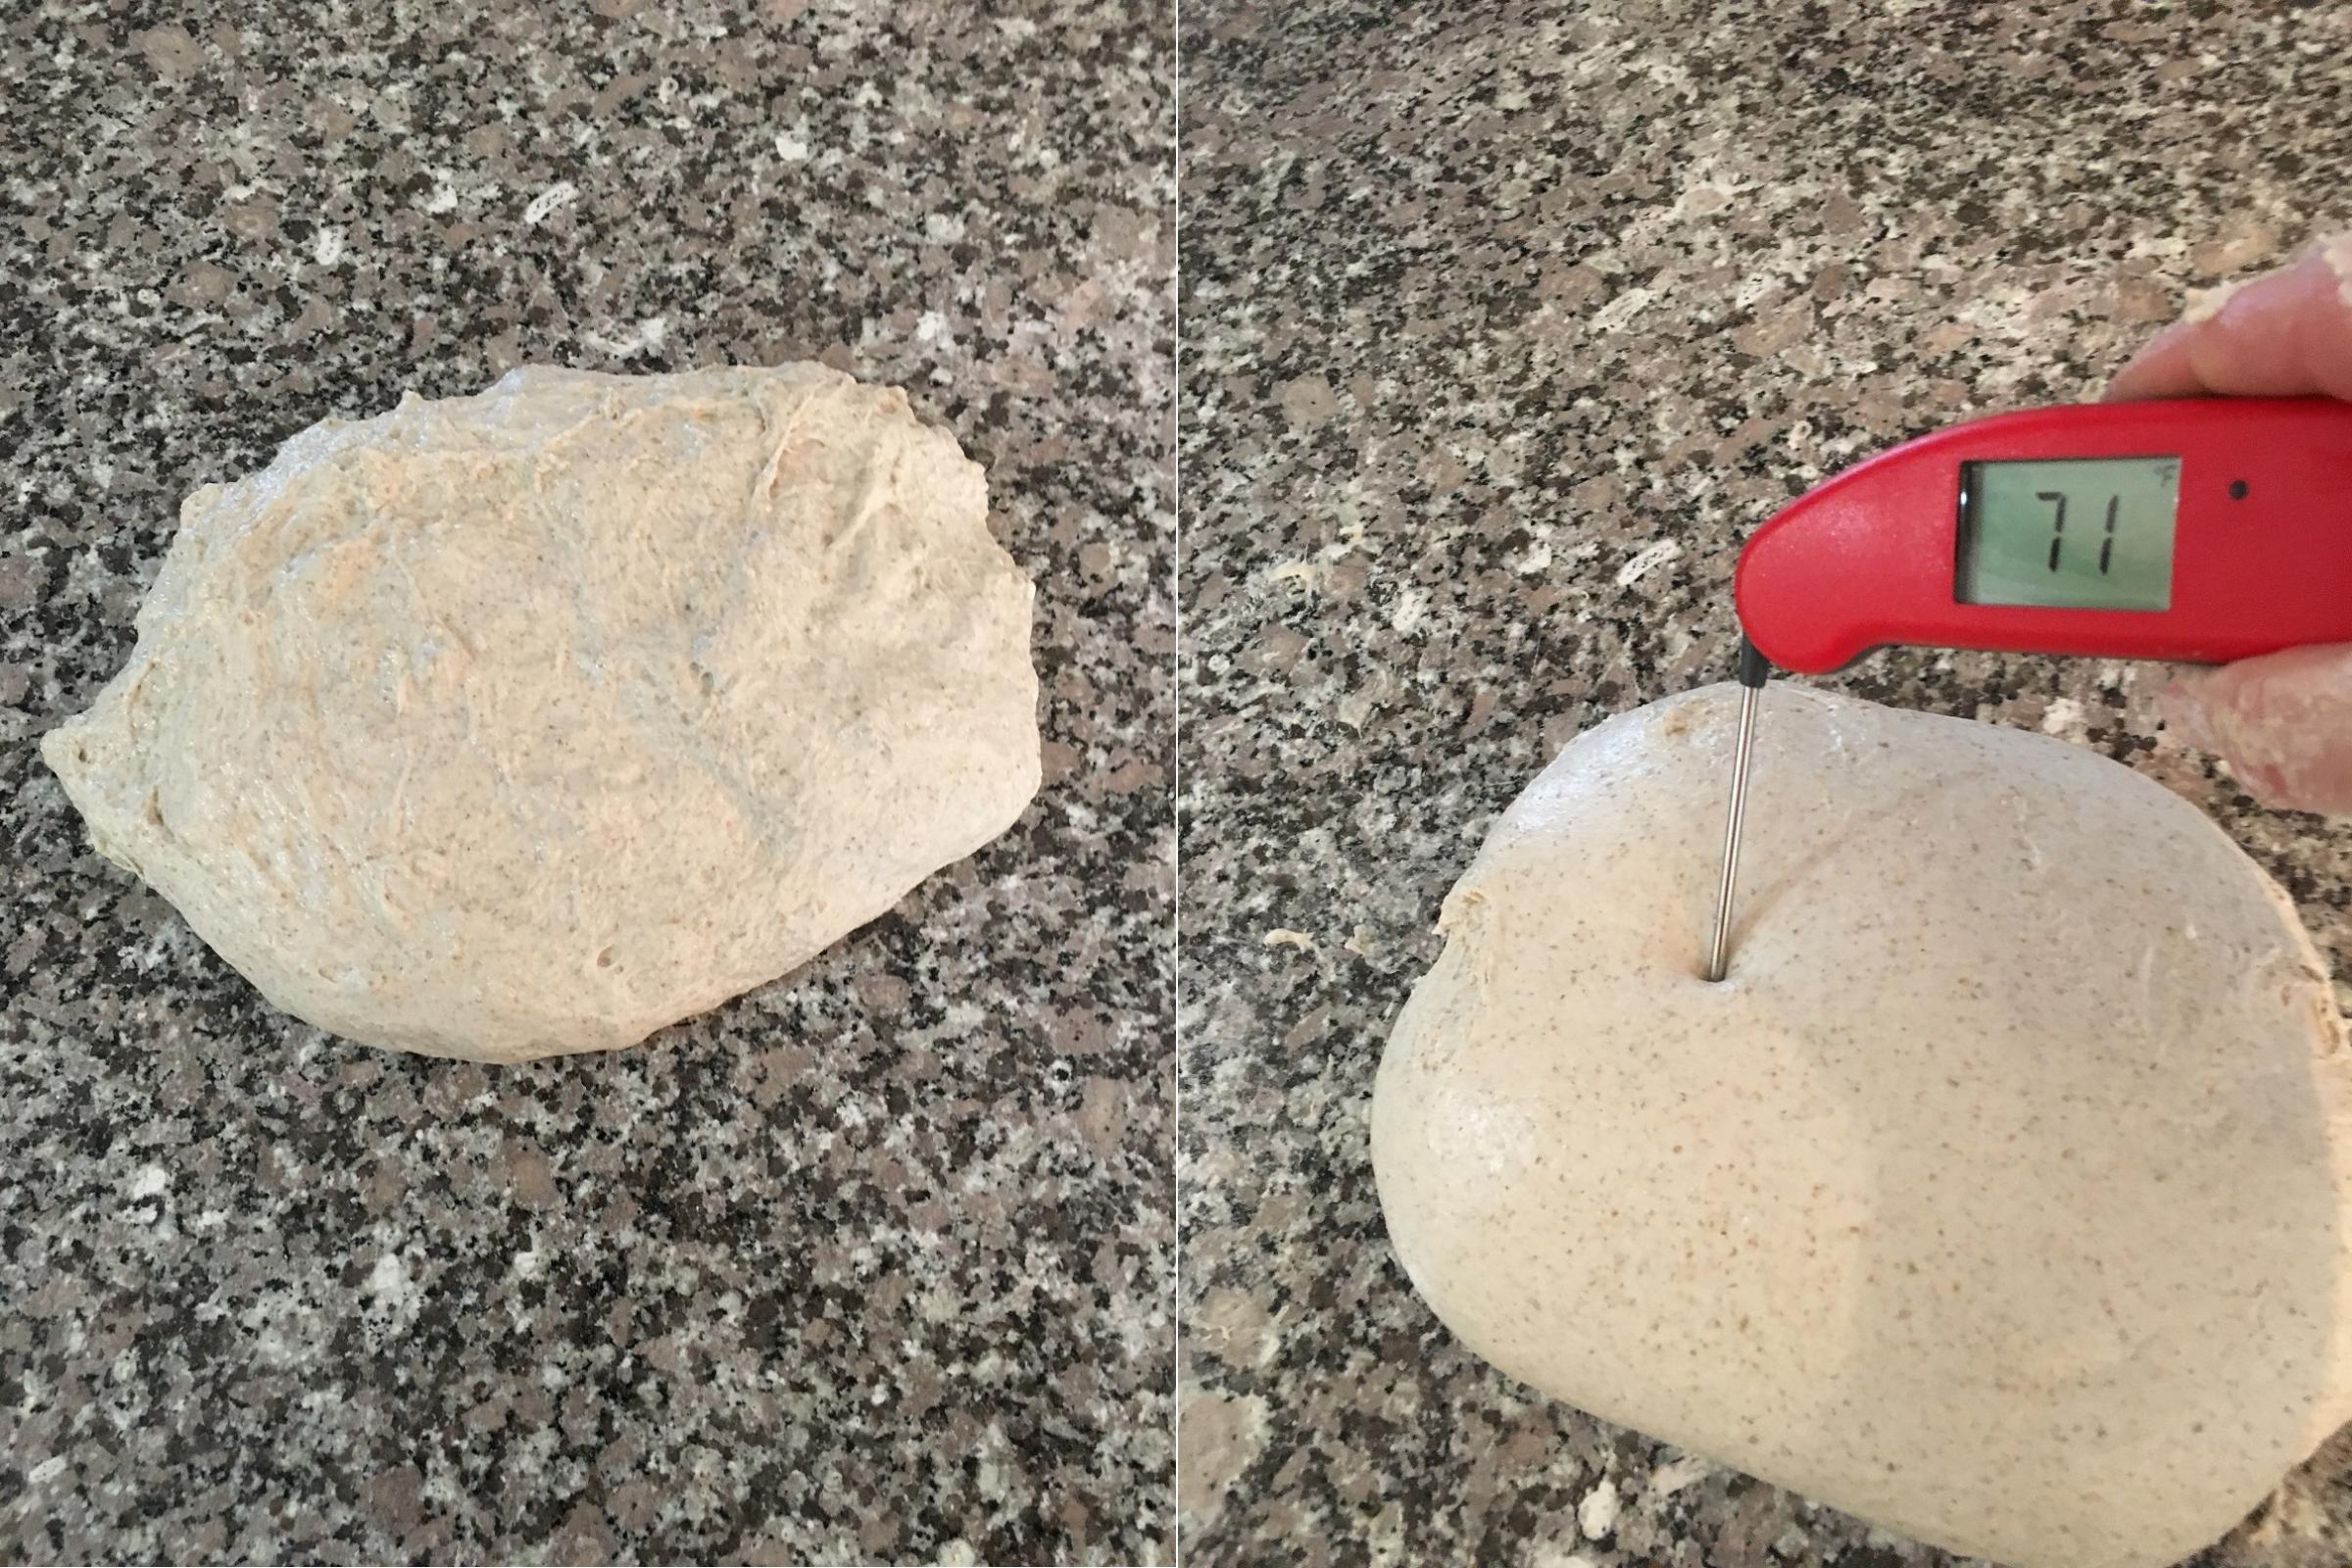
For this bake I decided to include some French Folds (aka slap-and-fold), but first I needed to mix the dough in the tub so that the salt could be distributed and the newly added water absorbed. Finally I had a dough mass that could be worked on our granite counter top. This photo shows the dough when first placed on the granite and then after the French Folds. I did a set of 200 followed by a minute of letting the dough sit and then another 200. The gluten development and strength of the dough were a pleasure to feel. I always take the dough temperature at the end of the initial mixing so that I have an idea of what to expect for the bulk fermentation.
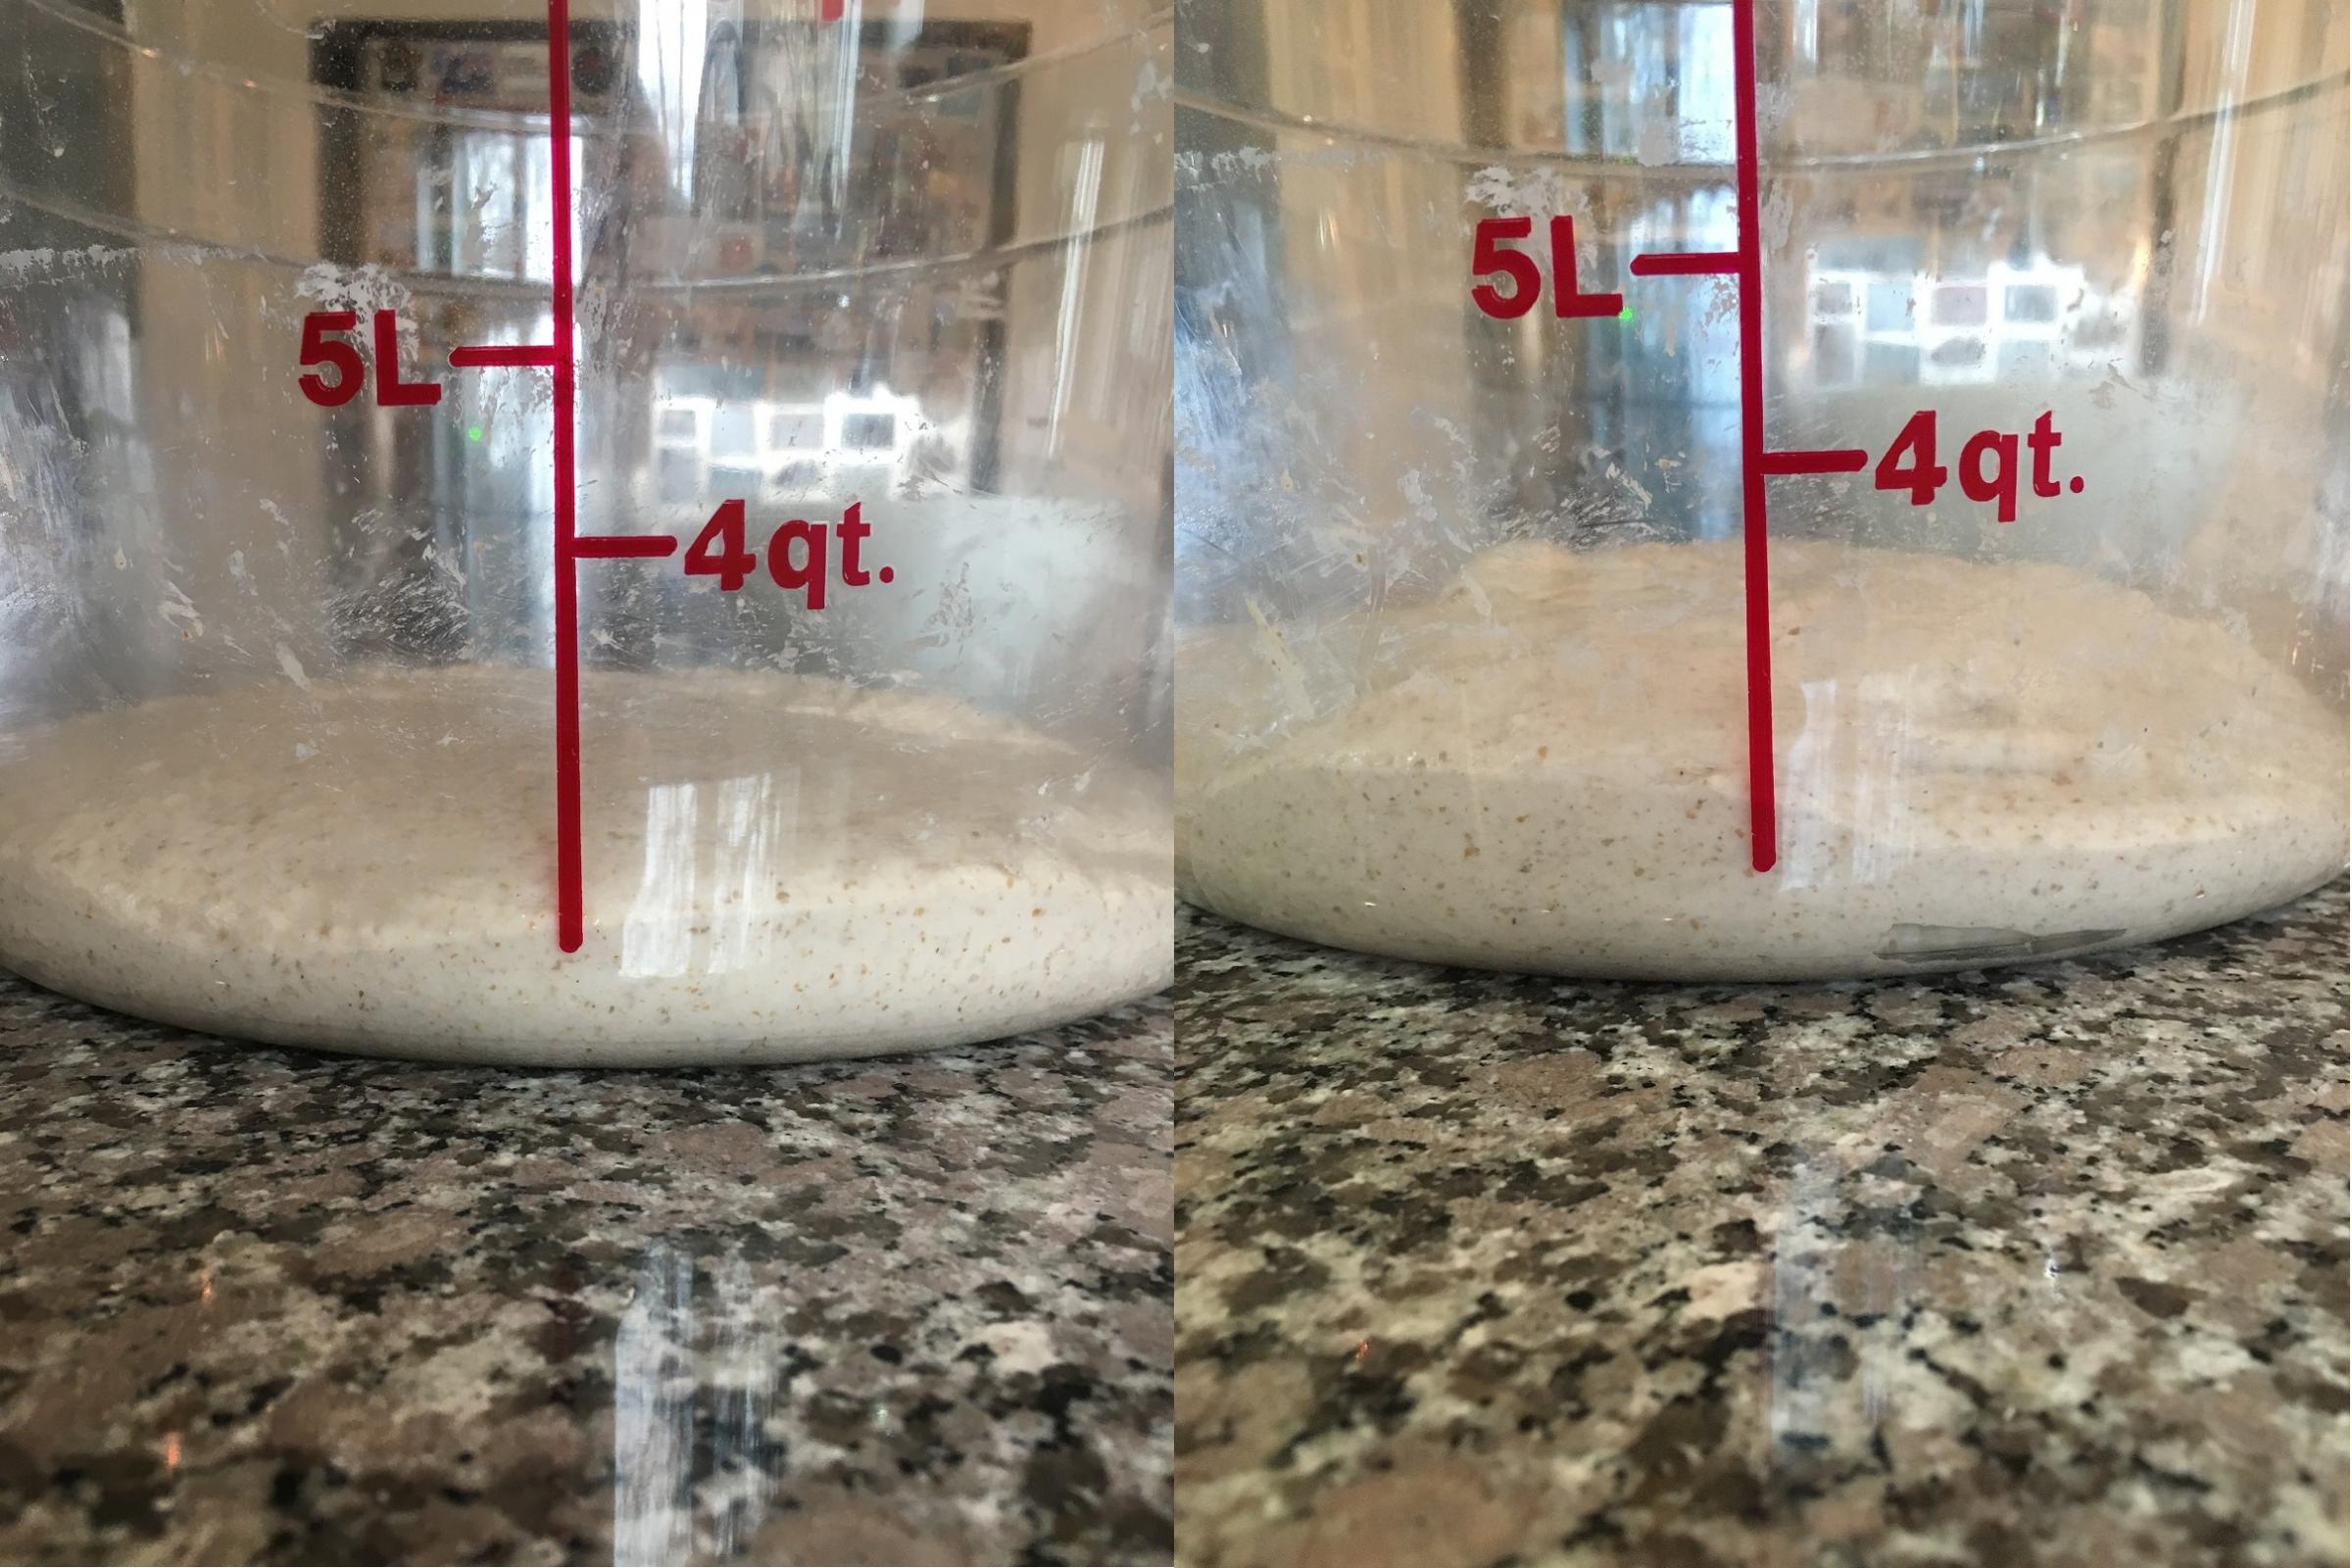
The recipe calls for four sets of stretch-and-folds (S&F) spaced thirty minutes apart. This photo shows the dough just before the first and fourth of these sets, and the growth of the dough mass is evident.
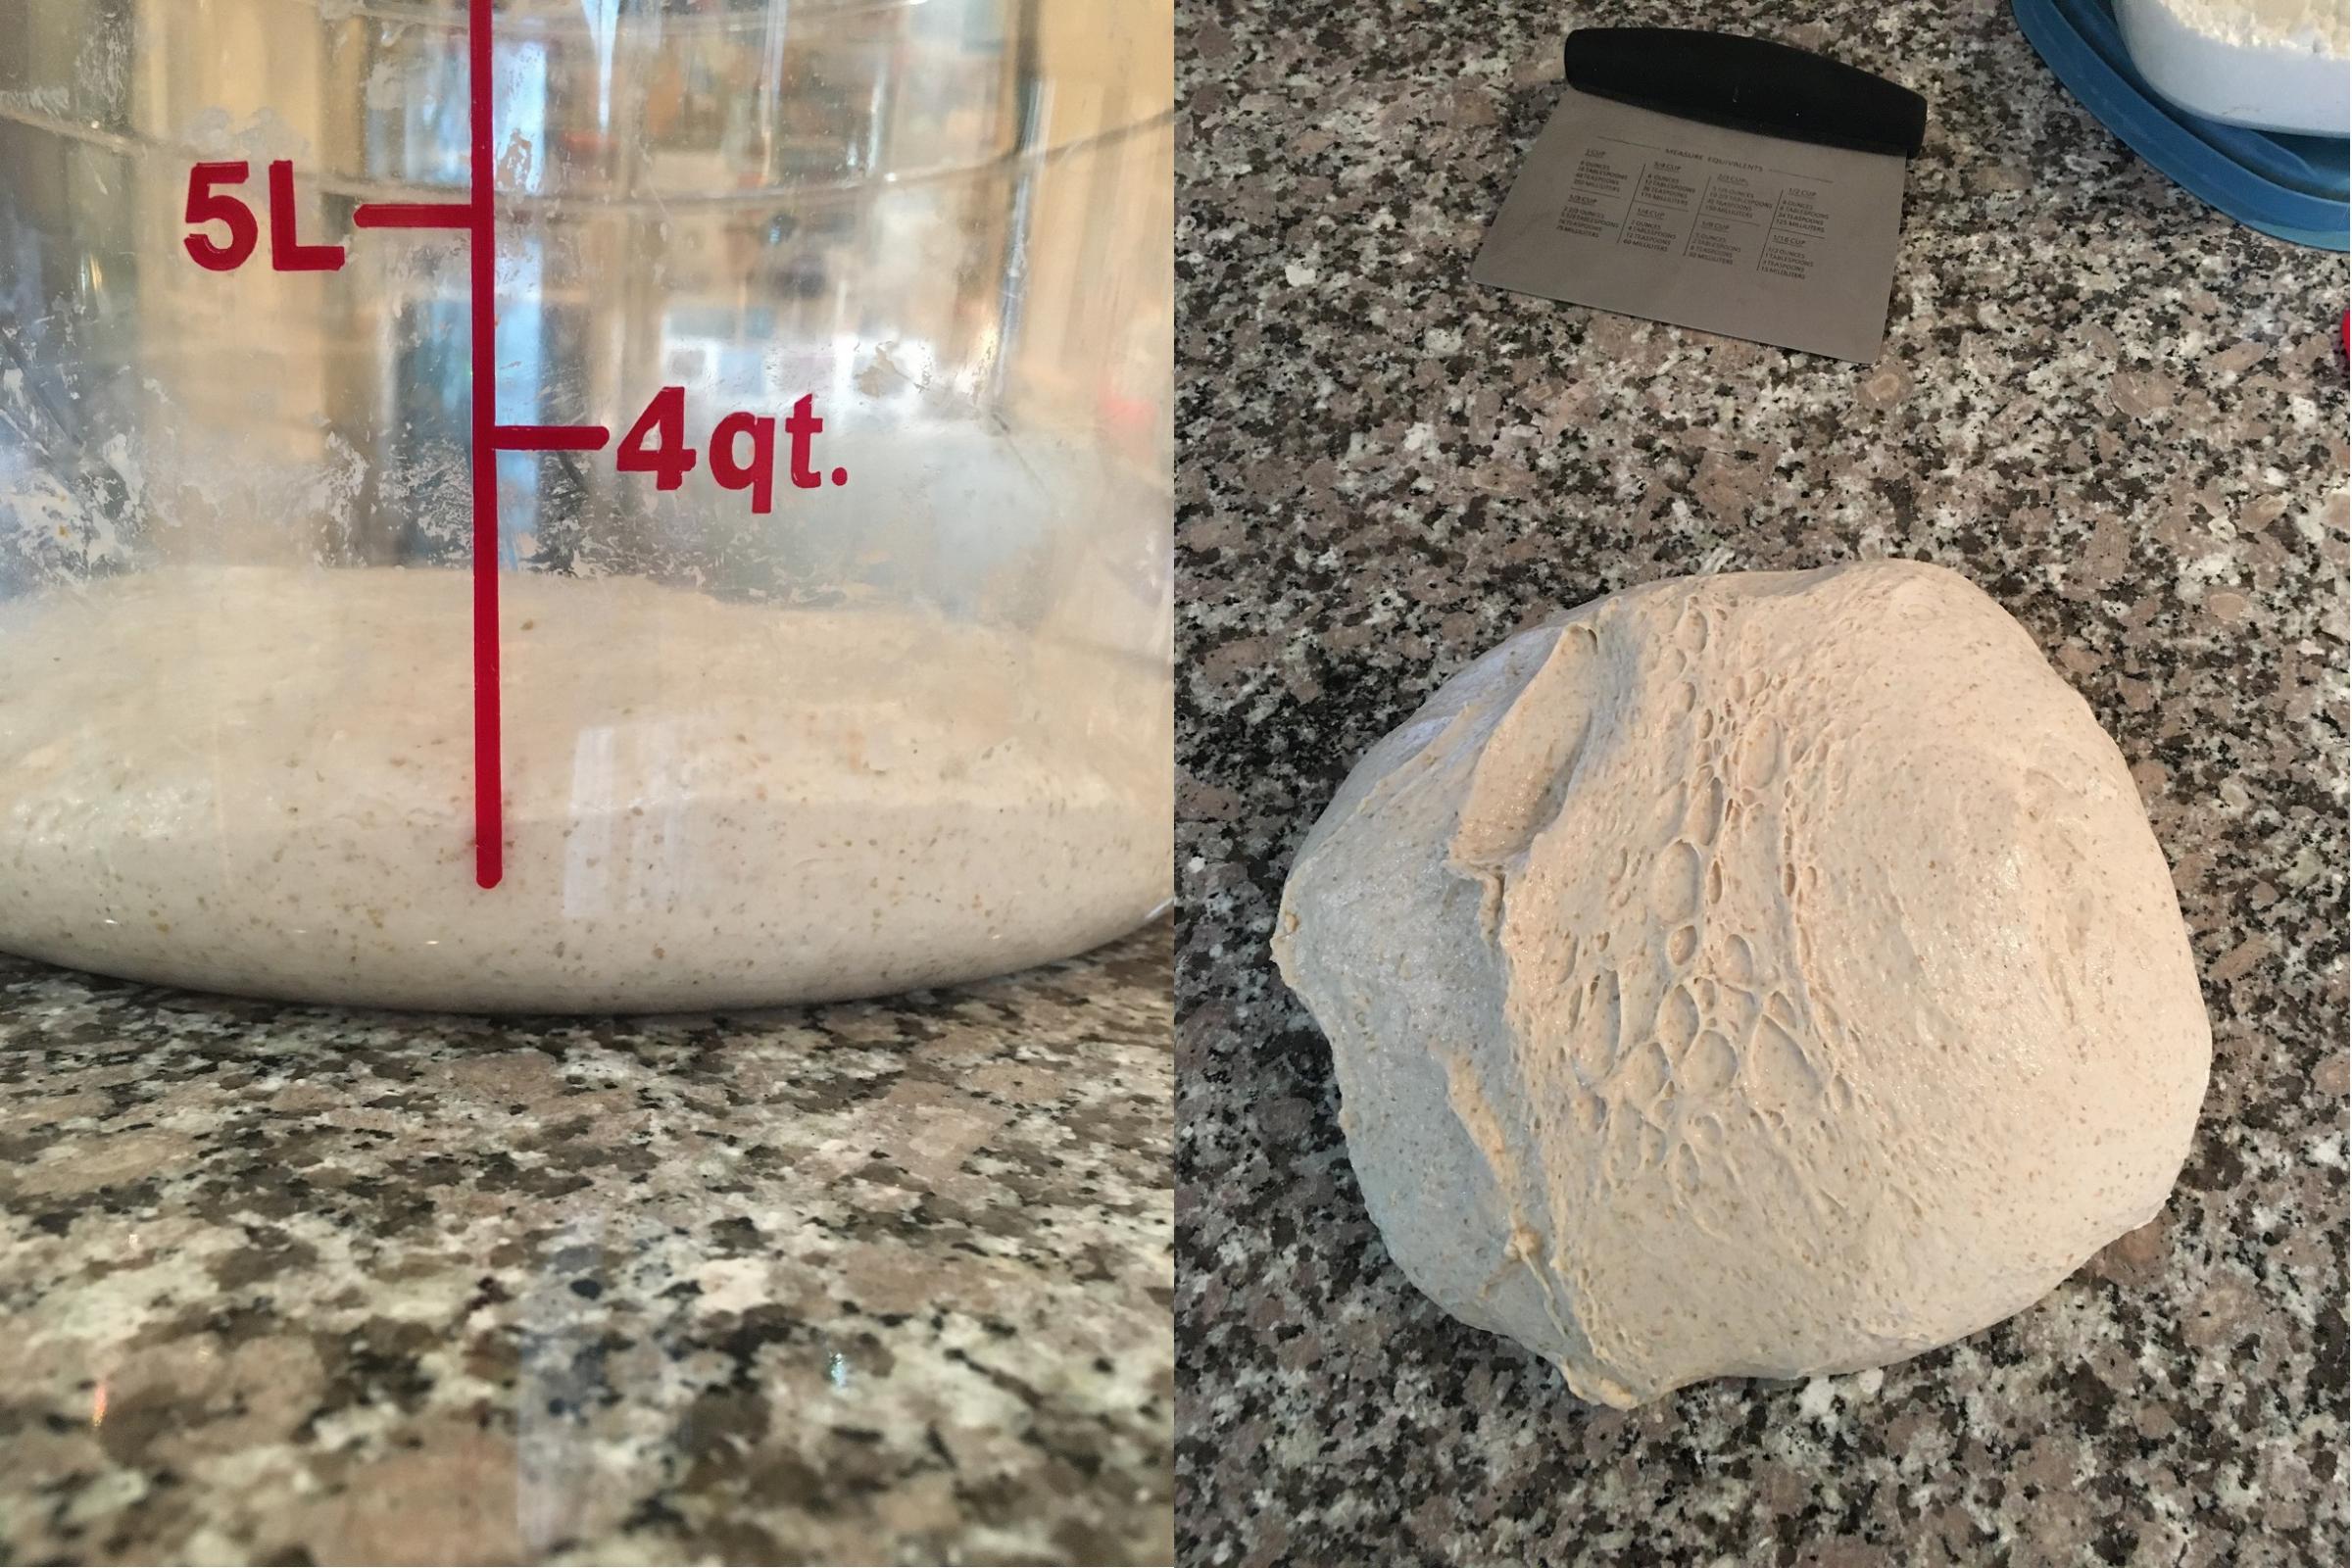
Only two hours had passed by this point, however, and sourdough baking requires patience. The Tartine book says to watch the dough and give it additional S&F as warranted. To give this 80% hydration dough some added strength, I did three more until the dough had expanded sufficiently during the bulk fermentation and exhibited readiness to be divided (dough not spreading to the walls as quickly after an S&F, bubbles on the sides and bottom of the tub, a puffy feel from the gas being produced inside). The entire bulk fermentation took about five-and-a-quarter hours in my 68 degree F kitchen. This photo shows the dough about a half hour before it came out of the tub and then on the countertop ready for pre-shaping.
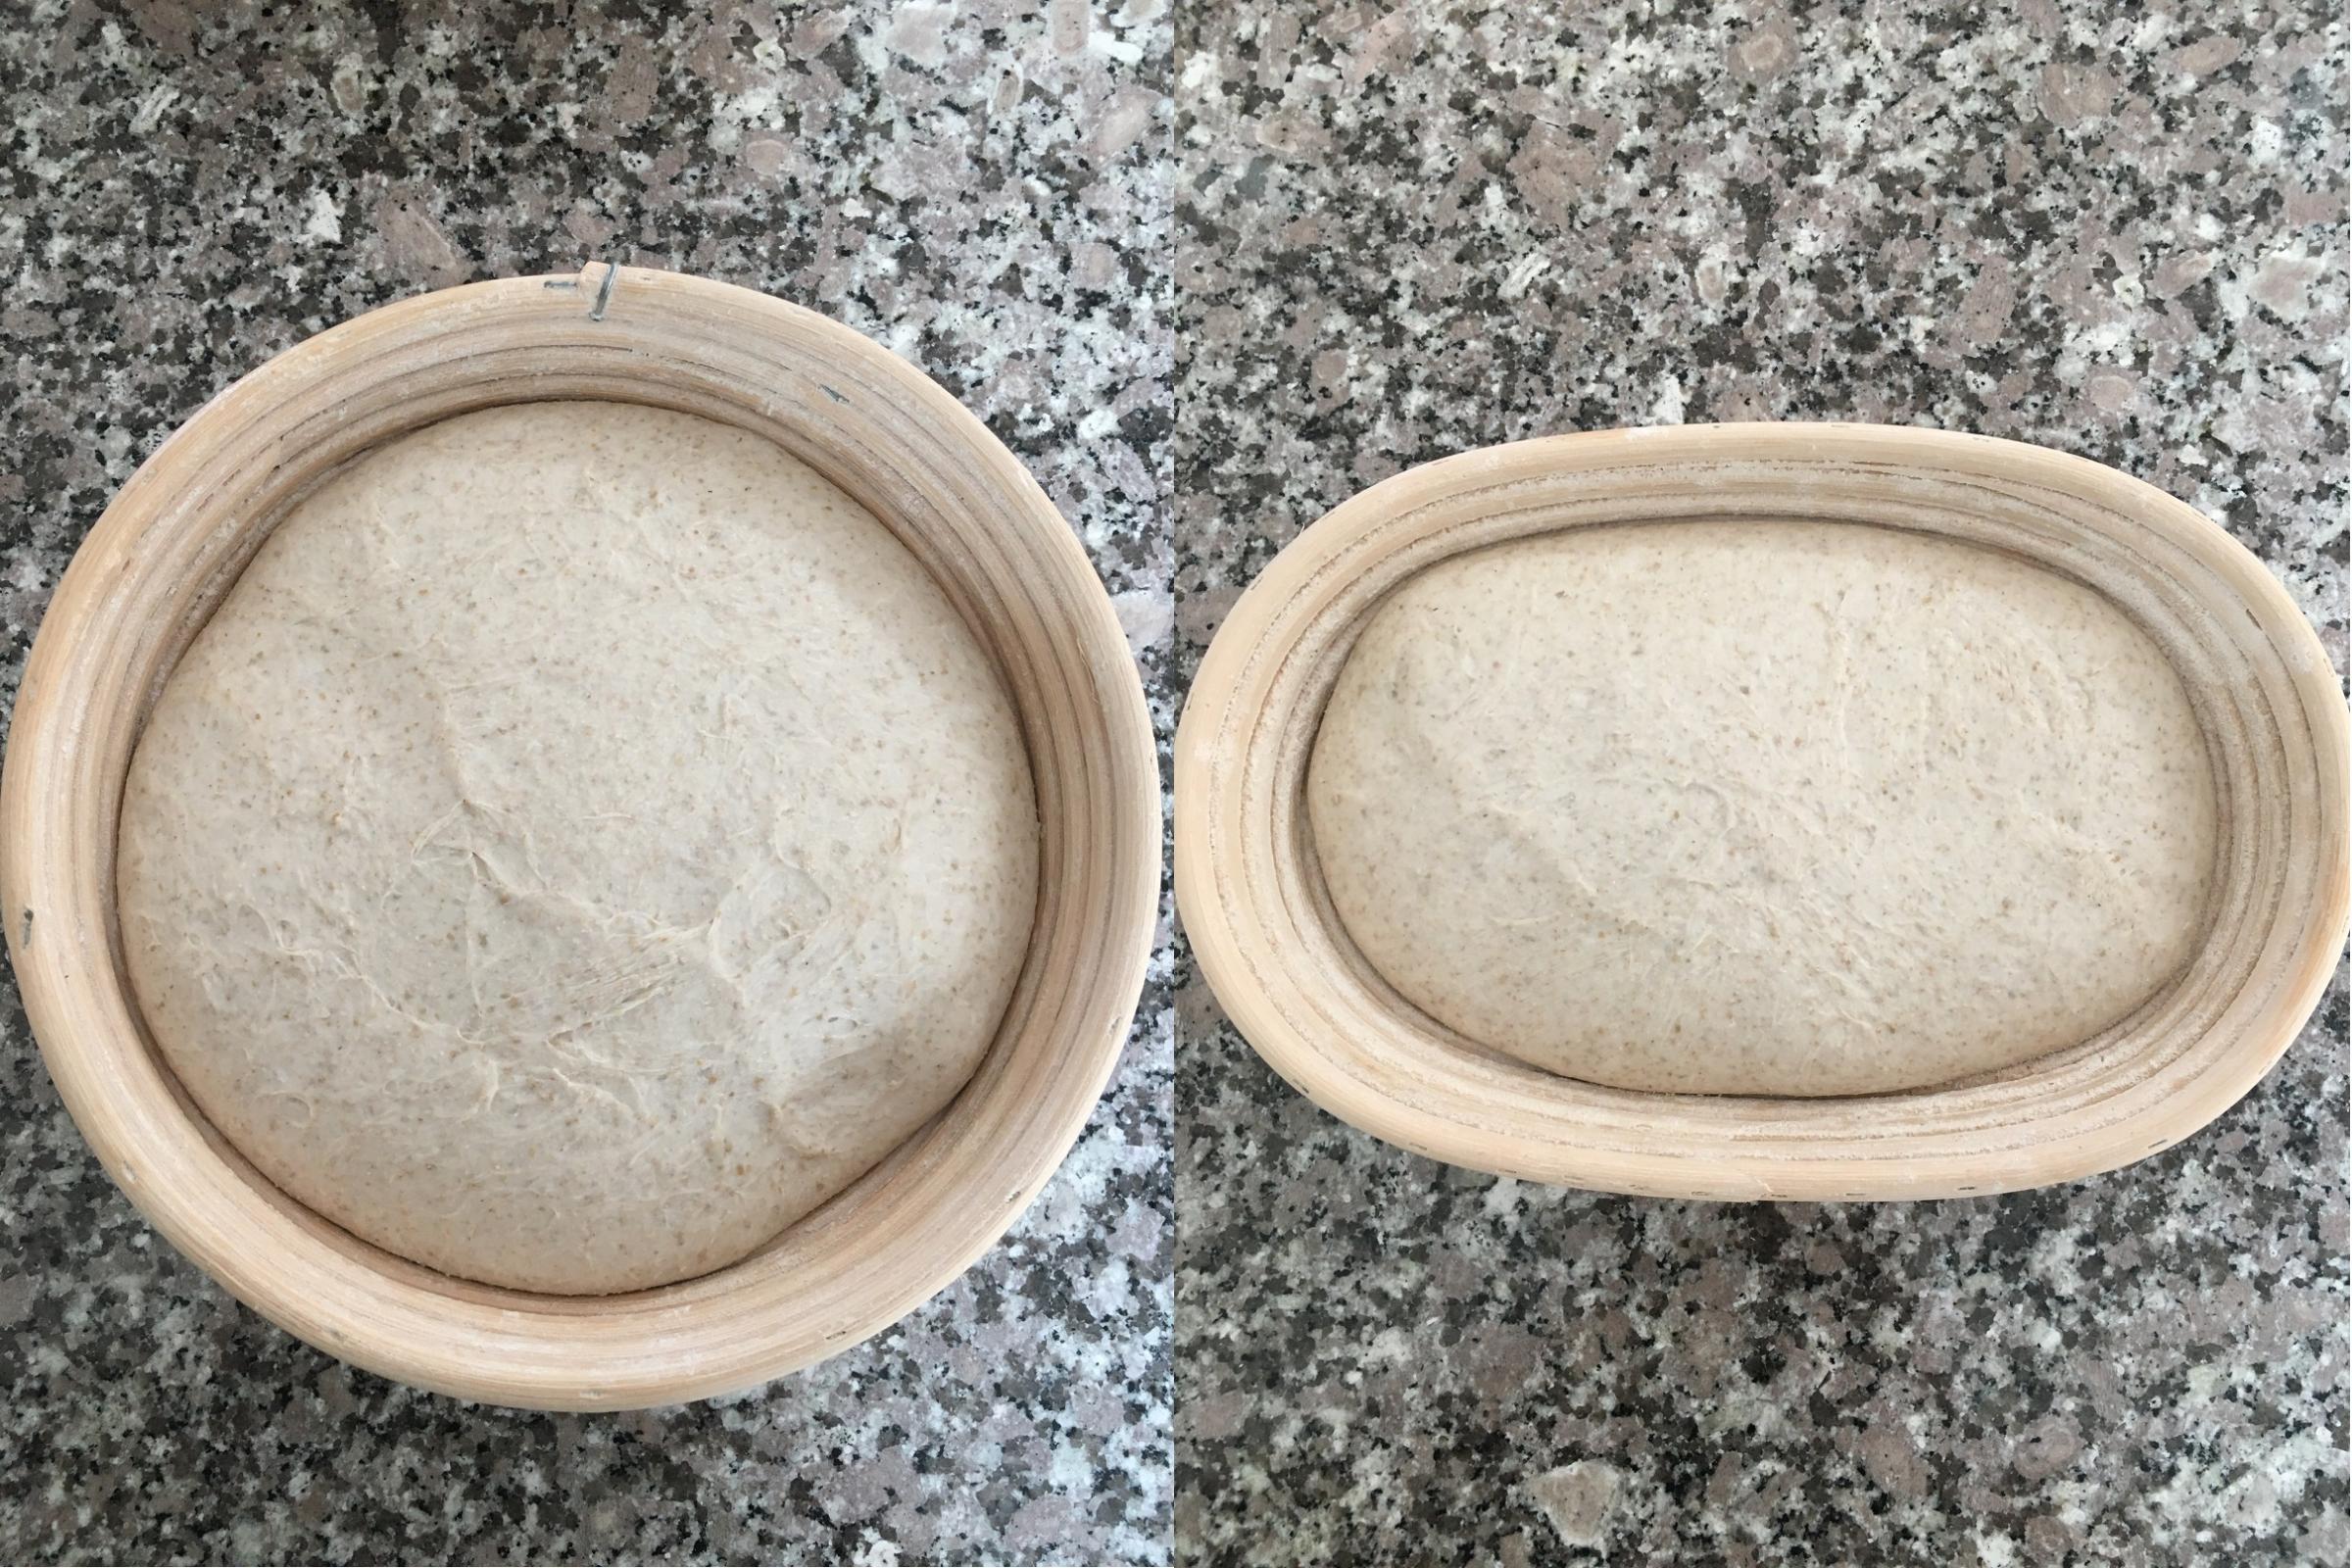
After pre-shaping I let the rounds sit for a twenty minute bench rest before the final shaping. Then I shaped one into a boule and the other into a batard. Into the bannetons they went. This is a somewhat sticky dough, and I made sure to flour the bannetons with a mix of rice flour and whole wheat flour. The bannetons were placed into plastic bags, which were clipped shut, and put into the refrigerator for overnight proofing.

This morning, after sixteen-and-a-half hours in the fridge, the dough had expended nicely.
I baked the boule in a Dutch oven and the batard on a baking stone. The lid stayed on the Dutch oven for the first twenty minutes, and the total bake was 44 minutes. I use two aluminum pie pans filled with lava rocks to steam the oven with the baking stone, and the total bake for the batard was 40 minutes. Here are the loaves.

The batard was given to a friend, and this is the crumb from the boule.
Nice chewy crust and moist crumb with a definite but not overpowering rye flavor. A really nice bread.
Hopefully some of you enjoyed going through the description and photos. Happy baking -- and stay safe and healthy.
- WatertownNewbie's Blog
- Log in or register to post comments
Thanks for taking the time to post such a well laid out and informative bake. The images are a great help.
Danny
Many thanks for your appreciation. Hope somebody can benefit from the description and images.
Happy baking -- and stay safe and healthy.
Ted
What a timely post- thank you so very much! I had not worked with tartine breads before but you inspired me. Your loaves look beautiful! I'm looking forward to playing with this a lot more...but 2 loaves are waiting to be cut in the morning and two more waiting to bake!
Do you find the 400 French folds to make a large difference in crumb/oven spring?
Thank you again!
Jen
Jen, thanks for your post. This is a delicious bread and is great by itself or toasted (with or without any topping). As for the oven spring and crumb, this is about what I have gotten in the past from a mixing by hand in the Cambro tub, but the surface of the dough mass is definitely smoother after the series of French folds, and the gluten development is superb by that point too. Perhaps that translates into something in the crumb and oven spring, but I tend to work the dough pretty well by hand in the tub when I use that method (it just doesn't display the smooth surface).
Sounds like you are busy baking with several loaves in the pipeline. Happy baking -- and stay safe and stay healthy.
Ted.
What a wonderful detailed post that will help so many bakers. Ted your bread looks perfect, great crumb and oven spring.
Benny
Thanks for your comments. I wonder how many of the new bakers will actually see my post. Maybe somebody will see something that gives them confidence or reassurance. I know that pictures helped me when I was beginning.
I am having some of that bread right now (toasted with a little butter). It is yummy.
Ted
this is really lovely. I have been working on this for about a week now and I am unable to get those massive ears I keep seeing. I am taking a few of your tips to try.
Your post made my day already. Part of the reason I went to some trouble to post a lot of photos and description was the hope that someone would benefit, and it seems that you will.
As for the ear, a nice sharp cut at an angle helps, but you also need some good oven spring. And a bit of luck -- those do not always happen for me.
Hope you have success with this bread. Please post some photos when you bake it.
Happy baking -- and stay safe and stay healthy.
Ted
What did you mean by “held-back” (50 grams)? The book doesn’t mention adding 50 grams of water like the Basic Country Loaf so do you or do you not add 50 more grams of water at the salting step?
First, thanks very much for taking the time to read the blog posting (which took a bit of time to assemble).
Yes, what I do is include 800 g of water in the dough (as in the Tartine book) but put in 750 g at the outset when the leaven is mixed in and then the last 50 g when the salt is added (as for the Basic Country Loaf).
You are correct that the Tartine book combines the entire 800 g of water at the outset with the leaven for the Country Rye bread. Over time I found that I liked having a bit of water to help dissolve the salt, so I held back a bit (the 50 g).
Thanks again for letting me know that someone actually reads the posts and is perhaps helped toward making nice bread.
Happy baking.
Ted
Thanks for providing clarity. I mixed with 800 than added another 50 when I salted. Hopefully, my dough isn’t too hydrated.
One more question. What size banneton basket did you use for the round and oval loaf? I have 9 inch baskets and they seem way too small.
The round banneton is 8-1/2" to the outside rim, and the oval one is 9-1/2" x 6-1/2" to the outside rim. The sides of the oval one slope inward, so the bottom dimensions are less by a little bit, but this should give you a rough idea of the sizes.
The extra 50 grams of water could make a difference, but during the winter my kitchen is fairly dry (as opposed to the humid spring and summer), and I occasionally add a bit more water than the recipe depending on how the flour feels and whether it is absorbing quickly or not (and in the spring and summer I sometimes reduce a bit if the flour is not absorbing the water).
Happy baking.
Ted
What nice loaves (the photos put a smile on my face). Excellent crust color and superb crumb. I hope that they tasted fine too, but I cannot imagine that they would not. Congratulations.
Happy baking (and stay safe).
Ted