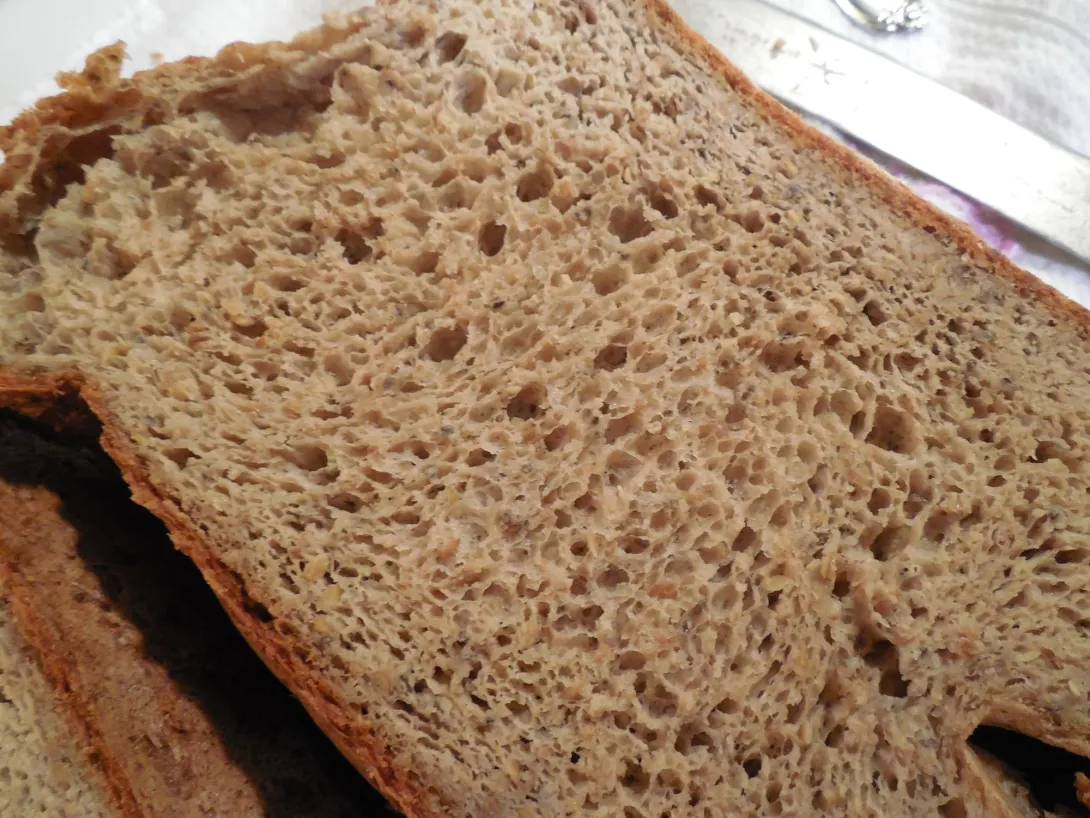
I've been experimenting with a new bread machine and gluten free. And it hasn't turned out too badly so far. There's a series I'm going to keep up until I feel like using the bread machine has become "routine" at https://www.nixgluten.com/2019/10/the-great-gluten-free-bread-machine.html There's also a part 2 so far. Here are some pics from the experiment.
Cinnamon Raisin bread:

Shrinkage over 90 min after baking

I'm breaking all the rules of using a bread machine and exposing both success and failure. Comments are welcome here or there.
My goal is to stop paying thru the nose for gluten free bread, which I need.
Update
Recipe
Gluten Free Every Day Bread Machine Experiment 2
Ingredients:
 |
| Uh, I meant Flax :) |
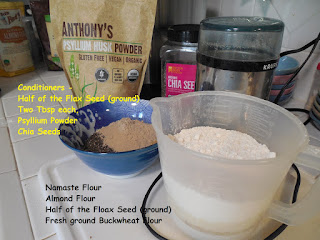
1 cup Namaste flour, gluten free, organic (this is the starchy flour)
1 cup Bob's Red Mill Almond Flour (Not Organic, I can't afford that, heh)
1/2 cup BRM buckwheat groats, ground in a coffee grinder until it's flour
1/2 cup flaxseed, divided in two parts and ground
2 Tbsp chia seed
2 Tbsp psyllium seed powder
1 and 1/2 cup water and 2 tsp salt in a large bowl
3 eggs
1/2 cup water (warm)
3 heaping tsp sugr
2 1/4 tsp yeast
Steps:
 |
| Yeast |
Combine warm water, yeast and sugar and stir. Allow to become slightly frothy. This time I didn't let it form a thick "head" because I just wanted it awake.
Prepare the "gluten free sponge" by combining half of the flax seed, the chia seed and psyllium powder with the 1 and 1/2 cups of water and salt. Stir vigorously until some bubbles are incorporated. Beat 3 eggs into it.
Measure the flours and have ready.
Place paddle in bread machine.
Add the warm water/yeast mixture.
 |
| "Gluten Free Sponge" |
Add the conditioners/gels mixture.
Add the flour mixture.
Set machine on Dough Cycle and watch at first to be sure it combines properly. Help the machine mix if needed.
If remembered, remove the paddle after the second mixing, and before the second rise gets going.
If the dough has risen to the top edge of the pan by the end of the Dough cycle, you may proceed to Baking the dough with the "Bake" cycle.
Allow the bread to stand for at least 1 hour, best is 3 hours. Then slice and enjoy!
I wrap the bread in cloth for one day, then store what's left in Tupperware in the fridge.
Flavor: Superb, it smelled even better several hours later. Only sourdough would be a better flavor than this. And buckwheat gives such a nice warm flavor.
Uses: Works equally well with jam, or sausage and mustard.
Believe it or not, there's still room for improvement in this loaf. It fell because it formed a popover type of top. That's cute in a pastry but not so cute in bread.
- Angelica Nelson's Blog
- Log in or register to post comments
Interesting work. Will you please share the recipes you're working from? My wife had to go GF.
I'm new to this site, should I copy/paste the recipe here too? I provided a link to my blog where I have the recipes for both loaves: https://www.nixgluten.com/2019/10/the-great-gluten-free-bread-machine.html Not sure of the protocol whether I should rewrite them here too. I"m really glad to see interest. I read Sharon Kane's articles on The Fresh Loaf last year and they really helped me understand more about baking gluten free bread. So when I had something that works I came here to share. Her username I think is sharonk if you want to look for her articles. I noticed there's someone new besides me, also. Even if we're a small minority it's wonderful to have a place to share gluten free breadmaking ideas.
Woops, I somehow didn't see the link before. Thanks, I'll check this out.
No worries, it was pretty busy with images. I did decide to try the edit feature out and copy-paste the recipe for the bread pictured first, the neutral tasting everyday bread. So I learned something. Thanks for asking.