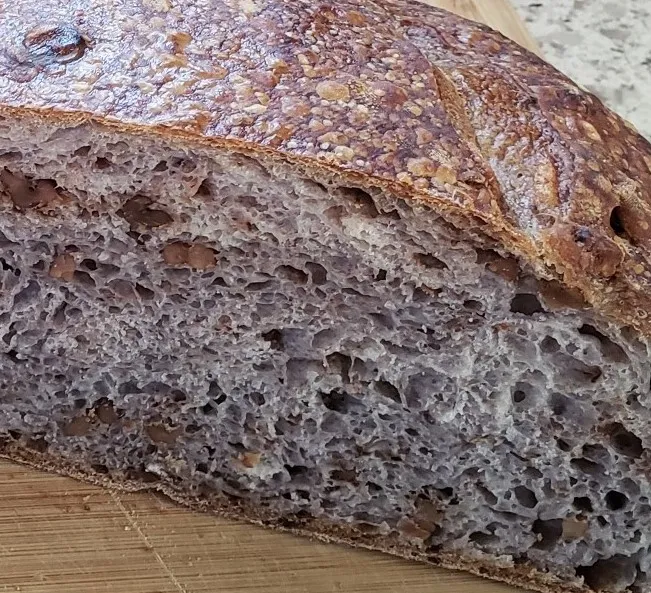


I am pleased with the way this came out (poor slashing and dull razor blade aside). Chad Robertson's recipes require paying close attention as he spends a lot of time on each of the baking steps as part of his knowledge sharing. The pictures provided fresh insight on steps I perhaps i missed in the past. I hadn't made one of his recipes in a long time as the his 75% hydration can make it tricky and the loaves can come out rather flat without proper shaping techniques.
Over the past few months the recurring theme from web searches, YouTube and other recipes posted on TFL is the importance when shaping to tighten up the outer skin on both the pre-shape and final shaping cupping your hands and using a gentle sliding of the dough lightly across the countertop a few times into the ball shape. That was a critical component in getting a nice rise in the final loaves.
The recipe uses a four hour proofing period with stretch and folds every 30 minutes for two hours,with two more hours at 30 minute intervals of a more gentle S&F being mindful of not deflating. This is followed by a 20- 40 minute bench rest which I never tried before but thought as another key step to be mindful of. It is amazing how the dough comes together. I used an overnight rest in the refrigerator after placing dough in the dusted banneton's, and placed in large plastic bags. The next morning had the loaves outside of fridge for 20 minutes while heating two dutch ovens at 500 degrees then lowering to 450 once placed in oven. The loaves did not stick as one step is to dust the bottom of the dough before flipping into the dutch oven. The loaves popped right out after cooking. No need for parchment paper, this was a great tip as I had trouble in the past with loaves sticking.
In summary:
1) strong starter build 12 hours, refreshed twice and build to 20% of flour weight
2) gentle stretch and fold every 30 minutes for four hours, being gentle the last two hours
3) 30 or 40 minutes bench rest after pre-shaping loaves
4) Gentle tightening of final loaves with a dough scraper (like the pizza guys use to scrape the counter) achieving almost a skin like cover holding the dough into the underlying ball shape by cupping hands and pulling dough towards you.
5) My preference for overnight proofing in fridge, adds nice blisters and very slight and subtle tartness
6) Hot oven, I used 475 degree pre heat of oven and dutch oven/combo cookers - he states 500 degree preheat and bake at 450 degrees. No steam required as sealed dutch ovens solve that.
7) Dust the bottom of the loaves so when you flip them into the dutch oven/combo cooker, the bottoms do not stick
8) Twenty minutes covered at 450 followed by 25-30 minutes uncovered. I baked until internal was 210 degrees vs. the 215 he states in recipe. Internal dough was moist, a nice almost gelatinous but cooked shine inside.
The basic recipe is also used on several other breads besides walnuts; herbs, olives, and more are in the book. Will try his olive bread next with herbs and some lemon zest. Glad I pulled this one off of the shelf and wish I had done so sooner.
Nickisafoodie
- Nickisafoodie's Blog
- Log in or register to post comments
Looks great, I love walnut in breads.
Benny