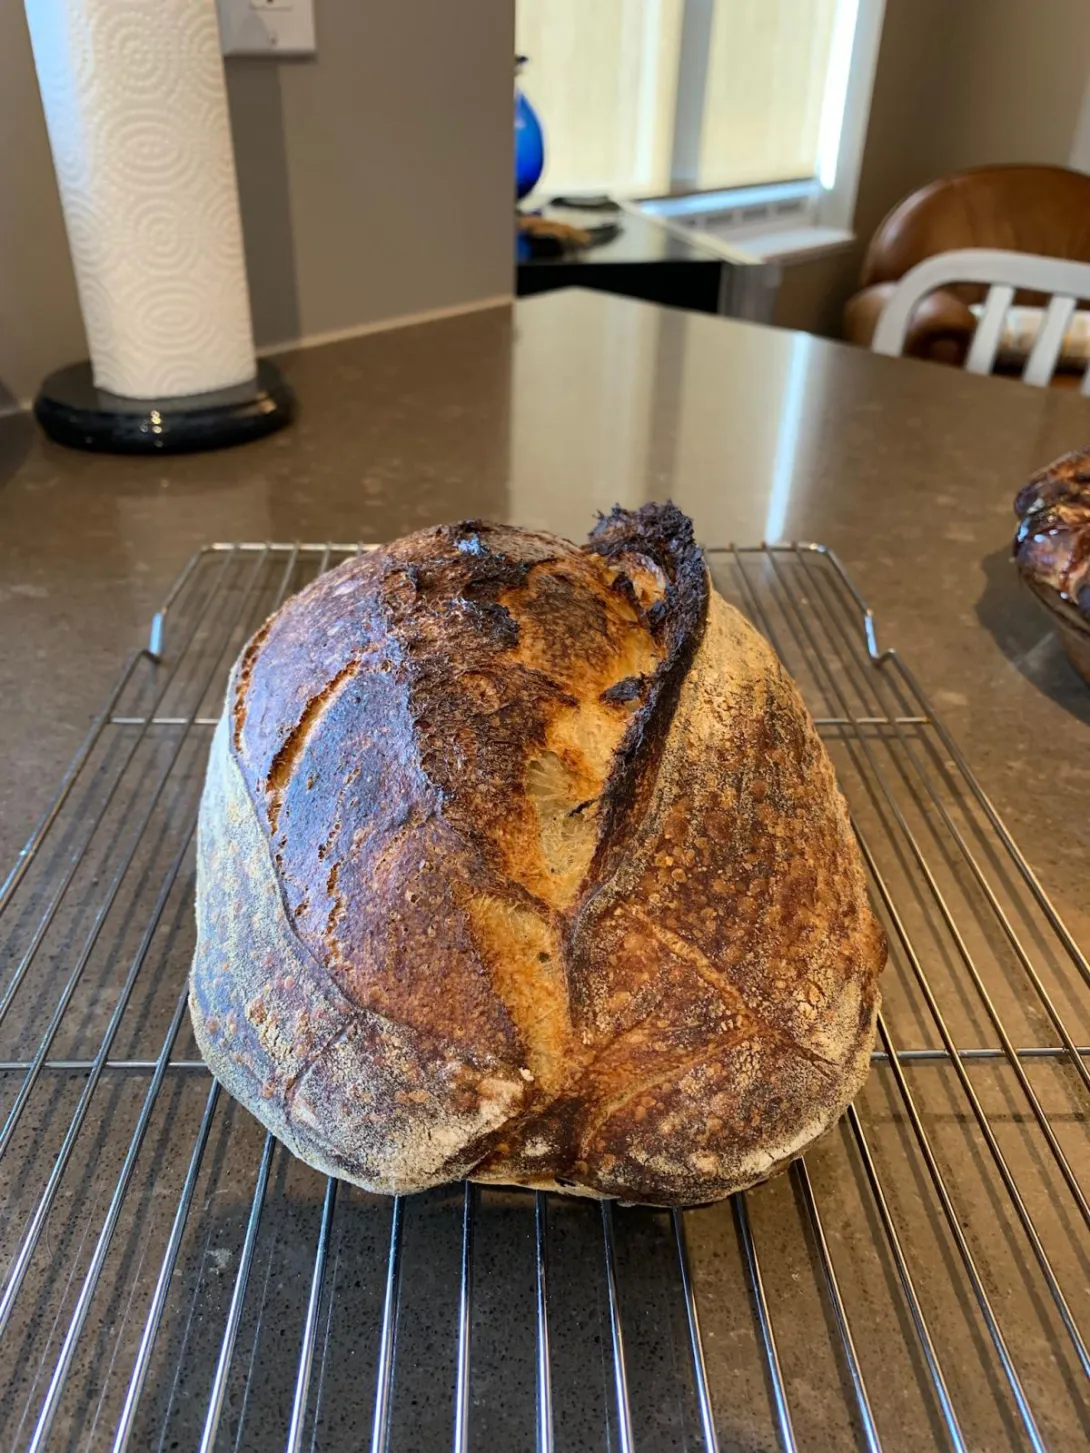
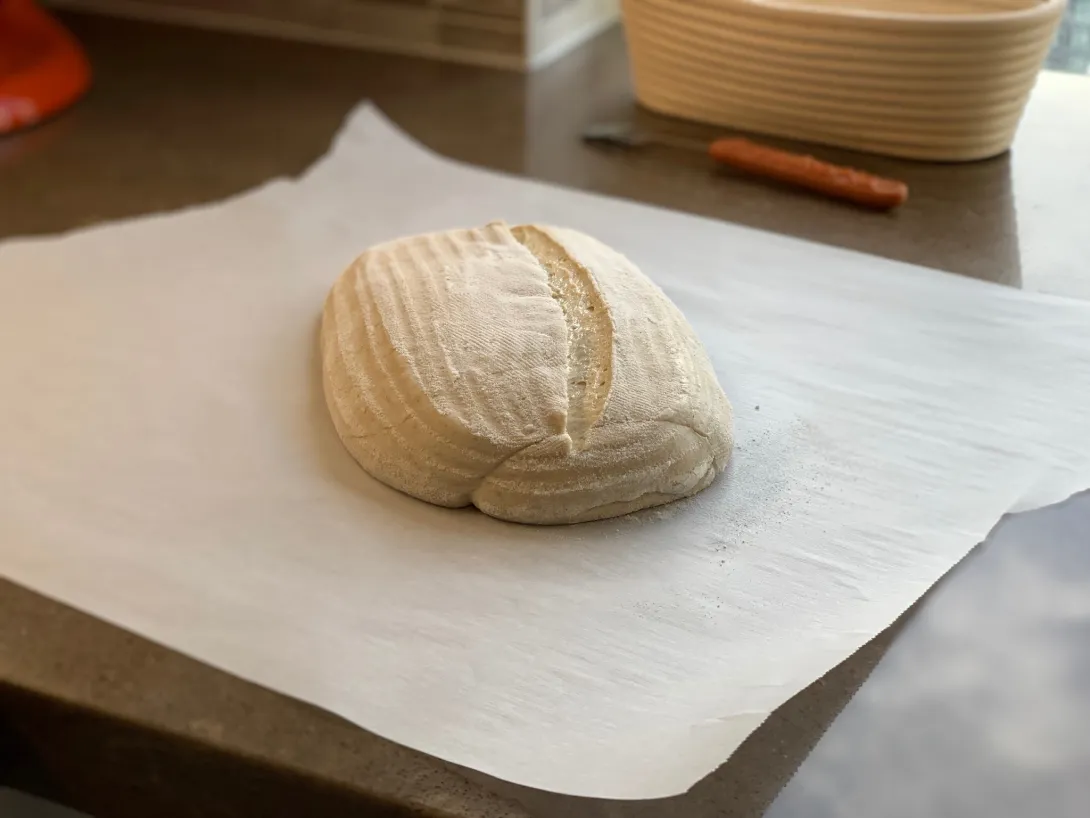
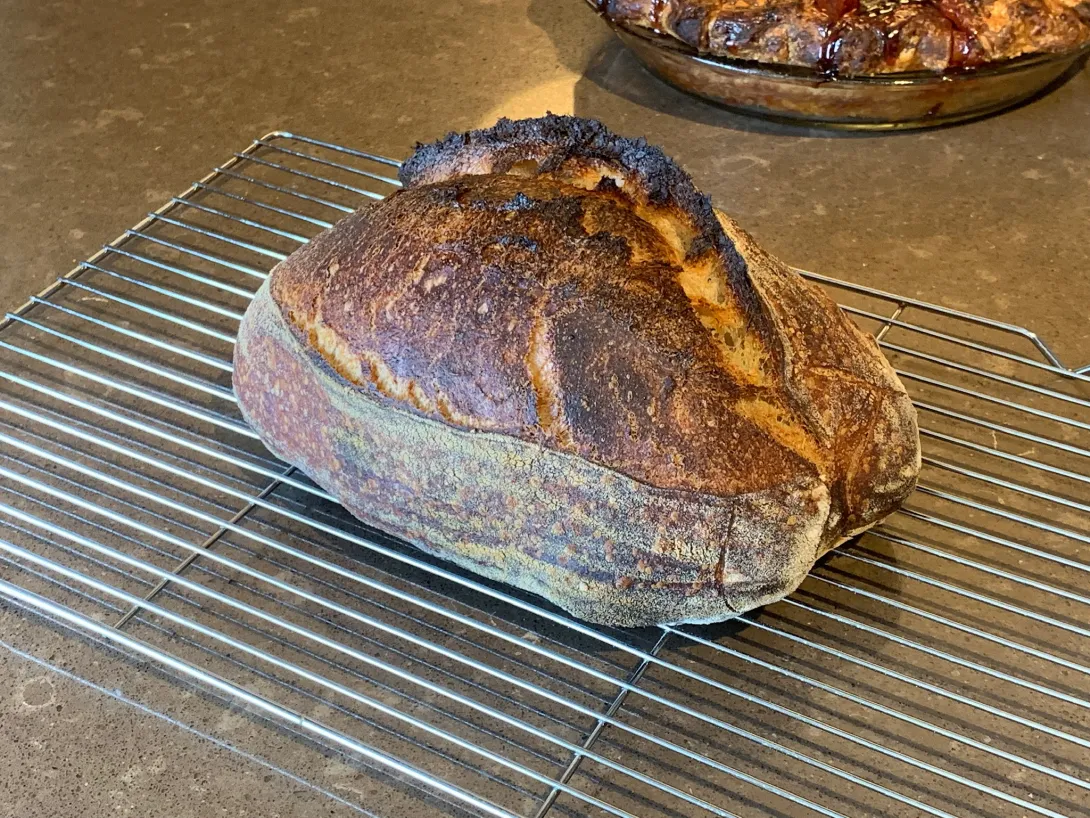
I know I’ve made this before but I wanted to see if my techniques have improved at all with more baking and for this dinner I wanted a simple sourdough without a lot of whole grain or other flavours added to the bread.

This was my best looking sourdough ever. I hope it isn’t underproofed as it didn’t rise as much as I expected during the cold fermentation last night.
For one 750 g loaf
311 g white bread flour
46 g whole wheat flour
21 g dark rye flour
287 g warm water reserve 21 g for later
7.5 g salt
77 g levain
Levain Build
35 g mature starter
35 g bread flour
35 g whole wheat flour
70 g filtered water
I’m sure most of you have looked at this recipe on The Perfect Loaf website but I will post it here if someone wants it.
I did slap and folds for 7 minutes and then over the course of two hours did three sets of coil folds. This was the first time I did coil folds and never combined the slap and folds with the coil folds. I think I will employ this from now on.
I made a couple of videos showing my coil folds and then final shaping. I’d be happy if you could offer advice on doing things better, I won’t be offended whatsoever. If I look so hesitant when doing both the coil folding and final shaping it was because I was hesitant and scared of doing it wrong. That was the first time I used that final shaping method and I think it created more tension than how I was doing it before.
Me coil folding the final time for this bake.
Me shaping the batard using this method for the first time.


Hopefully the crumb looks good. Fingers crossed.
- Benito's Blog
- Log in or register to post comments
Huge oven spring and a nice ear. Are you going to go pro on us? You could work as a physician during the day and moonlight in a bakery at night. LOL
Dan
Thank you Danny. Joining this site has helped me improve my baking immensely. I’m so thankful for all the help everyone gives here. Wonderful place to hang out when you’re not baking. Hopefully the crumb won’t disappoint.
Benny
Beautiful!
Thank you, hopefully no fool’s crumb.
Beautiful loaf. My bread never really rises much during the overnight proof either. Looking forward to seeing the crumb. I'm definitely going to try slap and fold + coil next time. For my last few bakes I stopped slap + fold and did the Trevor Wilson mixing method instead and I feel my crumb has gotten worse, not better.
Unfortunately it was underproofed. This might partly explain the great oven spring and ear I think, if I am correct in thinking underproofed dough often gets a good ear and good oven spring. Fortunately it actually tasted quite good and in fact it had a really good slight more sour flavour than usual.
Your shaping looks really good. And the video is extremely helpful, because it shows exactly how you work.
Two suggestions. The second one is most important.
I am wondering if the excess flour that was folded into the dough could have caused some of the large pockets. What do others think?
But it does look under proofed...
This bake can be a learning lesson for many of us. I know it is for me. I really need to err on the side of under proofing as opposed to over proofed. I think you are on the verge of mega success!
Danny
Believe it or not I actually do use a small strainer but put too much flour down on the work surface. I tried to ensure that there isn’t much raw flour on the “underside” of the dough which becomes the inside but I had too much flour around the dough after pre-shaping so when I scooped it up with my bench scraper I scooped a pile of raw flour into what was to become the inside of the loaf. When we cut the bread last night there was a small streak of raw flour in two of the slices of bread. ? I should have brushed off the excess flour when I saw it but I went on because I was video taping. I think I’ve started to over compensate for the times when I under floured and everything got stuck tearing the skin of the dough.
The streaks of raw flour which weren’t nearly as bad as I had expected them to be were not near the areas of the large pockets so I don’t think they led to the baker’s rooms.
Yes this bake was under proofed and was a good learning experience. Strangely the dough had the signs of good fermentation but perhaps because I had built up more gluten than usual with my slap and folds and coil folding, it make it look more fermented than it was. I look for the dough to have a convex shape at the edges for one of the signs and because of the good gluten structure it was nice and convex. It didn’t have quite as many bubbles as I usually wait for and that was a mistake. It probably needed another hour perhaps before shaping.
Thanks for the words of encouragement Danny and advice, all of it is appreciated.
Benny
I still catch myself doing that with flour sometimes. It'll get caught up in the fresh dough when I'm a bit heavy handed with dusting. Ain't no shame in your game!
Thanks, every bake is a learning experience.
Benny
Benny, I like this video jack made about flouring surfaces. It's good imho.
https://youtu.be/13iADnZoWmc
Thank you Lee, good video.
Benny
The scraper (bench knife or dough knife) is a must have tool, no doubt. It is indispensable for lifting an edge up or moving the dough around. Quick motion is the key for dough handling. BUT the way you handle the dough is vital. Trevor says it well, “don’t grab the dough, it will grab you”. Tough the dough quickly, then move your hands away.
When kneading, push the dough away from you. Don’t push it down into the bench.
A spray bottle filled with water is another must have. But use it sparingly. If you spray your hands, shake off the excess water. When spraying the counter, you can rub your hands in the wet surface to remove some of the water on the counter and at the same time wet your hands.
Carefully study THIS VIDEO from 12:30 to 14:12. This girl is a home baker with professional skills. The entire video IMO, is an example of perfect execution in every aspect. Notice her movements in every thing she does. She has “Baker’s Hands”.
Danny
That video is excellent Danny, thanks for pointing it out to me. Some of the details about dealing with the flour are super helpful. I will rewatch that before my next bake.
Benny
I just shaped a dough and decided to photograph the tiny amount of flour necessary to shape all but the wettest dough. I like to use THESE SHAKERS to lay down the flour. A very light tap on the shaker is all that is necessary.
I have to find a happy medium between not using enough, which I did in the past, and too much which I've recently done. Having some flour on my hands has been very helpful I have to admit. I've been using a small strainer to dust but had just become a bit more generous lately which has been to the detriment of my bread.
I have one of those strainers that I have icing sugar in so I can dust sweet baked goods, however, I don't actually use it much and now that I'm baking bread and making pies, having flour in it would be a better use for it. I will have to take the icing sugar out and replace it with AP flour and try it the next bake. Thanks Danny.
Benny
Benny, watch many of the popular bakers. You’ll be hard pressed to find their hands white with flour. Notice their floured bench. You may not even be able to see the flour.
Try this. Lightly flour the counter top. Spread some a little farther out than needed to work the dough. If you need flour for your hands, rub the palms of your hands in a circular motion over the outer area of your floured surface. That is plenty enough to get the job done.
The less extra flour you use, the better your bread. The extra flour makes sealing the dough during the shaping process difficult or impossible.
I’ve set it before, but it’s too good to pass up. Bench flour is like Brylcreem. “Brylceem, a little dab’ll do ya”
If you are not old enough to get it, check this out at 00:25 https://youtu.be/o6F4GtyRfto
Yes I guess I didn't mean thoroughly flour my hands, but rubbing a bit of the flour on the counter into my hands. I guess I've been watching too many of the bakers on Instagram who are working in bakeries and they seem to have a fair amount of flour on things yet get great results. I think I just need to dial it back a bit. I'm looking forward to my next bake to try it out again hopefully with better results.
I remember the line a little dab'll do ya, but never saw the ad before.
Benny
Hi Benny and Danny,
If this were my loaf I'd be really happy, which makes me ask why you think it was underproofed. Is it because of the three or so larger holes or something else?
My first few loaves were using FWSY and people on TFL suggested I was probably overproofing. As a result I've been quite restrained with my bulk ferment times and now I wonder if I have moved in a direction of underproofing. I never get big holes that signal underproofing, but I get a lot of oven spring and a tighter crumb structure. In Benny's photo of the scored bread, the dough really opens up where the slash is immediately before being placed in the oven. I have seen and admired this in other photos/videos, but this doesn't really happen for me.
I believe that what I see as under proofing are the big bubbles in relationship to all the dense areas of tight crumb structure. One thing you wouldn’t know because you didn’t get to feel the finished loaf is that the crumb was a bit more gooey and sticky than normal, I think that would be another sign of the under proofing. I think the amazing ear and oven spring is something that you’ll get a under proofing from what I’ve been told on this site. I think that just a little under proofing can make a loaf look amazing, but this was way more under proofed than that and funny because it wasn’t my intention, but a good learning experience none the less.
Hopefully others will add their opinions and information.
Benny
I've been having lots of good learning experiences lately too! Your idea of making a plain sourdough to test your technique makes a lot of sense and is something I've known I should too. The truth is half the fun for me is in all of the different ingredients and flavors so I make a completely different loaf each week as well as changing my process. My husband is a physicist and likes to remind me that I'm not running good experiments.
Looks like you were awfully close to a perfect loaf!
I’m like you, I like to make something different each time, but I know we probably learn best by making the same bread repeatedly until we really get our techniques and understanding of the process down pat. I feel that I am getting closer and at least all my breads have been edible and tasty. Because I also really like the flavour of the beginner’s sourdough I think I will make it a few more times, in fact this most recent one had the most sour flavour of any of my sourdoughs so far, something I actually quite enjoyed without it being too sour.
Benny
It looks beautiful! Lovely color.
Your videos are also really nice, I think you did great.
Thank you Julie, I’ll need to be careful with the dusting flour and watch fermentation and be more patient next bake.
Benny
It's not underproof one bit imo. It looks just perfect.
If maximizing the bloom with a mostly white loaf like that is your goal, from my own experience, upping the bulk temperature just a tiny bit, more frequent folds and cold retard(37f) is the best way, so basically upping the culture activity and pausing it soon after the loaf has been shaped.
It shouldn't proof a whole lot in the fridge if any.
The day I bulk fermented this loaf, the weather was cooler than normal, I should have taken that into account when I was judging bulk and should have let it go longer before shaping. But I was impatient and shaped too soon. Live and learn.
In my fridge I do find that it does continue to proof somewhat, I believe the temperature is about 5*C in my fridge.
Benny
wood is best because you can dust on a small bit of flour rub it in and then scrape it off. Nothing sticks to it ad why wood is used in all the videos by JH, the retired mater baker at KA flour. I never use any bench flour and usually work on granite - never a problem. You do want to dust off any flour on the dough before you fold but, if you don't use any, then it is never an issue. Just teach yourself to handle dough without bench flour instead.
The dough is not over or under proofed. It is perfect. Irregular sized holes of every size is the standard and this crumb meets its perfectly, I the crumb is wet then you need to bake it longer to say 210 F.
This is a great loaf of bread. Well done and happy baking
I've so far been too chicken to try to shape without any flour. I do not have a wooden board large enough to use for shaping, but I have noticed that quite a few bakers on You Tube and shaping on wooden counters so wondered about that. My counter tops are quartz.
I've thought about using some water to shape but again I've been chicken to try something different but may have to in the future. On the other hand I can just be more careful and use much less flour and eventually use almost none.
Interesting to read opinions about the proofing on this loaf. I was convinced that it was under proofed, but now with a couple of opinions that it was fine I'm starting to wonder. However, having eaten it and feeling the crumb it did seem a bit stodgy and in photos you cannot sense that, so I do think is was somewhat under proofed, perhaps just a bit less than I initially thought.
Benny