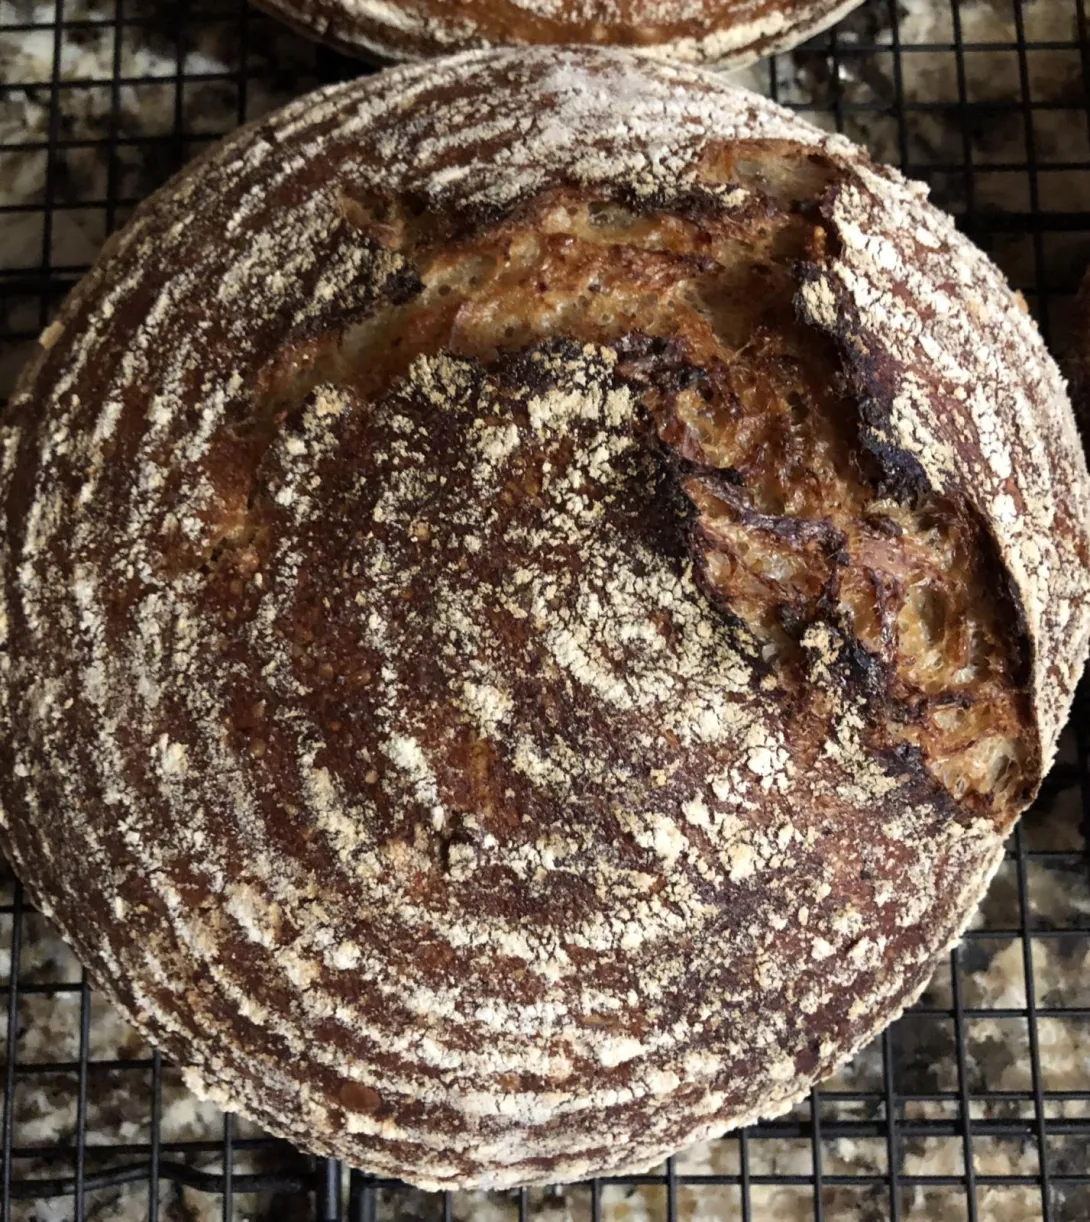
Quite a while ago, I had saved a number of recipes that CedarMountain had posted and I was looking for inspiration when I came across this one in my recipe app. It sounded intriguing with using a sprouted rye berry, ground toasted millet and flax porridge.
Recipe:
Makes 3 loaves
210 g rye berries divided into 100 g and 110 g portions
110 g spelt berries
110 g red fife berries
770 g unbleached flour
700 g water (main dough)
50 g flax seeds
60 g millet
205 g of water (for porridge)
30 g full fat yogurt
23 g sea salt
245 g 100% hydration levain (procedure in instructions)
Sprouting the rye berries
- Soak the 100g of rye berries in filtered water for about 8 hours. Drain and rinse.
- Leave on counter rinsing every 6 to 8 hours until you see rootlets that are about the same length as the berry. This took a couple of days.
- When the rootlets are as long as you want, rinse again, dry as much as possible and refrigerate until needed. I started mine on Wednesday night and they were ready Friday night when I cooked the porridge.
A couple of nights before:
- Mill the spelt, red fife and the remaining 110 g of rye berries. Sift all the flours through a #24 sieve and reserve the bran for the levain. I got a total of 34 g of bran. I reserved 87 g of sifted rye flour for the levain which left me with 5 grams that went into a cambro bucket.
- Add the remaining sifted flours and the unbleached flour to the bucket. Cover and set aside.
- Toast the millet and let cool. When cool, grind in a Bullet and set aside.
- Grind the flax in the Bullet and add to the millet.
The morning before:
- After having revived your starter for a couple of days, feed 30 g of it with all of the reserved bran and 34 g water. This will make for a very thick mixture. During the day, give it a couple of stirs when you think of it. I didn’t think of it and it was still smelling quite nicely by the evening.
Before going to bed the night before:
- Add the reserved rye flour and 87 g of water to the levain. Let sit overnight on the counter. It should have doubled by the morning. If you aren’t ready for it, stir it down and let rise again. Mine seemed to sit at peak for several hours so I didn’t have to stir it down. It was still smelling nicely about 10 hours later.
- Take the sprouted rye berries and mash them up in a food processor. There will still be a lot of chunks. Place them in a pot with the ground millet and flax seeds. Add 205 g water and the 30 g of yogurt. Cook into a thick porridge. This took 20 minutes on medium low heat. Place in a cool spot for the night. You can place it in the fridge but bring back to room temperature or use warm water for the dough in the morning.
Main dough:
- Loosen the porridge with the dough water (I had to use my hand as a spoon wasn’t breaking it up), and add to the bucket with the flours. Mix well. The dough felt a lot wetter than what I usually mix at this point (Uh, oh! High hydration dough! Hope I don’t end up with bricks which is what usually happens when I have dough this wet. Oh well, I forged on!). Sprinkle the sea salt on top. Let autolyse for 90 minutes to a couple of hours.
- Add the levain and mix well. This was very easy due to the well hydrated dough. Do 50 in bucket folds to ensure that gluten development is well on its way. The dough started pulling away from the sides of the bucket so maybe not all is lost! Cover and place the dough in a warm spot to rise.
- Do sets of stretches and folds about 30-45 minutes apart for the first 3 sets then go to hourly folds for the remainder span of bulk fermentation. Bulk fermentation took 3 and a quarter hours and the dough rose about 40%. The dough moved really fast even though it was a rainy and dreary day. I had bubbles on the edge of the container right from the second set of folds.
- Wet the sides of the dough with your hand to loosen from the bucket, and dump out onto a bare counter. Lightly flour the top of the dough again and divide into 3 equal portions of about 825-830 g. Pre-round the portions with a scraper. I am getting much better at this!
- Let rest for 30-40 minutes and then shape into a fairly tight boule. This was a bit tricky with high hydration dough but after cinching, I used the scraper to help tighten the boules as best as I could. Place seam side down in rice/ap floured bannetons, cover, and put to bed in the fridge for the night. This turned out to be 17+ hours.
Baking day:
- The next morning, heat the oven to 475 F with the dutch ovens inside for at least 45 minutes. Place rounds of parchment paper in the bottom of the pots and gently place the dough seam side up inside. The boules felt really soft and I was afraid they were over proofed. I usually don’t let proofing go that long, even in the fridge, but due to commitments, I had to prepare the dough earlier in the day than I would normally so it had a much longer nap in the fridge.
- Cover the pots and bake the loaves at 450 F for 25 minutes, remove the lids, be pleasantly surprised at the oven spring, drop the temperature to 425 F and bake for another 22 minutes or until nice and dark. I had a bit of a minor panic when I realized I didn’t hear the timer and that the loaves were still in the oven. Thankfully, they were just fine with no burnt bottoms!


- Danni3ll3's Blog
- Log in or register to post comments
they look then you need to give the bred gods mire wine! Can;t wait to see the crumb Danni.
Well done and happy baking
Millet is one of my pantry staples as I always add them to homemade granola. You really can't beat the crunch toasted millet brings. I guess it would smell kind of like popcorn once toasted and ground?
Another lovely multigrain bake, Danni! Now the first thing I'll have to do next morning is the see the crumb shot.
Can't wait too to see the crumb.
and still can't understand how you manage to bake 6 at one time! Kat
I stagger them in the oven. The bottom rack is sitting just above the floor of the oven resting on the curved bottom edge (the element is under the floor of the oven), and not on the supports since they aren't low enough. The top rack is just above the center of the oven vertically. I can fit 3 pots on each rack and since I have a hot spot on the bottom right hand side, I put two at the back of the oven and one towards the front. I reverse that for the top rack.
As to baking, Wendy (LazyLoafer) gave me her method, and she bakes 8 in her oven at once. I heat up the oven to 475 F on convection mode. I know convection mode does nothing for the bread initially since the loaves are completely enclosed, but once the oven is heated up, it keeps the coming on of the bottom and top elements to a minimum. This helps prevent hot spots that can cause burning. Another trick that Wendy taught me was to drop the temperature by 25 degrees to lessen the elements coming on as well. I bake the loaves for 25 minutes like this.
At the half way point, I pull all of the pots out, place them on cooling racks, remove the lids and swap the position they were in. So the top pots end up on the bottom rack and the bottom ones go on the top. I don't really watch where they go on the rack but I think they end up in a different spot. Once again, I drop the temperature another 25 degrees and keep the convection on. The hot air circulating for the last 22 minutes helps the browning of the top. I never have an issue with pale bottoms probably due to the contact with the hot pot.
This is a picture I took a while ago so you can have an idea of the set up.
That is totally amazing but I think it would scare my husband that I totally will 'tire out the element' in our oven! He is really worried with my daily baking just with 'one' loaf!...but I assume the oven does not 'care' whether there is one loaf or more than that.....oh I would love to be a mouse in the house to see your loading technique...I thought loading just one is a frenzy...that is amazing! :D Kat
I realized I would get burned if I continued. Plus, when you watch a number of people on videos such as Forkish, he doesn’t rush and even takes the pot out of the oven to show to the camera. Slow and steady, and being mindful of what I am doing has helped me staying burn free and the loaves don’t seem to suffer. I really should time how long it takes me to take them all out and swap things around.
Your loaves look lovely! I'm glad we averted the burned bottom crisis!
I'm going to have to give sprouting grains a try one of these days.
Happy baking!
Ru
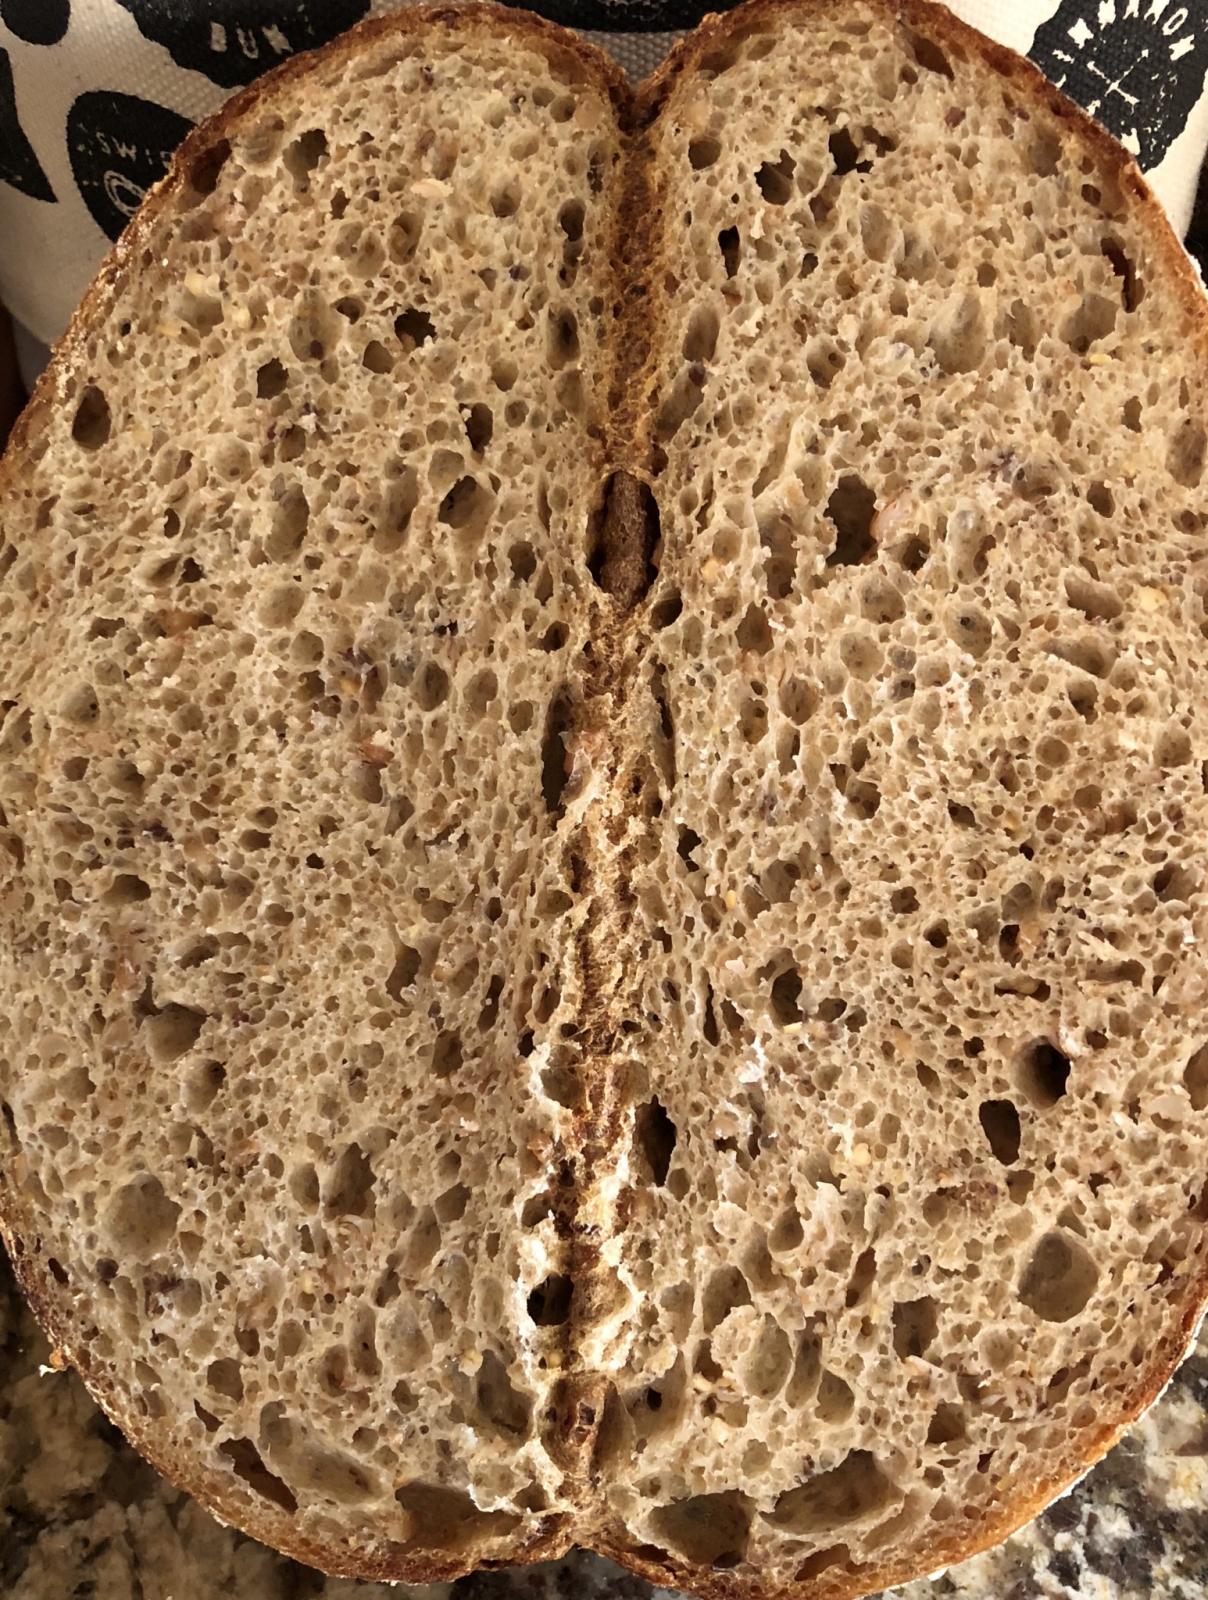
gave me the best crumb I have gotten out of my loaves in a very long time! He definitely knows what he is doing! Thank you for the inspiration!!
Best grilled ham and cheese sandwich ever! ?
It looks really moist and springy. Apparently you can't go wrong with grilled cheese!
is killer. The human ladies don't eat ham so no ham sandwiches are served at Luci's house:-(
really was what you Americans call Canadian bacon and we call Back bacon but Ham and cheese sounded better. ?
should not have looked before breakfast....that's so dangerous! Kat
Always such elegant and skilled work! I love that your normal bake is scaled to 6 loaves.
four batches where each batch makes 3 loaves. I show 6 because those are the first 6 to come out of the oven.
I suppose I could scale them to make a bigger batch so I have less mixing to do but this is working for me especially when everything is mixed by hand.
Very nice Danni, those are beautiful loaves, lovely crumb and crust - must be delicious! The soup kitchen patrons are in for yet another treat for sure...your bread makes that grilled cheese sandwich fit for fine dining, well done!