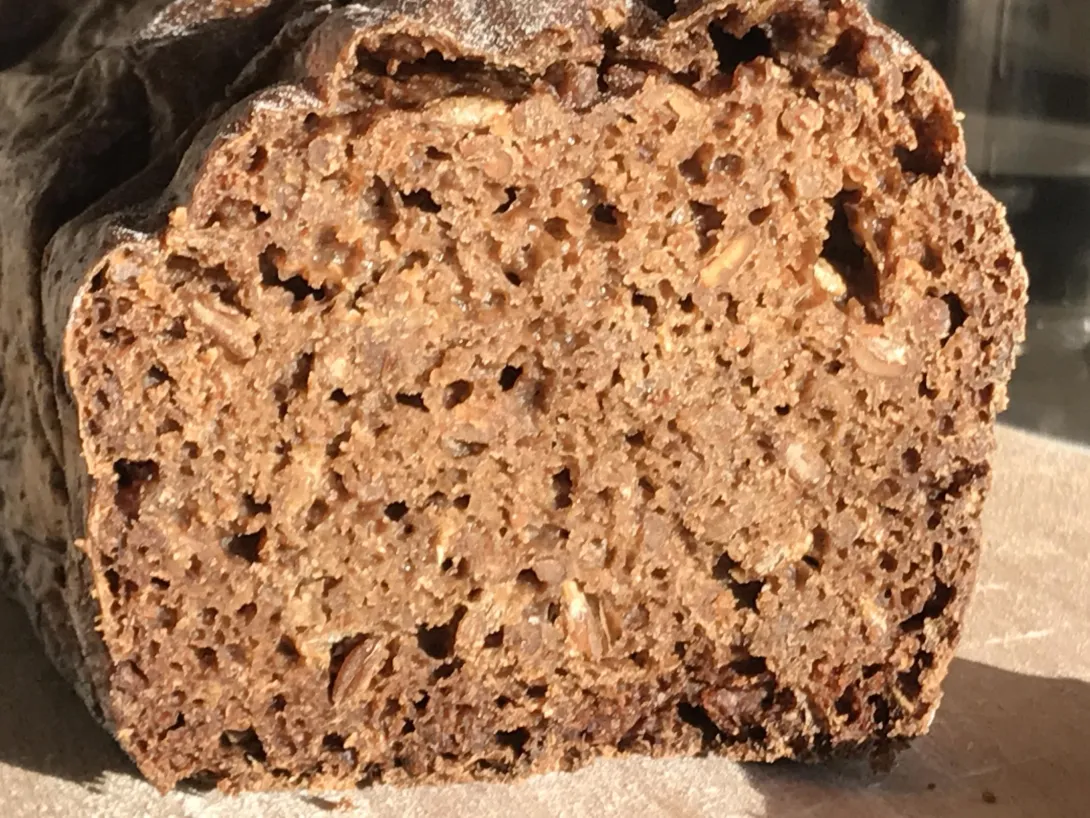
This bread takes two days to make and it needs to rest for 24 hours until it can be cut into. You have to prepare 3 different starters (a preferment and two soakers), have to then boil the rye berries, I even had to crack the rye berries using a manual coffee grinder as I couldn't find any cracked rye. Then the loaf needs to bake for 14 hours at a low temperature (yes, you read that right, 14 hours) and rest for another 24, whilst you are out there drooling next to it.
Having said that, it's worth every second, it's the most hearty bread I have ever tasted - during the slow bake the sugars in the rye will caramelize and give the loaf a very juicy full flavour. Moreover, the long fermentation and baking in addition to using whole and cracked berries makes for a very healthy bread too - tasty and healthy? Yes, please!
So, let's get to it - what do you need: a sourdough starter, rye berries, cracked rye (as I didn't have any, I just cracked some rye berries myself), water, salt and some maple syrup (or molasses). This recipe yields two medium size loaves.
1. For the preferment: 50g sourdough starter, 350g cracked rye, 350g water
2. For the Rye Berry Soaker: 200g rye berries, 200g boiling water
3. For the Cracked Rye Soaker: 200g cracked rye, 200g water
4. For the dough: 500g cracked rye, 150g water, 22g salt, 100g maple syrup.
Method:
1. First day:
- prepare the perferment
- put the rye berries in boiling water and cover
- place the cracked rye in water (room tem) and cover
Leave to rest for about 16 hours.
2. Second day:
- place the rye berries in boiling water on the stove and boil until soft (about one hour). Discard any remaining water and leave to cool down
- Prepare the dough by mixing the preferment, rye berries soaker, cracked rye soaker and remaining dough ingredients and leave to rest for 15 minutes.
- Place the dough in baking tins. Because the loaves will be baked slowly over 14 hours, it is paramount that steam does not escape, as such cover them thoroughly in both baking sheets and foil (I used 5 layers just to make sure, after all I didn't want 3 days of my life to be completely wasted). :)
- Bake for 14 hours at 120 C. The classical method states that the temperature should be gradually reduced, but I skipped that part and baked it at 120 for the entire time.
- After the 14 hrs have elapsed, shut down the oven and leave the tins inside the oven for 1 hour longer.
- Take the loaves out of the tins and leave to rest inside linen couches for at least 24 hours more. Resist the urge to cut through immediately after being removed from the oven at all costs.
The next day, you can finally enjoy the pumpernickel bread.
Enjoy!
Ref: Hamelman's Horst Bandel’s Black Pumpernickel and https://www.thebreadshebakes.com/2014/08/baking-traditional-real-german-pumpernickel-bread/
- Valentinaa's Blog
- Log in or register to post comments
You've done a nice job on the pumpernickel from here: https://www.thebreadshebakes.com/2014/08/baking-traditional-real-german-pumpernickel-bread/ It really is a great formula to work from!
I'm sure you'll find that the flavour just keeps getting better and better every day (I actually wait up to 3 days before slicing in to a pumpernickel), and toasting it adds another dimension entirely.
Thanks for sharing such a grand formula, and keep baking happy!
Yes, I was inspired by both the recipe you mentioned and Hamelman's recipe for pumpernickel, which offers great guidance into the chemistry of the process - added both as references. I am impressed you can resist the urge to cut through for 3 days, I could barely wait for 24 hours. :) I will try toasting it as well. Thank you. Happy baking!
I recently did a writeup on a pumpernickel loaf I tried because it was a "short" version but still as toothsome.
http://www.thefreshloaf.com/node/52790/pumpernickel-honey-and-dates
The prep took most of the time. The mix was short and the bake was 2-3 hrs. All in all, the loaf was very good with the whole berries being a perfect soft,chewy texture. A delicious loaf.
I am curious about how your loaf kept. I kept it in plastic (after cloth wrapping for 24 hours) on the kitchen counter and sliced what I wanted on day 2 and 3. On day 4 of my loaf, I sliced it all into slices and left it on the counter 1 more day. On day 5 I noted a small mold spot on the edge. That slice was removed and into the freezer it went.
I was a bit disappointed with the mold development so soon. Most of my other naturally leavened bread doesn't do that for at least 10 days. This is where I believe the long version of pumpernickel may be superior -keeping quality.I am interested to hear your experience.
Happy baking!
Hi,
The bread is keeping well enough, now in its 5th day and not developing any mould. However, the rye berries are getting a bit hard, might have been a good idea to wrap the loaf in some plastic to keep the moisture in - noted for next time. Your bread looks great, I will surely try it out as well.
Valentina
That is definitely an exercise in patience! And you were rewarded by beautiful loaves! Well done!
Yes, with the hardest part having to wait it out until being cut. :)