It all started so innocently --- I read Lazy Loafer's rye bake blog http://www.thefreshloaf.com/node/51615/another-allrye-bake, and started craving some 100% rye bread. I wandered down to the freezer and discovered that I was down to my last wee chunk of my last bake (I freeze in 200g chunks - 5 delicious slices), and that I had apparently also frozen the last chunk of my very first 100% rye bake (it was a 100% version of Stanley Ginsberg's "Black Rye Bread" http://theryebaker.com/black-rye-breadjuoda-rugine-duona-lithuania/) which had turned out as a heavy and wet (but delicious!) cricket bat. Since I obviously needed to refresh my stash, the logical thing would be to use that first bake as my first experiment with altus, right?!
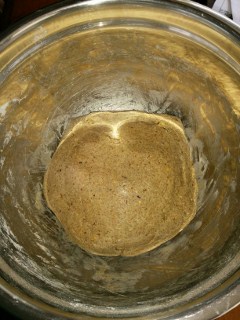
So - I thawed out that piece of "altus" - and was pleasantly surprised to discover that apparently it "freeze-dried" and ended up with a much lighter crumb than it went in to the freezer with: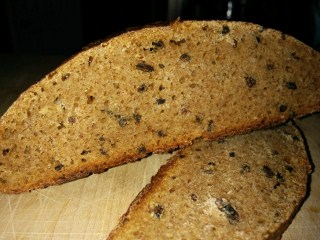
While that was thawing, I was lamenting to my husband that I really needed to get off my duff and get a pullman pan ordered so that I could try a Westphalian pumpernickel type of long, low bake. He suggested that someone who can seal aluminum foil well enough to boil rice on the barbecue could possibly make a foil bag sealed even better than a pullman --- so it was up to me if I wanted to keep making excuses or start making pumpernickel. After demonstrating my logic and maturity by responding with an extended raspberry, I conceded that he was right, and did a quick practice wrap on my bread tin --- no problem with a water-tight seal at all. So - decision made: long (22 hours), low (220 degrees F) bake in a sealed foil "bag", placed in roaster with a couple of cups of water in the bottom and then sealed to hold in the steam --- taken out of the roaster and left in the sealed foil "bag" inside the cooling oven for the final 2 hours. The bake is based on a number of different sources, including many Fresh Loaf experts' experiments (sheesh - dabrownman has done sooo many versions!) over the years, the technique outlined by Samartha: http://www.samartha.net/SD/procedures/PPN01/PPN01-4.html, and the technique outlined by The Bread She Bakes: https://www.thebreadshebakes.com/2014/08/baking-traditional-real-german-pumpernickel-bread/
From the discussion in the comments on Lazy Loafer's blog, I followed Mini Oven's advice and got out my starter early for a couple of days of TLC at room temperature (since I wanted to make sure that it was as strong as possible for the bake). I apparently can't keep things simple, so did one option using fresh milled whole rye and another using all Roger's Dark Rye commercial flour so that I could compare responses. Initial growth was much slower with the dark rye, but at the four hour mark after the second feed there wasn't much difference at all: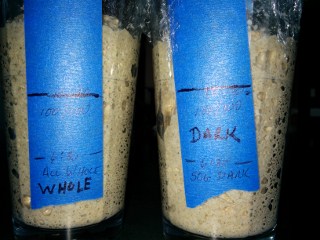
With the starter getting cranked up and ready to go, I had to choose a formula to work with. I'm pretty much incapable of following any recipe directly, so ended up with a mixed up version of the various pumpernickels but primarily based on Mini Oven's favourite ratio: http://www.thefreshloaf.com/node/15736/mini039s-favorite-rye-ratio. The final prep and formula came out as:
150g starter: 75g finely milled whole rye + 75g water
525g scald: 160g whole rye kernels + 10g whole red (non-diastatic) rye malt + 5g powdered chocolate rye malt in 350g boiling water (covered and soaked for 16 hours)
540g porridge: entire scald with additional 300g water simmered for 1 hour until kernels were soft, then cooled to room temp (came out at 540g total)
1339g final dough:
150g entire starter
540g entire porridge (includes scald)
100g coarsely chopped altus
90g coarsely chopped whole rye kernels
275g coarsely milled whole rye flour
5g red rye malt powder
5g white (diastatic) rye malt powder
160g water
14g salt
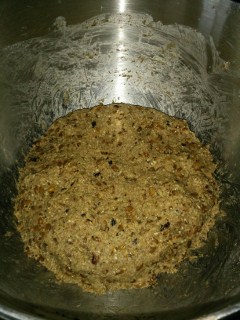
The porridge was quite dark from the malts: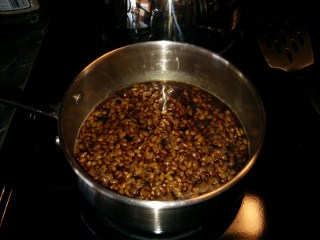
While that was cooling, I was able to get myself apparently organized: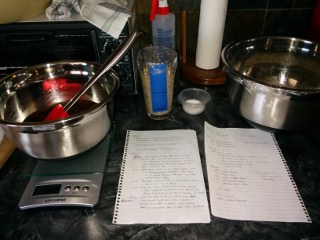
By the time the dough was mixed and tinned, the malts in the porridge didn't seem to make it very dark at all:
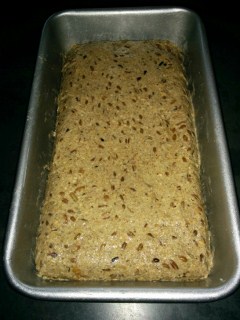
I followed Mini's timing and did a first mix, waited an hour to add the salt, mixed that in, and let it ferment for another 2 hours. I then used wet hands to fold it together and placed it in to a well buttered tin, and left it to proof some more. Well - there wasn't 'much in the way of rising (I'd say about 30%) over the next 4 hours, but there were obviously air pockets forming and a few wee bubbles popping at the surface. I figured that was a sign to get it in to the oven, so docked it all over, sealed it in to a foil bag, got it in to the roaster with the water, and put it in to a cold oven at 3:00 pm. I set the temp for 220 degrees F and just left it alone.
The lack of rise was eating at me, and I really didn't want to end up with no edible rye bread at the end, so I got up the next day with a plan to do a more simple and short rye bake, using the dark rye starter that I'd built up (I'd popped it in to the fridge when it doubled). As I pottered about the kitchen, though, I glanced at the extra altus sitting there, remembered a comment from Mini Oven about using altus to create the levain, and tied that together with a random idea of a rough comparison between the long, low bake and a higher temp short bake (yeah - I know - and I don't even have a lovely Lucy baking apprentice to blame it on).
So - there was a bit of the whole rye starter left from the first bake (refrigerated) which I pulled out just after noon and fed with equal parts altus and water and left at room temp.
In the meantime, my pumpernickel bake was finished, and I pulled the loaf out of the oven. The internal temp was just over 190 degrees F, the crust felt kind of thick and dry, but the loaf was really heavy --- so I let it cool to room temp on a rack then wrapped it up in plastic wrap and foil and put it aside to rest and redistribute the moisture for as long as I could stand to wait...
The altus levain had some obvious bubbling happening and a good rise after 8 hours at room temperature, so I gave it a stir and left it so I could do a morning feed and use it at peak the next day. Since I also wanted to do a comparison, I copied the scald from the original bake and had it resting overnight, too.
Next morning I fed the levain with the last of the altus (creating enough for 2 loaves), and cooked the scald / porridge. Since there was so much levain, I figured that I'd do a second loaf as more of a fruit / nut loaf. So - I would be baking one loaf basically the same as the first "pumpernickel bake" (only difference being that the altus that was in the final dough of the first bake was in the levain of this one - well, and the bake time / temp) and the fruit / nut loaf would be:
Fruit / Nut Final Dough:
150g Levain: 25g whole rye flour + 50g altus + 75g water
255g Soaker: 120g boiling water over 30g each of chopped dried raisins, prunes, figs, apricots along with 6g caraway seeds, and 2g each of powdered fennel, cardamom, and coriander, and 5g lemon zest
525g Roger's dark rye flour
5g powdered white (diastatic) rye malt
5g powdered red rye malt
5g powdered chocolate rye malt
45g chopped roasted, salted almonds
45g chopped roasted, salted peanuts
10g salt
20g soaked rye flakes (not in dough: to top proofed loaf)
The altus levain had more than doubled in four hours, so I got moving on the mixes. There was a massive difference in the look and feel of the two doughs:
It was a lot warmer and there were some huge pressure changes (storm front rolling by), so timing was quite different from the earlier bake. I mixed both and gave them just 40 minutes before adding the salt, and then let ferment for 1hr 40 before folding in to buttered tins. The fruit / nut loaf was getting close to doubling in 2hr 45 and the comparison loaf had risen a bit and had the air pockets / popping bubbles thing happening, so I docked them both and got them ready to bake: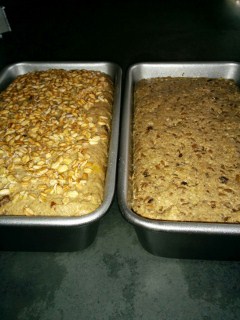
I put them in a covered dark roaster in a cold oven, set the temp for 430 degrees for 30 minutes, then removed the cover and dropped the temp to 390 degrees for another 90 minutes. Internal temp on both was under 200 degrees at that point, so I pulled them both from the tins and put them back in directly on the rack for another 10 minutes (which gave them both a very hard crust) until internal temp was over 200. I let them cool to room temp on a rack, then wrapped in plastic and foil and put them aside.
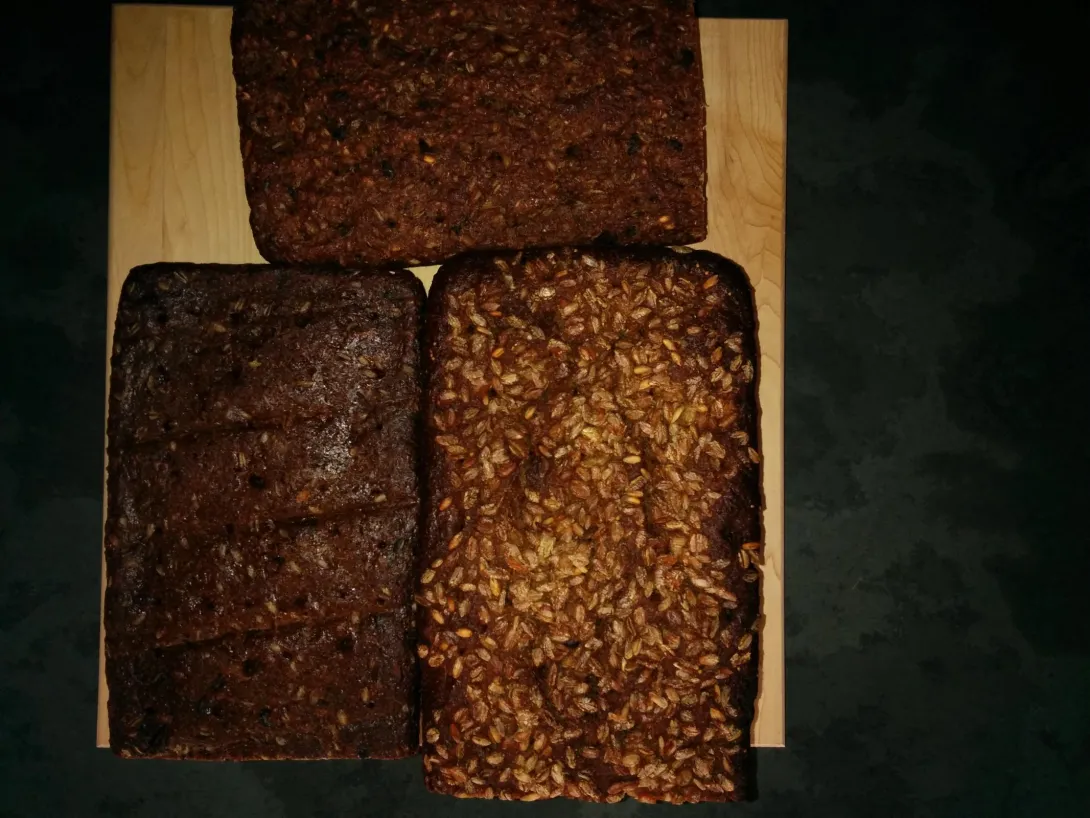
It was fortunately a quite busy weekend out at the farms, so I wasn't at home for the temptation of testing those wrapped loaves to drive me crazy! Yesterday morning we pulled them out for breakfast, so roughly 60 hours rest on the pumpernickel and 40 hours on the others :
Both of the comparison loaves have a very moist crumb (evenly so), which I'm not sure is just the nature of the beast (so little fine flour and all heavy, large, coarse kernels and kernel bits) or if they both were under-fermented. Considering that the only difference is the bake time / temp, the colour difference is really quite startling. The various "science of pumpernickel" articles that I've read attribute the colour to the Maillard reaction, but there seems to be some dispute here about whether that is possible with water present (speculation: all water in the loaf is only present as steam for most of the bake???). Regardless of the mechanism, there is assuredly something in the long, low bake that massively alters the bread: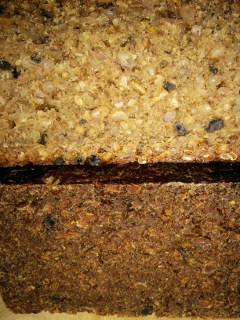
The flavours and textures are totally different, too. The pumpernickel smells and tastes like it is laced with blackstrap molasses (my husband found it far too strong - he's not a molasses fan - and asked me why I put so much in when I had said that I wanted to do a pure rye bake), and has almost a firm mozzarella texture. The molasses flavour is even quite strong for me, so we'll have to see what it does over the next few days. The regular bake version is more of a quick-bread texture, and has a pleasantly sweet rye flavour without the extreme molasses overtones. I thought that they both could use some drying, so I left them wrapped in just a kitchen towel from yesterday morning until this morning, and that allowed the flavour and texture of both to mellow out a fair bit. They definitely are more appealing to me heavily toasted rather than as-is!
That fruit / nut loaf is a completely different animal from the other two, and came out as light and fluffy as possible for a 100% rye loaf: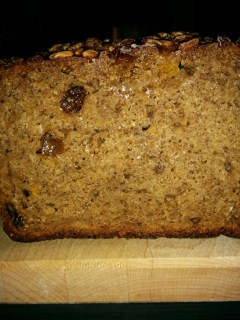
Both the husband and I love this one as is, and with it being so incredibly simple to mix and bake, I suspect that it will be repeated on a fairly regular basis.
All together, it was a good play session (too many mixed up variables to really call it "experimentation")! I've got enough to satisfy my 100% rye cravings for a while now, so needed to get all of this written out where I can find it the next time I discover that my stash is getting low. Next round I think I'm going to try having more fine flour in the pumpernickel loaf, no red or chocolate malts, and a shorter bake (around 14 hours) to see if I can't get that molasses type thing under control (either that, or add a pile of ginger, since it would be an amazing gingerbread).
Thanks to Mini Oven, and Lazy Loafer, and dabrownman, and everyone else for sharing your own baking experiences over the years, in the blogs and the comments. I still have a long, long way to go before I hit my baking stride, but am having a ridiculous amount of fun stumbling around here at the starting line. Oh - and to any other newbies: ALWAYS read the comments!
Hope you all are having just as much fun, and keep baking happy!
EDIT TO ADD: I just put a couple of slices of the pumpernickel in to the toaster and wasn't paying attention to the settings and left the room --- so it got toasted much more than I would have done deliberately. I came back to the kitchen smelling of melting chocolate, spread some cream cheese on, and am seriously in love with the rich chocolate notes that have overpowered the molasses notes on this one. I can't wait to see what the flavour is going to do tomorrow!
- IceDemeter's Blog
- Log in or register to post comments
But its a skill of its own... I will have to try it one day. Roll on retirement, or a lottery win! Well done.
but if you've got your starter running strongly, and use Mini Oven's ratio and instructions with a nice finely ground rye flour - I actually find it faster and easier than a wheat bread! If you enjoy ryes, then I strongly recommend giving it a try. It is actually a bit of a treat to me to just stir and wait, with none of the kneading and gluten development and whatnot needed for wheat breads.
Playing with the whole Westphalian pumpernickel - well, that's where it starts getting tricky! Still - fun, and delicious! I can highly recommend!
I'll do some reading up!
Beautiful loaves! It is about tie for some good rye in this house, also!
I haven't used the malts but I have gotten some strong tasting loaves that seemed to really mellow out over a few days time. I'm curious if yours will do that.
Keep baking and posting!
It is ALWAYS time to have a good rye loaf in the house!
The malts add great flavour (I use some in almost all of my loaves), and the diastatic (white) malt does a lovely job of increasing enzyme activity in the dough.
The flavour on the pumpernickel has changed every single day - mellowing from a super-strong blackstrap molasses to a really smooth chocolate / molasses aroma and taste. Toasted with a smear of cream cheese - well, it really is one of the finest treats I can think of!
The flavouring on the other two has also changed over the days, getting less tangy and more smooth. The fruit and nut one is seriously like eating a slice of cake, and is just incredible with some sharp cheddar.
I actually delay freezing rye breads because I want to freeze them at a more mellow flavour point, so my "stash" of all of these just went in to the freezer today.
I highly recommend anyone who likes hearty high-percentage rye breads to keep them in their regular baking rotation - they really are worth it. I hope to see your blog about your rye bake coming up soon!
Keep baking happy!
a travelogue around someone's kitchen. Great write-up!
And reminds me somewhat of the great txfarmer's long write-ups and accompanying photo sets. If you aren't familiar with txfarmer, who sadly just about never contributes here anymore, you might want to be. I missed her in her heyday posts, having only discovered this site a bit over three years ago myself. But you might just want to check out her compendium of experiments and superior work.
Thanks Laurie, alan
around in my kitchen like a little lost tourist, you'd know just how accurate you are with the "travelogue" description! I was actually checking my notes from a previous bake last night, and step 1 was "build up levain to 200g in 3 stage build - refrigerate when doubles after third feed - forget about it for a few days until you move something in the fridge and find it again". Yup - I need GPS and a tour guide for my own kitchen...
I love txfarmer's posts, and have a number of them bookmarked. Not only did she do some wonderful bakes, but detailed them with such clear instructions and great photos that anyone could duplicate the steps (not necessarily the results, mind you - she has talent!). I am nowhere near the baker / writer / photographer that she is, so am deeply honoured that this reminded you of her work (even if it's because mine is the polar opposite of hers!).
Thanks for all of your support, and keep baking happy!