Hi,
New to artisan bread baking and to this site. I have a few questions. After siting a website stating 5 min no knead artisan bread I tried it and became hooked. I have made quite a few loaves. With me since I did not have the heavy dutch oven but I had a large enameled dutch oven, and since it did not have a small bottom I used a springform pan to sit inside it to mock a small bottom.
What are your thoughts of using a form for artisan bread?
I have been using very warm water when adding it to my flour,salt and yeast and then letting it set overnight should it be cold water?
Where do you find rye flour been having a tough time even for Bob's red mill?
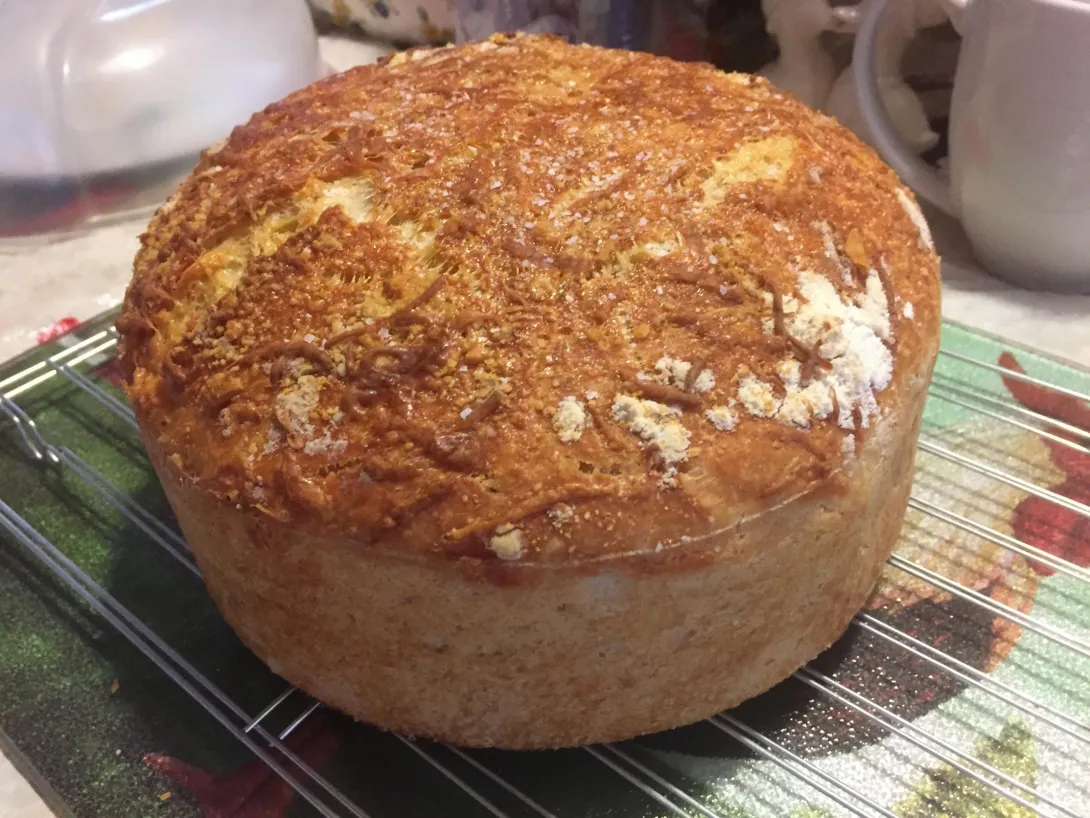
pic of one of my 5 cup flour artisan breads with smoked gouda and bacon attached made in springform 8 in
If it works for you just keep doing it. I also use an enameled cast iron dutch oven that is much bigger than my loaves. The dough does spread a little bit when first place it into the Dutch Oven, but it cooks in place and stops spreading. I did the same as you to get taller loaves, and it definitely works, which is perfectly fine. To make a loaf that looks a little more "artisan" I will place it in the DO free form so there are no mold marks on the sides, but its not any better, it just looks different.
I used to use ver warm water but I learned that y get better flavor when the yeast is allowed to work slower so I no longer use anything warmer than room temperature water and it works perfectly well because No-Knead ferments for a long time.
I have no problem getting Bob's Red Mill Rye Flour from Amazon:
http://amzn.to/2amAkJ5
Your bread looks so good! Can't wait to see your Rye!
Hi Bob,
Thanks for the follow up. I was wondering if maybe since I was using very very warm water for my overnight ferment is why sometimes during these humid night the dough would fall? They still came out good, but now wondering if that has affected my overall rise in which I greedily want higher bread domes. Am I being a silly girl..lol? Oh by the way the Smoked Gouda and bacon cheese from Yancey's fancy was phenomenal in this bread, so soft and moist no need at all for butter. I have done 2 other breads with cheese and this was by far the best. The other cheese breads I used Danish butter cheese from a german deli and one with imported Swiss Gruyere. Will keep looking for the elusive rye. Now from reading I guess if I was going to do my large 5 cup flour loaf I would use 3 parts white, 1 part whole wheat ( I actually have a white whole wheat) and 1 cup rye, does that sound right?
You're not silly at all, you are being perfectly reasonable and is achievable. Using very warm water can cause more than one problem. I've seen people overproof their loaves and I've seen them kill the yeast with overly warm water. There is a mathematical formula for managing the temperature precisely but for No-Knead it appears to me that room temperature water works best so the yeas can do their job slowly. The more time that the yeast spend working on the carbs, the more flavor they release.
Bob's Red Mill Rye is available, I just looked t amazon and its there in stock.
Hi Bob,
I am going to check a few more stores and a bakery outlet before I buy on line. I have been prodded by b/f to get dough all white flour started today so I can bake tomorrow morning. One more question,...he wants lots of airholes and bubbles which most bakers don't want...lol. I read that all-purpose makes more bubbles large crumb....what is your take on that?
Its amusing how so many people want bread with huge holes. Its not really gourmet but if that is what he wants then go with a higher hydration recipe (like French baguettes or Italian loaves).
I find that all purpose flour tends to collapse and not create lots of holes (for me), but if you mean white bread flour then yes that works very well and is whatnots home bakers I know use at home. I find that making Rye bread is challenging so I would focus on making conventional bread and mastering it then experimenting with Rye and Whole Wheat.
The commercial bakeries get away with lightweight "holey" breads because they have gigantic mixers that knead the dough and in that kneading process they push a lot of air into the read, which of course makes for more holes in the finished loaf (which make step loaf lighter which results in higher profits because there is less actual bread in each loaf).
The higher the percentage of protein in the flour the bigger the holes you can get, so when you go shopping see if you can find a flour that is 10% protein or higher (I think I've seen it as high as 15%. Most aren't labeled but good luck with that.
Hi Bob,
Thanks for this terrific dialog. So you think all-purpose does not help with air holes. That was interesting what you said about commercial bakeries guess I never thought about it like that...wow. I feel like a real nudge now, thinking air holes was so special...lol. Well for grins the one I am going to set up tonight I am going to use 2 cups all-purpose and 3 cups of white bread flour - King Arthur. For my 5 cups I usually use 2 1/2 cups of water. Do you think it should be more since you said more hydration? I know from reading to add more water when I add the white whole wheat, as they said on one website that whole wheat flour needs more hydration.
Scale
Measuring with cups results in inconsistent results because flour settles (resulting in different cups of flour having different amounts of flour actually in it).
In the US, the use of tea cups as a measuring device was started when many British immigrated here but could not afford to pay for a lot of baggage so they left large or heavy items back home. This resulted in very few of them having scales so all recipes were converted to being measured in cups, which has persisted to this day here.
Get a kitchen scale and weigh your flour, you'll see that the vast majority of recipes here are documented by weight not volume.
High Protein Flour
More protein in the flour gives more Gluten which is the elastic component in the dough. The more the dough stretches when its fermenting, the bigger the holes will be be when baked. For that reason you'll find that the recipes with big holes tend to be with 100% bread flour (and no AP flour at all), I use only high protein bread flour and it works great. You'll notice that most cakes are made with AP flour and they have very small holes.
Hydration
The amount of water in the dough is important. The more water, the bigger the holes. Since you are using half as much water as you do flour then you you bread has 50% hydration. To get really big holes the professional artisan bakers typically bake loaves with hydration in the 75% to 85% range. I have tried going up to 85% and my loaves were fluffier but its even harder to handle (to get into the screaming hot dutch oven) because its like a thick soupy mess. It can be done but it takes patience and practice. You now see another reason why we all use a scale to measure our ingredients (yes I even weigh the salt and yeast although that is not as critical, a quality measuring spoon will get you close enough) because its nearly impossible to figure out your hydration when you use cups as a measure.
Winging It
Since you do not have a scale right now, I would:
Good luck and most important is to have fun!
Hi Bob,
I love the learning...funny how when I researched I found that all-purpose would not give more bubbles. Thanks for pointing out the hydration I am going to try more. I have a crazy one bowl method I do my dough set up. I start with a big plastic container and mix my dough in it with a spoon and then leave it to rise overnight. Then the next morning I toss a little flour around the top edge of the dough all the way around and use my bench scraper to scrape it down and toss a little flour on the bottom area and manipulate the dough around like a kneading within my plastic container, then I dump it in my prepared springform and let it rise in there. I made it sooooooo easy peasy for myself it is ridiculous. I am probably not going to get a scale because I have a brand new stand mixer and immersion blender gift points at work that I never have even opened. I have a small galley kitchen so don't have a lot of space. I will try to give more hydration and will let you know tomorrow how that worked. I do have 2 thermometers and I have 2 because I did not trust the first one. When I take my breads temp they never seem to reach 200 but are still done...go figure unless both thermometers are bonkers...lol.
p.s. while researching found a pic of Chocolate Babka.. had to challenge that and made one so I am on a Chocolate Babka trip as well right now. My first attempt was not too shabby my filling was really good.
How your high-hydration experiment turns out when you get back to it. I follow a similar procedure as you do. My only difference I that when I pull the dough out of the fridge (I usually retard in the fridge for three days, just because I like to push the limits).
After I let the dough stand on the counter for several hours (so it gets near room temperature) I oil a plastic bowl scraper and use that scraper to scrape the dough into the screaming hot dutch oven, its simple, quick and easy.
You can follow the manufacturers instructions to check the calibration of your thermometers. Mine was easy, stick it into boiling water and see that it reads 212 degrees F then stir a mixture of water filled with ice cubes in it for 30 seconds, the temp should just barely reach 32 degrees F. If not then there is a calibration button that I'm suppose too use but so far my thermometer has passed that test every time.
Have fun!
Hi Bob,
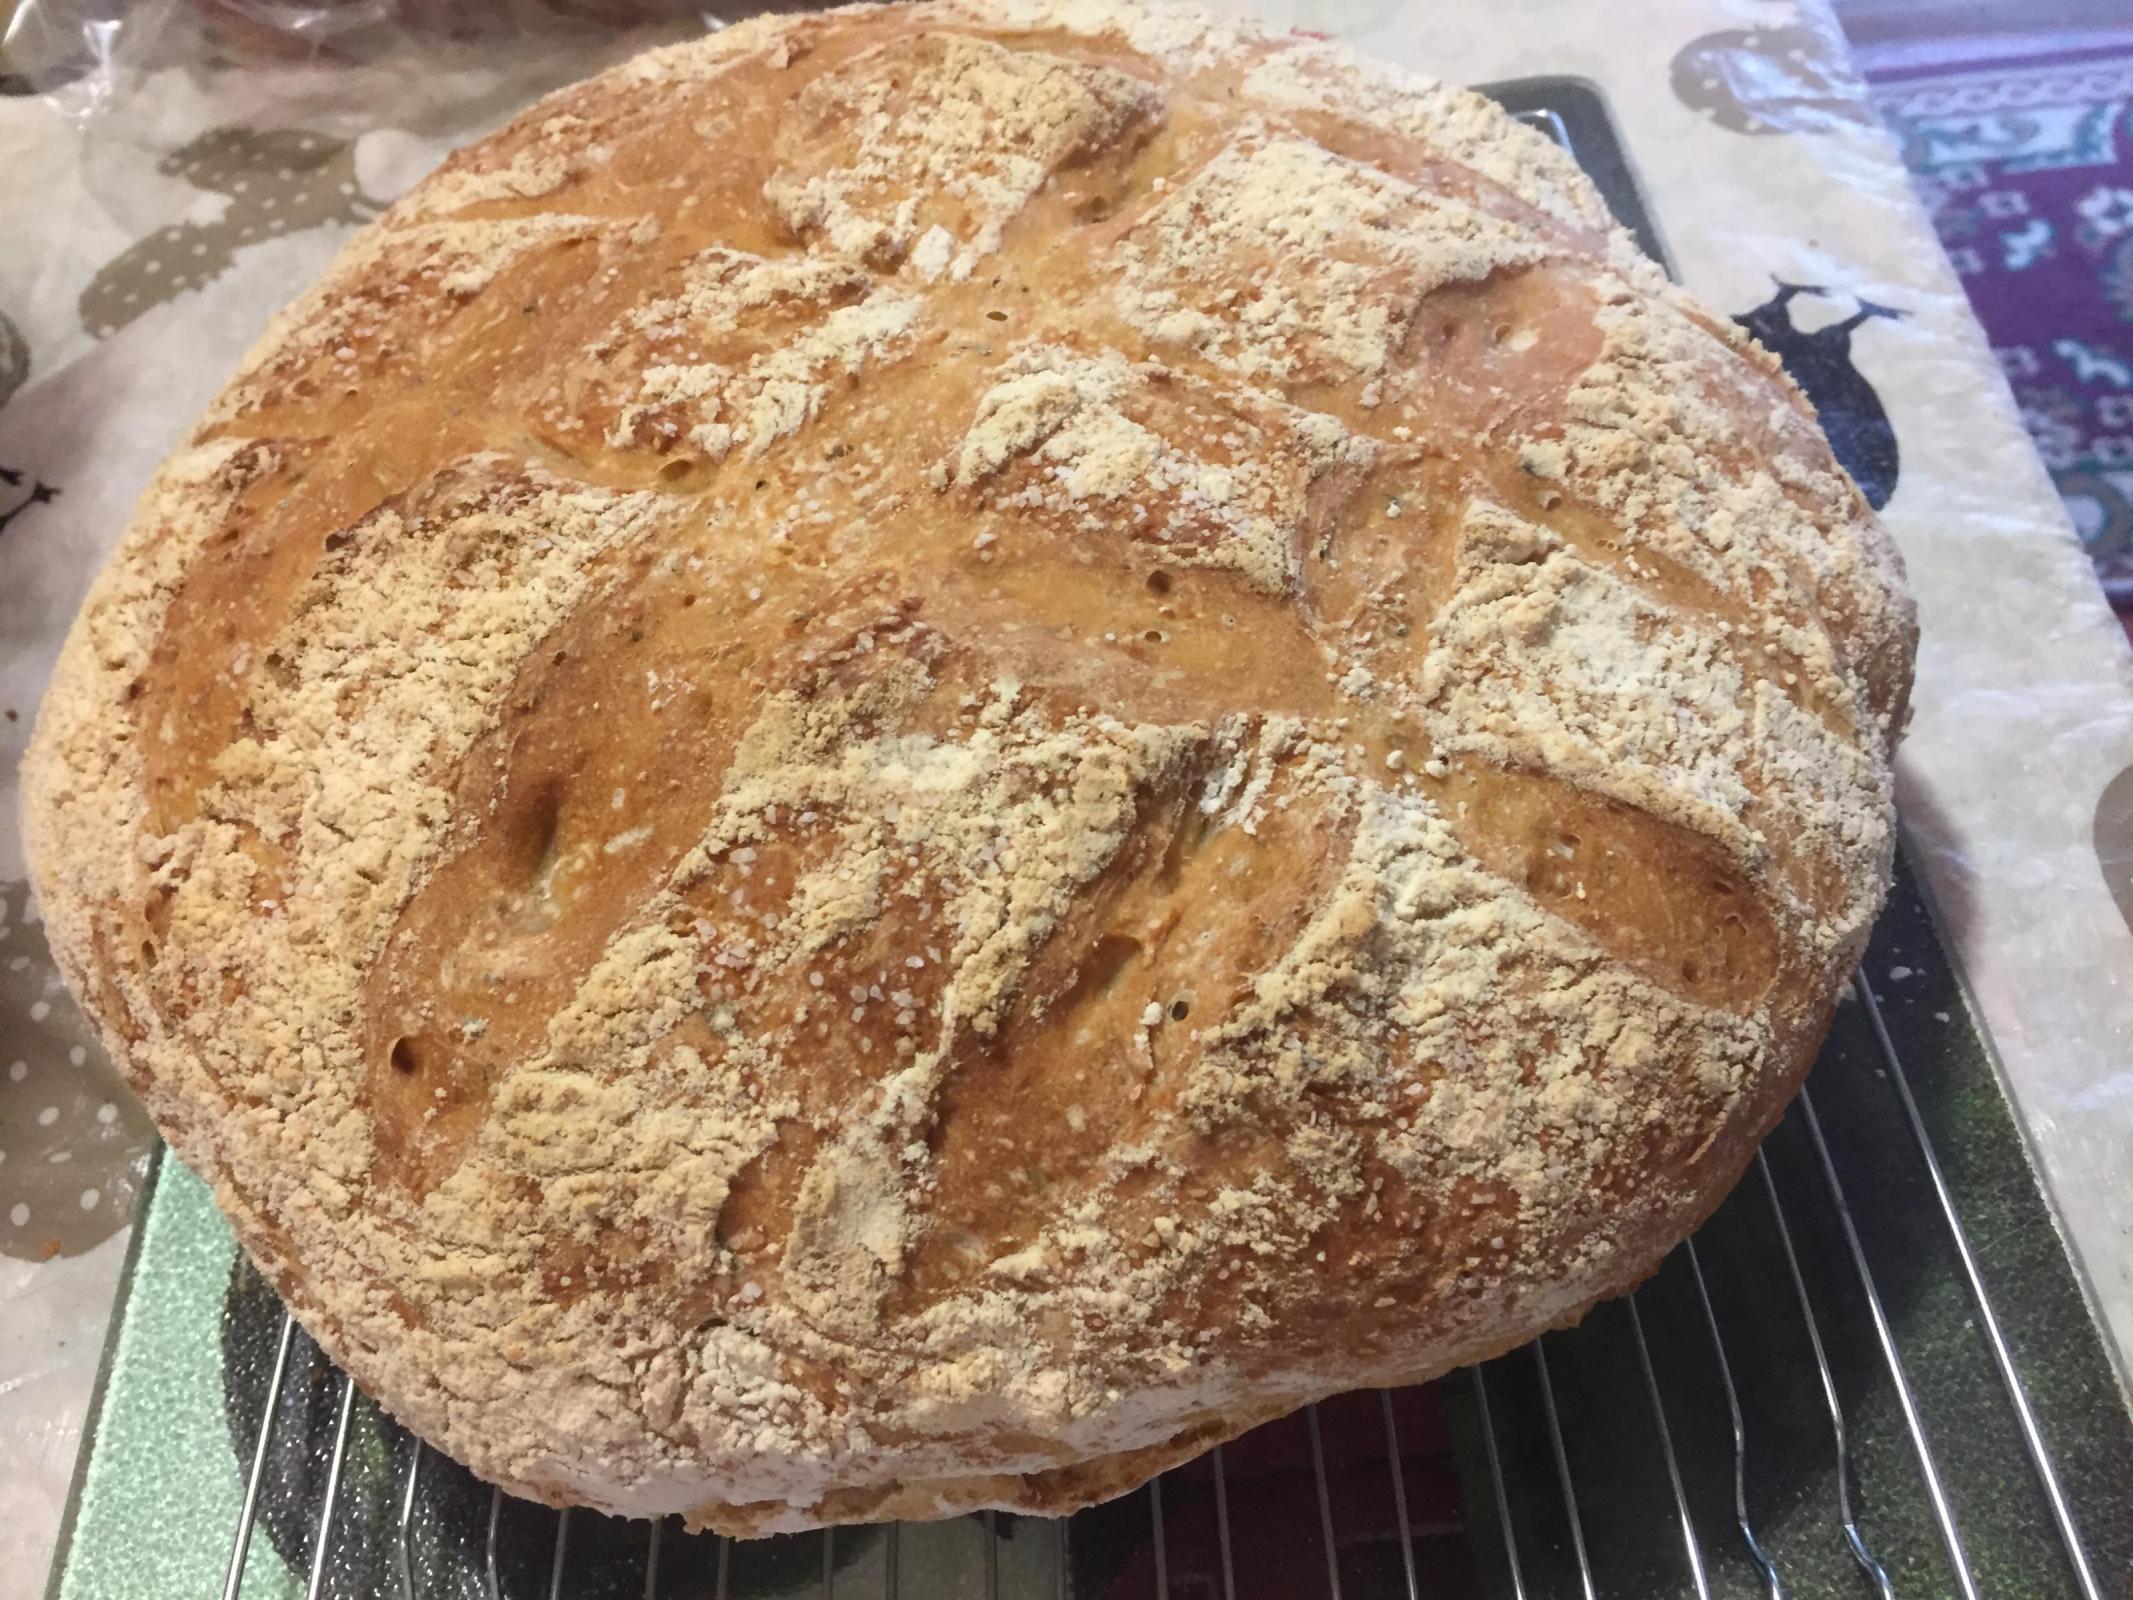
Well let me tell you it was a horrible ordeal...lol. First off I used room temp water for the yeast instead of my normal very warm water. I noticed it rose differently and it still fell by morning. B/F insisted on having some all-purpose so it had 2 cups AP to the regular bread flour 3 cups. I used some honey instead of my sometimes sugar. Which gives me usually a sourdough like taste from the fermentation when I use sugar. I put in some dehydrated chives and a 1/4 tsp dehydrated garlic. And then I put in my normal 2 1/2 cups water but then thought okay will try at least 1/4 cup more water. Okay next morning (oh by the way I do not refrigerate my dough I leave it out on the counter). I started to used my bench scraper with the dough but it was way too wet to deal with so I had to keep adding flour and flour and flour until it was manageable. Okay so now he wanted it freeform and not in my usual springform pan okay so I had a pizza pan and put it on it and then scored it and put some kosher salt on it and let it rise a bit but it was so wide I had to finally put it in the oven. I set up a pan on the bottom rack for the 1 cup of water and I spilled that all over the bottom of the oven because it caught on my parchment paper. LOL I was cursing all morning at this beast of a dough. I baked it for about 45 minutes and took it's temp which reached 200 degrees and removed it and the parchment paper. So I have this giant 1 foot diameter bread...lol. It came out okay but will not attempt this again because all the extra flour kinda made it taste floury. The slices towards the middle makes for a great gigantic 'dagwood' sandwich. Will post pics shortly of my wagon wheel of a bread.
I am so sorry! I've been through all that and can tell you that bread baking is a scientific process. The slightest change (like adding flour at the end of the process) does impact the results negatively. Adding other components can also adversely the results. High hydration dough can definitely work, its been done in Italy and France for as long as we have written history and I do to every time I bake my loaves.
I don't add Ap, nor honey, nor sugar of any kind. They aren't necessary and change the loaves. Yes, there are many recipes that call for them but what I tell my friends is to master the basic No-Knead recipe first and when that comes out consistently food every time, then you can change it up.
AP flours have almost no gluten strength and will make the dough runny and the loaves flat. Yes, there are recipes that call for a little bit in it but they are formulated and baked in a very specific way that works only for that recipe.
I have had very good luck guiding my family and friends to make very successful No-Knead loaves so I know it can be done.
The reason I don't use honey or sugar is that they are intended to make the dough rise very quickly by giving the yeast some easy to get food (instead of easting the carbs in the flour). This results in a very rapid rise but the downside is that the yeast are actually working too quickly, to get maximum flavor takes time which is why we allow the dough to rise overnight. The easily digested sugars also makes the yeast overproof and collapse the dough, before it goes into the fridge.
I find that freeform loaves are harder to make than loaves in a form, like a Dutch Oven. Since they taste the same to me I only make DO loaves now and have extremely consistent results (I also do that because I often make loaves with 85% hydration and I use a very hard to work with flour, so the DO makes it work perfectly).
Adding flour as you remove the dough and transfer it just makes for uncooked flour coating your loaf when you eat it since it has not had time to get hydrated. Thats why I coat the plastic bowl scraper with olive oil and it works great (I have also used water but you have to keep dipping the scraper into the water with each scrape, with oil its a but less likely to need to re-coat the scraper). I do know that everyone likes that white flour look with the brown crust bursting through it from below, but it takes time to practice to get it to be light enough to be artistic but not so heavy that you're eating raw flour.
I also sometimes use coarse corn meal when I transfer the dough. It works like ball bearings and it adds flavor and texture to the finished loaf. If you see any of my pics withhold colored grains on the crust, that would be the corn meal.
For folks that are just starting out, I have then follow these instructions No-Knead but watch Jim Lahey (the guy who invented No-Knead Bread) actually make it in this video. Typically they will realize that there are easy to improve techniques they see or read and student their bread becomes spectacular.
Keep it simple, master the original basic recipe (without changes, practice your technique until you can do it in your sleep then start making small changes as you desire. At that point you can experiment with free form baking (which probably means that you will have to learn kneading, proofing and shaping). Its takes time, practice and patience, but you will master it.
Have Fun!
Thank you Bob,
Now I know why it tasted floury but since he wanted a freeform had to add the extra flour. I usually just do the same as you scrape out my container and dump it right into my form that sits within my DO. Maybe I will try again with a tad more hydration but do what I have done with my form. My first bread I did was a 3 cup flour loaf and I had placed it into a 8 inch round form and it kinda came out freeform. The pic I am attaching is this first loaf. I see what you mean now about the sugar/honey and the deflation. Bob thank you for all your wonderful teaching!!!!
Its a challenge but is totally worth it as you master each recipe. Increasing the hydration is not likely to get rid of the floury exterior because its going into the oven before its has a chance to dissolve into the future crust. The loaves you see with that artistic floury dusting is created with a lot less flour than you might imagine.
Freeform baking is different from No-Knead baking. The kneading process causes you to pull the skin tightly al around the exterior. That simple act (called shaping) creates a skin tight enough to hold a shape as the dough is transferred to the oven so it doesn't ooze and create a flat loaf.
Read up on this form about how other folks shape their loaves and how they use brotforms (baskets thatch dough sits in as its proofing, which helps it hold its shape). Its is possible to make high hydration loaves freeform but it takes practice.
If you really are interested in freeform loaves (yes I have made them as well, I just like how my DO loaves come out now so thats what I mostly make) then I strongly suggest that you follow the lessens posted here on this forum
http://www.thefreshloaf.com/lessons
Follow each lesson precisely and you should get some rather good results. The instructions are clear and reliable and are a great way to develop your skills to the point where you can do any experiment you want and still get good results.
Let me know how it goes!
Hi Bob,
I watched the video with Bob and Jim making the simple artisan bread. That is pretty much the recipe I used except the recipe I had was 1 tsp of yeast and he has 1/4 tsp yeast. I have read it does not matter does it? Oh and my flour on top is intentional we really like it. I like it especially when I add the extra flour and some parmesan cheese and salt. yummers!
Oh and link 1 did not have a link
How much flour you use, too little and you get a pancake, too much and the yeast can eat up all the carbs (inflating the dough quickly) then dying off quickly. Follow well known and proven recipes precisely to get good results.
The next thing you should put on your To-Do list is to learn Baker's Math. The reasons that most of us only worry too much about recipes that we find is that we know that using Baker's Math we can tell if the recipe is in the proper range to be successful or not. I wasn't going to mention this until later so I didn't overload you but in the No-Knead recipes I have a lot of success with, I use 1% yeast and 1.5% salt. That means that whatever the dry weight of the flour is I add in 1% of that weight in Yeats and then add 1.5% of the origin four weight in salt. Each recipe varies that in accordance to how long the dough ferments, retards, proofs, etc. Now you see why I'm so big on using a scale. So depending on how much your total four weighs, one quarter teaspoon or one teaspoon could be correct, I don't know evasive I don't know how much you flour weighs.
Here are the two links again:
https://youtu.be/13Ah9ES2yTU
Lessons (highly recommended):
http://www.thefreshloaf.com/lessons
Hi Bob,
Thanks again for your wonderful teaching moment. Now, that is what I was suspecting when I saw in the morning or during the middle of the night my yeast deflating. Between too much yeast and sugar or no sugar usage it makes sense why it was deflating. I had seen some videos where folks were only using 1/4 tsp of yeast to my 1 tsp and was wondering if the recipe I had followed in the first place was correct. I am reducing the yeast down to 1/4 tsp now for my 3 cup flour boules. Whew so much to learn.
I hope you get a chance to watch the video link at the end of this entire discussion it is so very cute and I think you and other might get a kick out it as I have.
Are often correct because people pass recipes along on the Internet without checking them and the original recipe gets corrupted. Thats why I only recommend trying well known, successful recipes (there are a lot of great recipes here in this forum).
Hi Bob,
Going to cut back the yeast to what it should be going forward. That will save me on yeast pkgs. :-)
these pics go along with my recent post - I guess this was my experiment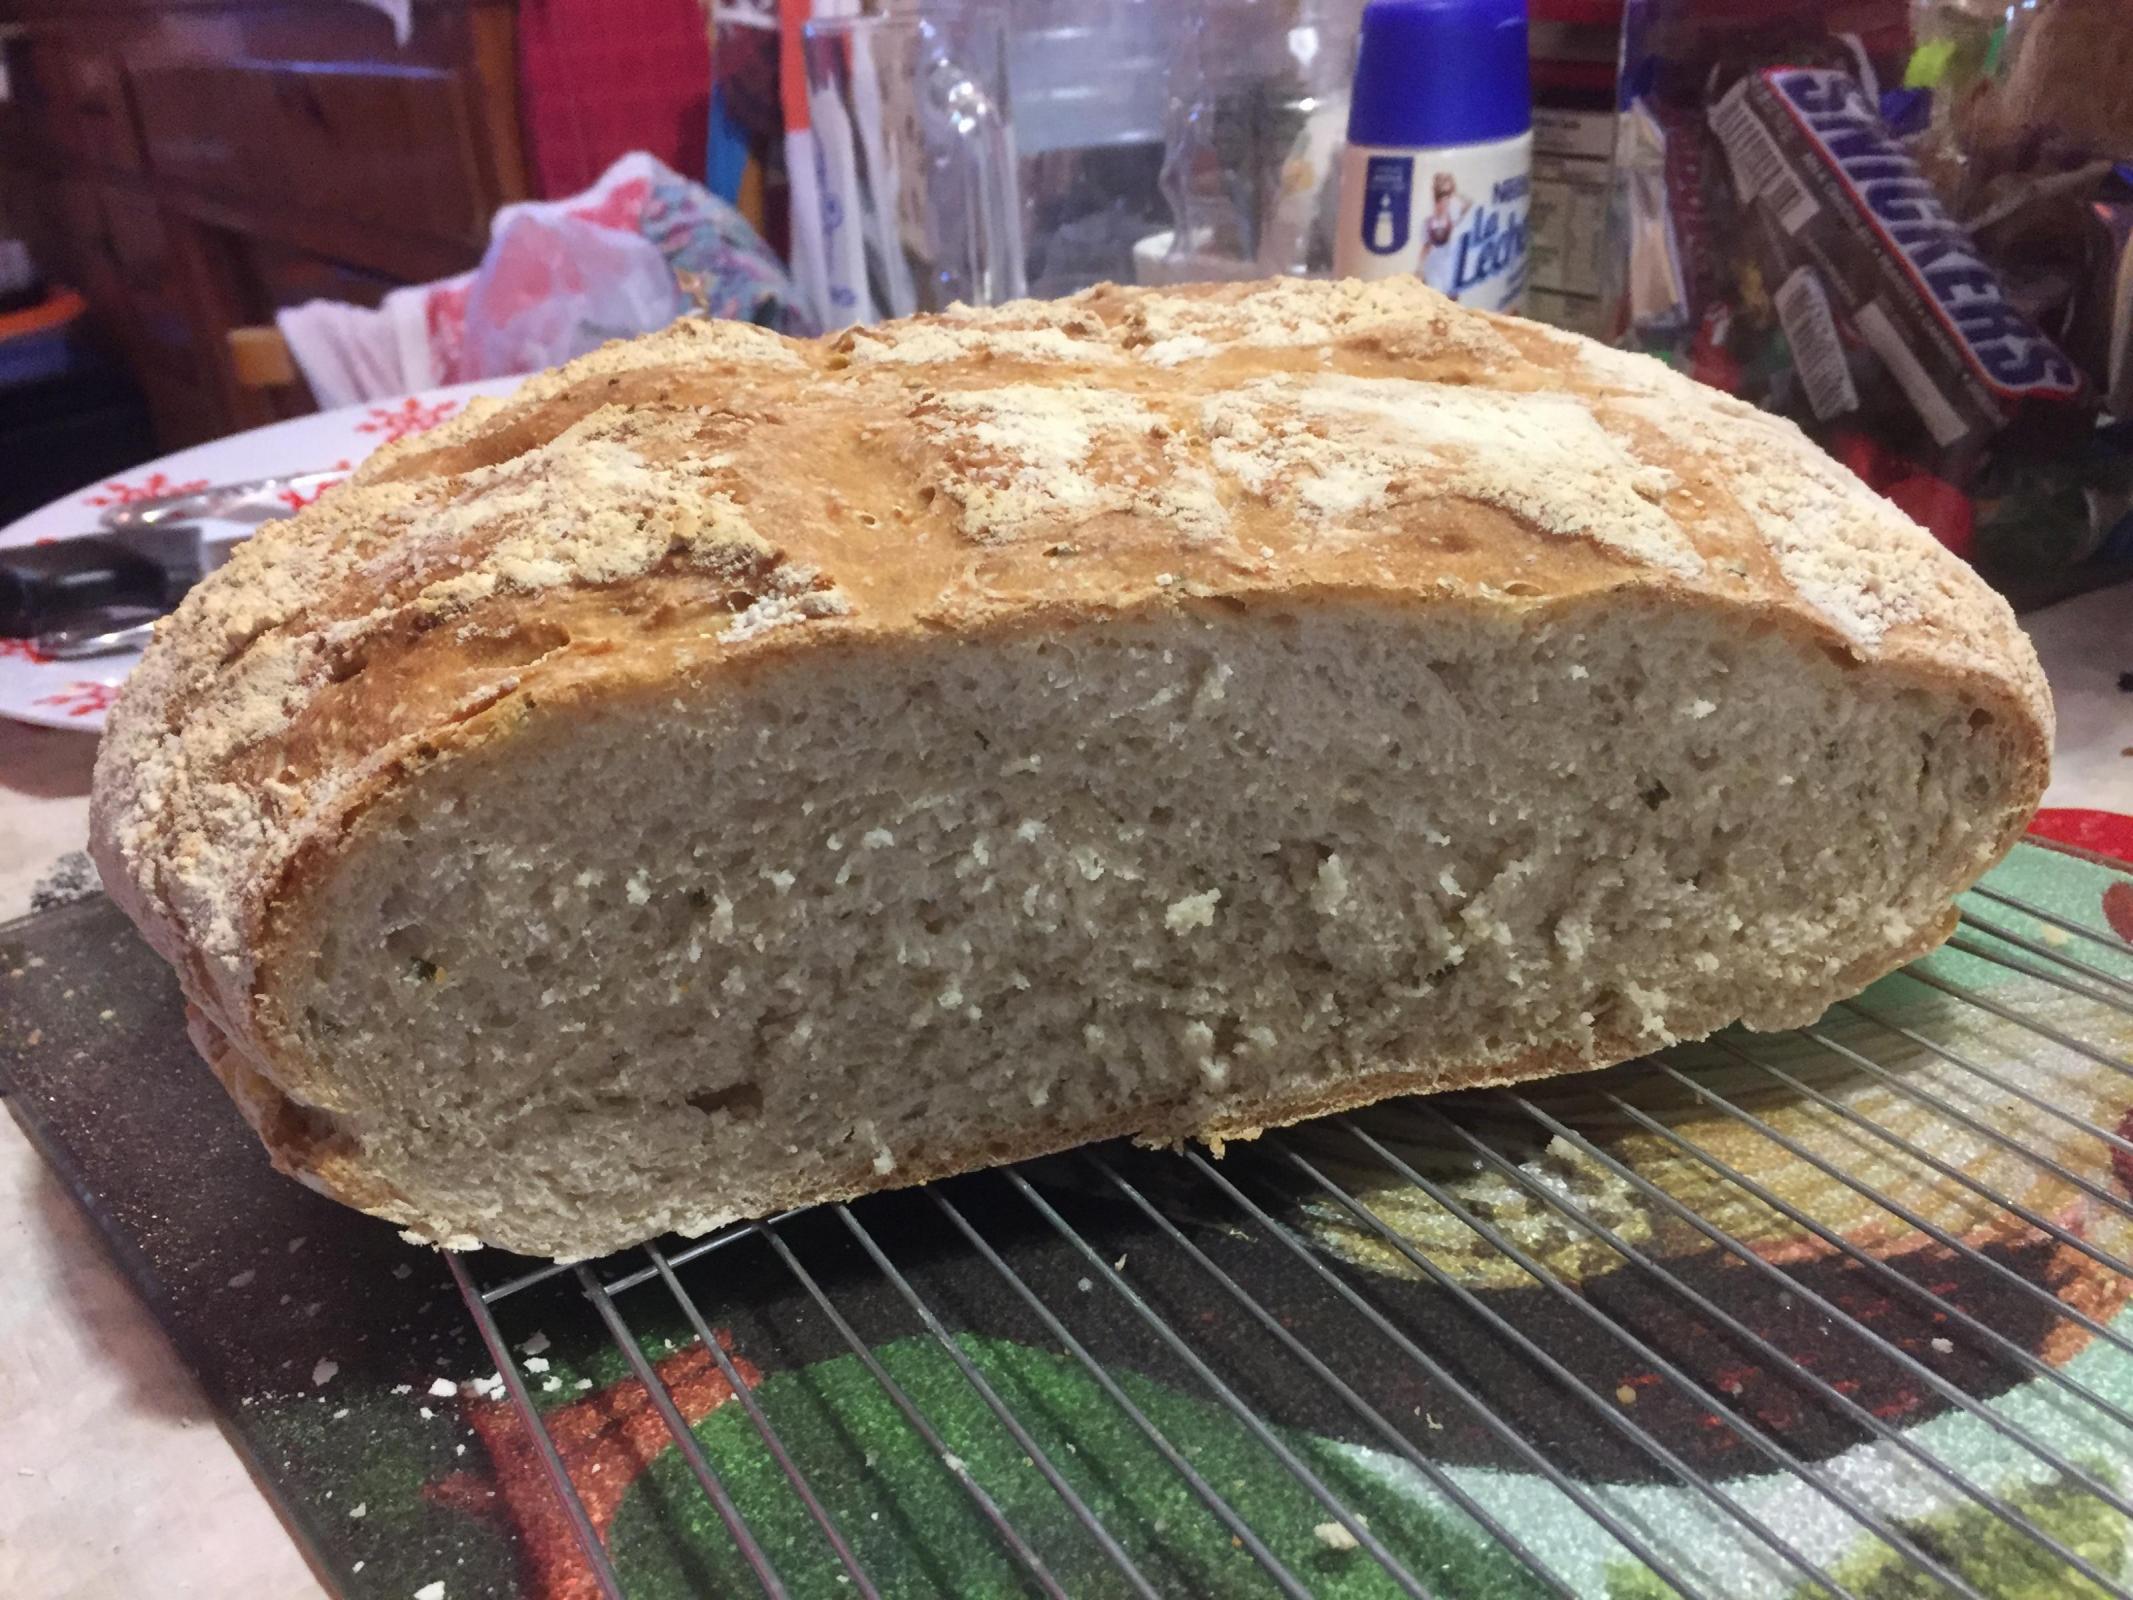
Just keep practicing and fine tuning and each loaf will keep getting better.
By Jon Lahey (the "inventor" of No-Knead bread, when we was lecturing at Harvard.
He makes a 100% hydration dough (one liter of water to one kilo of flour) by hand, which should prove interesting for folks that are struggling to make 75% to 85% hydration doughs. LOL
Its a very long video so I suggest starting at 7:30 and once he starts the technique to make the slurry come together Into a bankable dough, then you can fast forward or skip ahead if you so desire. Enjoy!
Jim Lahey at Harvard
Piratess, sell the immersion blender on eBay and purchase a scale... please! Your thread talks about dialing-in degrees of temperature and time, yet you may be off large percentages when using cups instead of grams. Changing from volume measurements to weight measurements had a profound effect on my endgame. I recommend you give the scale another look.
Hi Jim,
I know the devoted serious bakers vow this is a must. But for right now for me using cups and sometimes I just eyeball the tops of those and tossing it in my bowl is how I go instead of even leveling them off. (Hey just recently discovered not to use my measuring cup for liquid for solids...lol) When my mom would cook she many times would know recipe by feel, and I know baking is a science and my mom would get her European style measuring cup and measure with it. So far my bread has turned out good, friends and family have enjoyed them. I may be into something different soon so for right now will hold off on the scale. So for now going the real pirate rustic route....lol wink!
$20 will buy a scale that will do everything you need, all other changes will likely not be repeatable because of all the variables the measuring introduces.
Gerhard
Hi Gerhard,
That is my father's name whom I miss so much. I think he would like my bread that I made so far. I will keep my eye open for a scale next time I go to my favorite discount store. pic of my bread with gruyere
Somewhere in this thread there is a suggestion that using 2 1/2 cups of water to 5 cups of flour makes a 50% hydration dough - wrong, wrong, wrong! Hydration is a ratio of water to total flour by weight. A cup of water weighs 236 grams. A cup of AP flour weighs 130 grams. So your 2 1/2 cups of water weighs 590 grams, and your 5 cups of flour weighs 650 grams, making your hydration level 91%! No wonder it ends up as a large pancake, especially if you then add another quarter cup of water (making it nearly 100% hydration).
Wow
I feel like a real newbie nudge now. Now I get what you folks are saying. Lazy thanks so much for putting it into context like that. I had no trouble with my 3 cup loaf with 1 1/2 water nor my 5 cup loaf with 2 1/2 cup water.....it was my latest experiment to the 5 cup loaf to add 2 1/2 cups plus a 1/4 no wonder it came out like it did. Lazy Loafer thanks sooooo much for explaining it to me that way WOW is all I have to say. Now I get the useage of scale!!!!!
You're very welcome - that's what these forums are all about! If you do invest in a scale you'll be able to have all kinds of fun fiddling with adjustments to see what works best for you. I've actually settled on hydration levels between 70% and 75% for most of my breads, and they turn out wonderful - moist, creamy and open crumb. And they are much, much easier to handle. I bake for others, so I make larger batches. I can't imagine trying to bench and scale (i.e. dump the dough out on to the work bench, then cut it into 750 gram pieces) a puddle of 7,5 kilograms of 91% hydration dough!
Get a scale...you can't imagine how much more reliable your results will be. It is absolutely worth the space and minimal investment and I certain you will not regret it. It made all the difference for me. I am only in the beginning of my baking obsession but I can't imagine how much frustration I was spared by choosing weight over volume early on. Good luck!
daystar,
If you read my above comment back to Lazy Loafer you can see the clouds opened and the sun came through. Thanks to his explaination I get it now.
One day when I was browsing around youtube looking around for rustic loaves I landed on this gentleman video (of whom I have watched some of his other video's for doing pasta etc homemade by himself or mama) this video is of a trip he made to a small mountain town in Sicily called Longhi. Check this very old school like historical old school video of bread making in a old fashioned brick oven. I will post it for the folks on the Brick oven forum as well.
https://www.youtube.com/watch?v=0p5zNpxxgok
A lovely video! Notice how flat the free form loaves were compared to how our looks today.
That technique appears to be more modern, the best information we have from anthropologists is that it just took too much effort to knead enough dough to feed a village every day so its curently believed that Pre-Roman days the bread was not kneaded but rather they used a technique that looks very ,much like Jim Lahey’s No-Knead recipe. What is old is new again
I sing to my loaves as well! LOL
Hi Bob,
I just love that vid and would love to move in with Carolina and make bread with her. Ahhh the simple life. I love that yellow wheat they used. Interesting about the no knead technique and why. I was cursing at my experiment and sometimes I talk or sing to whatever I am making.