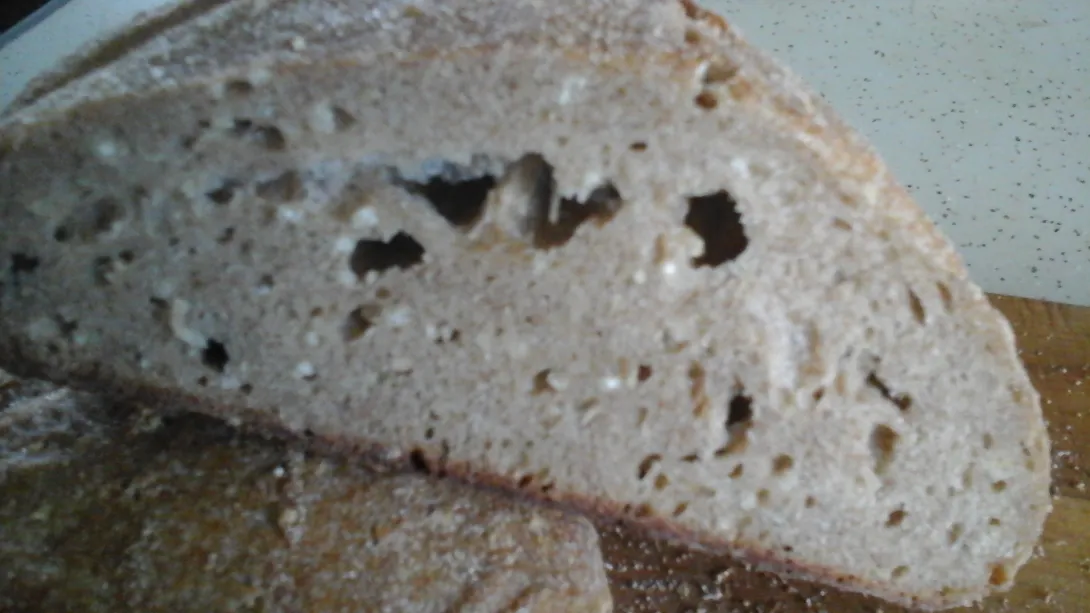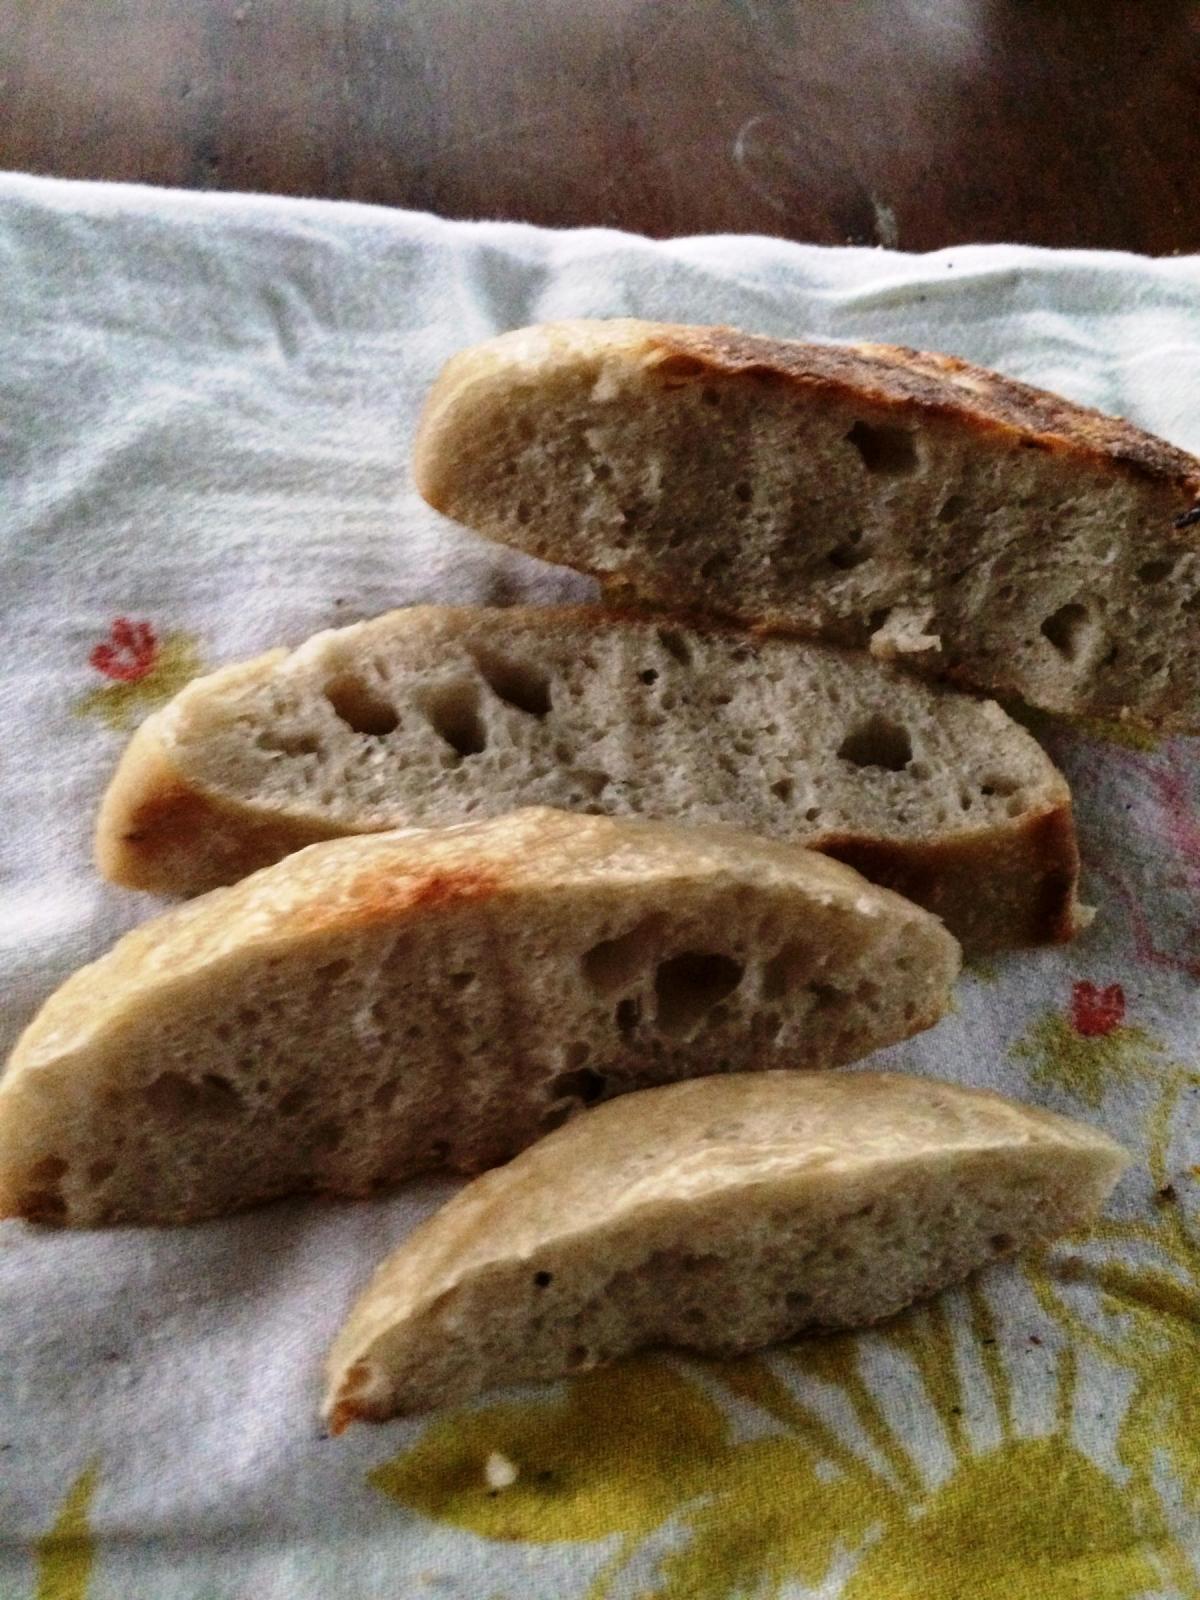
Sorry about the picture really need to get a camera instead of relying on the tablet (any suggestions?).About the bread, it is the fourth loaf using yeast water and this one is entirely leavened with it. I also wanted to have a porridge bread and since millet makes a favorite it was used. The porridge was made by cooking one third cup millet in one half cup milk and one half cup water with a pinch of salt until the liquid was absorbed. The flours were 30g millet,65g Einkorn, 100g Turkey Red wheat, 120g white wheat, and 200g AP. To that 350g yeast water, 100g millet porridge, and 10g salt were added. This was fermented for a couple hours after some S&F and then put in the fridge because it was getting late and I wanted to see what retarding did to a yeast water loaf. Next morning it was warmed allowed to get poofy then preshaped, final shaped into an oval loaf and proofed in a basket. Baked in an oval DO it morphed into a kind of shapeless blob, I think my oval shaping needs work considering the hole pattern and the blobbyness. The loaf is very tasty adding more emphasis to my appreciation of the yeast water method. Now some sourdough pancakes since my starter was feeling neglected and needed to be used.
The wheat in the garden is starting to break ground after about a week but it's supposed to rain most of next week and I hope it does't drown.
Stu
- STUinlouisa's Blog
- Log in or register to post comments
Am I looking at my own bread? A tight crumb with some random holes. How was your crumb? Mine was a bit undercooked and wet. When I saw the picture, I remembered I made a bread that looked like that last year. I don't know too, if it was my shaping or proofing that caused this. This was just a high hydration, white flour, instant yeast loaf with S&F's and overnight retard bulk ferment too but far from all the good and tasty things in your bread.

Full post here.
I just used my phone in taking this picture but it's the same that I use up to now for all of my photos. With practice you will improve too though it's not as versatile as a real camera.
Job
I do think it due to the shaping. The crumb was moist as with most porridge bread but not underdone. The taste is what counts mostly and this one won on that matter.
Stu
some in pots. Worked great! Could't figured out an easy way to thresh them after harvest so just rubbed off what I could , malted and dried it to make some beer.instead of bread.. First time ever for rye,wheat, Kamut, spelt, barley, emmer, einkorn pale ale:-) Not the best or worst beer though. Have fun with the grain and good luck with the threshing. The YW project is coming along well with some tasty bread too.
Happy baking
I've given some thought to threshing. Going to beat it on the ground in a gunny sack until the husk loosens then winnow on a screen in a light breeze to blow the stuff away. Seen that done on video, sounds like a lot of work but anything for the advancement (or is it the rediscovery)of knowledge.
stu
Hi, Stu:
If you're going to make this bread again, you may try the following:
1. hold off you yeast water, don't add ALL of it yet
2. Mix the flours (w/o the porridge) with YW, until the dough is "kneadable"
3. continue to knead and constantly test your dough for gluten development
4. as your dough becomes "strong" enough, add porridge and knead until well incorporated
5. add additional YW gradually and keep kneading, until the dough may not be able to take up anymore liquid. If you're not certain when to stop, ask DBM, he will give you a thorough lecture :-)
6. make a note of the hydration in the dough, record the results of the bake, then make adjustments for future bakes if needed.
Good luck!
P.S. - About the camera: You may not need one. The background of your picture is in focus. All you need to do is move your bread there. The camera that comes with your tablet may be more capable than you think. You just need to play with it, get to know it, and find out its potential, just like you do with yeast water!
I don't make YW bread this way. I treat YW like SD and build a 3 stage levain out if it over 12 hours using YW for the liquid in the ;levain. Sometimes I just do 75 G of YW and 75 g of flour for the levain in one build and when it doubles it is ready to go. Then the rest of the liquid in the dough flour is just water. Sometimes I build a SD levain too and use a SD and YW combo levains that total about the same 15 to 20% pre-pfermented flour
Happy baking
your way and Stu's, depending on...the weather :-)
Actually that is very similar to what actually happened, I started out with a target of 60% hydration and actually added WY until it got to 70% be caused the dough seemed too dry. I started low because porridge in the past seemed to loosen the dough rather dramatically. At that point I ran out of what YA that could be used without reserving some for the continuation of the culture. It was not the most hydrated dough I've handled and was surprised by the big holes the picture doesn't show but they were distributed throughout the loaf, maybe not a bad thing.
So it sounds like I need to do two things increase my YA to more than the pint jar it's now kept in and play with my tablet camera until the pictures improve.
Usually if you tap the object you want the camera to focus on, you will see it snap into focus.
Sometimes it would be nice if these things came with more instructions. But finding your own way can be instructive by itself.
Don't tap the object itself. Tap the screen where the object appears. :)
Will share results when done.
I will be very interested in the results. Hope you have fun doing it.
Work in progress...
Tomorrow...
It's done...