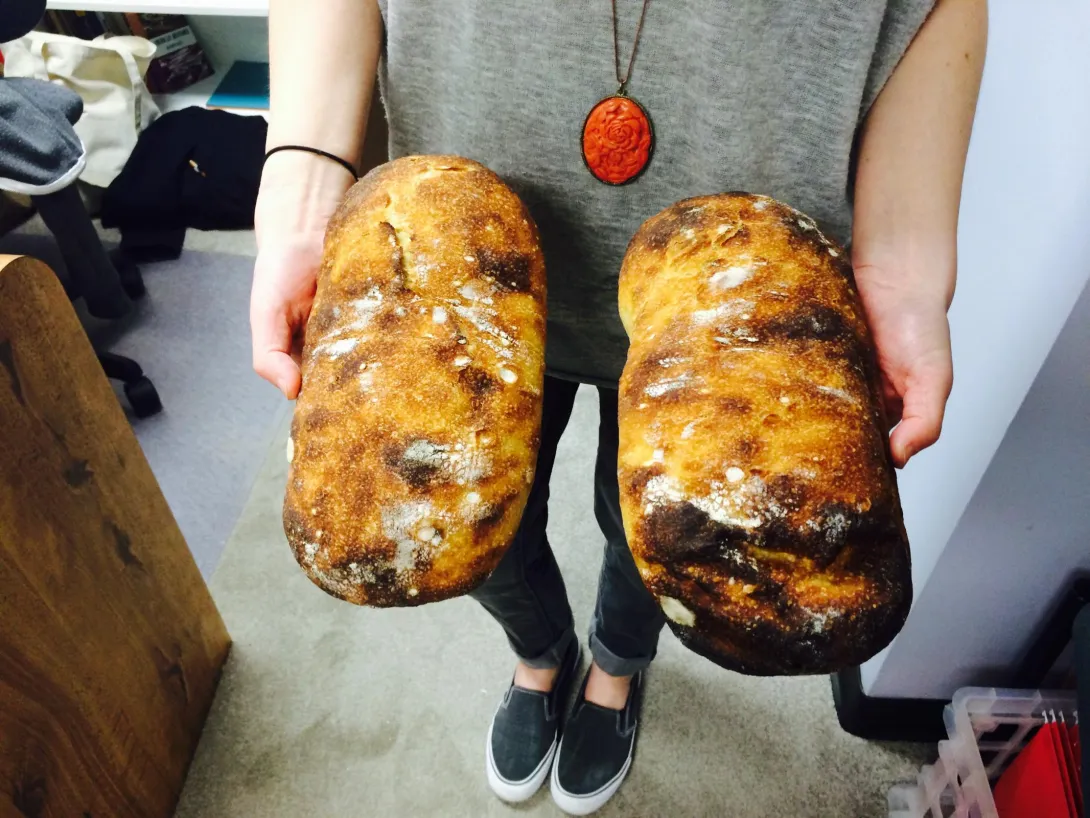
As it turns out, the only bread style that could tear me away from my preoccupation with the intricacies of batard shaping and scoring is a style that shines brightest with the least possible handling. The process of guiding the ciabatta from bulk container to baking stone is uniquely challenging and satisfying.
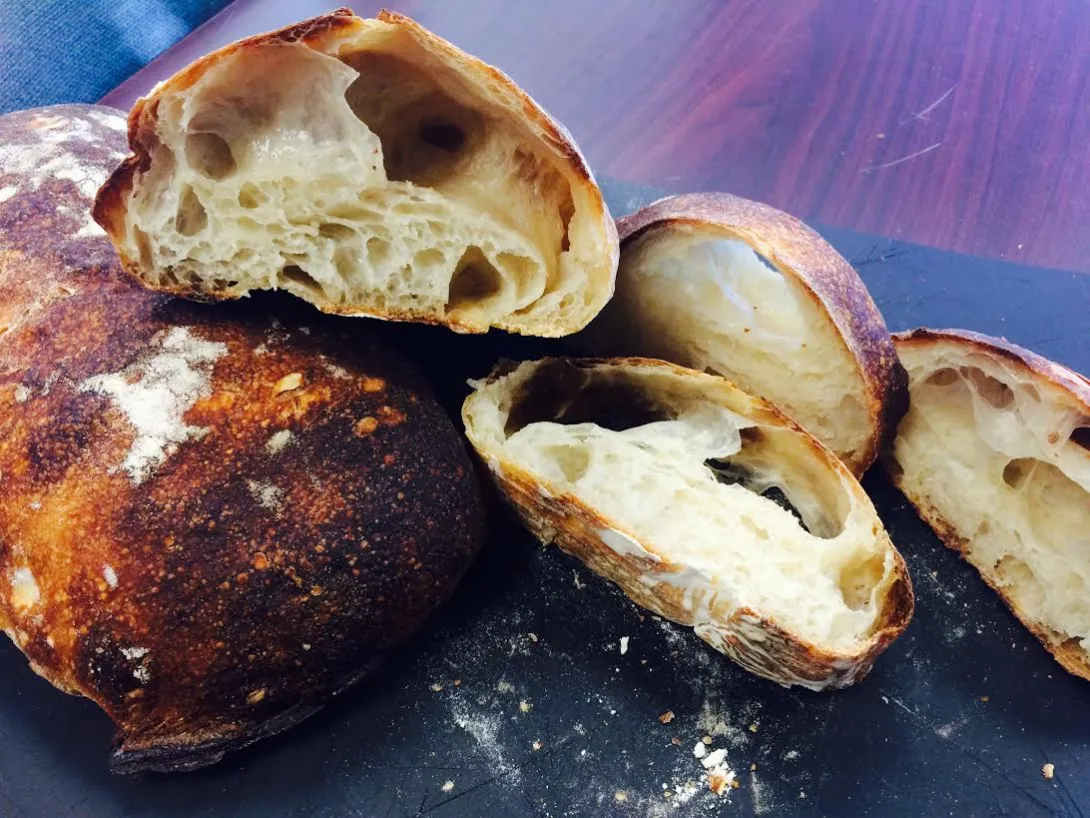
As is the case with most of my bread quests, this one came about through a frustrating mistake. Last Saturday, I had two doughs going for two different friend-bakes. It was really early in the morning, so of course I divided the dough that was meant to be a single boule for Mary. YARGH. I had to think quickly. I remembered txfarmer’s stunning sourdough ciabatta made with her legendary 36-hour recipe, and I was pretty sure she had done nothing but pour, cut, proof, and bake. So that’s what I did. Here’s one of the ciabattas with one of the torpedos I also baked that morning. I got a good ear on that one!
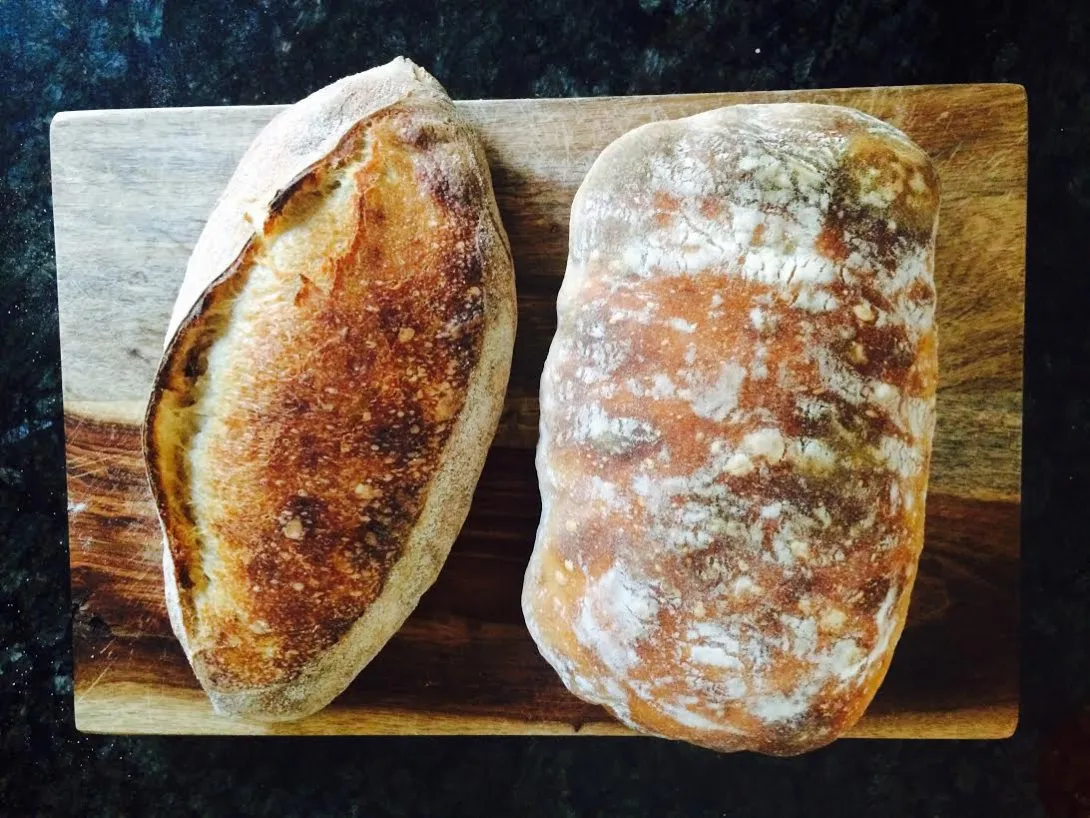
Mary liked the ciabatta, but when I saw a picture of the crumb, I noticed that most of the air rose to the top of the bread, sort of like a huge thick pita. The airiness was all in the cavern between the crumb and the top of the crust. I wasn’t satisfied with that. I had to try again, and soon.
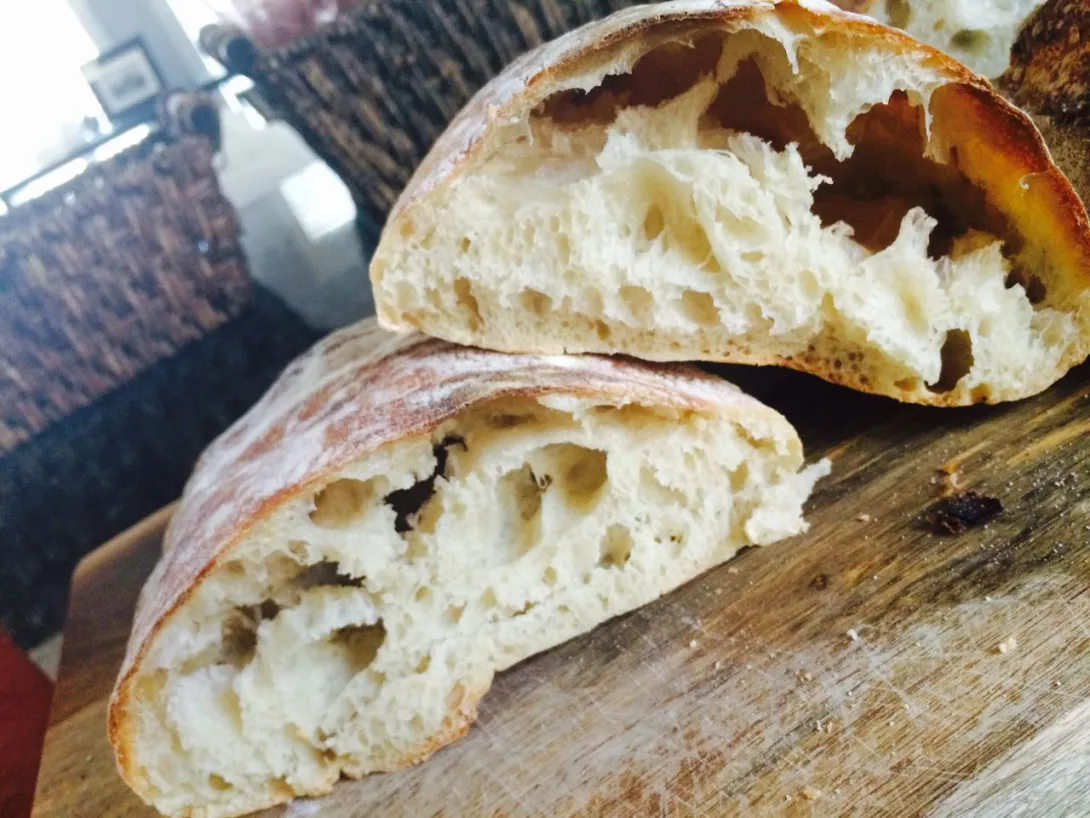
My next attempt was a much more deliberate stab at ciabatta. I liked this formula a lot and, with just slight variations, it’s the one I’ve now baked three times.
Sourdough Ciabatta with Old Dough
Ingredients
500 g AP flour
400 g cool water (water 1)
10-20 g cool water (water 2)
11 g salt
15 g sugar (I’m out of diastatic malt. Darn it!)
100 g old dough (pate fermentee)
Method
Mix together flour and water 1, and autolyse for 2 - 12 hours. I really, really like the long autolyse for ciabatta. I remembered reading somewhere that one of the biggest challenges with ciabatta is building strength with such a high hydration; this is all the more important if you're working by hand, as I am. The long autolyse does wonders for the gluten structure, and it happens while I go about my work day. I don’t know if others experience this, but when I handle dough that’s been autolysed that long, there’s this eerie balance of strength and extensibility.
Sprinkle 10 g of water over the dough. Sprinkle salt and sugar atop the water. Pinch off pieces of old dough into the bowl. Mix the mass together with the pincer method for about 3 minutes.
Slap and fold the dough for 3-4 minutes, until you feel no noticeable pieces of old dough or signs of unincorporated salt. With such a wet dough, this is way easier than I could have imagined.
Stretch-and-fold every 30 minutes for 2.5 hours. I’ve come to approach my stretch-and-folds this way: I perform as many turns as I think the dough “wants.” My criterion there is the point at which I am lifting the whole dough mass off the bowl when I pull up from the corner. This will be anywhere from 4-16 turns, every time.
Rest at room temperature for anywhere from 10-16 hours--until roughly doubled in bulk...but not more than doubled. If anything, go for 80% over 120%. Mine doubled all three times. Each time, it took 12 hours at room temperature.
Optional: Retard for 12-24 more hours in the refrigerator.
To shape, sprinkle flour generously on the surface of the dough, then carefully release it from the sides of the container. Pour onto a well-floured surface, flour-side down.
Rest for 5-10 minutes
Divide into two equal pieces, then very, very, very gently fold each in half. Gently scrunch the dough to roughly 5 x 10 inch loaves. I really like the way the slight scrunch marks look on the final loaves.
Proof for 1.5 hours or until very puffy, but not doubled.
Place a piece of parchment on an upside-down cookie sheet (or other very large smooth surface--my pizza peel isn’t big enough for this task!) Gently transfer the loaves to the parchment, at least 4 inches apart from one another.
Gently slide parchment onto your baking stone.
Bake with steam at 460 for 10 minutes, for 450 without steam for 20 minutes. Turn the loaves after 20 minutes, if possible.
Loaves baked without additional retarding during bulk (24 hours total)
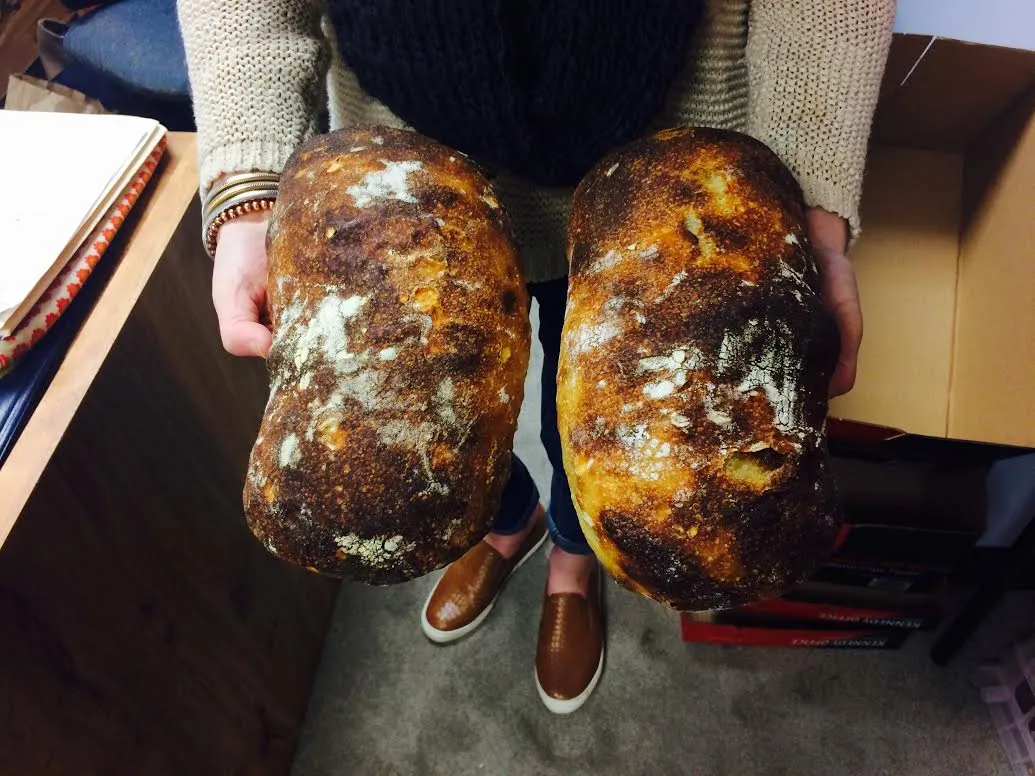
Loaves baked with additional 12-hour retarding during bulk (36 hours total)
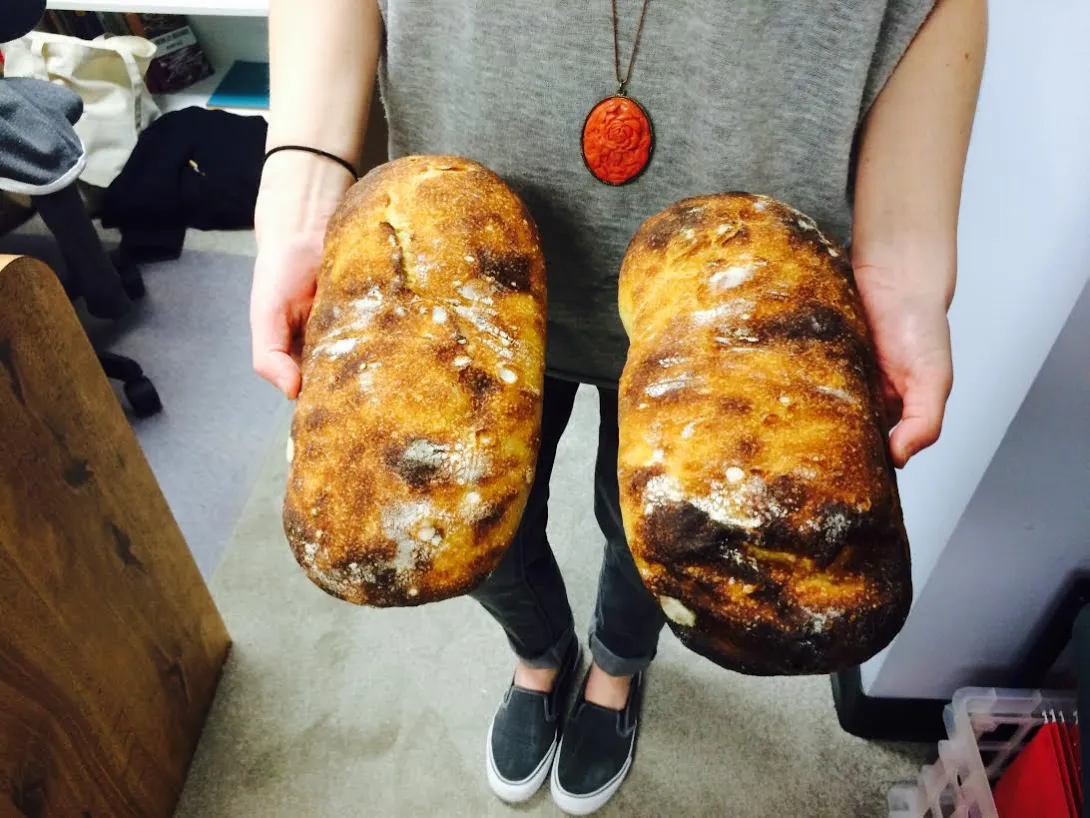
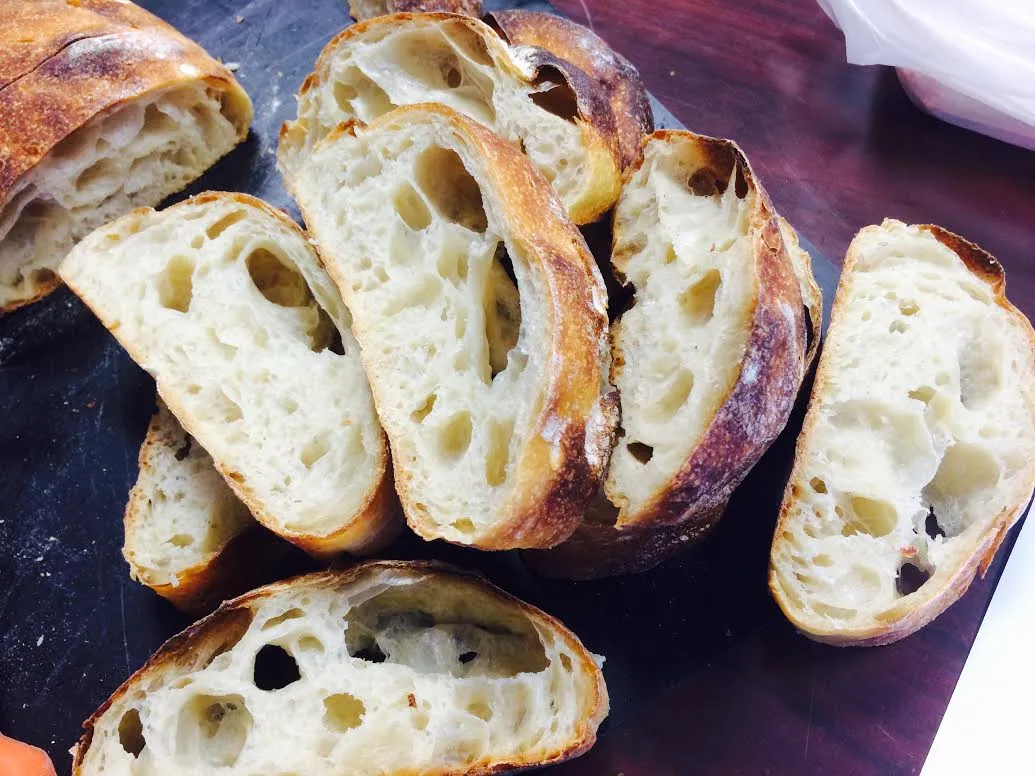
I really like the effect of the single fold on the crumb of ciabatta, but I am, of course, open to a whole lot of shaping experimentation. This recipe yields a tangy, almost traditional San Francisco-style taste -- I think that this is the result of the long, slow room temperature bulk resulting from the use of a very small amount of old dough. I have used up to 400 g of old dough with a new dough of this weight, with great results, it just happens in about 1/3 - 1/4 of the time. I will try this recipe holding everything constant, but changing the amount of old dough. My prediction is that it will yield a milder loaf. The tang is nice, though.
I served one of these with butter and chocolate shavings, the other with olive oil and cracked pepper. I highly recommend both.
Off I go to daydream about fermentation...
--Hannah
- a_warming_trend's Blog
- Log in or register to post comments
They look and have to taste great. Next time,15 minutes before you put them in the oven, flip one of them over so you can compare the crumb for both methods. The trick to getting a uniform open crumb with ciabatta where the large holes don't end upon the top of the loaf is to flip them right before they go in the oven. I know it sounds weird and they should deflate but be gentle using 2dough scrapers from the short end - but it works well for me. Now I'm going to be thrown out of the ciabatta club for telling you this little secret - sad really since I just got it last year, :-)
Happy ciabatta baking
Wow...thanks for the fantastic tip! I am intimidated by it, though; I don't even own two dough scrapers, and I've seen how the dough sticks to the parchment even when I've heavily floured the outside. But I'm way too intrigued not to try it. Out of curiosity...
1) How do you fold yours, and
2) What percent of the bake time do you use steam?
Thanks, as always!
with a flip at the end of proof. The fn part starts at the 6 minute mark and the 'redistribution of bubbles' is around the 7 minute mark.
https://www.youtube.com/watch?v=v24OBsYsR-A
Whoa...that double-scraper flip! It was intense, but it definitely helped me understand how on earth such a flip could be possible at 90% hydration (or more!).
too!
Well done and happy baking
Great images and interesting journey. Thanks for sharing!
Pate Fermentee really isn't used enough! Great looking bake! The blistering is very seductive!
I agree about pate fermentee...it's such an incredibly simple way to leaven a loaf, but I always forget about it. The idea that one could bake a simple loaf every day forever using a tiny bit of the previous loaf...that's pretty great.
If using diastalic malt, would the measurement still be 15g? I usually do not use sugar in my sourdough bread and incorperate it when mixing the dough, or is the sugar neccessary for ciabatta? You can make your own by sprouting soft wheat berries, drying, & grinding.
I know my use of sugar is unorthodox, but the amount i use is never detectable in the final flavor of the loaf. I've found it to be a passable substitute for malt in encouraging fermentation.
It is definitely not necessary, though. And if I were using diastatic malt, I would use 5 g in this recipe.
Thanks for the home-grinding tip! Man, I have so, so much to learn.
Thanks for the measurement on the malt. By the way, when I make my own, soak 1 cup of soft wheat berries over night, sprout in a large jar for 3 days, set them out on a tray to dry, and then use a coffee grinder. If it's not ground enough I'll use my pestal & mortar to make it fine. Store in a jar in the frig. Pretty easy do do and really enhances the flavor of the dough. Make sure you eat some of the freshly sprouted wheat...it's tasty and sweet. I usually don't measure mine when using, just toss some in with the starter and the dough. Good luck!
...is such a cool idea. I will definitely try it. Thank you!
that may help with your malting quest. with some disclaimers
Making Red Rye Malt
http://www.thefreshloaf.com/node/30857/making-white-and-red-malts-sprouted-rye-whole-wheat-and-spelt
Now I sprout the grain In a cheese mould so that I can rinse the sprouts every 12 hours as they sprout to deter fungus and the water drains out the bottom. You want to cover the sprouts so no light gets in over the 4 days of sprouting or they will turn green with chlorophyll. I now dry the grains at 105 F in a dehydrator for the white diastatic malt portion 150 F was too high in the oven and the enzymes could have been damaged.
Happy malting
Your endless experimentation is starting to pull me in directions other than my baguette/batard pursuit! ;)
Great stuff, Hannah. I like a challenge, and 90% hydration certainly seems like a good one! Not to mention that death-defying flip onto the stone! Thanks for the tip, dabrownman.
Great looking batard, too.