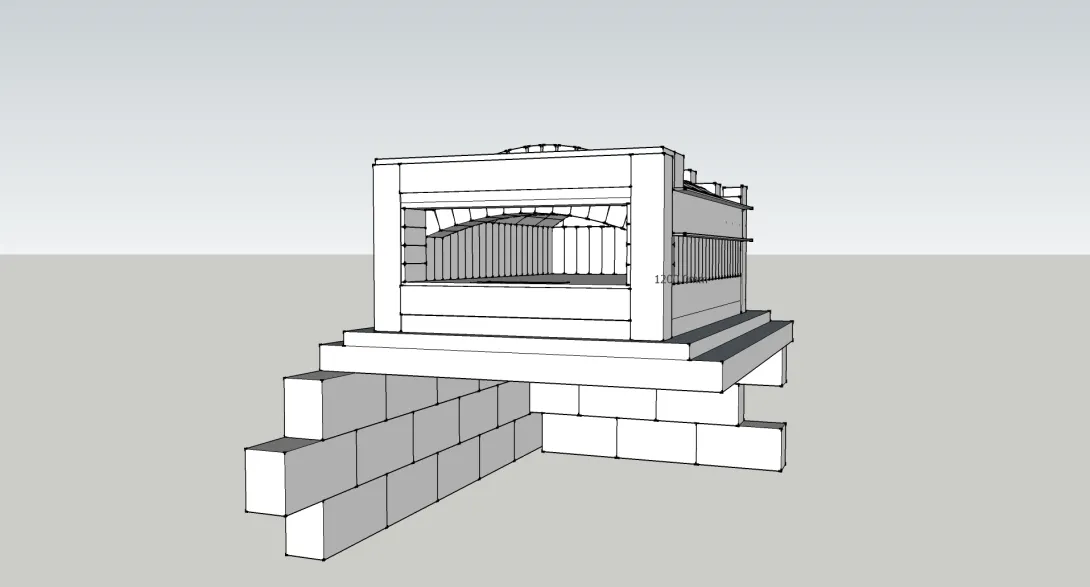
I have been working on a design for a internally, wood fired bread oven for some time. I have a background in Physics and design, so I have been trying hard to optimize the efficiency and other characteristics of the oven. I have just started to build it. I am blogging about the build so that I can shares my learning with others and some chat about baking, bread buns etc also. My blog address is;
http://fireandfocaccia.blogspot.co.uk/
Thanks
matthew
Great! I will definitely keep an eye on your progress.
Love all that foamglas in your pics. Looks like it's coming along! Thanks for sharing! You're gonna LOVE it!! ;)
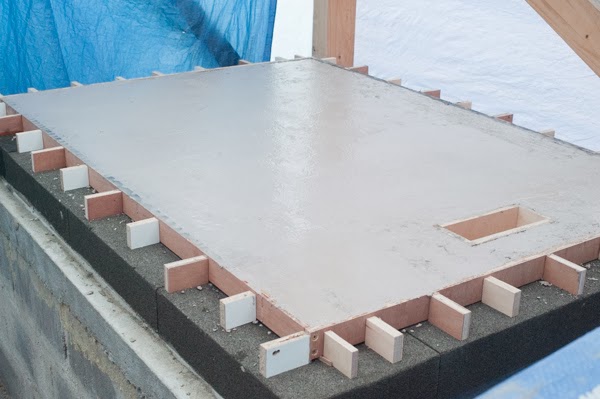
Today we finally got round to pouring the slab of refractory that the hearth bricks will sit on. Well not really poured, more like spread, as the mixture used was quite dry. I have put a quite detailed description of how we did this and why on my blog along with lots of pictures. Here is a quick picture of the finished slab
My blog is now at a proper address: http://blog.fireandfocaccia.com/
Look forward to your comments and feedback.
Matthew
Today I took the formwork and plastic wrap off the hearth slab. I'm quite happy with the results. More details can be seen via my blog link.
After a hard days work, it was time to unwind by laying a few of the hearth bricks for my wood fired oven. It's not exactly the best time of year to be doing this, it is definitely winter here in Poland, dark by 4 PM and about -5 °C by then.
Step by step details and photographs on my blog at: http://blog.fireandfocaccia.com/
I'f I'm doing something wrong, please shout, this is only adobe, so the bricks can come off again if needed.
Matthew
I have more progress to report now after a couple of late nights. Finally the hearth bricks have all been laid. With above freezing temperatures predicted for the next few days, I hoping to keep up the momentum and cast the door lintel.
More details of by build are on my blog http://blog.fireandfocaccia.com/2013/12/building-wood-fired-bread-and-pizza.html
I have started on the door lintel. here are the supports for the door lintel and the reducer arch
More pics and details on by blog post http://blog.fireandfocaccia.com/2013/12/building-wood-fired-bread-and-pizza_30.html
Matthew
some more pics of progress
The lintel mold
Compacting the stainless steel fiber reinforced refractory in thin layer for maximum strength
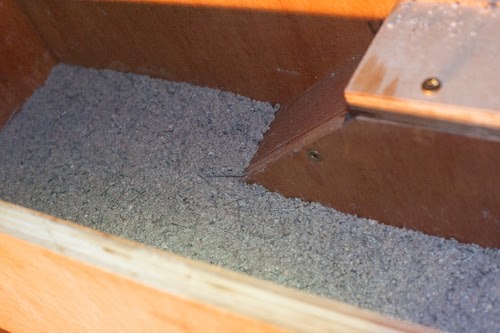
The mold, now full. Can't wait to de-mold tomorrow
Matthew
Lintel now de-molded.
Matthew
more pictures an discussion on my blog - http://blog.fireandfocaccia.com/
Lovely day today. Had a lot of fun welding the steel oven strapping. The steel frame is designed to prevent the low parabolic arch from pushing out the soldier bricks.
Matthew
Have been really busy this weekend working on the oven. Glad to have made some real progress. All the soldier bricks are now set and will be given a week while I'm away for work for the mortar to go off before starting on the brick dome.
I can almost smell the bread cooking now!
As always the full story and detailed pictures on my in by blog post. http://blog.fireandfocaccia.com/2014/01/building-wood-fired-brad-and-pizza-oven.html
Matthew
Its been some time since I had time to work on the oven , but today I finally found time to make the formwork that will be used to support the dome during construction.
I have recorded my method in a blog post here
It was good to get into the workshop for a change.
Matthew
Have made some more progress this week. Got to race the cold weather coming. I will need to have a heater under the dome before the mortar freezes in a couple of days.
Full details of the processes followed on my blog here
Matthew
Working flat out now in the little time I have in the evenings, but finally got the big dome completed today.
Full story as usual is in a blog post here
Matthew
Finished the last of the brickwork last night after posting my previous update.
all the pics and story here
Matthew
Just finished the first curing fire in my oven. Have been heating the brickwork with an electric heater all week above 30 C so it was time to start increasing the fire. I'm staying below the protocol provided by the refractory manufacturer so I'm hoping for not too much movement or cracking. None spotted so far, but much higher temperatures to come.
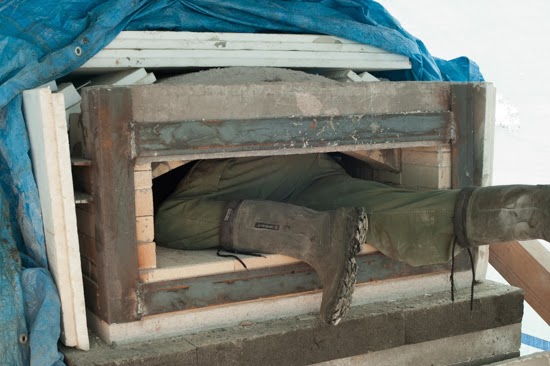
This just got very exciting.
Here is the traditional 'stuck in the oven' picture
Lots of detail and some really cool pictures of this evenings firing on my blog here.
Matthew
finished the chimney transition and have been constantly curing the oven. accidently set a much larger fire than I had intended for curing.. oops!
full story on my blog here
Matthew
Finally got to cook in our oven today. Lots of work had to be completed first. The full story and lots of pictures in my blog post here
Thanks
Matthew
I have been baking my sourdough every week for a couple of years, but this week was the first time I have done it in a wood fired bread oven. Although my oven is far from finished I could not resist- I have also never baked more than about 3 Kg of dough in one day , so i thought it was about time ti try a bigger batch. I attempted to do a test bake followed by an 8 Kg bake to get to know the oven. Conclusion are that I need proper insulation and a door. the temperature declined too fast, but i did manage 3 batches in the end.
i have written more details of the experiment in a blog post here. I also detail how my standard weekly bake dough is made.
Thanks
Matthew
A little bit more work done on the oven today after not having any time for a couple of weeks. Time to experiment with the expansion gap / gasket at the rear wall/arch.
This may not be the last time I re-visit this bit of the oven design I think and I probably need to find a more substantial gasket material for this approach to work.
I have more details in the blog post here
Matthew
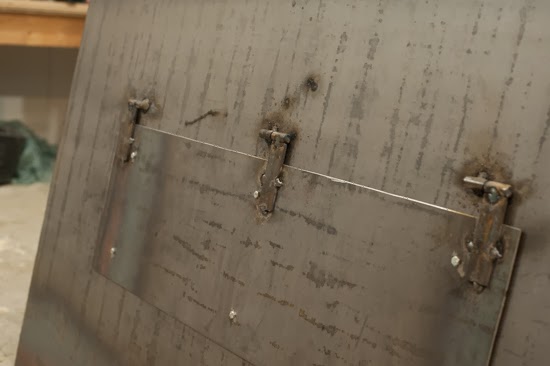
started making the exterior of the oven this evening. Got some of the panels cut and have tack welded the door together. Still needs lots of work before it will look and work ok, but its good to have started.
Matthew
Just finished tack welding the oven walls. Its not going to be the best looking oven, but It should have more than enough insulation. Should get the insulation finished tomorrow ready for some fire / pizzas and then a bread bake Sunday and monday. All the details of how the cladding and insulation are fitted in my blog post here.
thanks
Matthew
I have just been testing out the new wood fired oven to see how it is performing. Very happy as the results are far better than I have managed to achieve in a domestic oven. Quick picture form my blog although I have not yet written up anything about the recipe. Will have to do that once I get time and oven is working properly. Still some refinements to do around the door area.
Matthew
Today I have been experimenting with improving the air flow for firing the oven with the addition of a firing door. This aims to optimise the door shape while burning wood in the oven.
Full discussion of why and how on my blog here.
Thanks
Matthew
Hi Nicole, If you are referring to the firing door. This is just a temporary setup, the finished one will have spring loaded pins that hold it in place. It is only used for a first few mins of firing to get things going. After a couple of mins the flue dampers are closed half way and the main insulated door is left just partially open to reduce the rate of burn so not to heat the oven up too quickly.
Matthew
Hi Beretta,
The spring loaded pins were going to be used on the firing door, but I have not really been using this door and instead i have been restricting the air flow into the oven by having the main door closed during firing and having air go into the oven via the ash slot. I partially cover the ash slot with a sheet of steel to control the amount of air. this has work very well and has been more successful at controlling the rate at which a heat the oven. With a longer slower burn with the main door closed, I am getting through much less wood as more of the heat is being retained in the oven rather than going up the flue.
Thanks
Matthew
I sure wish you lived closer to me. I'd beg / pay very well for you to put one in my backyard.
Hi Patman,
I was not all that hard to build, practice for a bigger one I hope. I can highly recommend having one of these in your garden if you have the space.
Thanks
Matthew
The oven is still not finished, it still needs a roof. I will eventually get chance to make some more progress, but for now my job is taking up too much time. The little time I have has been spent trying to improving the quality of a couple of bread recipes. The results I am getting are certainly far better than what I have managed to achieve with a domestic oven. I have a long way to go to get my results consistent, but I am slowly learning how to fire the oven to the right temperature and to deal with changes to fermentation as the weather and temperature change.
Matthew