After a week full of "disaster breads", I am happy to report that I was *finally* able to produce a few loaves that didn't make me laugh when they came out of the oven :) So now I will post some photos as evidence so that when I create my next major flop or paperweight, I can come back and be inspired to try, try again...
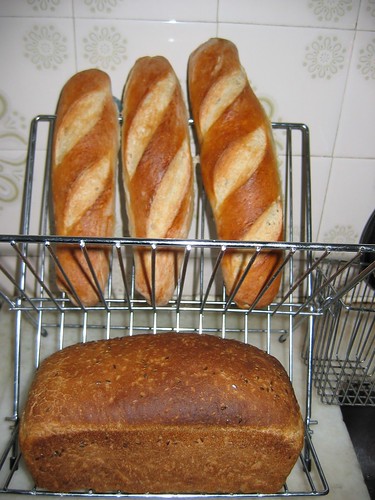
***The final results of my baking day:
 -
-
***One of the secrets to my newfound ability to rise dough again:
-
-
***One of the secrets to my newfound ability to rise dough again:
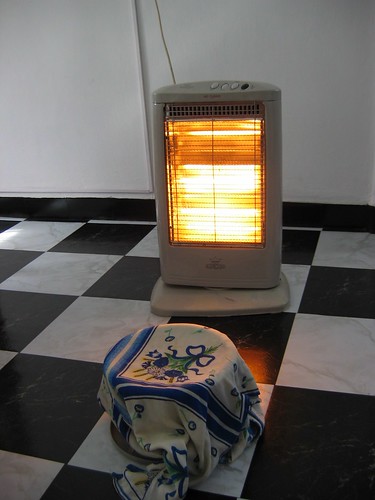 Our apartment is very cold right now (no central heating here), but for some reason I thought my bread baking could continue as normal as long as I just let the dough rise for longer periods of time...apparently not. If you enjoy reading about and laughing at baking misadventures, you can see my previous blog entries for descriptive and *gloopy* & *rock-hard*pictoral evidence of my recent streak of jaw-challenging and vertically-challenged loaves :)
-
My mother-in-law came for a visit yesterday, and when I showed her this photo of my dough rising, she laughed and said she used to rise bread in a similar way...but she actually created a little warm "rising tent" by putting a large piece of fabric over the kitchen table, then putting the heater and the dough under that. Maybe I will try that next time...maybe I will sit under the tent too!!!
-
I was SO happy to see (and taste) these results again...finally! Bring on the cold!!! :)
-
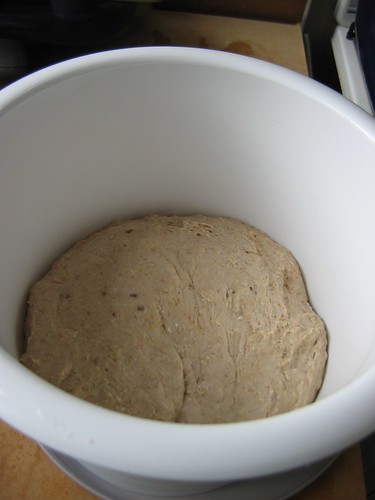
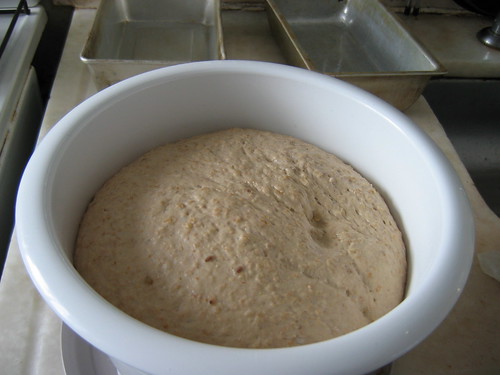
***Whole wheat/flax seed/oatmeal dough
*Before...
 *After (it rose!!!)...
 -
-
***Baguette dough
*It rose too!!! (I didn't put this dough by the heater because I didn't want it to rise too quickly...I just put it on my kitchen counter while I was baking the other loaf so the room was a bit warmer than usual).
-
-
***Baguette dough
*It rose too!!! (I didn't put this dough by the heater because I didn't want it to rise too quickly...I just put it on my kitchen counter while I was baking the other loaf so the room was a bit warmer than usual).
 -
-
-
That's all for now...this is one *much happier* baker signing off for now :)
-
-
-
That's all for now...this is one *much happier* baker signing off for now :)
 -
-
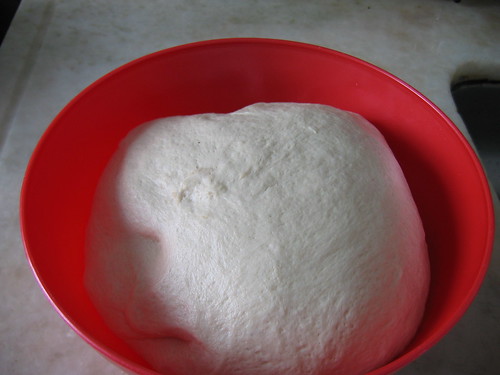
***One of the secrets to my newfound ability to rise dough again:
-
-
***One of the secrets to my newfound ability to rise dough again:
 Our apartment is very cold right now (no central heating here), but for some reason I thought my bread baking could continue as normal as long as I just let the dough rise for longer periods of time...apparently not. If you enjoy reading about and laughing at baking misadventures, you can see my previous blog entries for descriptive and *gloopy* & *rock-hard*pictoral evidence of my recent streak of jaw-challenging and vertically-challenged loaves :)
-
My mother-in-law came for a visit yesterday, and when I showed her this photo of my dough rising, she laughed and said she used to rise bread in a similar way...but she actually created a little warm "rising tent" by putting a large piece of fabric over the kitchen table, then putting the heater and the dough under that. Maybe I will try that next time...maybe I will sit under the tent too!!!
-
I was SO happy to see (and taste) these results again...finally! Bring on the cold!!! :)
-
***Whole wheat/flax seed/oatmeal dough
*Before...
 *After (it rose!!!)...
 -
-
***Baguette dough
*It rose too!!! (I didn't put this dough by the heater because I didn't want it to rise too quickly...I just put it on my kitchen counter while I was baking the other loaf so the room was a bit warmer than usual).
-
-
***Baguette dough
*It rose too!!! (I didn't put this dough by the heater because I didn't want it to rise too quickly...I just put it on my kitchen counter while I was baking the other loaf so the room was a bit warmer than usual).
 -
-
-
That's all for now...this is one *much happier* baker signing off for now :)
-
-
-
That's all for now...this is one *much happier* baker signing off for now :)- rmk129's Blog
- Log in or register to post comments
The baguettes look gorgeous! Congrats on finding a way to get your dough to rise in the cold.
I face the same problem in the winter here in New England, when my house is usually a chilly 60 degrees or so. I've taken to putting my dough on top of an upturned bowl inside a cooler (the kind you'd bring on a picnic). Then I pour a cup of hot water into the bottom.
It keeps the interior nice and moist, though it can get too hot in there if I'm not careful. I use my instant read thermometer to keep it at about 80 degrees for yeast breads.
Sourdough, though, seems to like the cold (all that time in the fridge, I suppose), so I just wait it out on the counter.
Congrats again! I love the photo of your dough bowl in front of the space heater ....
- Log in or register to post comments
Thanks JMonkey :) I love your cooler idea! A much more energy-efficient alternative...so now I will be keeping my eyes open for coolers, although it isn't really the season for coolers here at this moment ;)
- Log in or register to post comments
Hope it works for you. I stopped using it for sourdough, because unless I let the sourdough rise at 75 degrees or less, there's just no "sour" there. As far as regulating the temperature goes, I just open the lid for half a minute or so and then close it. That usually takes the temperature down 5-10 degrees. The instant read thermometer helps -- I've got one with a long metalic string, so I can put the thermometer inside the cooler and get a reading while it's still closed. Here's a link to the thermometer I use. Best bread gear purchase I ever made, after my heathkit.
- Log in or register to post comments
Oh please, please please, tell me what you did and how many you got in the oven at one time. Did you use egg white on your loaves? My dough is ready to shape. Got a recipe? They look fantastic. My hubby asked for Kaiser rolls today and they are pretty much baguettes in small round form. I put my dough on the scale when I finished kneeding and it came out to 780gms.
Steam? Mini ovens of different kitchens....Mini Oven
- Log in or register to post comments
Hi Mini Oven,
Here are the answers to your questions :)
*My "secret" recipe and shaping instructions can be found here: Baguettes from the Hearth
-This was the recipe that got me started on this whole bread-making thing...vrey dangerous :) I follow the instructions very closely although I have now incorporated quite a few shortcuts. I think the fold and seal part it especially important to the final outcome...I try to get the "skin" of the dough as tight as possible during this stage, even if it means doing that step 3 or 4 times.
*Yes, I "brush" with egg whites beaten with a little bit of water...I actually soak a paper towel in the mixture and pass that over the dough since I don't have a brush.
*I usually only cook 2 mini-baguettes at a time...otherwise I find that I have to squish them together too much and the sides end up touching each other and sometimes undercooking. However, I was VERY happy to happen across a cheap perforated mini-baguette pan in a bazaar the other day ("molde para mini baguettes")...perfect for the ovens here! The sides of the baguettes still sometimes end up touching, but they seem to cook through, so I just separate them by hand afterwards and they still look fine.Yay!!! I can cook 3 mini-baguettes at one time now!!!
*Steam: I have a small pan (14x25cm) that I fill halfway with water and put on the oven floor while I am preheating. I put the oven on its highest heat (no idea what temperature that is), and when the water has completely evaporated, I put the baguettes in (rack on lowest level, ~3cm above the pan) and pour 1 large cup of hot water in the pan and close the door. This provides a nice initial blast of steam, and seems to continue steaming for about 10 minutes. This is the point at which I open the oven and move the rack up to the next level (5cm higher) so the bottoms don't burn and the tops brown nicely.
*I don't have a kitchen scale yet, so I have no idea what to tell you about your 780 grams of dough ;)
*Hope these mini-oven tips are useful for you! Happy baking :)
- Log in or register to post comments
rmk129 Thanks for the recipe and tips. Yesterday I tried with 1/2 cup of powdered milk and a little oil added to recipe and got what I've been looking for. Totally browned the first batch but the second batch took total of 12 minutes and on the middle shelf, 200°c. Those cute round shapes went up without steam and were as big as croquett balls! My hubby came home for lunch and ate them all. Today I'm doubling the recipe so I'm not baking every day. The nice thing about a mini oven is moving it around, In winter it doubled as a space heater, now in summer, I've put it outside on the terrace. (Did you find my scissors tips? They are somewhere. Doesn't look like you need them though.)
Since your're having a second winter, here's wishing you warm thoughts and sunshine. :) Mini Oven
- Log in or register to post comments
Wow! With all these helpful comments, my wish list is growing every day!!!
Microwave...picnic cooler...thermometer-timer (coolest gadget ever--recommended by JMonkey!)...baking stone & peel...bench scraper...kitchen scale... Good thing I am not very "geographically stable" yet, or else my kitchen cupboards would be overflowing in no time!
Thanks for all the tips :)
- Log in or register to post comments
In the United States, getting a Bakers Catalogue catalog (I give them to friends I want to torment) or going to a Viking store is a very dangerous thing. In reality you can create great bread with a large mixing bowl, a spoon, and a stone of some sort (even a $14.95 one from Target), but if you like toys you can spend a LOT of money on this stuff ;-)
sPh
- Log in or register to post comments
Since I'm on the move every few years, and can't lug a lot of stuff around, most everything doubles as something else. We don't have central heat here either and most of Febuary, I was curled up in my comforter. I tucked the rising bread into a large garbage bag, tied it and tucked it under the comforter with me and my book. A Cooler is handy when transporting vegetables and salads in summer and winter (if you have a long way to go to shop,) and like you pointed out, seasonally available. I've never put bread in it, my bowls don't always fit. Baking stone? ...never needed one. The flour or oatmeal I sprinkle on baking sheet to prevent sticking, normally goes into the next loaf or used to thicken soup, sauces. Oven thermometer? Maybe a little stand up one with a hook is not bad for a gas oven. I once had a gas mini oven made from recycled aluminum 7Up cans, it balanced on tuna cans on a gas burner and was hard to control the temperature without it. When I opened the door, the glass weighed more than the whole oven and it would fall forward. Baking was a balancing act.
My Cooler was my refrigerator! With a new ice block every 5 days. We were on the beach, quite a bit west of Mt. Merapi, Indo. There It was always a good idea to sift the flour and remove added protein before mixing.
My latest discovery is walnuts. China has all kinds of them, cheap too! I didn't have a recipe with me and one that I googled stated the nuts must be roasted before putting into banana bread. Wow! what a difference! 10 min at 150°c before starting to mix works out well. I normally grate nuts into a light flour for baking. No grater here and I'm not into bloody knuckes. Whole walnut and rye bread served with sweet butter and Blue cheese. Heaven on earth! Next time in the big city I'll have to find rye flour. Mini Oven
- Log in or register to post comments
> There It was always a good idea to sift
> the flour and remove added protein before
> mixing.
Having grown up in rural Tennessee, my mother always said "weevils add crunch AND protein". But I imagine the bugs in Indonesia would be a little bit larger and perhaps not so healthy to eat!
sPH
- Log in or register to post comments
Actually not too many and they were small, but the threads and hair and one time a nail, they sort of bothered me. Once I found a 4 inch needle in a pillow. I had opened it to make it smaller. "Live and learn" I say. Well I had doubled my recipe and reduced the sugar to one teaspoon per cup of water. The men dropped by and ate everything so what's a kitchen maid to do? At least they brought cold beer and parma schinken. We got onto the subject of bread (naturally) and soon, I was giving lessons. In one hour there was bread rising and one man smarter. It was the poolish recipe without the poolish. Put it in the refrigerator overnight and took it out 12 hours later. Punched it down and shaped one cold loaf. Parked it over hot water and let it rise, eventually it made it to the oven in a cake pan. Cut a flower in the top with my scissors. Makes good cheese toast too. Guess I better get started on the next loaf, world cup soccer! Mini Oven
- Log in or register to post comments