The Fresh Loaf

A Community of Amateur Bakers and Artisan Bread Enthusiasts.

Most bookmarked

Mini Oven's picture
Mini Oven

Mini's 100% Dark Rye & Chia Recipe ...Love at 104% hydration


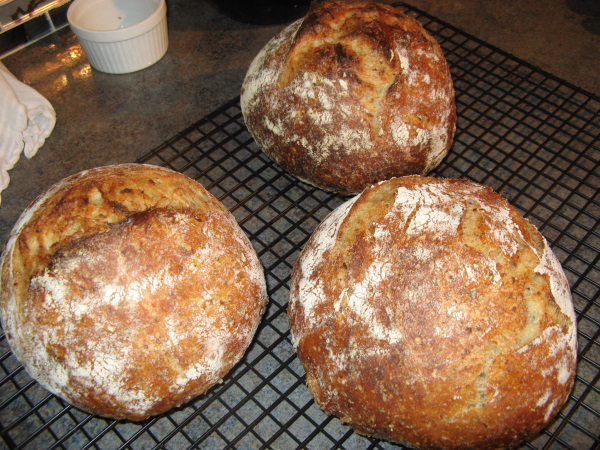
This rye recipe is my Chilean version of my favorite rye ratio recipe using a rye sourdough starter and the addition of chia seeds that increase the dough hydration yet maintain a nice shape.  Use a large Dutch oven for a free form shape. 

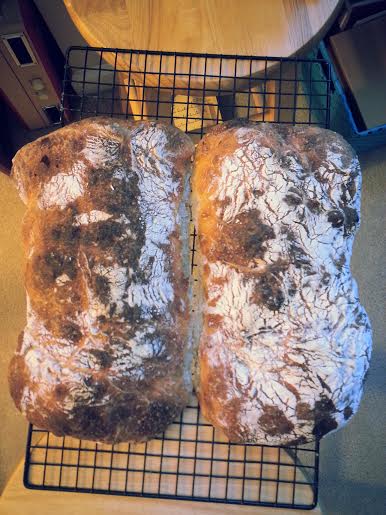
I designed this recipe for one narrow tapered loaf pan:   cm: 30 x 11 x 7.5   or   inches: 11 3/4 x 4 1/4 x 3 

It is my basic rye recipe (starter:water:flour) (1: 3.5 : 4.16) plus 6.1% chia (on total flour weight including flour in the starter) plus 4 times the chia weight in water added to the dough.  Also added nuts, seeds and 90g to 100g arbitrarily selected moist rye altus (day old bread.)


DARK RYE & CHIA BREAD

The wet:

  • 175g vigorous peaking rye starter  100% hydration
  •  90g  moist rye altus 
  • 812g  water  24°C   (75°F) 

        1077g

The dry:

  • 728g rye flour  (dark rye 14% protein)
  •  50g chia seeds
  •  17g salt   (2%)  
  •  17g bread spice  (2%)  (toasted crushed mix: coriander, fennel, caraway seed)
  •  17g toasted sesame seed  (2%)

         829g    (total dough so far 1906g) 

           (optional:)

  •     4g black pepper  (0.46%)
  • 100g broken walnuts
  • 150g chopped Araucaria Pine nuts   
  • sunflower seeds to line bottom and/or sides of buttered form 


Method:

Inoculate (1:5 to 1:10) sourdough starter soon enough to have a vigorous starter when ready to mix up dough.  

Plan to bake in 3 hours from the time you start combining liquids with the flour to make dough.  

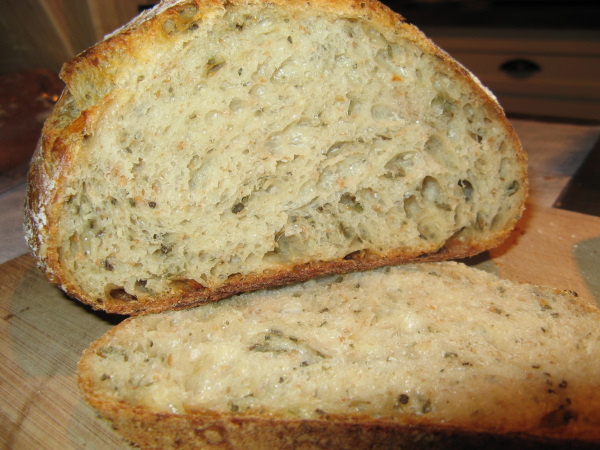
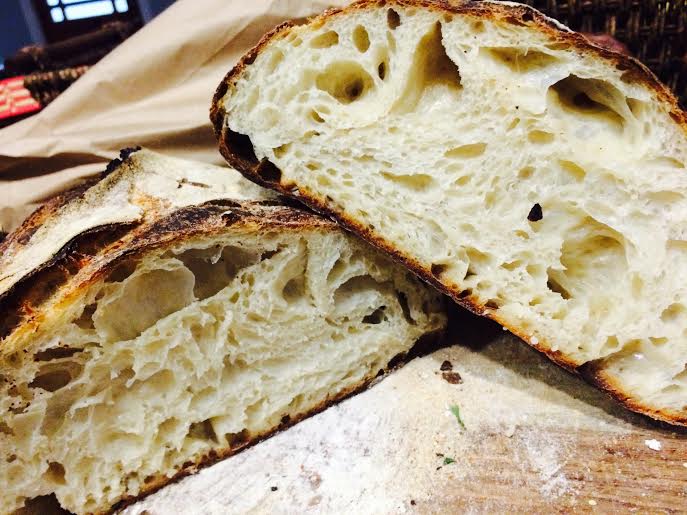
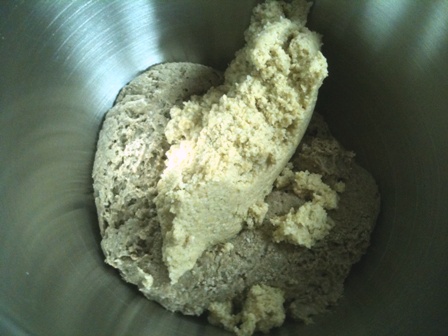
Combine liquids and break apart floating altus.   Stir dry ingredients and add to liquids stirring until all dry flour is moistened.  Scrape down sides of bowl, cover, let stand 2 hours.  No kneading ever!  Dough will stiffen as it rests.   (Another order for combining is to add the chia and spices to the wet ingredients and allow to swell 15 minutes before adding flour, salt and nuts.  Not sure if it makes a difference but if you find you're getting a gummy crumb, let the chia soak in the water and swell before adding the flour.)

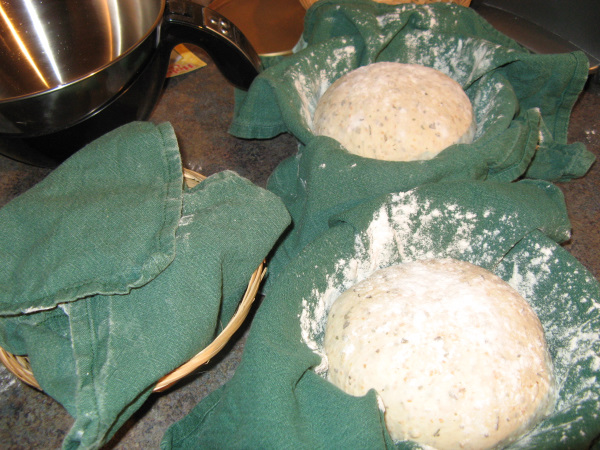
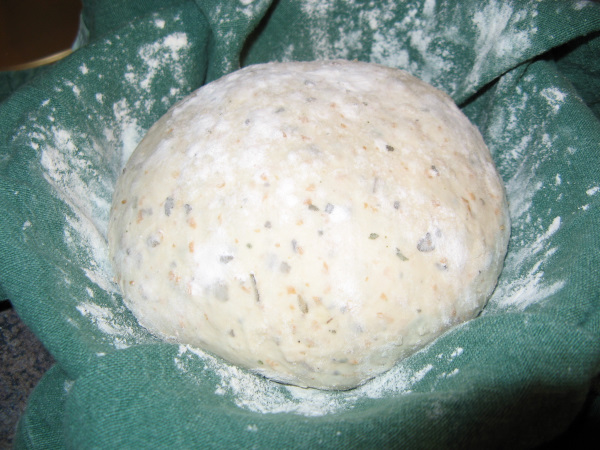
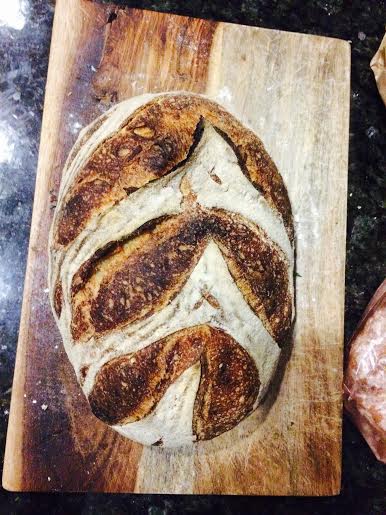
Smear bread pan with butter and dust/coat with raw seeds, crumbs or flour.  Spoon or plop dough (trying not to trap air) into form or floured banneton.  (The recipe lends itself well to free form in a large Dutch Oven.)  Use a wet spatula or wet fingers & hands to shape dough.  Pile the dough up higher in the center for a nice rising shape.  Sprinkle with seeds and press lightly into dough while making a nice dome shape.  

Let rise about an hour.  Meanwhile heat oven 200°C to turn down to 185°C (365°F) 15 minutes into the bake.  Make a cover for the loaf from a double layer of alufoil or flip an identical pan over the top.  Leave room for loaf expansion.  

When ready dock,  take a wet toothpick and poke about one hole every inch, all over, toothpick deep.  Wait a few minutes and smoothen over with a wet spatula.  Dough is ready to dock when you see the dough surface threatening to release trapped gasses under the surface.  One or two little pin hole bubbles is enough to start docking.

Spray or rinse the inside of foil or empty bread pan cover with water and cover the dough to trap steam during the bake.   Bake for about 40 minutes on the lowest rack, then rotate and remove the protective cover to brown the loaf top.  Finish the loaf in another 20-30 min for a rough total of one hour baking time.  Inside temp should reach 94°C, sound hollow, but I tend to shoot for 96°C or 205°F.   Cool on rack.   Wrap when cold.  

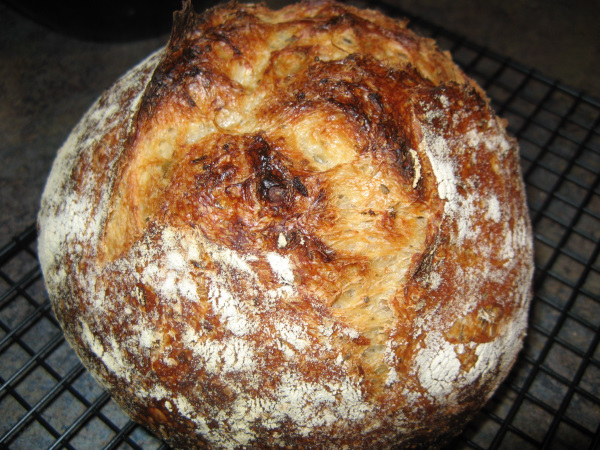
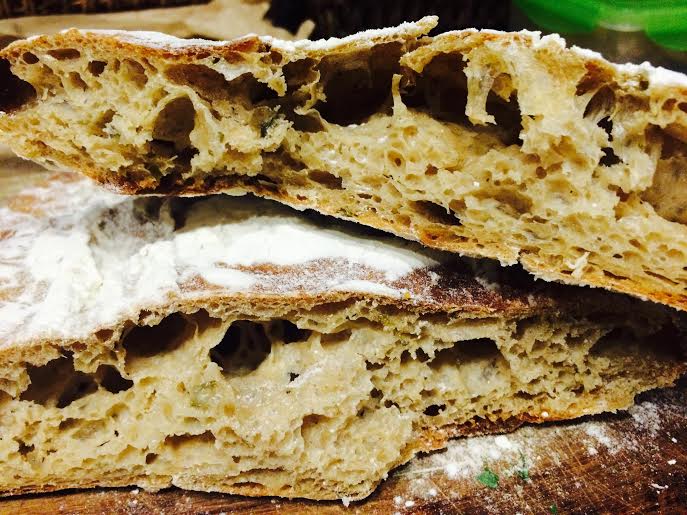
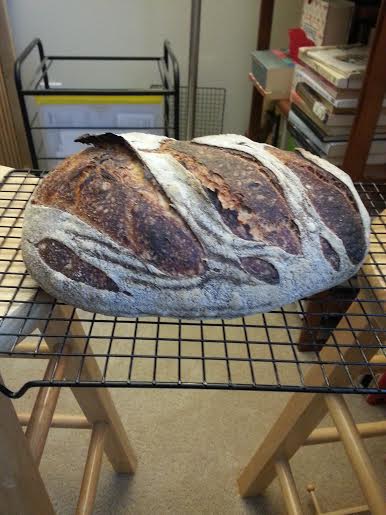
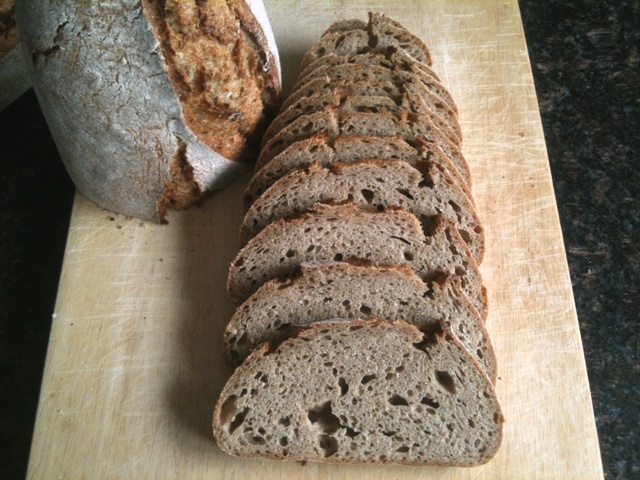
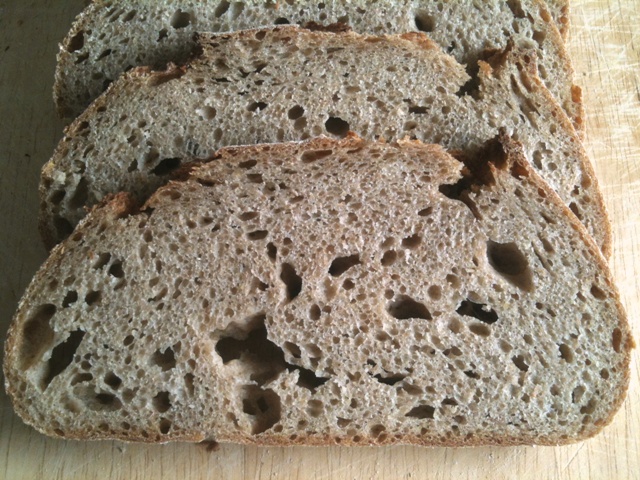
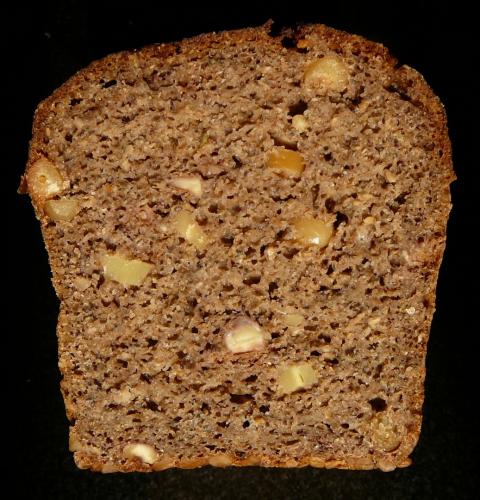
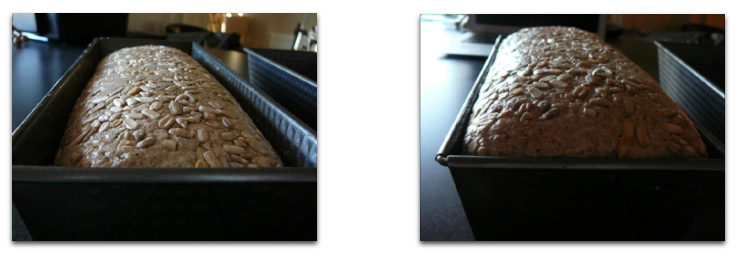
Here is the cold loaf (after 12 days, last 6 in the fridge) and you can see how much the dough rose. The shaped dough would have been rounded under the rim.   There are no nuts in this loaf other than what came from frozen stored altus.

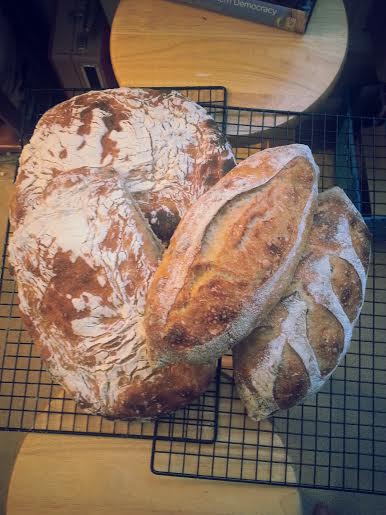
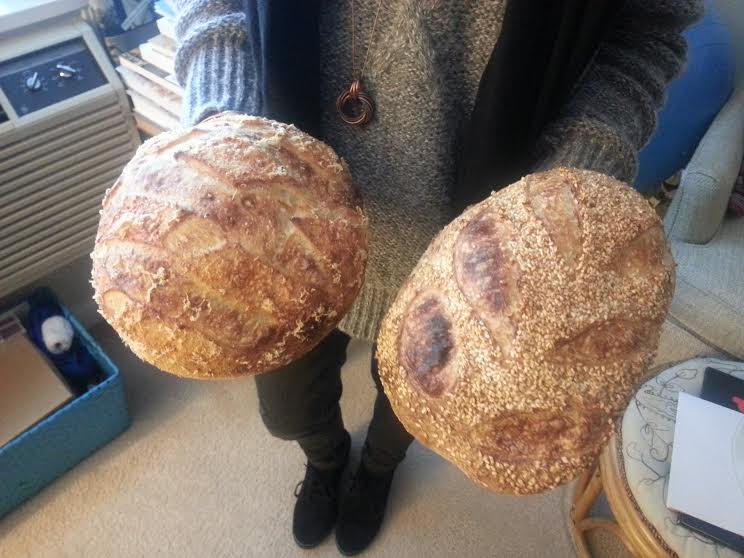
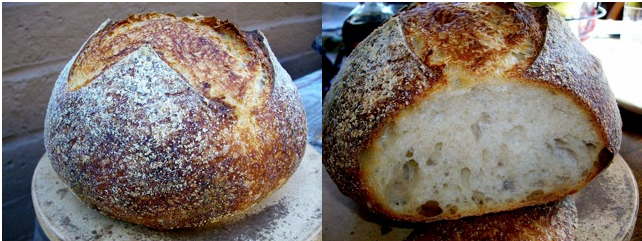
Free form using floured rice sieve:           Oops, I spy a few docking holes!  

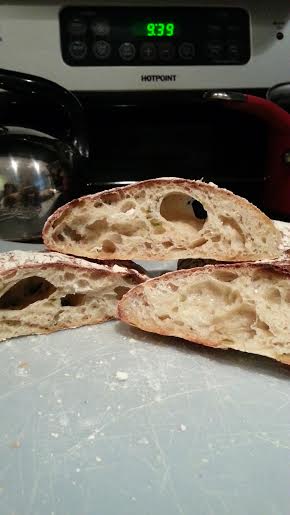
Have fun,  I do!    Really proud of that one!   


Lazy Loafer's picture
Lazy Loafer

Sage & Onion Levain

This is one of my favourite breads at this time of year. It smells just like stuffing and makes the best leftover turkey sandwiches! It's also great with turkey soup. This is a naturally leavened bread made with fresh, ripe sourdough starter so you can only imagine the smell permeating my kitchen when this bakes - sourdough bread with sage and onions! I usually bake the bread in the Italian bread pans in long loaves, but wanted to see how it turned out baked in the cast iron pots. In a word, it turned out good!

I used 100% hydration bread flour starter, fed and left to ripen overnight. The basic ingredient list is pretty simple:

  • 85% bread flour (I use Rogers Silver Star bread flour)
  • 15% whole wheat flour
  • 70% water (warmed to around 90 degrees)
  • 2% sea salt
  • 25% starter

Note that the overall hydration is higher than 70% as I just calculate the percentage of starter as a single ingredient, without breaking it down into flour and water percentages. As the starter is 100% hydration this affects the overall dough hydration. It works, at any rate.

The added ingredients are onion and sage. For the onion, I rehydrate dehydrated minced onion in an equal amount of boiling water and let it sit until cool. Use as much as you want (probably around a quarter cup of rehydrated onion per 750 gram loaf). The sage is sometimes chopped fresh sage from my garden, and sometimes rubbed dried sage from the bulk store, depending on the season.

Mix the flours, water and starter well and let sit for 30 minutes or so. Add salt, onion and sage and incorporate well, using whatever method suits you best. I sometimes do this in my stand mixer, and sometimes use Ken Forkish's method (folding and pincering; see https://www.youtube.com/watch?v=HoY7CPw0E1s).

I stretch and fold the dough three or four times over the next couple of hours, and the rest varies depending on what kind of time I have available or what my schedule is. This last batch was fermented at room temperature for about four hours, then in the fridge for another three or four hours. I then shaped it and put it in baskets lined with floured napkins (seam side down as per Ken Forkish). We then went out to see Star Wars and I left the proofing loaves, tucked into plastic bags, in the cool basement. My starter tends to be very vigorous so I didn't want them to overproof.

Once home, I pre-heated the cast iron pots in the oven at 475 degrees, for about 45 minutes. The loaves went into the pots seam side up so I didn't have to score them (they bloom naturally at the seams). 20 minutes with lids on, then another 20 minutes with lids off. The bottom crust was very dark, the top was awesome and the interior temperature was around 205 degrees. They sang as they cooled and I went to bed (late) with the scent of fresh bread filling my head!

This morning I cut a couple of slices to take to work with me, along with a pot of home made turkey soup. Very impressed with the crumb - it was moist, creamy and shiny. I had thought the dough was under-proofed when I put it in the oven, but any more proofing and it would have been a bit too holey for me. All in all, a success!


a_warming_trend's picture
a_warming_trend

A Weekend Roundup (And One Simple Formula)

Phew. I've baked for a number of friends over the last few days! Many of them just wanted or needed a very generalized designation of "bread" for events, so I was able to experiment a bit with sourdough baking.

Disclaimer: All ciabatte described are "pre-dabrownman-flip-recommendation," so don't judge me too harshly...I still haven't acquired a second pastry scraper, so all ciabatta experiments are on a temporary hold...

Saturday, I baked some whole wheat ciabatte and a few small simple batards.

also, a small parmesan-encrusted boule, and a small sesame-encrusted batard.


Then on Sunday, a few more ciabatte -- this time with cream cheese and chive. 


And then just this morning, Monday, before work: A simple 80% hydration batard with 5% levain. Still working on my shaping. Still striving for those ears. 

Because my friend just emailed me saying that this was her favorite bread I've given her, I'll post a very basic formula:

Ingredients:

425 g AP flour

50 g whole wheat flour

375 g water 

5 g wheat germ

11 g salt

10 g sugar (in place of 5 g malt)

50 g 100% hydration white starter 

Steps:

1) Mix flour and water, and autolyse at room temperature for 6-12 hours. 

2) Incorporate all other ingredients using the pincer method. This should take about 4 minutes. You'll notice that because the dough was already so wet, incorporating that small amount of 100% hydration levain, salt, sugar, and wheat germ is a surprisingly smooth process. 

3) Stretch and fold vigorously every 30 minutes for 3 hours. The number of turns depends on how the dough feels! Anywhere from 1-4 turns (4-16 folds), each session, performing the turns until the whole mass of dough wants to lift from the container.  

4) Rest on the counter for 8-12 hours, until dough has increased 80% - 100%, but no more.

5) Retard for 2-24 hours.

6) Sprinkle flour over the top of the dough in the container, and allow the flour to coat the edges as you gently release it. Pour onto a floured surface and rest for 10 minutes.

7) Shape and place seam-side up in a a brotform of some kind, cover with plastic, and proof at room temperature for 1.5 hours. 

8) Place  the brotform in the freezer for 15 minutes (I really like this freezer trick for high-hydration doughs proofed at room temperature...I genuinely think it helps with ovenspring!).

9) Score and bake at 460 for 20 minutes with steam, 25 minutes without.

The recipient has confirmed the appropriateness of the loaf for egg-dipping. 

More soon!

--Hannah

DonD's picture
DonD

Baguettes a l'Ancienne with Cold Retardation

My first post in April of last year was about a side by side comparison of two of my favorite baguette formulations by Philippe Gosselin and Anis Bouabsa that David Snyder had previously published here on TFL. It was a tough choice to decide which one was better. The Gosselin baguette had an unequaled sweetness due to the overnight cold autolyse and the Bouabsa baguette had an incredibly complex taste due to the cold retardation. I was thinking why not have the best of both world so I started to experiment with combining the two formulations. After a couple of tries, I have succeeded in making a baguette that has the best attributes of both.

Yesterday, at the request of my wife, I made a batch of Baguettes a l'Ancienne with Cold Retardation for her monthly Book Club Party. The formulation follows David's transcription of Gosselin's Pain a l'Ancienne with a few slight variations. I have to clarify that this is not the formulation that Peter Reinhart and Daniel Leader had adapted from the original Gosselin technique but the true ice cold overnight autolyse method that David had published. After the overnight autolyse and the incorporation of the reserved water, yeast and salt the next morning, instead of bulk fermenting, shaping and baking the same day, I partially bulk ferment the dough at room temperature for 3 hours then retard it in the refrigerator for 18 hours before shaping and baking. I use a mix of 94% King Arthur Organic Select Artisan Flour (11.3% protein) and 6% Bob's Red Mill Organic Dark Rye Flour with 70% hydration. I also reduce the yeast amount by 2/3 because of the extended fermentation. Here are the results:

The crust has nice caramelization from the extra sugar produced by the long cold autolyse.

The crumb is open and soft with a slight chewiness. The taste is sweet and nutty with a complex aftertaste.

The crumb is medium thin with nice crunchiness and the crumb shows good translucent gelatinilization.

P.S. Following a number of requests, here is the entire formulation.

Formulation:

 Flour Mixture:

  • - 470 gms Unbleached AP Flour
  • - 30 gms Dark Rye Flour
  • - 300 gms Ice Cold Water

 Dough

  • - 10 gms Sea Salt
  • - 1/2 tsp Instant Yeast
  • - 50 gms Cold Water

 1- Mix flour blend and ice water w/ flat beater for 1 min. and refrigerate overnight.

 2- Add yeast and water and mix w/ flat beater for 3 mins or until all water has been incorporated. Add salt and beat for 3 mins or until dough slaps side of bowl.

 3- Let rest 15 mins and do S&F 4 times at 30 mins intervals (1 1/2 hrs total) and 2 more times at 45 mins  intervals (1 1/2 hrs total).

 4- Refrigerate for 24 hours.

 5- Divide dough in 3 and gently pre-shape in torpedo shape. Let rest 1 hr.

 6-Gently shape baguettes and proof on linen couche for 45 mins.

 7- One hour before baking, preheat oven to 490 degrees f w/ baking stone and cast iron skillet filled w/ lava rocks.

 8- Mist sides of oven then slash baguettes 4 times and transfer baguettes to baking stone in oven. Immediately pour 2/3 cup boiling water on lava rocks.

 9- Reduce oven temperature to 460 degrees f and bake 10 mins.Remove cast iron skillet, reduce temperature to 430 degrees F and bake for another 10 mins on convection mode.

 10- Remove baguettes from oven and let cool on wire rack.

Happy Baking!

Don

rushyama's picture
rushyama

Fig & Walnut Multigrain

I've been thinking of making a fig and walnut loaf for awhile and finally got around to trying it this week. It turned out very well and it's a formula I'd like to tinker with again.


Notes:

  • I build a little extra levain as a bit gets stuck to the side of my container. I end up adding as much as I can scrape out easily.
  • I held back about 75 grams of water to help with the addition of the levain and salt. In the end I probably left out about 15-20 grams, though a little got added with the turns when I wet my hands. The dough probably could have handled the full amount, but I wasn't sure how the figs would play into the mix so I decided to be conservative.
  • This made two loaves (the batard shown here and a boule not pictured -- being gifted.

The result:


This is probably one of my favorite loaves to date, hearty and flavorful. I really like the purple color walnuts bring to the game, and there's just enough figs to bring a touch of sweetness. If anything I'll add a touch more figs next time. The crust is crackly and thin, just how I like it. The loaves did color quickly, so I ended up dropping the oven temp to 425F for the last 10 minutes or so.

Hope you all are enjoying the Christmas season!


Susan's picture
Susan

Eric's Fav Rye

Eric's Fav RyeEric's Fav Rye

My first try

at Eric's favorite deli rye.

Eric's Rye CrumbEric's Rye Crumb

eatalready's picture
eatalready

Borodinsky Supreme -- Old School -- 100% Rye

Borodinsky bread is my childhood staple food.  We had it practically every day and never grew tired of it. The aroma, the well balanced sweet and sour, the substantial “meaty” crumb and thin glossy crust — should I go on listing all the wonderful things that put this loaf in the bread hall-of-fame?

Nowadays, it seems that every dark rye bread sprinkled with caraway or coriander seed claims the name Borodinsky.  I tried those sorry numbers from stores that carry Russian foods… Half of them are too dry and too fluffy, others are missing that signature tang that only wild sourdough can lend, others still, generously “enhanced” with chemicals resemble very little of the bread we used to eat instead of chocolate.

Over the years, I’ve seen scores of recipes of Borodinsky and, having tried more than enough of them, came to a grim conclusion that the true Borodinsky has become a myth, an urban legend, an elusive unicorn — many claim to have seen one, but none actually delivered the goods.  However, I knew that somewhere out there in the world of used books, there should be an old school formula from soviet bread factories, a so called GOST (Government Mandated Standards) recipe, or even an older one, which, if done right with good ingredients and a bit of careful planning, could yet bear the right results.

Making 100% Rye Borodinsky Supreme

I was right.  There are still some serious bread enthusiasts, both in Russia and otherwise, who dug up the old textbooks and technologies and rendered very good step-by-step instructions accompanied by beautiful photos explaining the process in modern terms and in great detail. Some even dared to adapt for available flour types in each country via many a trial (and, no doubt, some error).  Exciting!

Now to the business of the actual Borodinsky.  Majority of us who grew up with Borodinsky, consumed the part rye/part wheat bread.  It was delicious and we loved every bit of it.  There is, however, a version of Borodinsky of a higher grade, called “supreme”, which is 100% rye.  It blends whole rye and white rye flours in 85/15 proportion.  No wheat to be found. The formula of that bread is cited in the book by Plotnikov called 350 Varieties of Bread (4th Edition, 1940). Some of the formulas in the book existed before government standards were established (1939).  See, many GOST formulas were streamlined for mass production, sometimes simplified, cheapened, etc., while many of the pre-GOST formulas upheld the old school best traditional methods and standards of bread making, thus yielding superior (albeit more labor and time consuming) bread.

Making Red Rye Malt Flour

Sprouting organic rye berries to make red rye malt

Making Red Rye Malt Flour

Final product — red rye malted flour, milled moderately fine

When I stumbled upon the pre-GOST formula, and soon thereafter a detailed blog post with illustrations, I was beside myself. The only thing that stood between me and 100% rye Borodinsky loaf was red rye malt, more precisely, the lack of the above.  Now, that one I still can’t get over.  Possibly due to differences in product naming, and partly due to the fact that I can’t reliably get the true organic red rye malt anywhere in quantities less than 100 kilo (190 lbs), I finally decided to make red rye malt flour at home.  I entrusted myself to the detailed set of instructions I found on this site (THANK YOU!!!), and made my first batch the other day.

Making 100% Rye Borodinsky Supreme

I have to say that the aroma that permeated my house during the roasting process has brought back some serious childhood memories, and for that alone I will be forever grateful.  It also brought the first promise of true Borodinsky in the future, because it smelled exactly like our USSR bread shops filled with still warm unwrapped bread loaves.

Anyway, I am getting distracted here, as my bread is almost done baking and the entire house is now smelling unbearably beautiful.

The process is quite lengthy, but the actual hands-on time is minimal. Good ‘ole “good things come to those who wait” has never been more true (well maybe beat by the famous Pumpernickel). The most important thing here is to plan your pre-baking stages, so that they don’t disrupt your busy schedule.

My impression of the bread: for me it turned out a bit sweet and under-salted, even though I weighed everything quite precisely. The aroma and visual appeal were definitely there. The crumb and crust are both as I remember them. Thin, slightly crunchy crust and substantial, lightly moist, uniformly porous crumb. Color is about milk-chocolate shade. I feel I could have given it a bit more rise and it could be baked at a higher temperature — the top didn’t come out quite as dark as it should be, but the bread was at 180F throughout and baked uniformly through.  I will definitely try this recipe again with the above adjustments.  Overall, I would wholeheartedly recommend this formula, especially if you like your bread with a touch of sweetness.  It passed the ultimate test of schmaltz with cracklings and coarse salt, the sweetness of the loaf was just perfect for this.

References/Sources:

- Detailed blog post with superb step-by-step photo of rye+wheat Borodinsky 1939 version (in Russian) http://registrr.livejournal.com/16193.html

- Blog post with excellent photos  of 100% rye Borodinsky Supreme (in Russian) http://mariana-aga.livejournal.com/152489.html

Borodinsky Supreme

Makes a small loaf in a 1-1/2 quart (1.4 liter) pan.
From start to finish (with some steps going simultaneously) – 14-16 hrs

Step 1: Rye starter

Refresh your 100% hydration rye starter (6-8 hrs), you will need 125 g of it

Step 2: Scalding (5-6 hrs)

  • 200 g boiled water at 150F (65C)
  •   50 g whole rye flour
  •   25 g red rye malt flour

Step 3: Pre-ferment  (3-4 hrs or until doubles or more)

  • all of the scalded batch
  • 125 g refreshed starter
  • 125 g whole rye flour
  • 125 g water, room temperature

Step 4: Final dough — soft and very sticky (30-90 min bulk fermentation or until doubles or more)

  • all of the preferment
  • 200 g whole rye flour
  •   75 g white rye flour
  • 5 g salt
  • 30 g sugar
  • 25 g molasses (I used Blackstrap)
  • 2.5 g ground coriander (best if freshly ground for more intense flavor)
  • 0.5 g dry yeast activated in 75 g water and 3 g sugar (20 minutes)

Step 5: Shaping and final proofing (60 min or until tops the pan)

Grease 1.5 quart loaf pan. Pack the dough nicely into corners at first and then the rest. Smooth over with wet hands. Cover with plastic and let rise until reaches the top of the loaf pan.

Step 6: Flour washing (1 min)

Mix 1 tbsp AP flour with 50 ml water, shake well. Brush the bread right before setting into the oven. Sprinkle the top sparingly with whole coriander or caraway seed, if desire

Step 7: Baking (60 min)

Preheat to 400F (200C). Bake 60 minutes.

Step 8: Kissel (custard) washing (1 min)

Mix 1 tsp corn or potato starch with 150 ml water. Bring to a boil.  Brush the bread as soon as it finishes baking. Remove the loaf from pan and cool on rack.

Flour wash before baking and custard wash after baking are needed for creating that famous beautiful glossy, almost lacquered looking crust on top of the loaf, which also prevents the bread from going stale too fast.

Mebake's picture
Mebake

Rye Sourdough with Spelt and soaker

Last week, I had some left over whole spelt flour, some corn meal, and some semolina in addition to a ripe Rye starter. Therefore, I decided to put them all to use in a new recipe as follows:

UPDATE** INSTRUCTIONS:

Prepare the Rye sour by adding a tablespoon and a half of your active rye starter to the 250g water, and mix well to disperse. Add the Whole rye flour, mix well, and let stand for 8-12 hours at room temperature until the surface just starts to crack and collapse. To prepare the soaker, weigh all soaker ingredients into a bowl, and then weigh 160 grm of water, boil it, and add it to the soaker. Mix well, cover, and let stand until overnight, or when your rye sour is ready.

Next day, mix all ingredients at once, by hand or using a mixer for 5-10 minutes. The dough will remain relatively sticky, so try to resist adding any flour at this stage.Shape as a round and let ferment in an oiled bowl for 2 hours at preferably 78 F or 24-25C, folding it half way through at the 1 hour mark. By the end of bulk fermentation, the dough will have risen by 50-60%. scrape your dough onto a heavily floured surface, pat the dough even (Don't knead), divide into the desired dough pieces, and round each piece leaving them to rest for 15- 20 min, covered. Dust your basket with a mixture of all purpose flour and rice flour, and shape your dough and invert it smooth side down into the basket. The final fermentation will be only 45 minutes, but watch the dough NOT the clock. Preheat your oven at this stage with a stone in place to a 500F or 260C. 5 minutes before loading the bread, place your steaming dish filled with wet towels on the bottom of your oven.  When ready, invert the dough on baking paper lined peel/ board and close the oven immediately. Bake for 15 minutes with steam, and then remove the steaming dish and reduce the temperature to 400F for another 20-25 minutes. 

When the time is over, remove your bread from the oven. Wear oven mitts, and tap on the bottom of one loaf, It should  sound hollow. Furthermore, you may insert a thermal probe into the center of the loaf from the bottom, and the temperature should register 195-200F or 90-95C. If it doesn't, put it back in the oven for another 10 minutes. Cool the bread completely on a wire rack, prior to cutting. 


Due to the soaker, the aroma of this bread is really attractive. When cool, The crust was somewhat chewy, and the crumb slightly moist but not chewy. The flavor of this bread is earthy sweet and very pleasant. The crumb is close textured and compact due to all the whole grains, the bread might have benefited from extra lightness by increasing bread/all purpose flour.

I have eaten this bread thinly sliced with a spread of cheese, and it was fabulous. This bread keeps really well.


- Khalid


Susan's picture
Susan

Simple Sourdough (9/09)

50g firm starter, 204g water, 275g high gluten flour, 25g white whole wheat flour, 6g salt.  All mixed minimally by hand, rested for 30 minutes, one Stretch & Fold, two more S&Fs at 1-hour intervals, let rise to double.  Kept the dough temperature in mid-70'sF.  Pre-shaped, rested 15 minutes, shaped, then plopped into linen-lined colander.  Put in plastic bag, then into fridge for overnight.  Out of fridge for 2 hours before scoring, then baked at 450F for 20 minutes covered followed by 20 minutes uncovered.

Abelbreadgallery's picture
Abelbreadgallery

90% biga loaf (Italian method)

90% biga loaf, as I learned from italian maestro Ezio Marinato.

This means when you mix the dough, 90% of the flour is already prefermented. As a result we have a very digestive bread, also a lot of aroma and character.

Method:

Biga: 900 grams of bread flour + 405 ml water + 3 grams of instant yeast or 90 gr sourdough. Disolve the yeast in water. Add flour. Mix 1 minute at slow speed, just until you get wet flour threads. We don't want to develope gluten in this stage. Let the biga mature 14-16 hours at 14-16 degrees celsius inside the same mixer bowl, covered with kitchen rag.

Final dough: All the biga + 100 grams stoneground flour + 300 ml warm water + 20 gr salt.

Bulk fermentation: around 1 hour.

Divide and preshape. Let rest 30 minutes.

Shape. Final proof, 1 hour.


Pages