The Fresh Loaf

A Community of Amateur Bakers and Artisan Bread Enthusiasts.

Most bookmarked

hanseata's picture
hanseata

Croissants - in Buttery Heaven!


When my husband decided to open up a furniture store in Portland, ME, he found a big old garage in Fore Street. After spending a month with scrubbing, painting and cutting new panes for each of the high windows, he turned the dark and dirty place into a beautiful, light space, to showcase his contemporary furnishings.

Eventually Richard Parks Gallery moved to Commercial Street, and the first floor of the old store became Fore Street Restaurant, one of Portland's foodie temples.

The souterrain was turned into a bakery, and, instead of housing French sofas and bistro tables, it's now home of Standard Baking Co., maker of the best French breads and pastries in Maine!

Richard Parks Gallery on Fore Street in the early Nineties

Whenever we visit Portland, we get Pain au Levain, Seeded Fougasse, Croissants, or, on Fridays, Rugalachs.

Last time we came into the bakery, I saw a pile of books: Standard Baking Company had published "Pastries" with many of their recipes, including those of the croissants and rugalachs we were just about to buy. Of course I didn't hesitate one second, grabbed one of the little books, and, while driving home and munching on a walnut filled rugalach, studied the recipes.

Though I bake (and sell) lots of breads, I have little experience with French baking, and couldn't wait to try making one of those mouthwatering pastries myself.

I was also wondering whether Alison Pray and Tara Smith had dumbed down their formulas to make them "everybody's darling". Or, jealously guarding their secrets, changed them so that the home baked pastries would never taste the same as their professional counterparts at the store (try finding the original Sachertorte in Hotel Sacher's pastry book!)

Worth every penny!

To my utter delight neither was the case. Every piece of pastry I made so far was outstanding - and tasted as good as its sibling at the bakery. (No, I don't get a kickback for my gushing!)

Croissants, with their multi-layered, buttery dough, are the gold standard of pastry baking. I had made them only once before. Those had turned out quite nice, and I was curious how the Standard Baking ones would compare to them.

I found the formula easy to follow, with clear, detailed instructions and explanations for every step of the way. Involved as the process is, it's not rocket science, and you really can do it at home!

You have to plan ahead, though, because you'll achieve your best results when you allow the dough sufficient time to rest. As with most of my breads, time and the refrigerator are your friends, achieving three important goals: relax the gluten (readying the dough for the next turn), keep the butter cold (preventing it from seeping out) and develop the taste.

Therefore, make yourself familiar with the whole procedure before you start! This is your schedule for the 3-day process (no worries, the actual hands-on time is much less!)

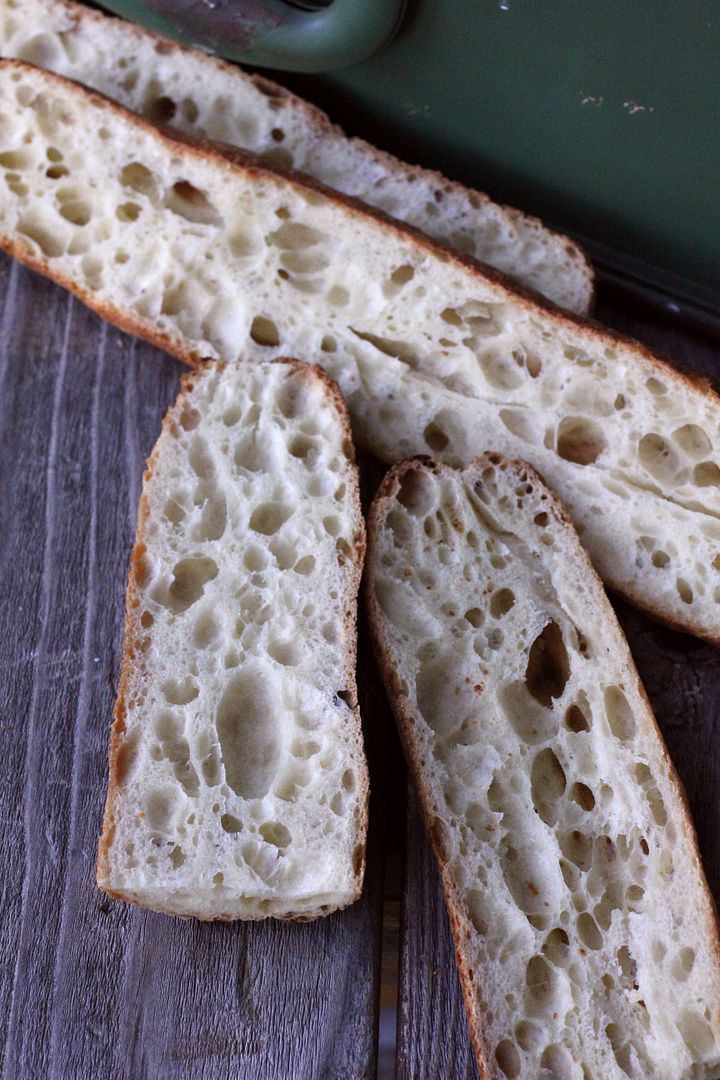
Pure buttery, flaky goodness!

 TIME PLANNER

DAY 1 (Mixing the dough)
Hands-on time: 20 minutes mixing           Resting time: 1 hour plus 1 night

DAY 2: (Laminating the dough)
Hands-on time: 2 to 2 1/2 hour                 Resting time: 2 hours plus 1 night

DAY 3: (Shaping and baking)
Hands-on time: 30 minutes                       Resting time: 1 1/2 to 2 hours
            

If you don't want to use all the dough for regular butter croissants, use part of it for Sticky Buns, Pain au Chocolat or Ham & Cheese Croissants. You can also freeze the laminated dough up to 10 days, thaw it in the refrigerator overnight before baking.)

And if you have leftovers, recycle them into utterly delicious Almond Croissants!


BUTTER CROISSANTS   (12)  (adapted with Alison Pray's permission from Standard Baking Co. "Pastries")

Dough
630 g all-purpose flour (4 1/2 cups)
    7 g instant yeast (2 1/4 tsp)
  50 g sugar (1/4 cup)
  14 g salt (2 1/2 tsp)
  28 g unsalted butter*) (2 tbsp), cool, cut in pieces
186 g water, at room temperature (about 70ºF) (3/4 cup)
186 g milk, at room temperature (about 70ºF) (3/4 cup)

Butter Roll-In
280 g/10 oz unsalted butter*), chilled

Egg Wash
1 egg
2 tsp. water
1 pinch salt

*) If you have the chance, get European style butter with a higher percentage of fat (like Cabot's European style butter or Plugra)

DAY 1
For the dough, whisk together flour, yeast, sugar and salt in a large bowl. Using your fingertips, rub butter into dry ingredients until it is evenly distributed and coated with flour mixture.

  
Rubbing the butter into the dry ingredients is easy

Using a stand mixer with dough hook: Combine water and milk in mixer bowl. Add dry ingredients on low speed and incorporate for 3 minutes, scraping down sides of bowl as needed.

Increase to medium speed, stopping mixer after 2 minutes to check consistency of dough. It should be medium-soft. (If it feels stiff, add more water, a tablespoon at a time.) Resume mixing for 2 minutes more. Dough will not be completely smooth, but hold together. (Don't over-mix, you don't want the dough to become tough!)

Using a food processor: Pulse for about 2 minutes, or until dough comes together in a ball. (Don't over-mix, otherwise dough becomes more difficult to roll out, and result in less tender croissants.)


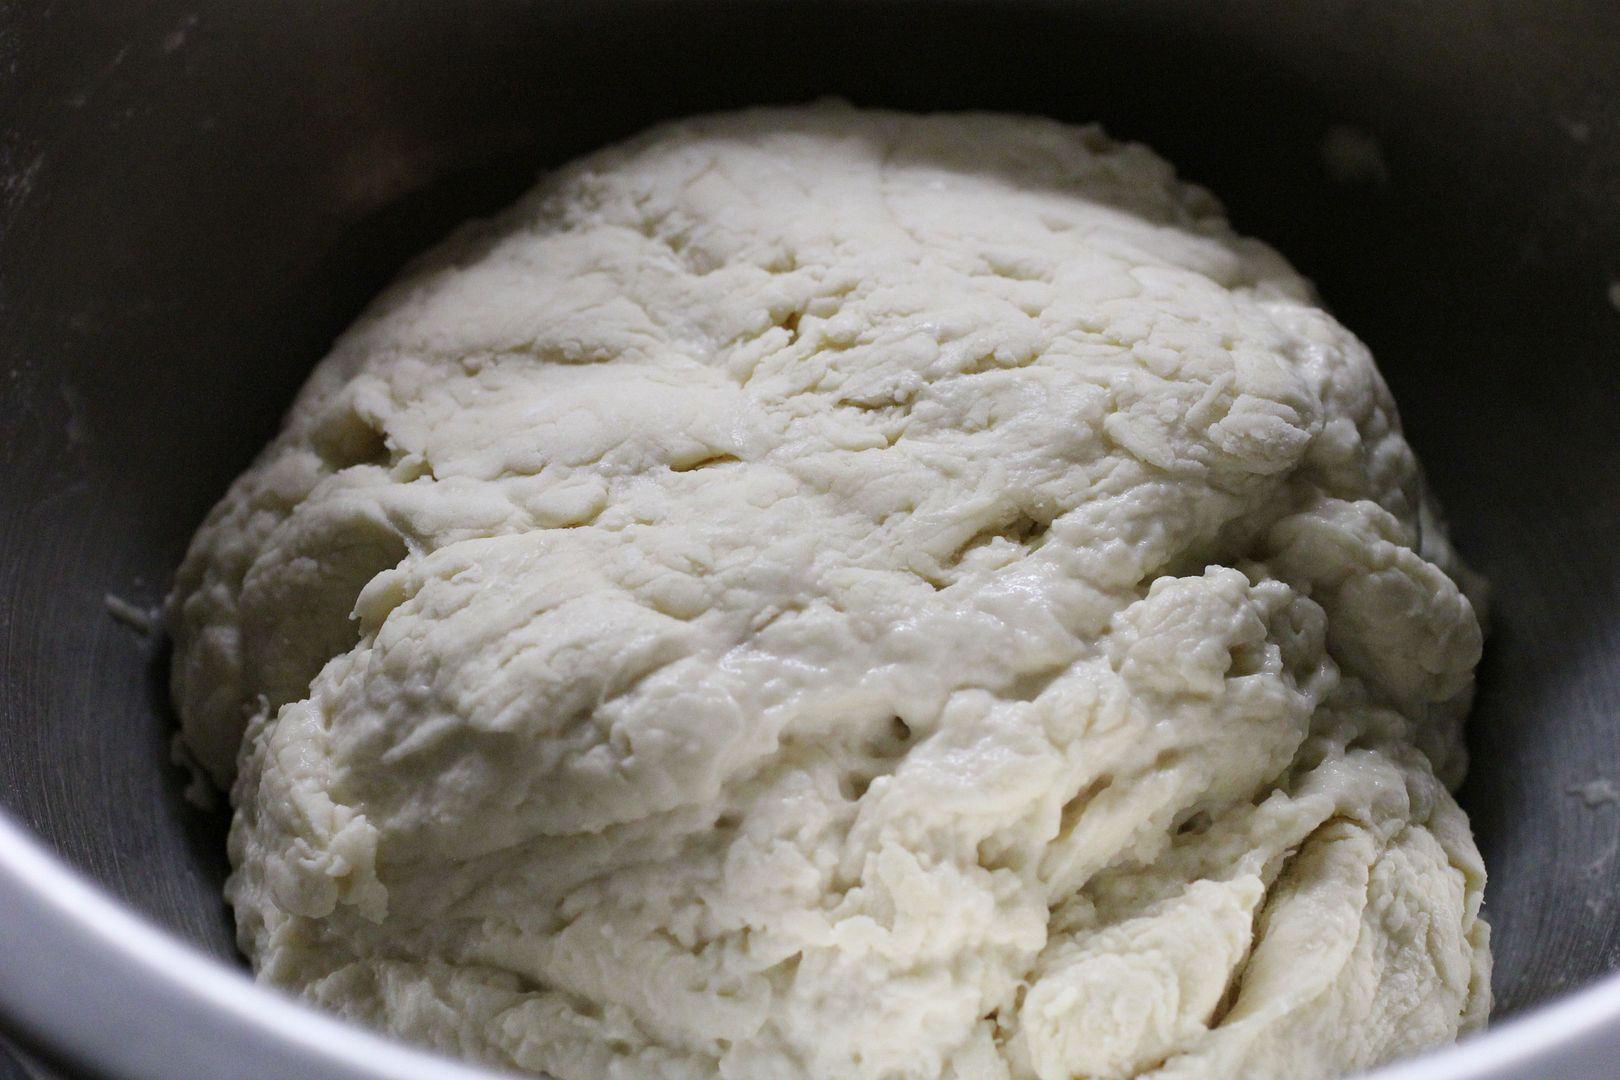
Place dough in lightly oiled container, turn around to coat with oil, cover, and let rise in a warm spot (ideally 75ºF) for about 1 hour, or until it has grown by about half.

The dough has risen 1 1/2 times its original size   

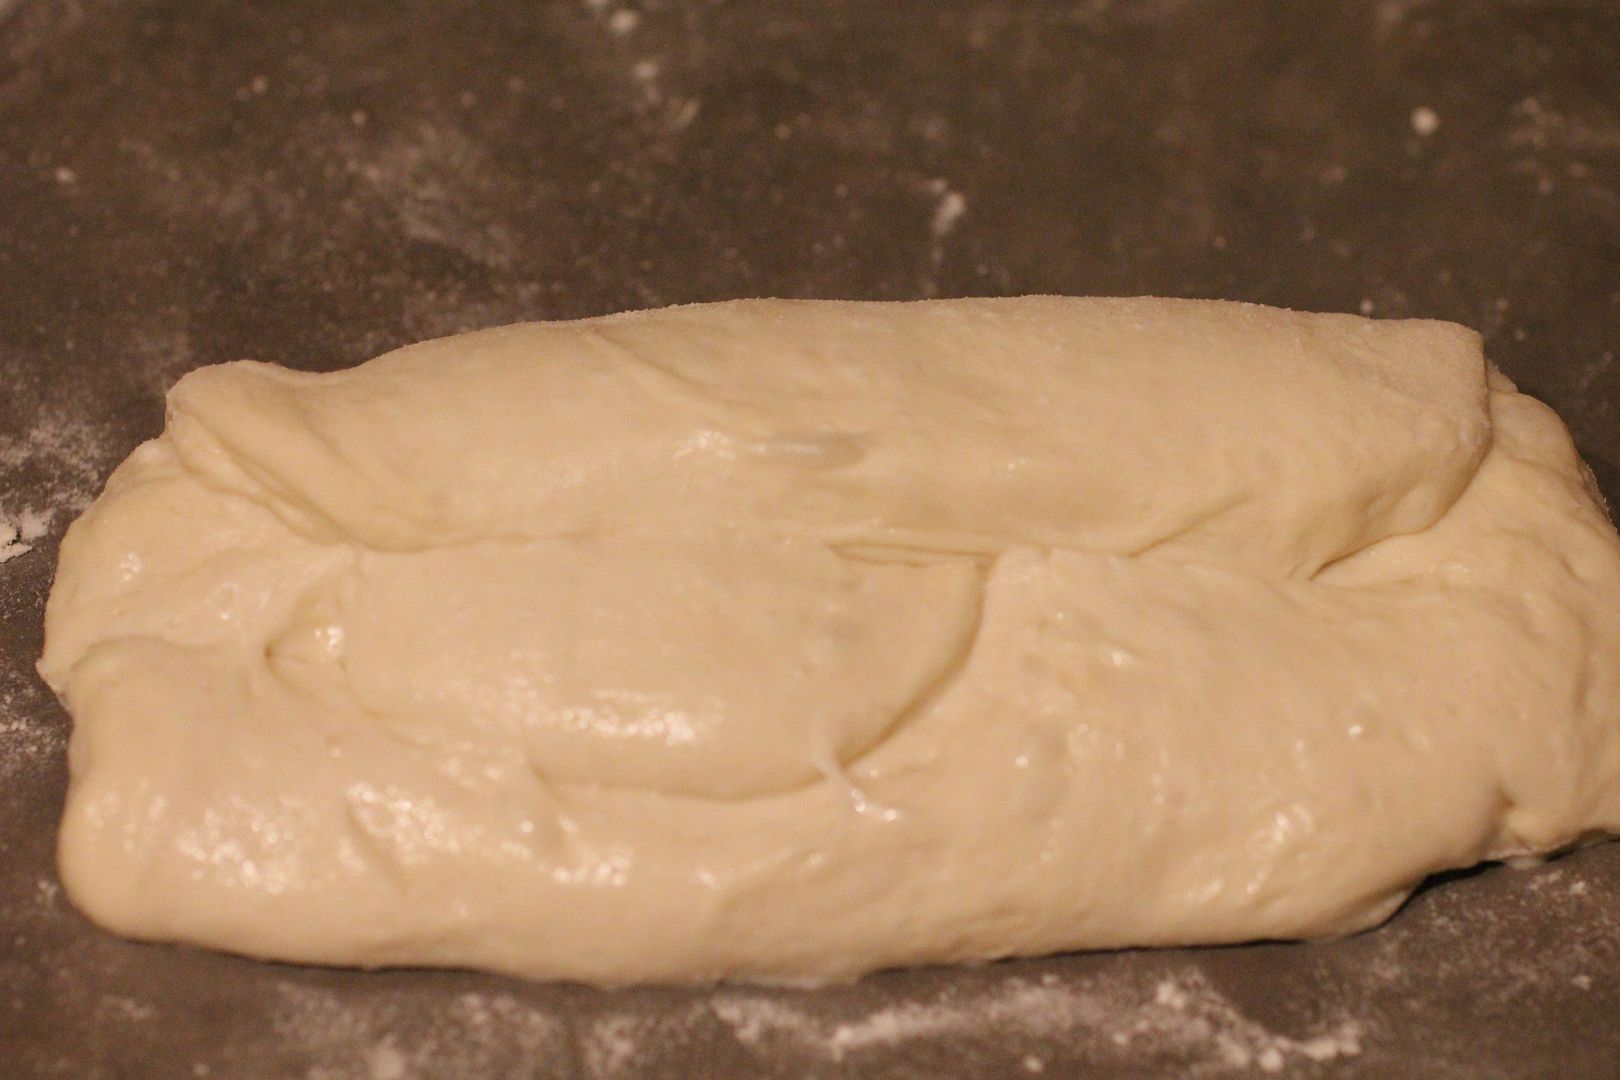
Transfer dough to a lightly floured work surface and pat it into a rectangle about 2 inches thick. Wrap it in plastic and seal it well to prevent it from escaping when it rises. Refrigerate dough overnight (or at least for a minimum of 4 hours.)

(I placed the dough on lightly floured cutting board, sprayed it lightly with baking spray,  put the whole thing first into an unscented garbage bag, and then in the fridge.)


DAY 2
About half an hour before rolling out the chilled dough, prepare butter roll-in: cut cold butter into large chunks, and place them in mixer fitted with dough hook. Beat butter on medium speed until completely smooth and pliable, but not warm (about 3 minutes.)

(You can also pound the butter with a French rolling pin until it is flat and pliable, but the mixer works great.)

After kneading the butter is pliable but still cold

Transfer butter to a piece of plastic wrap or parchment paper. Press it into a 6-inch square, 1/2 inch thick. (I measured and marked parchment paper at 6 inches, and folded it into a square, then closed it with the butter inside, and pressed on the package until the butter filled the edges.)

Chill butter square in refrigerator for about 15 minutes (it should be just firm, but not hard.)

Folded parchment paper helps pressing the butter into a square

And now the fun starts: you are about to create something absolutely wonderful, a tender, buttery, multi-layered (laminated) croissant dough.

Room temperature and work surface should be on the cool side, and each step should be done as quickly as possible, to prevent dough and butter from getting warm. Put everything you need (flour for dusting the work surface, roller pin, brush for excess flour, and ruler for measuring) within easy reach.

The butter square covers half of the dough rectangle.

If the chilled butter feels too firm, take it out of the fridge a few minutes before using. Dust work surface lightly with flour. Remove dough and butter block from refrigerator. Roll dough into rectangle twice the size of the butter square: 12 x 6 inches. Brush off excess flour from top of dough. Place butter square (unwrapped) on one half of rectangle, so that edges are neatly stacked.

Fold other half of dough over butter, and press open sides together to seal butter in. Lightly re-flour work surface, if necessary, and roll out dough rectangle into a square, about 1/2-inch thick and twice as long as it is wide (the long side should be facing you.) Brush dough surface to remove loose flour.

Roll out dough into rectangle twice as long as it is wide

Fold dough lengthwise in thirds like a business letter, always brushing any loose flour from the surface before you fold: first fold left third over center, then right side over left. Using a bench knife, straighten and square edges, so that layers are neatly stacked. Congratulations! You just made your first turn (aka envelope fold.)

Wrap the dough "envelope" in plastic wrap and refrigerate it for 45 - 60 minutes, so that you and the gluten can relax and cool down. In the meantime, clean your work surface from any remaining bits of dough, and dust it again lightly with flour.

After its workout the dough needs another break in the fridge

Unwrap cooled dough and place it on work surface, the long, folded side facing you. Roll out dough as before into a 1/2-inch thick rectangle. Fold it again in thirds, always brushing off excess flour between folds. The second turn is done! Re-wrap and re-chill dough again for 45 - 60 minutes.

Now you're already a pro, and know how to handle the third and final turn. Unwrap, roll out, fold, and use the brush in between! You don't want flour to keep the layers from adhering.

Brushing off any flour from the top of the dough is important

So, that's it for the day, wrap your (beautifully laminated) dough in plastic and place it in the freezer. Before you go to sleep, take it out, and put it in the fridge so that it can slowly thaw overnight. (Or, if your mouth waters too much, and you need to bake it the same day, give it at least 2 hours chill-out time before shaping.)

TO MAKE AHEAD: You can also freeze the dough up to 10 days, thawing it in the fridge overnight before baking.

DAY 3
Line 2 baking sheets with parchment paper. On a lightly floured work surface, roll dough into 12-inch x 25-inch rectangle (1/4 inch thick.) Re-dust with a little flour, if needed, to prevent sticking. If dough springs back and is difficult to lengthen, let it rest a few minutes, before you continue. When desired length is reached, trim and straighten narrow ends with pizza wheel or chef's knife.

A same size piece of parchment paper with markings helps with the cutting

Cut rectangle into long, skinny triangles, 4 inches wide at base and 10 to 12 inches long on sides. (It's easier if you cut parchment paper into a same size rectangle, and measure and mark bases and tips of triangles on it. Place paper over dough, and then mark dough in the same way with little incisions.)

Make a 3/4-inch incision in the center of each triangle base (this notch helps to create the desired length in the final shape.)

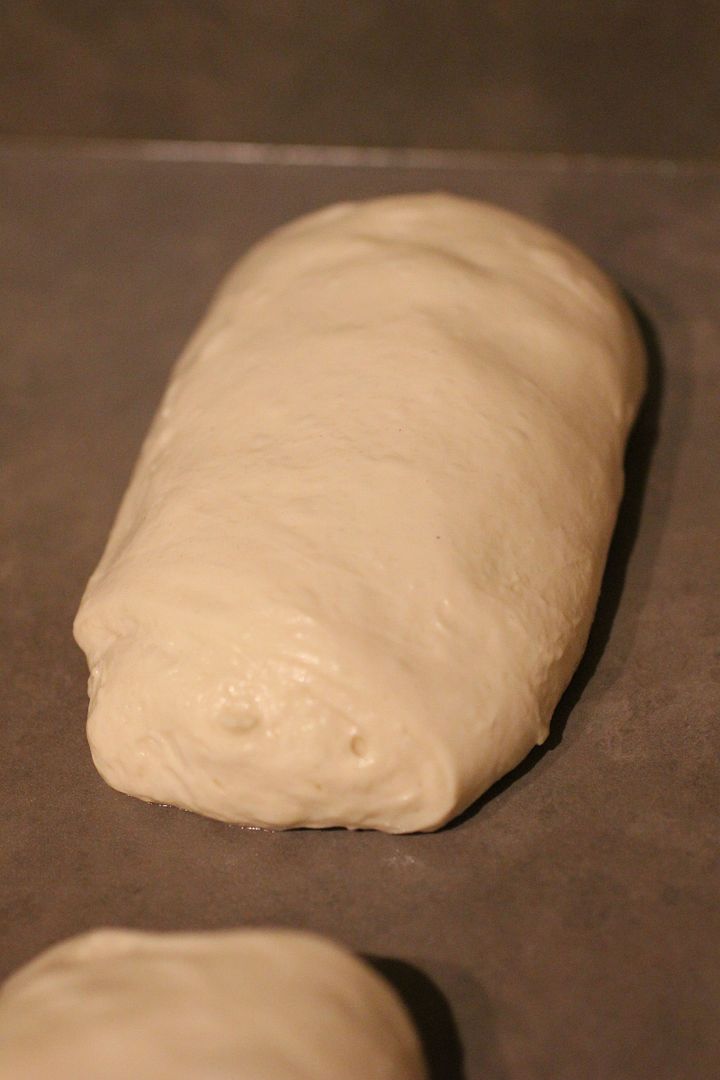
To shape each croissants, pick up a triangle, holding base edge with one hand. With the other hand about 1 inch from base, pull dough gently to lengthen it slightly, without causing any tears. Place triangle down again, base towards you, and gently but firmly roll it up towards the tip. (If done properly, you should have 6 to 7 tiers.)

Leftover dough scraps: Place cut off half-triangles from both edges side by side, pinch the middle seam together, put any other small scraps on top, and roll this patchwork triangle up, too. It will be a little "malfatti" (badly made) as my half Italian spouse calls it, but nothing of your precious dough will be lost.

The triangles get a notch at the base to make lengthening easier

Put shaped croissants on prepared baking sheets, evenly spaced, the tips should be tucked underneath.

For the egg wash, whisk together egg with water and salt in small bowl until smooth. Brush croissants lightly with egg wash, carefully avoiding open edges, so that the egg can't glue them together and prevent tiers from rising. (Refrigerate remaining egg wash for the second application.)

The croissants need to proof for about 1 1/2 to 2 hours. Place baking sheets in the (unheated!) oven, then put a pan with hot, steaming water on the bottom to provide the ideal rising environment: humid, to prevent a skin from forming, and warm, but not too warm - you don't want the butter to melt, resulting in less flaky, greasy croissants.

Half an hour before baking, remove proofing croissants from oven. Position racks in upper and lower thirds, and preheat oven to 430º F.

Cover croissants, and continue to let them rise, until they have almost doubled in size, and dough springs back slightly when pressed gently with a finger tip, but the dimple should remain visible. Each tier should still hold its distinct shape. (Check croissants frequently after the first hour of rising, if they overproof, they will have loose their flakiness and have a bread-like structure. The room temperature should not be too warm.)

Proofed croissants. The "malfatti" on the upper right is not much different from the others
  

A few minutes before they go into the oven, brush risen croissants again with a thin coat of egg wash, carefully avoiding the edges (you don't want to screw up now!)

Bake croissants for 10 minutes, then quickly rotate baking sheets from top to bottom and from front to back, for more even browning, taking care not to leave the door open too long. Continue baking for another 4 - 6 minutes, until they are evenly baked, with deeply browned, crisp edges.

Remove sheets from oven, and transfer croissants to wire rack, to cool a bit. They are best when eaten while still warm, or shortly after baking.


If you cant eat all of the croissants right away, you can wrap them individually in plastic wrap, and re-crisp them at 375ºF for a few minutes.

OR YOU TURN THEM INTO HEAVENLY ALMOND CROISSANTS!

There is no such thing as stale croissants when you recycle them into these!

Submitted to YeastSpotting

Floydm's picture
Floydm

Honey Whole Wheat Bread


I was looking for a recipe for a whole wheat bread that would taste something like the rolls they used to serve at The Good Earth restaurant, a health food chain that used to exist in California. I couldn't find anything that looked right, so I made something up. It turned out excellent (though, if anyone can find a recipe for the original Good Earth rolls, let me know).

Honey Whole Wheat Bread
makes two loaves
1 lb whole wheat flour
12 oz hot water
8 ounces bread or all-purpose flour
1 5 oz can evaporated milk (or milk, or more water or soy if you are vegan)
1/3 cup honey
2 teaspoons salt
3 teaspoons instant yeast an additional
1/2-1 cup flour, as necessary, to achieve the desired consistency

Mix the hot water and whole wheat flour together in a bowl. Cover the bowl with plastic and set aside until around room temperature, at least 1 hour.

(My thought is that soaking the flour may help soften the bran and release some of the sugars in the wheat, though, truthfully, I don't know for sure if it does).

Add the milk, honey, salt, yeast, and bread flour to the original mixture and mix until well combined. Add additional flour and knead by hand or in a stand mixer until a tacky but not completely sticky dough is formed.

Place the ball of dough in a well-oiled bowl, cover with plastic wrap, and set aside to rise for 60 to 90 minutes.

Divide the dough in two and shape the loaves. Place the loaves in greased bread pans, cover the pans loosely with plastic (I put them in a plastic bag), and set aside to rise again for 90 minutes.

During the final 30 minutes of rising, preheat the oven to 425 degrees. Place the pans into the oven and immediately reduce the oven temperature to 375 degrees. Bake for approximately 45 to 55 minutes, rotating the pans once so that they brown evenly, until the internal temperature of the loaves is around 190 degrees and the bottom of the loaf sounds hollow when tapped.

txfarmer's picture
txfarmer

Straight Method Baguette - a good starter baguette to practice on

Sending this to Yeastspotting.

Click here for my blog index.


For a lot of bakers, it's an important milestone to learn to make a good baguette. I have been asked many times both at my Chinese blog and TFL what the "trick" is for those big holes in the crumb. The truth is that, there's no trick. It's everything: appropriate flour, S&F rather than intensive kneading, appropriate fermentation, precise shaping, clean scoring, good steam and high temperature baking. I have yet to make a baguette that I am totally happy with, probably it's the chase that keeps me making it again and again. For that reason, I hesitate to call this post a tutorial - how can a student in bread baking offer a tutorial at all. However, I did write it up for some of my blog friends who are new to bread/baguette baking, and in need of a simple recipe to get started. This recipe contains lessons and notes learned from many many many baguettes I have made over the years, hopefully it will be helpful to others.

Since this recipe is meant for newbies, I intentionally kept it as simple as possible. No sourdogh, just dry yeast. No long cold fermentation, just straight method. No whole grain flour or addins, just white AP flour. By taking out all those variables, hopefully it's easier to follow and repeat. Even with such simplification, as the pictures show, the crumb still can be very hole-y, and the crust still can be very crisp, however, the flavor does suffer. Its taste is not nearly as complex as my favorite 36 hour baguette formula and its many variations (see here). Therefore, once you are comfortable with this straight method, I would definitely encourage you to move on to more complex recipes.

Straight Baguette
Note: makes 4 baguettes, each 220g, 40CM in length

AP flour (I used King Arthur AP flour because most people can get that easily and reproduce the recipe with the same flour), 500g
water, 375g (this means the dough is 75% hydration, yes, it's wet, but trust me, it's managable, especially after a few tries)
salt, 10g
instant yeast, 2g

1. Mix everything together. No need for kneading. Just mix everything into a rough dough.

2. Cover the container, rise at room temp (22C-25C) for 3 hours. At 45, 90, 135min, do Stretch and Fold (S&F). TFL handbook has good explanation on S&F. For a dough this size, I find it's the best to water/oil/flour my hands, lift the dough out and do S&F directly in my hands. That's two quick movements, one in horizontal direction and one in vertical direction . The hand/dough touch time is so brief that sticking is not an issue. By the end of 3rd S&F, the dough magically becomes very smooth. And by the 3rd S&F, you can feel the dough offers resistence when being stretched out, that's a sign of gluten developement. Rember how the dough feels, because you want to remember how "elastic" (i.e. gluten strength)  yet extensible of a "good baguette dough" should be. Oh yeah, keep the container oiled and covered the entire time.

3. Dump the dough out and divide into 4 portions. Try to have less small scrap pieces. I have practiced enough to eyeball and cut 4 equal portions without too much weighing and adjustment. I find each detail in preshaping and shaping affects final crumb, in general the less I touch the dough (yet still get all the tasks done) the better crumb is. Roll each piece into a colum, with tight skin surface . This is my version of preshaping, there are other methods. Again, the key for less sticking is lightly flour/oil/water hands and surface, AND MINIMAL TOUCHING. Cover and rest for 25-30 minutes.

4. Shaping the baguette. Now there are so many good ways to do this, my method below is just what I am used to. As long as you can shape the dough into desired size/shape with minimal handling, your method is good. The key here is 1)keep skin surface tight, AND 2)don't destroy too much of internal bubbles. Be gentle yet effective.If you find it hard to roll the dough long enough, the dough is too strong, S&F less next time or use a weaker flour. If you find the dough to be limpy, extensible but offers zero resistence when being rolled long, can't keep a tight surface, the dough is too weak, use a stronger flour or S&F more next time.
a. Lightly pat the preshaped column into a rectangle, roll the top edge down twice

b. Turn the dough 180 degrees, and fold the now top edge to middle

c.Fold in half again, top edge meeting bottom edge, seal. Roll it to 40cm long. "Light", "firm", and "even" are the key words while rolling out. Start rolling from the middle, move both hands outward until the ends, while applying light force downward and outward. If the skin of the dough is tight enough, it should be enough to just lightly flour the surface for the dough not to stick. Most of the flour should end up on skin, rather than inside of the dough anyway. If you find the dough slipping while rolling, you might be flouring the dough and surface too much. Put them on lightly oiled parchment paper (and the whole thing sits on the back of a baking sheet), with middle part of the parchment paper srunched up to act as dividers. Note that there are people who prefer bakers couche such as this, and I have seen/used it in a class using profession oven with great success, HOWEVER, in a home environment, I much prefer to use parchment paper so that I can slip the dough along with paper together into the small home oven onto the steaming hot stone. I don't want risks associated with moving the dough onto a peel, then moving the dough again from peel onto stone. It's just safer, neater, and quicker.

5. Cover and proof at room temp (22C-25C) for 30-60minutes. The dough should have grown noticably but still have enough bounce left. If you dough does not grow much in oven, you have over-proofed, proof for less time next time. If the dough grew too much in oven, resulting in bursting seams and uneven distribution of holes, proof longer next time. Score. For tips on scoring, please see this great tutorial from David. For baguettes in general, the dough is pretty wet, which means you need to be quicker and firmer with your movement for the blade not to drag and stick. Dipping thd blade in water before each cut sometimes help. Furthurmore, David's tutorial mentions "classic cut", which is done by cutting at a shallow angle to get "ear/grigne/bloom". With a 75% hydrated dough, you might at first have trouble cutting at the shallow angle without sticking, don't worry, just cut perpenticular to the surface for now, once you get all the other components correct, you can then start cutting at an angle and try to get "ear" for your cuts. The dough may seem deflated somewhat when you score it, don't worry, a well executed baguette dough would recover and expand beautifully in the oven.

6. Bake at 460F for 10 min with steam, then 15min without steam. Turn off oven, crack the door open, and keep baguettes inside for about 5 minutes. Take out and cool. Note that I preheated my stone at 500F for an hour to make sure the oven is hot enough, only reduce the temp to 460F when the dough is loaded. There are many ways to steam and load, each oven seems to prefer a different way. I use the most common method for my very ordinary electric home oven: a cast iron pan on a rack below the stone with some rocks inside; it's preheaded along with the stone; once the dough is ready to be loaded, I pour a bit of boiling water onto the cast iron pan (steam comes out, watch out!), close the door and get the baking sheet (with the dough/parchment on top) in hand; open the door again and slide parchment paper along with dough onto the hot stone; pour another cup of boiling water into the cast iron pan (watch out again, more steam comes out); close the door. The whole operation is pretty intense, my husband is still amazed that I haven't lost a finger loading bread doughs ... yet. However, it does get easier with practice.

Comparing to my 36 hour baguette doughs, this dough is much easier to score!

Crumb is decently hole-y, and even. :)

Crust is thin and crispy. If they are baked enough, they should be singing for a long time while cooling, which means a lot of tiny cracks on the crust.

However, I am never completely happy with my baguette. Holes can be bigger, more even, and I can live without the line in the middle of the crumb coming from the seam at the bottom. But hey, like I said at the begining, the fun is in the chase. :)


Baker's Math

Let’s have a quick math lesson.

Math?! Yes! Professional bakers don’t usually talk about recipes, but rather about formulas. Bread is all about proportions, and baker's math is a way of breaking down ingredients into these proportions so that you can scale up or down as needed. It also makes baking much easier because, once you understand the basic proportions, you can freely mix and match ingredients to invent all kinds of breads on your own.

It's not necessary to learn baker's math to bake good bread, of course, but it can expand your ability to mix and match ingredients and break free of recipes to create your own formulas.

In baker's math, every ingredient is expressed in terms of the flour weight, which is always expressed as 100 percent. For example, let's take a typical formula for French bread:

    * Flour: 100%
    * Water: 66%
    * Salt: 2%
    * Instant yeast: 0.6%
    * Total: 170%

So, let’s say we’ve got 500 grams of flour. If I wanted to make French bread, here’s how I’d figure out the weight of the other ingredients

•    Water: 500 * 0.66 = 330 grams
•    Salt: 500 * .02 = 10 grams
•    Instant yeast: 500 *.006 = 3 grams

We can also first decide how much dough we want, and work backwards. Let's say we want to make 1 kilogram of dough. First, we need to figure out how much flour we need. To do this, we divide the total of all the ingredient percentages added up (170% = 1.7) into the total weight of the dough:
1000 grams / 1.7 = 588 grams of flour (rounded to nearest gram).

Now that we know the flour weight, we figure out the weight of each of the ingredients by multiplying their percentage by the flour weight, just as we did above.

    * Water = 0.66 * 588 = 388 grams
    * Salt = .02 * 588 = 12 grams (rounded)
    * Instant yeast = .006 * 588 = 4 grams (rounded)

my daily bread

If you ever read my baker blog, you'll know that almost every week, regardless of what else I am baking, I bake a batch of pain sur poolish. I began baking a bread like this while reading The Village Baker. I've since adapted it to be even simpler.

This recipe really has become my control, my baseline for experimentation. Whether it be a new mixing technique, a new brand of flour, or a new baking schedule, when I apply a change to this recipe I have the easiest time perceiving how that change modified the outcome of my bread.

I'm offering up this recipe here because a few people have asked for it. But more than advocating this recipe in particular I'm advocating the method of finding something you like and using it as your baseline for experimentation.

My Pain Sur Poolish (Daily Bread)
Makes 2 loaves

Poolish
1 cup flour
1 cup water
1/4 teaspoon instant yeast

Final Dough
1 pound flour
10-12 ounces water
1 teaspoon instant yeast
2 teaspoons salt
all of the poolish

Combine the ingredients for the poolish in a small bowl the night before baking. Cover the bowl with plastic wrap and leave the poolish out at room temperature overnight.

The next day, prepare the final dough, either by using the autolyse method of flour and water first then the rest of the ingredients with minimal mixing or by combining them all and mixing until you have decent gluten development (8 to 10 minutes).

I typically fold the dough once an hour twice during primary fermentation, then shape the loaves and give them a longer final rise, typically around 90 minutes. Meanwhile, my oven and baking stone are preheating as hot as they can safely go.

Baking, with steam, takes me 20 minutes, 5 minutes or so at maximum oven temperature, the remainder at 450-475. I rotate the loaves once half way through the baking.

my daily bread

That is it. Simple, tasty, and a great recipe to practice with.

Relate Recipes: Italian Bread, Rustic Bread.

Do you have a bread recipe that is your standard? Please, share it!

My Daily Bread

Jim Burgin's picture
Jim Burgin

Chasing thin, crispy, not thick/tough dough

For a year, I have been the route with the best books, internet sites, conversations with authorities (King Arthur); have altered everything you can name (hydration, baking temperature, Pizza store and Lodge pot, spraying and not, baking time, etc. etc. etc.  AND, STILL produce thick, chewy (trip to the dentist) crust!  After trying all the best books/methods, I am now finally going simple (Artisan Bread in 5 Minutes a Day).  Does anyone know what REALLY works for thin, crispy crust???  Thanks much.  Jim Burgin 

dmsnyder's picture
dmsnyder

San Joaquin Sourdough: Update

While I enjoy a variety of breads, the San Joaquin Sourdough remains my “go to” bread. It's easy to fit into a busy schedule. It uses few ingredients. It always tastes delicious. It's wonderful freshly baked but also makes great toast, French toast, garlic bread and croutons for salads or onion soup. It is almost as good after being frozen as fresh. What's not to like?


I first developed this formula about 3 years ago. Since then, I've tweaked the formula and methods in many ways. I know many TFL members have made this bread and enjoyed it. So, I thought an update on my current recipe might be of interest.

To summarize the changes I've made in the past 6 months:

  1. I substituted 25 g of whole wheat flour for an equal amount of the rye flour in the original formula. The difference in flavor is subtle, but I like it better.

  2. I adopted the oven steaming method for home ovens we were taught in the SFBI Artisan I and II workshops. 

    SFBI Steaming method

  3. I switched from using a parchment paper couche to a baker's linen couche. (Highly recommended! Here is my source for linen: San Francisco Baking Institute)

  4. Most recently, after trying several different methods, I've settled on the method of pre-shaping and shaping bâtards taught in the King Arthur Flour instructional video. (See: Hamelman technique videos  The relevant instructions are in the fourth video, starting at about 7:00 minutes.) The SJSD dough is very extensible. This method forms a tighter loaf which is shorter and thicker than that produced with the method I had been using.

Ingredients


Active starter (100% hydration)

150 g

All Purpose flour (11.7% protein)

450 g

BRM Dark Rye flour

25 g

Whole Wheat flour

25 g

Water

360 g

Sea Salt

10 g

Procedures

Mixing

In a large bowl, mix the active starter with the water to dissolve it. Add the flours and stir to form a shaggy mass. Cover tightly and let rest (autolyse) for 20-60 minutes.

Sprinkle the salt over the dough. Using a plastic scraper or silicon spatula, stretch and fold the dough 30 times, rotating the bowl 1/5 turn between each stroke. Cover tightly. Repeat this stretch and fold procedure 3 times more at 30 minute intervals.

Fermentation

After the last series of stretches and folds, scape the dough into a lightly oiled 2 quart/2 liter container and cover tightly. (I use a 2 quart glass measuring pitcher with a tightly fitting plastic lid manufactured by Anchor Glass.) Ferment at room temperature for 90 minutes with a stretch and fold after 45 and 90 minutes, then return the dough to the container and place it in the refrigerator and leave it there for 21 hours. 

Dividing and Shaping

Take the dough out of the refrigerator and scrape it gently onto a lightly floured work surface. Gently pat it into a rectangle. Divide the dough into two equal pieces.

To pre-shape for a bâtard, I now form a ball rather than a log. Place each piece of dough smooth side down. Pat into a rough circle, degassing the dough gently in the process. Bring the far edge to the middle and seal the seam. Then go around the dough, bringing about 1/5 of the dough to the middle and sealing it. Repeat until you have brought the entire circumference of the piece to the middle. Turn the piece over, and shape as a boule. Turn each ball seam side up onto a lightly floured part of your board.

Cover the dough with plastic wrap and/or a kitchen towel and let it rest for about 60 minutes. (The time will depend on ambient temperature and how active your starter is. The dough should have risen slightly, but not much.)

To shape a bâtard, I now favor the method portrayed in the King Arthur Flour instructional video. I encourage you to watch the video, but here is a verbal description of the method:

  1. For each piece of dough, place it in front of you on an un-floured board.

  2. Hold down the near side and stretch the far side of the piece into a rough rectangle about 8 inches front to back.

  3. Now, fold the far end two thirds of the way to the near end and seal the seam with the heel of your hand.

  4. Take each of the far corners of the piece and fold them to the middle of the near side of your first fold. Seal the seams.

  5. Now, the far end of the dough piece should be roughly triangular with the apex pointing away from you. Grasp the apex of the triangle and bring it all the way to the near edge of the dough piece. Seal the resulting seam along the entire width of the loaf.

  6. Turn the loaf seam side up and pinch the seam closed, if there are any gaps.

  7. Turn the loaf seam side down. Then, with the palms of both hands resting softly on the loaf, roll it back and forth to shape a bâtard. Start with both hands in the middle of the loaf and move them outward as you roll the loaf, slightly increasing the pressure as you move outward, so the bâtard ends up with the middle highest and the ends pointed .

Preheating the oven

One hour before baking, place a baking stone on the middle rack and put your steaming apparatus of choice in place. (I currently use a 7 inch cast iron skillet filled with lava rocks.) Heat the oven to 500F.

Proofing

After shaping the loaves, transfer them to a linen couche, seam side up. Cover the loaves with a fold of the linen. Proof until the loaves have expanded to about 1-1/2 times their original size. (30-45 minutes) Test readiness for baking using “the poke test.” Do not over-proof, if you want good oven-spring and bloom!

Baking

Pre-steam the oven, if desired.

Transfer the loaves to a peel. (Remember you proofed them seam side up. If using a transfer peel, turn the loaves over on the couch before rolling them onto the transfer peel. That way, the loaves will be seam side down on the peel.) Score the loaves. (For a bâtard, hold the blade at about a 30 degree angle to the surface of the loaf. Make one swift end-to-end cut, about 1/2 inch deep.)

Transfer the loaves to the baking stone. Steam the oven. (I place a perforated pie tin with about 12 ice cubes in it on top of the pre-heated lava rocks.) Turn the oven down to 460F.

After 12-15 minutes, remove your steaming apparatus from the oven. Rotate the loaf 180 degrees, if it is browning unevenly. Close the oven door. (If you have a convection oven, switch to convection bake, and turn the temperature down to 435ºF.)

Bake for another 12-15 minutes, then remove the loaf and place on a cooling rack. Check for doneness. (Nice crust color. Internal temperature of at least 205F. Hollow sound when you thump the bottom of the loaf.) If necessary, return to loaf to the oven to bake longer.

When the loaves are done, turn off the oven but leave the loaves on the baking stone with the oven door ajar for another 7 minutes to dry the crust.

Cooling

Cool on a rack for two hours before slicing.

Enjoy!

David

Submitted to YeastSpotting

bwraith's picture
bwraith

Sourdough Rise Time Table

I've had a number of discussions with TFL participants recently about sourdough rise times versus temperature and inoculation. Temperature has a big effect on sourdough rise times, and sometimes a starter appears unhealthy, when it is really just rising more slowly because of low temperatures in the kitchen during winter. Also, recipes that used to work seem to fail during the winter, but the colder temperatures may be the cause. To adjust for cold winter kitchen temperatures, either the temperature must be managed actively (oven with pilot light or electric light, coolers with a bowl of warm water in them, and so on), or the percentage of fermented flour must be adjusted in the recipe, or much more time must be allowed for the bulk fermentation and proofing.

I constructed a table that provides (in hours) the doubling time, bulk fermentation time, proofing time, and total mix-to-bake time for various temperatures and percentages of fermented flour. The table has two sections, one for no salt meant for unsalted levains, and one for 2% salt meant for doughs or salted levains.

Inoculation, as used in the table, is the percentage of fermented flour contributed by a levain or storage starter to the total flour in a levain or dough. For example, if 50g of storage starter at 100% hydration is contributed to 225g of flour and 175g of water to create a levain, then the total flour is 250g (25g+225g) and the percentage of fermented flour is 10% (25g out of 250g total flour). Similarly, if a dough containing 1Kg of total flour is made by contributing the levain just mentioned to 750g of flour and 550g of water and 20g of salt, then the inoculation or percentage of fermented flour is 25%, or 250g out of a total flour of 1Kg.

The table is made to match up to rise times for whole wheat, high extraction, or generally high ash content flours I tend to use in my sourdough hearth breads. For pure white flour doughs and levains, the times tend to be about 20% longer, i.e. white flour rises a little more slowly.

Your starter may well be faster or slower than mine. If you build a test levain using a representative entry in the table, such as 10% at 75F, you can see how your starter compares to these table entries and then adjust your rise times and proof times up or down by the same percentage. For example, if you starter doubles in 80% of the time indicated in the table, then it makes sense to use 80% of the time in the table for other temperatures and inoculations also.

You can see from the table that the rise times vary over a huge range depending on temperature. Also, inoculations need to be changed drastically for long overnight rises, depending on temperature.

The strategy for maintaining a starter should also change dramatically if the temperature is 65F instead of close to 80F in the kitchen from winter to summer. For example, a 25% inoculation at 65F results in a 10 hour mix-to-bake time, which is a couple of hours before a levain would peak and begin to collapse, but at 80F an inoculation of only 0.5% results in a 10 hour mix-to-bake time. I've used this model at wide ranges of temperature and had reasonable results. The interesting thing to notice is that a 20g:30g:30g feeding at 65F peaks in around 12 hours but a 1g:100g:100g feeding at 80F peaks in around 12 hours, too. Or, if you look at the mix-to-bake time at 65F for a 10g:45g:45g feeding (10% inoculation), it's 12.5 hours, so if you feed that way at 65F the starter won't be getting to its peak and may be overfed if the feeding is repeated every 12 hours, while the same feeding at 80F will peak in less than 8 hours, so a 12 hour schedule will work well at that temperature.

This is simplified from my rise time models, so it doesn't include some additional adjustments for the dough consistency I make in my spreadsheets. Of course, this is a very rough approximation. All kinds of complications may cause these numbers to be different from actual results. So, it's just a guideline and something to think about, and it's biggest use may be as a learning tool or to just get in the general ballpark for rise times. For example, if your temperatures are very different from the ones the author assumed in the recipe, or if you just don't have an idea where to start with rise times for some recipe your trying, maybe the table will help.

Apologies in advance, if it turns out there is a bug in the table somewhere, but at least some of the numbers made sense after browsing through the table.

bagels
I don't know why, but I thought making bagels was considerably more complicated than making a loaf of bread. Well, it's not: it is easy.

A recipe and a description of how easy it was to make these below.

I knew making bagels involved boiling them. Somehow this left me with the impression that it would be as complicated as deep frying is, where you have to get the oil just the right temperature or else you end up either setting your kitchen on fire or eating little wet balls of grease. Plus there is the whole pot of grease clean up factor. Yuck. Not something I've wanted to deal with.

So when I read a couple of bagel recipes and all they said was "bring a pot of water to a boil. Drop bagels in and boil for a minute or two on each side" I... well, I felt like a dolt. Why didn't I try making these sooner?

About Bagels

There are a ton of bagel recipes out there. A large percentage of them include eggs and butter. Most suggest using high protein bread flour. Some include sugar, some include honey, and others include malt syrup or powder.

For my first time baking bagels, I decided to use the recipe from the The Bread Baker's Apprentice. It appealed to me because it had an extremely simple ingredient list (only one ingredient that don't routinely keep around the house, and it was simple to find and inexpensive) and included an overnight retardation of the dough that made it perfect for baking in the morning. As regular readers will recall, preparing bread in the evening for baking first thing in the morning is an ongoing desire of mine. This recipe fit that model perfectly.

Recipe

Makes 1 dozen bagels

Sponge:
1 teaspoon instant yeast
4 cups bread flour
2 1/2 cups water

Dough:
1/2 teaspoon instant yeast
3 3/4 cups bread flour
2 3/4 teaspoons salt
2 teaspoons malt powder
OR
1 tablespoon malt syrup, honey, or brown sugar

Finishing touches:
1 tablespoon baking soda for the water
Cornmeal for dusting the pan
Toppings for the bagels such as seeds, salt, onion, or garlic

The Night Before
Stir the yeast into the flour in a large mixing bowl. Add the water and stir until all ingredients are blended. Cover with plastic wrap and allow to rise for two hours.

Remove the plastic wrap and stir the additional yeast into the sponge. Add 3 cups of the flour, the malt powder (the one unusual ingredient, which I was able to find at the local health food store), and the salt into the bowl and mix until all of the ingredients form a ball. You need to work in the additional 3/4 cups of flour to stiffen the dough, either while still mixing in the bowl or while kneading. The dough should be stiffer and drier than normal bread dough, but moist enough that all of the ingredients are well blended.

Pour the dough out of the bowl onto a clean surface and knead for 10 minutes.

Immediately after kneading, split the dough into a dozen small pieces around 4 1/2 ounces each. Roll each piece into a ball and set it aside. When you have all 12 pieces made, cover them with a damp towel and let them rest for 20 minutes.

Shaping the bagel is a snap: punch your thumb through the center of each roll and then rotate the dough, working it so that the bagel is as even in width as possible.

Place the shaped bagels on an oiled sheet pan, with an inch or so of space between one another (use two pans, if you need to). If you have parchment paper, line the sheet pan with parchment and spray it lightly with oil before placing the bagels on the pan. Cover the pan with plastic (I put mine into a small plastic garbage bag) and allow the dough to rise for about 20 minutes.

The suggested method of testing whether the bagels are ready to retard is by dropping one of them into a bowl of cool water: if the bagel floats back up to the surface in under ten seconds it is ready to retard. If not, it needs to rise more. I didn't bother doing this, instead counting on it taking about 20 minutes to get my son's teeth brushed and get him to take a bath. In the quick interval between bath time and story time, I placed the pan into the refrigerator for the night.

Baking Day
making bagels
Preheat the oven to 500. Bring a large pot of water to a boil. Adding one tablespoon of baking soda to the pot to alkalize the water is suggested to replicate traditional bagel shop flavor. I went ahead and did this, though I have no idea if it made any difference.

boiling bagels
When the pot is boiling, drop a few of the bagels into the pot one at a time and let them boil for a minute. Use a large, slotted spoon or spatula to gently flip them over and boil them on the other side.

Before removing them from the pot, sprinkle corn meal onto the sheet pan. Remove them one at a time, set them back onto the sheet pan, and top them right away, while they are still slightly moist. Repeat this process until all of the bagels have been boiled and topped.

Once they have, place the sheet pan into the preheated oven and bake for 5 minutes. Reduce the heat to 450 degrees, rotate the pan, and bake for another 5 minutes until the bagels begin to brown. Remove the pan from the oven and let cool for as long as you can without succumbing to temptation.
bagels

Wrap Up

These bagels were awesome. I may try a different recipe next time, like an egg bagel recipe, but I have no complaints about this one.

I did learn that you can put too many seeds on top of a bagel. I went particularly overboard with the poppy seeds. Next time I'll use a few less, but the bagels were still a hit with everyone.

bagels

Related Recipes:Challah Bread, English Muffins, Struan Bread.

Bagels

cranbo's picture
cranbo

TIPS: dough ball sizes and weights for common bread shapes

I wanted a quick reference list for dough ball sizes for common items I bake: breads, rolls, pizza. I haven't found one on TFL, maybe it's here, but no luck yet. So I figured I'd share what I have so far.

Pizzas

12" pizza, personal (plate-sized): 175g (thin) - 250g (thicker)
14" pizza, thin crust, NYC style: 450g
14" pizza, medium "american" crust style: 540g
16" pizza, thin crust, NYC style: 567g

Sourdough and Rustic Loaves

Regular free-form loaf (boule) of sourdough: 1000g
Small free-form loaf (boule): 750g
"Standard" loaf-pan loaf (9.25" x5.25"x2.75"), heavier multigrain bread or sourdough: 1100g

Other Breads

"Standard" loaf-pan loaf (9.25" x5.25"x2.75"), light lean bread: 800g

12" hoagie/sandwich roll: 227g
6"/7" hoagie/sandwich roll: 113g

Standard baguette: 340g
Home oven baguette: 200-250g

Large pretzel: 160g
Bagel: 96-113g

Burger & hot dog buns: 92g
Small soft dinner roll: 48g

Feel free to comment or add other recommended values.

Pages