The Fresh Loaf

A Community of Amateur Bakers and Artisan Bread Enthusiasts.

Most bookmarked

LilDice's picture
LilDice

Jason's Quick Coccodrillo Ciabatta Bread

This is a formula originally posted on usenet in the great alt.bread.recipes group by Jason Molina all credit to him and the 'King of Gloop', I'm reposting it here for those that missed it there. I've made this quite a few times and it's always a huge hit. Giant bubbles and a golden crust. Best part is you can do the whole thing in about 4-5 hours. It does not use the traditional stretch/fold method for a ciabatta because it's so damn wet, the only stretch is the final shaping.

THIS WILL NOT HURT YOUR PRECIOUS KITCHEN AIDS

Ciabatta Bread Ciabatta Bread

Variaton 1

500g bread flour
475g (~2 cups) water
2 tsp. yeast
15g salt

Varation 2 (Semolina)

350g bread flour
150g semolina flour
475-485g (~2cups) water
2tsp. yeast
15g salt


  1. In Kitchen Aid style mixer: Mix all ingredients roughly till combined with paddle, let it rest for 10 minutes.
  2. With the paddle (I prefer the hook to prevent the dough from crawling into the guts of the mixer), beat the living hell out of the batter, it will start out like pancake batter but in anywhere from 10 to 30 minutes it will set up and work like a very sticky dough. if it starts climbing too soon, then switch to the hook. You'll know it's done when it separates from the side of the bowl and starts to climb up your hook/paddle and just coming off the bottom of the bowl. I mean this literally about the climbing, i once didn't pay attention and it climbed up my paddle into the greasy inner workings of the mixer. It was not pretty! Anyway, it will definately pass the windowpane test.
  3. Place into a well oiled container and let it triple! it must triple! For me this takes about 2.5 hours
  4. Empty on to a floured counter (scrape if you must, however you gotta get the gloop out), cut into 3 or 4 peices. Spray with oil and dust with lots o' flour. Let them proof for about 45 minutes, which gives you enough time to crank that oven up to 500F.
  5. After 45 minutes or so the loaves should be puffy and wobbly, now it's iron fist, velvet glove time. Pick up and stretch into your final ciabatta shape (~10" oblong rectangle) and flip them upside down (this redistributes the bubbles, so you get even bubbles throughout), and onto parchment or a heavily floured peel. Try to do it in one motion and be gentle, it might look like you've ruined them completely, but the oven spring is immense on these things.
  6. Bake at 500F until they are 205F in the cnter (about 15-20 minutes), rotating 180 degrees half way through. Some people like to turn the oven down to 450F after 10 minutes, but whatever floats your boat. I usually bake in 2 batches.


Here's my crumb:

Crumb


And my loaves:

Loaves


Original usenet thread with extensive discussion and Q&A - http://groups.google.com/group/alt.bread.recipes/browse_thread/thread/ad0e477790ef4f03/a644f520f4b3cd48?rnum=2#

txfarmer's picture
txfarmer

36 hours+ sourdough baguette - everything I know in one bread


This baguette has many inspirations: the long cold autolyse from Anis, long cold bulkrise from Gosselin, SD instead of instant yeast from David's San Joaqin SD... With 12 hr autolyse, 24 hr cold rise, the process last at least 40 hours from start to finish, however, very little time is spent on real work, most of the time, I just have to wait and let time do its magic.


"Little hands-on work" does NOT equal to "easy to make", in fact, with the extra long process, there could be a lot of variations on how much to S&F, when to start and stop fermentation, etc, not to mention shaping and scoring continue to be a challenge at 75%+ hydration. With plenty of tweeking and adjusting, tthe end result is DELICIOUS: thin and crackling crust dark from all the caramalized sugar, airy and moist crumb, sweet and layered flavor - in the past 2 months, this is our weekend dinner of choice. I have made it at least once a week, sometimes twice a week.


Right now, this is my favorite bagette to eat - and to make.


36hr+ SD baguette

100% hydration starter: 150g

flour: 425g (I usually use KA AP)

ice water: 300g (sometimes a tad more when I feel extra daring)

salt: 10g

1. mix flour and water into a lump of mass, cover and put in fridge for 12 hours. (let's say Thurs morning, takes <5 min)

2. add starter and salt to the dough, use hand to mix until roughly evenly distributed. Note that the 100% starter here has two purpose: it's levaining power to raise the bread, AND it's extra water acts as the "2nd hydration" step in the original Anis formula. To make it even better, the consistency of the starter is much closer to the dough than pure water, so it's easier to mix.

3. bulk rise at room temp (70 to 75F) for 2-3 hours until it grows about 1/3 in volume, S&F every half hour until enough strength has been developed. Put in fridge. (Thurs evening, 3 hours, with 15 min of hands-on work.)

4. 24 hours later, take out dough, if it has not doubled or nearly doubled, give it more time to rise at room temp. I usually have to give it about 1 to 2 hours, depending on temperature, which means the dough can probably be stored in the fridge for even longer than 24 hours.Do make sure it has a sufficient bulk rise, so the dough is strong enough; but don't let it go too long, the dough will be so bubbly that the shaping would be difficult - this is where you need to experiment with timing a lot.

5. divide and rest for 40min.

6. shape and proof for 30 to 50min, score, bake with steam at 460F for 25min. (about 2 to 4hours on Friday night)


There is a lot of room here in term of how to arrange the bulk rise timing - more time before fridge, less during/after; OR more in the fridge; OR now that it's cooler at night, put the dough outside instead and skip fridge all together... The goal is to give the dough a long sufficient bulk rise, regardless how it's done. The key for me is to learn how the dough "feels" and "looks" when it's properly fermentated, so I know I've gotten to the finish line, using whatever fermentation schedule. Before I thought the most difficult part of making baguettes is the shaping, now I thihk it's in managing fermentation - even though I am really not doing anything in that step.


Since we love to eat it, I will conitnue to make this bread a lot, hopefully I will get better with scoring this wet dough! Right now, I am not even trying to get ears, just aim to have the cuts expand properly in the bake.


Sending this bread to Wild Yeast's YeastSpotting event.

dmsnyder's picture
dmsnyder

San Joaquin Sourdough Baguettes

San Joaquin Sourdough Baguettes

April 1, 2013

My San Joaquin Sourdough originated in Anis Bouabsa's baguettes which had won the prize for the best baguette in Paris in 2008. Bouabsa's baguettes departed from convention in utilizing a 21 hour retardation after bulk fermentation and before dividing and shaping. Jane Stewart (Janedo on TFL) and I initially modified Bouabsa's formula by adding a bit of rye flour and some sourdough starter for flavor. I then omitted the commercial yeast altogether and began using the modified formula to shape as bâtards. Over time, I have tweaked the formula and method in various ways, but have settled on the current one as providing the best product.

Today's bake takes the San Joaquin Sourdough back to its roots, so to speak. I used my current formula and method to make San Joaquin Sourdough baguettes. I am very happy with the results.


Total ingredients

Wt (g)

Bakers %

AP Flour

479

89

WW Flour

33

6

Medium rye Flour

29

5

Water

392

72

Salt

10

1.8

Liquid starter

17

3

Total

960

176.8

9.2% of the flour is pre-fermented

Liquid Levain ingredients

Wt (g)

Bakers %

AP Flour

29

70

WW Flour

8

20

Medium rye Flour

4

10

Water

42

100

Liquid starter

17

40

Total

100

240


Final dough ingredients

Wt (g)

AP Flour

450

WW Flour

25

Medium rye Flour

25

Water

350

Salt

10

Liquid levain

100

Total

960


Method

  1. Mix the levain by dissolving the liquid starter in the water, then add the flours and mix well. Ferment at room temperature, covered tightly, until the surface is bubbly and wrinkled. (8-12 hours)

  2. Dissolve the levain in the water, add the flours and mix to a shaggy mass. Cover and autolyse for 30 minutes.

  3. Add the salt and mix to incorporate.

  4. Transfer to a clean, lightly oiled bowl and cover tightly.

  5. Bulk ferment for 3-4 hours with stretch and folds in the bowl every 30 minutes for the first 2 hours, then a stretch and fold on the board after 2.5 hours. The dough should have expanded by about 50% and be full of small bubbles.

  6. Refrigerate the dough for 18-24 hours.

  7. Take the dough out of the refrigerator and transfer it to a lightly floured board.

  8. Divide the dough into 4 equal pieces and pre-shape as logs or round.

  9. Cover the pieces and allow them to rest for 60 minutes.

  10. Shape as baguettes and proof for 45 minutes, covered.

  11. Pre-heat the oven to 500ºF with a baking stone and steaming apparatus in place.

  12. Transfer the baguettes to your peel. Turn down the oven to 480ºF. Score the loaves and load them onto your baking stone.

  13. Bake with steam for 10 minutes, then remove your steaming apparatus and continue to bake for another 10-12 minutes. (Note: After 10 minutes, I switched my oven to convection bake and turned the temperature down to 455ºF.)

  14. Remove the loaves to a cooling rack, and cool for at least 30 minutes before serving.


When tasted about 2 hours after baking, the crust was crunchy and the crumb was soft. The flavor was complex, with a caramelized nuttiness from the crust and a sweet, wheaty flavor from the crumb. There was some mild acidity but no discernible acetic acid tanginess. These are among the best-flavored sourdough baguettes I have ever tasted. Very yummy fresh baked and with great sandwich, crostini, toast and French toast potential.

David

Submitted to YeastSpotting

Floydm's picture
Floydm

Rustic Bread

I've made two batches of the Rustic Bread from Jeffrey Hamelman's Bread: A Baker's Book of Techniques and Recipes and they have turned out excellent. Pretty, too: for once my loaves are decently shaped. I'm not sure it is has so much to do with the recipe or just that, after 4 months of constant baking, I'm starting to get pretty good at this.

I love the simplicity of this one: 2 lbs flour, 1 tablespoon salt, just over 1/2 teaspoon yeast, and enough water to hydrate it all. It still amazes me how the best bread is made with the fewest ingredients.

I want to do a lesson on shaping soon, as well as one on pre-ferments. So I'm not going to cover those steps in the level of detail I should here, but I'll get enough of the recipe down that most people shouldn't have trouble following it.

Rustic Bread

Makes 2 large loaves

Preferment:
1 lb. bread flour (3 1/2 cups)
9.5 oz. water (1 1/4 cups)
1/2 tablespoon salt
1/8 teaspoon instant yeast

Final dough:
10 oz. bread flour (2 1/2 cups)
6 oz. whole wheat or rye flour or a mixture of them (around 1 1/2 cups)
12.5 oz. water (1 1/2 cups)
1/2 tablespoon salt
1/2 teaspoon instant yeast
all of the preferment


Put the yeast in the water and stir. Mix the flour and salt together in a bowl and pour in the yeasted water. Mix until the flour is hydrated, adding more water if necessary. Cover the bowl with plastic wrap and leave the pre-ferment out at room temperature overnight (up to 16 hours... if you need more time before baking put it in the refrigerator).

To make the final dough, combine all of the ingredients except the pre-ferment in a mixing bowl. Chop the pre-ferment up into small pieces and mix or knead it into the final dough until they are thoroughly combined. This is quite difficult to do by hand: Hamelman assumes the baker has a mixer and can mix it for 5 minutes by machine. I mix and knead my dough by hand for about 10 minutes. At the end of that time the new and old dough aren't perfectly combined-- you can still see a few streaks of the lighter colored pre-ferment in it-- but they are sufficiently combined that loaves bake evenly.

Place the dough back in a greased bowl and ferment for 2 1/2 hours, punching down or folding the dough twice during that time.

(Folding the dough consists of taking the dough out of the bowl, spreading it out a little on a clean surface, folding it in thirds like a letter, rotating it 90 degrees and folding it up again, and then returning the dough to the bowl and covering it again. Like punching down, folding degases the dough some, but it also encourages gluten development. More on this topic in a future post.)

At the end of the fermentation, divide the dough into two pieces and preshape each into a ball. Cover with a clean towel and let each rest for 5 to 10 minutes before shaping into the final shape. Once shaped, cover the loaves with a clean towel and set aside for a final rise, approximately 1 1/4 to 1 1/2 hours.

Halfway though the final rise, begin preheating the oven to 450 degrees. If you are using a baking stone, preheat it as well.

Right before placing it in the oven, score the loaves. Place them in the oven and use whatever technique you use to create stream in the oven (squirt bottle, skillet full of hot water, etc) to encourage proper crust development.

After 20 minutes of baking, rotate the loaves 180 degrees so that they'll bake evenly. Bake until an instant read thermometer reads around 200 degrees, which took approximately 35 minutes for my batard ("football") shaped loaves.
Rustic Bread


Related Recipe: Italian Bread

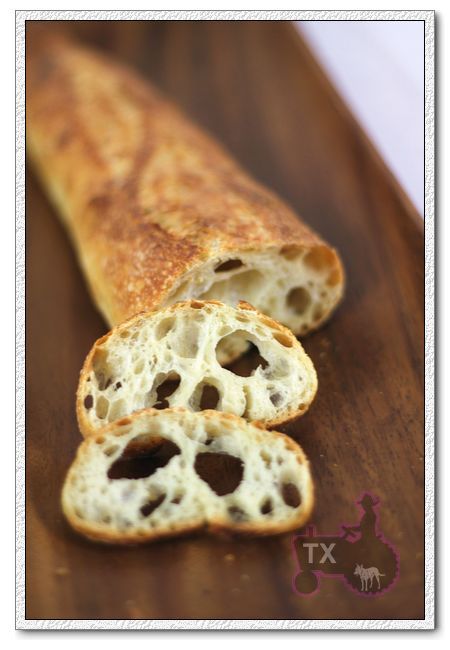
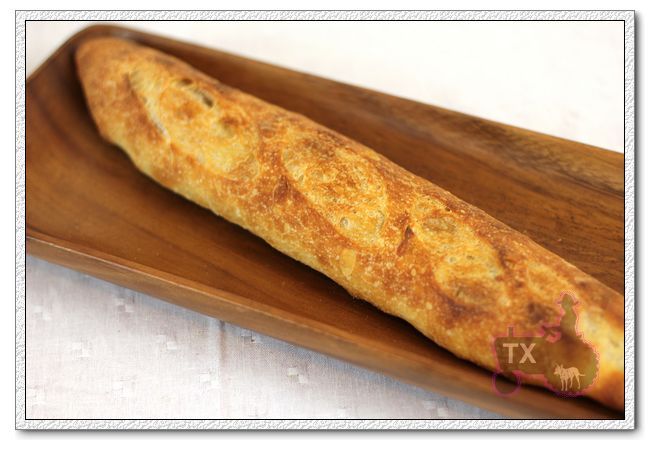
If you've ever made French bread at home, you've made pizza dough. Traditional, DOC (Denominazione de Origine Controllata) designated pizza dough from Italy contains nothing but flour, salt, water, and yeast.

The dough at most neighborhood pizza joints contains a few more ingredients. Fats are added to make the dough more supple, and sugars are added to feed the yeast and give the bread a touch of sweetness.

I suggest that home bakers begin with a simple, versatile pizza dough recipe like the one below. Once you've got that under control you can experiment to find something more to your liking.

Realize that you are going to give your pizza a lot more TLC than the employees at most chain pizza places do. If teenagers working at Dominos for 6 bucks an hour can make a decent pizza, you shouldn't have any problem doing it yourself at home!

A Versatile Basic Pizza Dough

This is the Neo-Neapolitan Pizza Dough from Peter Reinhart's American Pie. It is a low-yeast, slow-rising dough with enough suppleness to make it easy to work with. I find it to be the most versatile dough recipe I've come across.

At the end of this article I will talk about how to modify it to better match your preference in pizza dough style. But, first things first:

pizza

The Dough:

Makes 4 10-inch pizzas
5 cups all purpose flour
1 Tablespoon sugar or honey
2 teaspoons salt (or 3 1/2 teaspoons kosher salt)
1 teaspoon instant yeast
2 Tablespoons olive oil
1 3/4 to 2 cups room-temperature water

Combine all of the ingredients in a large mixing bowl and stir vigorously with a wooden spoon or mix in an electric mixer. After you've combined all of the ingredients, set the dough aside to rest for 5 minutes. Stir again for 3 to 5 minutes, adding more water or flour if necessary. Generally speaking, you want the dough to be wetter and stickier than your typical bread dough. It should be dry enough that it holds together and pulls away from the side of the bowl when you mix it, but it doesn't need to be dry enough to knead by hand.

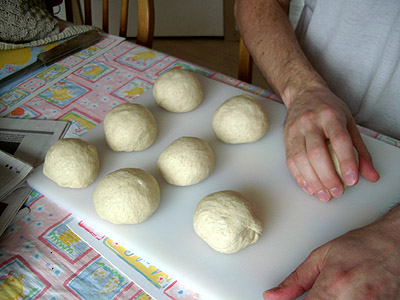
Divide the dough into 4 pieces. Place each one into an oiled freezer bag. I just squirt a couple of sprays of spray oil into the bag. You can also brush the outside of the dough with olive oil and then place it into the bag. All that matters is that you be able to get the dough out of the bag later.

If you aren't going to bake them that day, you can throw the bags into the freezer. They'll stay good in there for at least a month. The evening before you intend to bake them, move the frozen dough balls to the refrigerator to thaw.

If you intend to bake them later that day, place the bagged dough balls in the refrigerator. Remove them from the fridge and let them warm to room temperature an hour or two before you intend to bake them.

Remember that, as a baker, time is your friend: longer, slower rises at reduced temperature result in better tasting bread. But sometimes you don't have the luxury of time - that is OK; this dough will still work well if only given an hour or so to rise at room temperature. Allowing pizza dough to rise is more about giving the yeast time to bring flavors out of the wheat than it is about leavening. Most of the leavening occurs when you put the active dough into the hot oven, so you don't need to wait until the dough balls double in size.

Surely you can prepare the dough an hour before baking, can't you? That'll give you time to make the sauce, grate the cheese, and get the oven hot. Speaking of which, it is time to put together a sauce.

Getting Saucy

Once again, there are a million different pizza sauces. If you already have one you like, feel free to stick with it. Or consider doing something totally different, like using pesto or barbecue sauce instead of a tomato sauce.

I throw this recipe out because it takes under 3 minutes to make and is quite good. Once again, it is from Peter Reinhart's pizza book.

pizza

The Sauce:

1 28oz can crushed tomatoes
1 teaspoon dried basil
1 teaspoon dried oregano
1 Tablespoon garlic powder or 4 or 5 cloves of crushed garlic
2 Tablespoons red wine vinegar or lemon juice, or a combination of the two
salt and black pepper to taste

Stir everything together. If the tomatoes are too chunky, break them up with your fingers.

Fresh tomatoes or herbs can be substituted for canned tomatoes and dried herbs. The fresh tomatoes don't even need to be cooked first, since the time in the oven baking is enough to cook them.
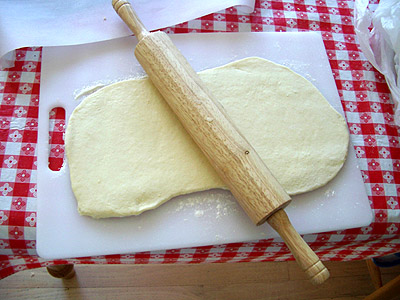
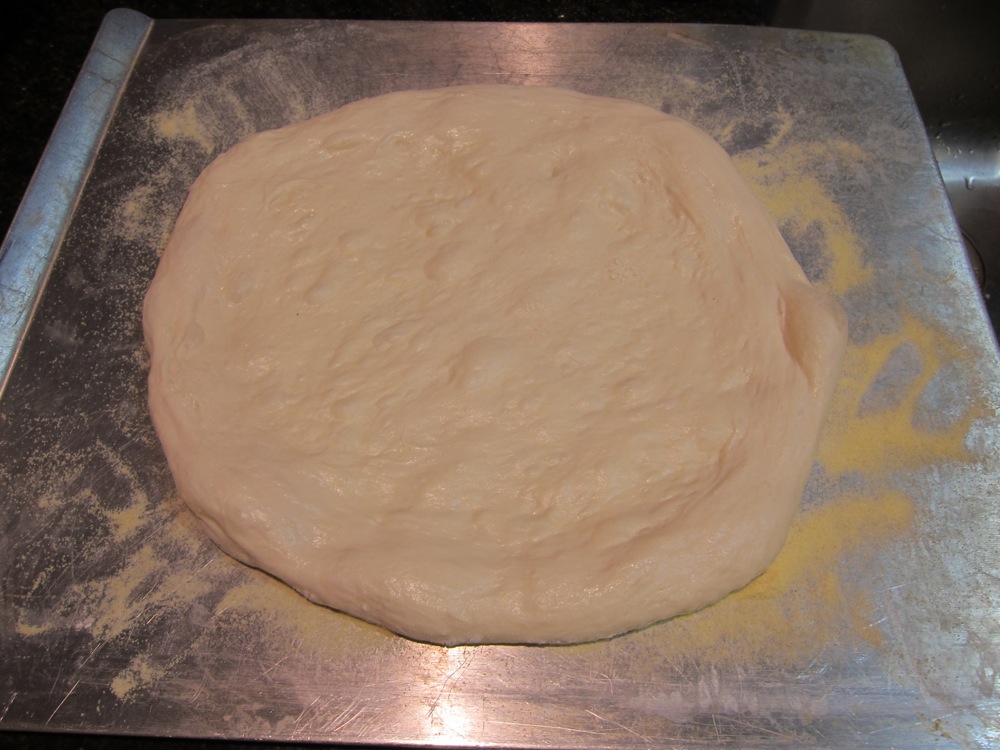
Shaping

I am not experienced enough to do the whole "throw the pizza into the air" thing. My technique for shaping the dough is extremely simple. I pick up a ball of dough and gentle stretch it into a circle. Once I've got a circle four or five inches across, I hold it up by the edge and, while rotating it, let the weight of the rest of the dough pull it down to stretch it out.

When I start feeling resistance in the dough, I set it down on a lightly greased plate to rest for 5 or 10 minutes. Then I pick it up again and stretch it a little thinner before lying it down to add the toppings.

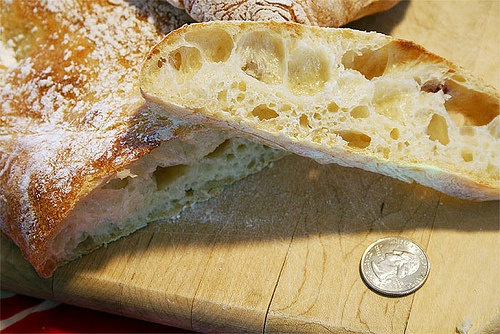
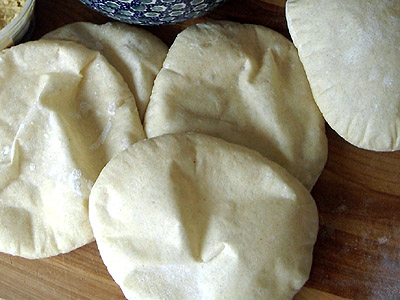
I like to stretch my dough quite thin, until it is almost transparent. If you like thicker pizza dough then, obviously, don't stretch it out so much.

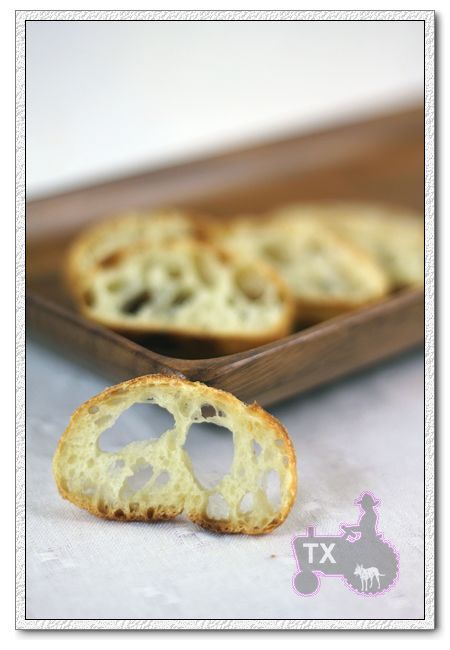
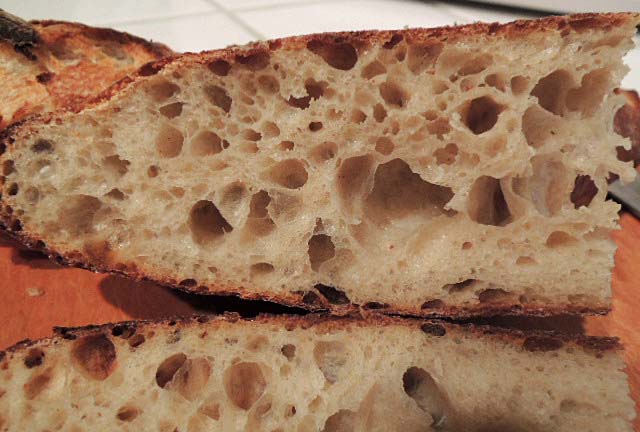
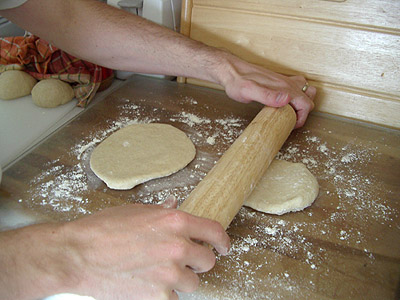
You can use rolling pin to shape the dough. Doing so results in a more uniform dough with numerous small holes. I personally like the dough to be thinner in the center than the edge and to have a thicker, bready crown full of large irregular holes around the outside. This effect is difficult to achieve with rolling pin, but if that suits your taste then go for it.

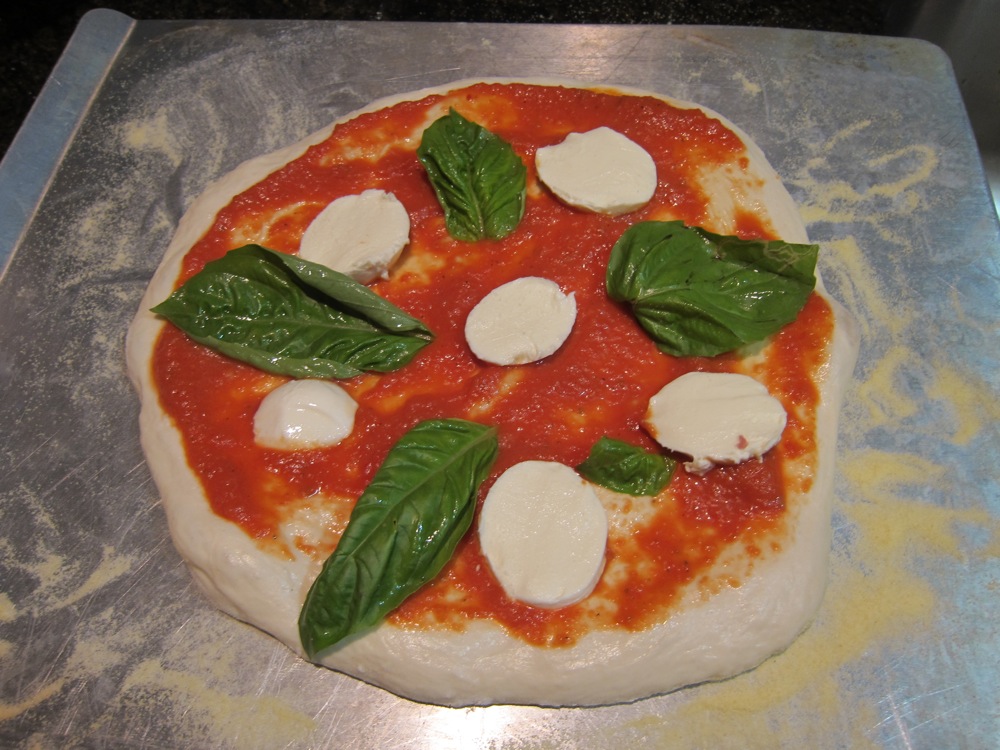
Topping and Preparing for Baking

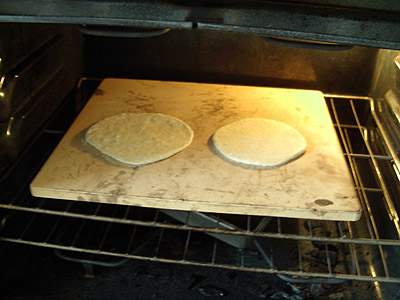
Before you put the toppings on the dough, you need to know on what surface you intend to bake the pizza. If you have a pizza stone, it should be put in the oven and getting hot (450 or 500 degrees) by now. If not, the back of a cookie sheet works fine.

If you are going to try transferring your pizza from one surface (like a peel or a cookie sheet) to another (like a hot pizza stone), I strongly recommend using parchment paper under the pizza. Particularly if you are going to add a lot of toppings to the pie: the extra weight pressing down tends to make the dough stick to the surface you dressed it on. You could also try to sprinkle corn meal or semolina flour on the surface hoping that will be enough to let you slide the dough without sticking - in my experience, though, it rarely is; I've had many pizzas end up looking like roadkill because they wouldn't to come off the peel smoothly. I've cut the number of swear words I use in the kitchen in half just by springing for a 5 dollar roll of baking parchment and placing a piece of it under the pizza. I just grab a corner of the paper and tug it into place when it is time to slide the pizza into the oven. Much, much simpler.

Whatever surface you decide to dress the pizza on, sprinkle it with corn meal or semolina flour and spread the dough over it. Add the sauce, the grated cheese (typically mozarella and parmesan, but there is no reason you can't improvise), and toppings.

Baking

As I mentioned earlier, most of the rise you get from pizza dough actually happens in the oven. Professional pizza ovens are much hotter than home ovens. At home you typically want to make pizza at the highest temperature that your oven can safely handle, like 450 or 500 degrees. Baking on a pizza stone will give your dough a little more pop when it gets in the oven but it is not necessary to make good pizza.

If not the lowest shelf, then the second to lowest is probably the best place to bake your pie. You want the pizza to be as close to the heat source as is possible without burning. But every oven is different, so adjust accordly.

Place the pizza in the hot oven, close the door, and let it bake for 5 minutes. Check it every minute or two until the cheese is melted and the dough looks baked. In my oven with the size pizzas I make, I bake them for 7 to 9 minutes.

Pull them out, slice them, and eat!

The Pizza Spectrum

As I mentioned, there are dozens of dough recipes for the endless different styles of pizza. The most traditional recipe includes nothing but flour, yeast, salt, and water. Adding a little bit of oil makes the dough more supple so that it can be stretched easier and is softer to the bite. Adding a touch of sugar gives the yeast something to snack on. And more yeast can be added to guarantee a rise even for heavily topped pies.

Some general recommendations, based on a couple of the more popular styles of crust:

  • Thin and Crackery - Add less (or no) oil. Try using some high protein bread flour, like one out of five of the cups. Stretch the dough extremely thin. Bake it on a pizza stone or as close to the heat source as possible without burning it.
  • Thick and Chewy - Substitute milk for half of the water. Add more oil or shortening to the dough. Increase the sugar and the yeast by half again. Don't roll the dough out so thin. Bake it up a shelf or two in the oven so that it can bake longer without burning.

Any of the other techniques you've learned for baking bread can be adapted for pizza: sourdough, the sponge method, including whole wheat flour, even grilling, which I will write about when the weather warms up. So use your imagination!

If other folks have dough recipes they've had good experience with, I'd love to have them share them below. Please specify what style dough it makes.

A Pizza Primer

dabrownman's picture
dabrownman

No Muss No Fuss Starter

I thought I would make a post on how I keep my starter for those who have an interest in doing the same.  My method is based on several wants.  First, I don’t want to maintain or feed a starter for up to 16 weeks.  Second, I want to keep as small amount of starter as possible so that I can bake a loaf of bread each week using a bit of it and still have it last 16 weeks.  Thirdly, I want a starter that is sourer and has a higher LAB to yeast ratio than the normal 100 to 1 found in most starters.  Finally two more wants, I don’t want any waste and I want to make any kind of bread with it.

To get these characteristics I make a stiff (66% hydration) whole rye starter in the 100g range and keep it in the fridge.  Stiff is relative, since many breads are made with this hydration but mine tend to be quite a bit more wet than 66%.   I take a small bit the starter each week and when it gets down to 10 g or so I build it back up using a 3 stage starter build.  As follows:


Build

1st

1st


2nd

2nd


3rd

3rd


Seed

Flour

Water

Total

Flour

Water

Total

Flour

Water

Total

H2O

10

10

10

30

20

20

70

40

16

126

65.7%

8

8

8

24

16

16

56

32

13

101

66.1%

6

6

6

18

12

12

42

24

10

76

66.6%

I usually build the 101 g total line for my 1 loaf of SD bread a week.  The first two feedings are 4 hours each at 100% hydration and the starter should double 4 hours after the 2nd feeding.  I it doesn’t then toss the 2nd feeding total amount in weight and redo it.  The final 66%hydration is accomplished by using much less water for the 3rd feeding.  Once the starter rises 25% in volume after the 3rd feeding, that is when you refrigerate it for its long term storage.

Make sure you are maintaining 80 -84 F while building the starter.  This is the temperature range that suits yeast reproduction rates and the LAB will still be out reproducing yeast at that temperatures.  What happens, over weeks of storage time in the fridge, is that the starter will become sourer as time progresses.  The bread it makes after 8 weeks in the fridge is worth the wait.

But, like most things it is relative and the resulting bread isn’t too sour either.  If you want really sour bread do some of the following at 94 F – build the starter, levain build, gluten development, bulk ferment or final proof after shaping.  I like using a small amount of starter to build a levain amount under 10%, a very cold bulk ferment, counter warm up and a 94 F final proof when I’m going for a really sour bread.

Now, to get this small amount of starter to last for 12-16 weeks you want to make bread with a small amount of it to build the larger levain you want for the bread.  Here is a chart to use for 800g of dough (1 loaf for me) that can be used for different times of years, various ambient temperatures, how much time you have (faster or slower process needed) and how much sour you want for the time you have.  Making a 3-5 day loaf of retarded bread in the summer is much different than making 1 day SD bread in the winter.  I like to retard dough to bring out its full flavor and fit my schedule better.  So in the warm summer, I use half the levain that I might in the colder winter months to get a 12 hour retard into the process.  To get more sour in a 1 day (after a 12 hour levain build process), I might use 30% levain (the 240 g line) to speed things along and still keep some of the sour I want.  Here is a chart to use for various levain builds for 800 g of dough using this starter.


First

First


2nd

2nd


3rd

3rd


Dough


Build

Build


Build

Build


Build

Build


Weight

Seed

Flour

Water

Total

Flour

Water

Total

Flour

Water

Total

800

3

6

6

15

11

11

37

22

22

81

800

4

8

8

21

17

17

54

33

33

120

800

6

11

11

28

22

22

72

44

44

160

800

7

14

14

34

28

28

90

55

55

200

800

8

17

17

41

33

33

108

66

66

240

The method of the levain build remains the same – (3) 4 hour builds.  If the levain fails to double 4 hours after the 2nd build then toss the 2nd build weights and redo the 2nd feeding.  I usually refrigerate the levain for 24 hours after it rises 75% -100% after the 3rd feeding to bring out more sour and fit my schedule. 

If you mill your own flour and or have a sieve, you might consider sifting the whole grain flour and use the sifted out hard bits to feed the levain.   He levain seems to love these hard bits and getting them wet for a longer period will help to get these hard bits as soft as possible potentially resulting in better spring, bloom and a more open crumb.  I even do this with sprouted, dried and milled whole grain bits but build less levain as these grains are on steroids already and might turn the dough to goo if trying for a 12 hour retard.

For the 3 stage starter and the levain builds it might take 8-12 hours in the summer if your kitchen is a warm as mine and more than 12 hours in the winter if you don’t use a heating pad.   You can make any bread with this starter and levain method by using the flour you want for the levain build.  Use white flours for white breads and various whole grains for bread with whole grains in them.  Any combination of levain flour works -  at least for the more than 100 varieties of bread I have made with it. Without any maintenae of the starter or throwing any starter or levain away.     

Happy SD baking the No Muss No Fuss way!

dmsnyder's picture
dmsnyder

dmsnyder Recipe Index

Rye Breads

TFL Handbook section about Rye Flour

Jewish Sour Rye

Jewish Sour Rye: an update

Norm's Sour Rye

Russian Rye

Pumpernickel Bread from George Greenstein's "Secrets of a Jewish Baker"

Care and feeding of a rye sour

Hamelman's Flax seed rye bread - Thanks, hansjoakim!

Three-Stage 80% Sourdough Rye Bread from Hamelman's "Bread"

Hansjoakim's Favorite 70% Rye: Revisiting an old friend 

Sourdough Rye from Advanced Bread & Pastry

Baguettes

San Joaquin Sourdough Baguettes

Baguette crumb - 65% hydration dough (Pat Roth's baguettes)

Proth5's "Starting to get the bear" baguettes

Anis Bouabsa ficelles

Philippe Gosselin's Baguettes

Baguette Tradition after Phillip Gosselin

Épi de Blé

Sourdough Breads

The Great Baguette quest N°3: Anis Bouabsa   This was the origin of what evolved into my San Joaquin Sourdough

San Joaquin Sourdough 1

San Joaquin Sourdough variation

San Joaquin Sourdough, updated 10/10/2010

San Joaquin Sourdough: Update 6/26/2011

San Joaquin Sourdough Baguettes (2013. Latest version.)

My favorite multi-grain sourdough bread 11-10-2020

Sourdough Bread with 31% Freshly-milled Whole Wheat Flour

Buttermilk-Spelt Sourdough Bread

Sourdough Challah from "A Blessing of Bread"

Susan from San Diego's Ultimate Sourdough

Susan from San Diego's Original Sourdough

Sourdough Italian Baguettes (5/2015)

Sourdough Italian Bread

Italian-San Joaquin Sourdough 

Italian bread with currents, fennel and pine nuts

San Francisco Sourdough from Reinhart's “Crust&Crumb”

Sourdough bread with new steaming method

Sourdough Multigrain Bread from "Advanced Bread and Pastry"

Greek Bread - Improved

Sourdough Pan de Horiadaki from "A Blessing of Bread"

Miche from SFBI Artisan II - 2 kg

This miche is a hit!

Country Bread with fresh-milled flours

Walnut Raisin Sourdough Bread from SFBI Artisan II

Sourdough Fig-Walnut Bread, a new and improved version

Sourdough Bread from SFBI Artisan II  also see This week's baking - July 18, 2016

Miche from Michel Suas' "Advanced Bread and Pastry"

Vermont Sourdough with Increased Whole Grain, from Hamelman's "Bread"

5-grain Sourdough with Rye Sourdough from Hamelman's "Bread"

Multi-grain sourdough bread made with home-milled flours August 12, 2018

Sourdough Whole Wheat Bread from AB&P

Gérard Rubaud Pain au Levain

My San Francisco Sourdough Quest, Take 4 (The best version)

My San Francisco Sourdough Quest, Take 6 (and final?)

San Francisco-style Sourdough Bread with Walnuts and Sour Cherries

San Francisco-style Sourdough Bread with Walnuts and Figs

Sourdough Honey Whole Wheat Multigrain Bread

Pane Valle Maggia, ver. 2 3/7/2014

Pane Valle del Maggia

San Francisco-style Sourdough Bread with increased whole wheat flour

San Francisco-style Sourdough Bread 3-22-2019

Pugliese Capriccioso

Pizza

Pizza Bliss

Pizza made with Sourdough Starter Discard


Sweet Breads & Pastries

Oatmeal Bread with Cinnamon and Raisins from Hamelman's "Bread"

Cheese Pockets

Other/Tutorials

Debra Wink's wonderful instructions for creating a sourdough starter: The Pineapple Juice Solution, Part 2

Scoring Bread

Scoring Bread: An updated tutorial

Scoring Bread made with high-hydration dough

Proofing "en couche:" or A Couching Coaching

Flipping Board (Transfer Peel) Demonstration

High Hydration dough Shaping - From SFBI

My sourdough starter routine: a FAQ

Baker's Math: A tutorial 

Converting starter hydrations: A Tutorial. Or through thick and thin and vice versa

Understanding autolyse

Baking under an aluminum foil roasting pan

Hamelman's “Stretch and Fold in the Bowl” no-knead technique

KAF instructional videos

NoKnead.html (by Mark Sinclair/mcs)

Shaping a boule: a tutorial in pictures.

Quick doodle should help (rainbowz's cool diagram of how to use a transfer peel)

Mixing a stiff starter

Norm's onion rolls and kaiser rolls

Norm's Double Knot Rolls

Kaiser roll shaping

Tom Cat's Semolina Filone (from Glezer's Artisan Breads)

Potato-Nut Bread from South Tyrol (Thanks, Salome!)

SFBI Artisan I Workshop

SFBI Artisan I workshop: Day 1 

SFBI Artisan I workshop: Day 2 

SFBI Artisan I workshop: Day 3

SFBI Artisan I workshop: Day 4

SFBI Artisan I workshop: Day 5

SFBI Artisan II Workshop

SFBI Artisan II Workshop - Day 1

SFBI Artisan II Workshop - Day 2

SFBI Artisan II Workshop - Day 3

SFBI Artisan II Workshop - Day 4

SFBI Artisan II Workshop - Day 5

Pita bread is a great bread for beginning bakers or for making with kids. The entire process of making them only takes about two hours too, so it is also a great one for people on a tight schedule.


Flat Breads

Flat breads can be made in dozens of different ways. They can be made from grains other than wheat, such as corn in corn tortillas. They can be made with no leavening, such as matzo or flour tortillas, with chemical leavening (baking soda or baking powder) such as pancakes or crepes, or with yeast, such as naan or pita bread. They can also be made from a starter. And they can be baked (pitas), fried (fry bread), grilled (zebra bread), and, I would imagine even steamed (I'm drawing a blank... anyone?). Flat breads of some sort exist in just about every culture on the globe.

Anyone who grew up in a household where flat breads are an essential part of every meal knows will attest that they are a hundred times better when baked fresh than when bought from the store wrapped in plastic and already two or three days old.

I wasn't brought up in such a house, actually, but a year or two ago I started going to a local Lebanese restaurant solely for the fresh pita bread that they baked. After draining my wallet by eating lunch there every day for a week, I realized pita bread must be pretty simple to make at home. So I tried it and was extremely pleased with the results. I still visit the Lebanese restaurant for their pitas every few weeks, but I've cut back and saved myself a ton of money.

About The Ingredients

There are only 6 ingredients in this recipe for pita bread, and you even have quite a bit of flexibility in choosing which of those to include. I'll go through the ingredients one-by-one:

  • Flour - I like to use one cup of whole wheat flour and 2 cups of all purpose unbleached flour. It gives the pitas a heartier flavor than using all white flour. You can use any combination of the wheat flours you have around the house, from 100% white flour to 100% whole wheat flour. You could probably even use flour made from other grains, though I'd suggest trying it with wheat flour the first time before getting too crazy.
  • Salt - Salt is necessary to retard the yeast (slow it down) and to flavor the bread. Without salt bread is pretty... blah. I used kosher salt for this, but any type of salt you have in the house will work just fine.
  • Water - Plain old tap water, assuming your water is drinkable. If not, bottled or distilled water. Something close to room temperature (warmer than 50 degrees fahrenheit, cooler than 100 degrees) works best.
  • Sugar - A touch of sugar or honey provides a little more food for the yeast and will make the bread brown faster when it caramelizes. It also can add a touch of sweetness to the dough. You can safely omit it from the recipe and it will turn out fine, or add more if you like it sweeter.
  • Yeast- I use instant yeast, which is also know as Rapid Rise or Bread Machine yeast. Instant yeast is a little more potent than active dry yeast and can be mixed directly in with your dry ingredients and will have no problem waking up when the water is added. Active dry yeast works just as well as instant yeast, but requires being activated in a little bit of warm water before being added to the rest of the ingredients. If you are using active dry yeast, read the instructions on the package to figure out how to activate the yeast before adding it to this recipe and reduce the amount of water you add later in the recipe by the amount of water you proof the yeast in (i.e., if you activate the yeast in a half a cup of water only add 3/4 to 1 cup later).
  • Oil - Oil or fats soften the bread and keep it fresher longer. Olive oil is the most traditional oil to use in Mediterranean and Middle Eastern cooking, but if you do not have any you can use whatever you have in the house. And, in the worst case, you can even omit it.


Pita Bread

Makes 8 pitas

3 cups flour
1 1/2 teaspoons salt
1 Tablespoon sugar or honey
1 packet yeast (or, if from bulk, 2 teaspoons yeast)
1 1/4 to 1 1/2 cups water, roughly at room temperature
2 tablespoons olive oil, vegetable oil, butter, or shortening


If you are using active dry yeast, follow the instructions on the packet to active it (see the note on yeast above). Otherwise, mix the yeast in with the flour, salt, and sugar. Add the olive oil and 1 1/4 cup water and stir together with a wooden spoon. All of the ingredients should form a ball. If some of the flour will not stick to the ball, add more water (I had to add an extra 1/4 cup).

Once all of the ingredients form a ball, place the ball on a work surface, such as a cutting board, and knead the dough for approximately 10 minutes (or until your hands get tired). If you are using an electric mixer, mix it at low speed for 10 minutes.

(The purpose of kneading is to thoroughly combine the ingredients and to break down the flour so that the dough will become stretchy and elastic and rise well in the oven. A simple hand kneading technique is to firmly press down on the dough with the palm of your hand, fold the dough in half toward you like you are closing an envelope, rotate the dough 90 degrees and then repeat these steps, but whatever technique you are comfortable using should work.)

When you are done kneading the dough, place it in a bowl that has been lightly coated with oil. I use canola spray oil, but you can also just pour a teaspoon of oil into the bowl and rub it around with your fingers. Form a ball out of the dough and place it into the bowl, rolling the ball of dough around in the bowl so that it has a light coat of oil on all sides. Cover the bowl with plastic wrap or a damp kitchen towel and set aside to rise until it has doubled in size, approximately 90 minutes.

When it has doubled in size, punch the dough down to release some of the trapped gases and divide it into 8 pieces. Roll each piece into a ball, cover the balls with a damp kitchen towel, and let them rest for 20 minutes. This step allows the dough to relax so that it'll be easier to shape.

While the dough is resting, preheat the oven to 400 degrees. If you have a baking stone, put it in the oven to preheat as well. If you do not have a baking stone, turn a cookie sheet upside down and place it on the middle rack of the oven while you are preheating the oven. This will be the surface on which you bake your pitas.

After the dough has relaxed for 20 minutes, spread a light coating of flour on a work surface and place one of the balls of dough there. Sprinkle a little bit of flour on top of the dough and use a rolling pin or your hands to stretch and flatten the dough. You should be able to roll it out to between 1/8 and 1/4 inch thick. If the dough does not stretch sufficiently you can cover it with the damp towel and let it rest 5 to 10 minutes before trying again.

If you have a spray bottle in the kitchen, spray a light mist of water onto your baking surface and close the oven for 30 seconds. Supposedly this step reduces the blistering on the outside of your pitas. I've skipped it many times in the past and still been pleased with my breads, so if you don't have a bottle handy it isn't a big deal.

Open the oven and place as many pitas as you can fit on the hot baking surface. They should be baked through and puffy after 3 minutes. If you want your pitas to be crispy and brown you can bake them for an additional 3 to 5 minutes, but it isn't necessary (in the batch pictured here I removed them at 3 minutes).

That's it. They should keep pretty well, but we almost always eat them as soon as they come out of the oven.


Yum!

pita bread

If you have any tips on baking pitas or have a recipe you'd like to share, please add a comment below.

Pita Bread

blueberry cream cheese slice
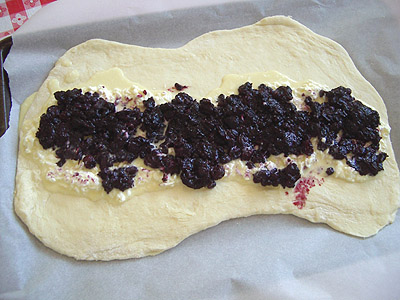
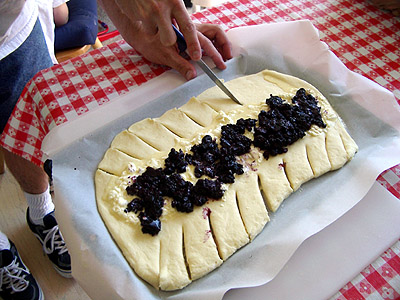
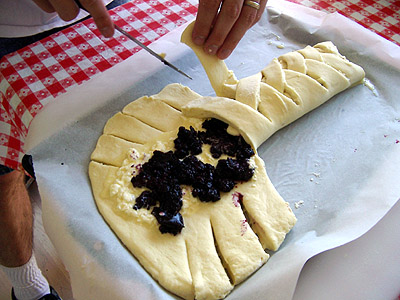
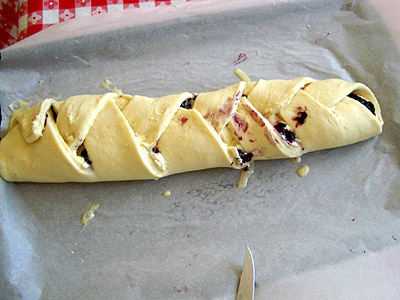
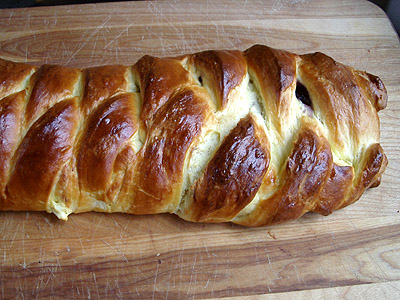
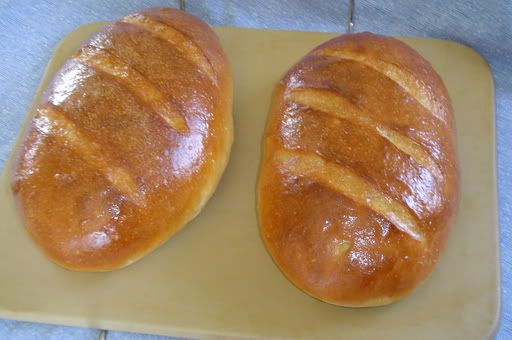
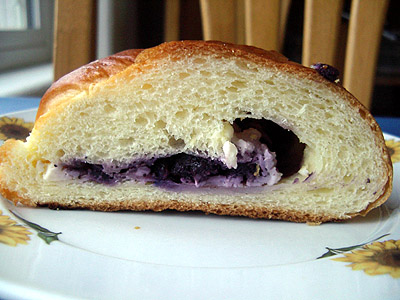
Blueberries and cream cheese wrapped in a sweet yeasted dough. Yes, it really is as good as it sounds, and it is making me hungry again just sitting here thinking about it.

The recipe and a lot more picture below.


This dough is a wonderful one from Beth Hensperger's The Bread Bible. I like it because it is sweet and rich without being too rich. Any sweet dough will do though.

Hensperger suggests making a raspberry filling and sprinkling a streusal on top instead of using egg wash. That, too, sounds excellent, I just happened to have a bunch of extra blueberries in the freezer and some extra cream cheese in the fridge so I modified the recipe to fit my needs. Obviously, you should adapt this to use whatever you enjoy the most, have easy access to, or have an excess of.

I think you could do a wonderful savory version of the recipe if you used a less sweet dough. Think about something along the lines of a mushroom braid with Swiss cheese, or a pesto and parmesan braid, or a sausage and onion braid. Hm? Any of them sound good? Well, they do to me.

Blueberry Cream Cheese Braid

Makes 2 braids

Sponge
1 tablespoon instant yeast
1 tablespoon sugar
1 1/2 cup warm milk
2 cups unbleached all-purpose flour

Dough
2 eggs
1 1/2 teaspoons salt
1/3 cup sugar
2 1/2-3 cups unbleached all-purpose flour
1/2 cup (1 stick) butter

Blueberry Filling
2 cups blueberries
1/4 cup sugar
1/4 cup cornstarch
2 tablespoons lemon juice

Egg Glaze
1 egg
1 tablespoon milk

Cream Cheese Filling
3/4 cup cream cheese
2 tablespoons sugar
1/2 teaspoon vanilla extract
1 tablespoon egg glaze

For the sponge: mix the sugar, yeast, and flour together in bowl. Pour in the warm milk. Beat until smooth, then cover with plastic wrap and set aside for 1/2 hour.

Add the eggs, salt, sugar, and one cup of the flour to the sponge. Beat until smooth. Then add the butter in small chunks and beat well. Add the remaining flour a handful at a time and mix in until a soft but kneadable dough is achieved and the butter thoroughly incorporated.

Knead the dough by hand or with a mixer until it is smooth and satiny, about 5 minutes.

Place the dough in a greased bowl, cover with plastic wrap, and let rise and room temperature until doubled in size, 1 1/2 to 2 hours. Deflate the dough, recover the bowl, and refrigerate overnight.

The next day, make the fillings before shaping the loaves.

Blueberry Filling: combine all of the ingredients in a small saucepan and bring to a boil over medium heat while stirring constantly. Reduce heat and simmer for 5 minutes, then remove from heat and let cool.
Egg Glaze: combine the egg and milk in a bowl and beat until combined.
Cream Cheese Filling: combine all the ingredients in a bowl and mix until combined

Once your filling has cooled off, take the dough out of the refrigerator and gently deflate it. Divide it into two pieces. Use a rolling pin to shape each piece into a thin (1 cm.) rectangle.

rolling the dough

Spread your fillings in the center of the dough.

rolling the dough

At an angle, slice the sides of the dough into tabs approximately 1 inch wide.

cutting the braid

Alternating from side to side, fold the pieces in over the filling. When possible, gentle press on the tabs to seal the folds.

rolling the dough

After it has been fully folded, glaze the braid with egg wash. Cover loosely with plastic (I place the entire baking pan in a clean kitchen garbage bag). Set aside to rise until doubled in size, approximately 45 minutes. While it is rising, preheat the oven to 350.

rolling the dough

Just before placing the braid in the oven, glaze it again with any remaining egg wash. Bake on the center rack of the oven for approximately 35 to 40 minutes, rotating it once after 20 minutes so that it bakes evenly. Remove it from the oven and allow it to cool for at least half an hour before slicing.

baked blueberry braid

Heaven!

Blueberry Cream Cheese Braid

SourdoLady's picture
SourdoLady

Wild Yeast Sourdough Starter

I have been baking with wild yeast sourdough for the past 5 years. It all began when I purchased a starter from Sourdoughs International. One starter led to another starter, until I had 5 different ones. Recently, I felt up to the challenge of making my own wild yeast starter from scratch. I had tried this once before, many years ago, with no success at all. At that time I knew next to nothing about wild yeast and how it works.

This starter recipe is awesome because it really works, and it explains why it works. The starter I made is very good. The flavor is amazing and it rises very well. I purchased rye and wheat berries at my local health food store and ground them in a coffee grinder to make flour for my starter. It was kind of tedious to grind but I only needed a few tablespoons. I'm sure that you could just buy freshly milled flour at the health food store and it would work just as well. The wild yeast is on the grains and you just need to provide the right conditons to wake it up.

Procedure for Making Sourdough Starter

Day 1: mix...
2 T. whole grain flour (rye and/or wheat)
2 T. unsweetened pineapple juice or orange juice
Cover and let sit at room temperature for 24 hours.

Day 2: add...
2 T. whole grain flour
2 T. juice
Stir well, cover and let sit at room temperature 24 hours. At day 2 you may (or may not) start to see some small bubbles.

Day 3: add...
2 T. whole grain flour
2 T. juice
Stir well, cover and let sit at room temperature 24 hours.

Starter at Day 3:

Day 4:
Stir down, measure out 1/4 cup and discard the rest.
To the 1/4 cup add...
1/4 cup flour*
1/4 cup filtered or spring water

*You can feed the starter whatever type of flour you want at this point (unbleached white, whole wheat, rye). If you are new to sourdough, a white starter is probably the best choice. All-purpose flour is fine--a high protein flour is not necessary.

Repeat Day 4:
Once daily until the mixture starts to expand and smell yeasty. It is not unusual for the mixture to get very bubbly around Day 3 or 4 and then go completely flat and appear dead. If the mixture does not start to grow again by Day 6, add 1/4 tsp. apple cider vinegar with the daily feeding. This will lower the pH level a bit more and it should wake up the yeast.

Starter at Day 7:

How it Works

The yeast we are trying to cultivate will only become active when the environment is right. When you mix flour and water together, you end up with a mixture that is close to neutral in pH, and our yeasties need it a bit more on the acid side. This is why we are using the acidic fruit juice. There are other microbes in the flour that prefer a more neutral pH, and so they are the first to wake up and grow. Some will produce acids as by-products. That helps to lower the pH to the point that they can no longer grow, until the environment is just right for wild yeast to activate. The length of time it takes for this to happen varies.

When using just flour and water, many will grow a gas-producing bacteria that slows down the process. It can raise the starter to three times its volume in a relatively short time. Don't worry--it is harmless. It is a bacteria sometimes used in other food fermentations like cheeses, and it is in the environment, including wheat fields and flours. It does not grow at a low pH, and the fruit juices keep the pH low enough to by-pass it. Things will still progress, but this is the point at which people get frustrated and quit, because the gassy bacteria stop growing. It will appear that the "yeast" died on you, when in fact, you haven't begun to grow yeast yet. When the pH drops below 3.5--4 or so, the yeast will activate, begin to grow, and the starter will expand again. You just need to keep it fed and cared for until then.

Once your wild yeast is growing, the character and flavor will improve if you continue to give it daily feedings and keep it at room temperature for a couple of weeks longer.
After that time, it should be kept in the refrigerator between uses/feedings.

My First Loaves From New Starter:

Pages