The Fresh Loaf

A Community of Amateur Bakers and Artisan Bread Enthusiasts.

Blogs

Anonymous baker's picture
Anonymous baker (not verified)

Finally got myself an inexpensive digital camera and would like to show off one of my "creations" which is far from original.  I'm sure many of you have made this danish ring.  I got this recipe from www.cookscountry.com/recipe.asp?recipeids=3846&bcd=46152.  Cooks Country is a great web site, by the way, and would like to know how many of you are members and whether or not you use your membership.  They seem to have a gold mine of knowledge with truckloads of practical advice.  I'm thinking of signing up.

Anyway, I'm showing pictures of the (1) preparation for the dough where I slather it with the filling, (2) the finished product and (3) the product partially gobbled up.  I halved the recipe, and didn't quite succeed with the cutting and the turning upside of each slice, but the recipe gives a step-by-step.  I'll try it again one day, and hopefully, get the technique right!

Picture 1:  Prepping the dough.

 prepping the dough


2.  Danish ring fresh out of the oven:

danish ring as it came out of the oven

3.  And now, as it was partially eaten (closer look of slices - as you can see I did not quite do the slices with flying colors!)

partially eaten ring


vincent's picture
vincent


INGREDIENTS ·         2 cups evaporated milk

  • 3/4 cup white sugar
  • 1/2 cup butter
  • 4 teaspoon instant dry yeast1 1/2 teaspoons salt
  • 1/2 teaspoon baking soda
  • 1 teaspoon baking powder
  • 6 cups all-purpose flour
  • 4 tablespoon vegetable oil
  • 4 tablespoons or more dry bread crumbs for topping
  • Note no water added
DIRECTIONS
  1. Heat the milk in a small saucepan until it bubbles; remove from heat. Add the butter and sugar and the salt; stir until melted. Let cool until lukewarm. And dissolve the baking powder and the baking soda
  2. Pour the cooled milk mixture into a large mixing bowl.. and 6 cups of the flour and the instant dry  yeast (note: be sure you mix well the flour and the instant dry yeast ; stir well to combine. Add the remaining flour, 1/2 cup at a time, stirring well after each addition. When the dough has pulled together, turn it out onto a lightly floured surface and knead until smooth  . And it should a little bit sticky not so wet…if it is to dry add milk just enough to make sticky and when you kneading just  greased the surface with vegetable oil  no flour.
  3. Lightly oil a large mixing bowl, place the dough in the bowl and turn to coat with oil. Cover with a damp cloth and let rise in a warm place until doubled in volume, about 1 hour.
  4. Preheat oven to 375 degrees F (190 degrees C).
  5. Deflate the dough and turn it out onto a lightly floured surface. Divide the dough into 25 pieces (depending how many you cut) as long it will be equal parts and form into rounds. Then dip into the bread crumbs and roll it all over.  Place the rolls on a lightly greased baking tray. Cover with a damp cloth and let rise until doubled in volume, about 1 hour
  6. bake at 375 degrees F (190 degrees C) for about 15 to 20 minutes or until the tops are golden brown.

  7. i cut remeaning dough about a quart in the pandeasl dough is for the ensaimada  for my trial to make ensaimada it's  the same recipe in the pandesal....


MY TRIAL ENSAIMADA ( PRETZEL LOOK)


 when you finish the 1st rising of the dough fold it just like pretzel fold and when you finish folding brush with scramble egg the outer surface then cover again with cloth let it rise for 1 hour then bake

Note: i baked them together 1st layer is the pandesal 2nd layer ensaimada after 10 minutes i switch the position  puting the ensaimada 1st layer and the pandesal 2nd layer... until golden brown

bake at 375 degrees F (190 degrees C) for about 15 to 20 minutes or until the tops are golden brown. then get the baking tray spread with margarine by brush and dip in into the sugar i prepared it is hot when done by margarine and sugar....  same reicpe of the pandesal ....  my trial taste good and the pandeasal ....enjoy

vincent

SylviaH's picture
SylviaH

Well I'm just getting in practice...the fire needed to be hotter today..Im still very much in the learning stages! At least I know how to build a fire!  That took practice..now I can make a fire with only a few minutes of the smoke you get when first lighting up the logs and let me tell you...you can get a lot if you don't do it right!  The first time my daughter and I lit it up...the fire department drove by in our neighborhood!!  I guess they saw what it was and didn't bother us.  A neighbor probably called!!  We had such a laugh! Im practiceing doing multiple bakes! First pizza.  I tried a new crust recipe from PR American Pie Book.  New York Style Crust..it's thicker and supports heavier toppings...I like the Neo-Neapolitan the best!  I made JH Vermont sourdough this time putting one into the WF Oven...I decided to put the other two loaves in my regular oven because I suspected the WF Oven was not quite hot enough!  My thermo. is broke so I had nothing to register the oven temperature except my hand!  I want one of those lazer thermos!  Last but not least a small roast went in and my husband can take it out when he gets home from work!

  Nice Fire!  Nearly No Smoke!!  I made 5 Pizzas!

J.H. Vermont Sourdough was next as the ovens temp. started to cool!  Started the Levain at 11PM last nite and finished loaves at 9PM tonite!  I retarded in frig. to time with WFOven temperature drop... I was close!  Oven could have been a little hotter...bread took about 30 min. to bake I gave it a couple of spritz of steam!

J.H.Vermont Sourdough loaves that were baked inside...I placed all 3 loaves in oblong plastic tubs for the frig. with spice jars rolled in parchment to support them ; /  ... It was all I could think of as I don't have much room in my refrigerator!

Wood Fired loaf on the Left.  Oven loaves on the Right.Last but not least...a small Bar-B-Q Roast still in the oven for a long slow cook.  The oven will hold heat all night and into the morning!

Sylvia


gothicgirl's picture
gothicgirl

Posted on www.evilshenanigans.com - 3/25/2009

When I was in England last Fall I fell in love.
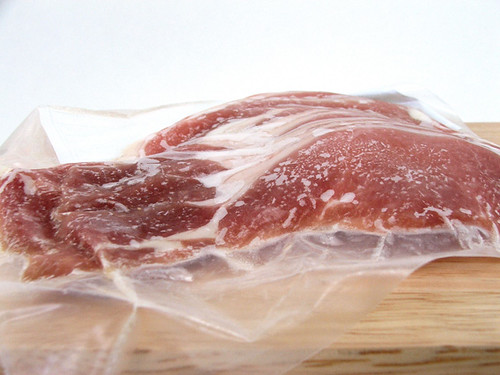
Back Bacon  

Not with a person, or even the land or the culture, however fantastic they all are.  No, I fell in love with the bacon.  In England they serve, almost exclusively, back bacon.  If you have never had this kind of bacon before it is a  glorious mix of lean meat, similar to Canadian Bacon, with a streaky tail, similar to our bacon in the US.  It is nothing short of a miracle, and I am so unhappy that the only way I can get this bacon in Texas is by ordering it from British expat food shops at a premium price.
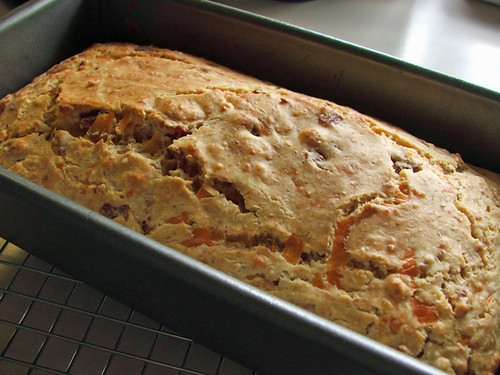
Fresh from the Oven 

Of course, my love knows no bounds and what are a few dollars compared to the comfort of a well cooked, meaty rasher of bacon?   So, I have a few packs stored in my freezer awaiting their weekend to be fried and eaten, and while I have enjoyed this singular way of eating back bacon, I secretly craved something different.  
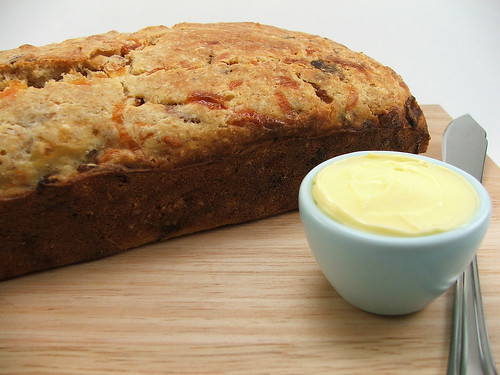
Bacon Cheddar Bread 

Last year I received The Bacon Cookbook by James Villas.  As the name implies, this book is about cooking with bacon and it even has a section with bacon desserts (which, of the ones I have tried, are quite good!).  I found myself flipping through this book one Saturday when I found his recipe for English Bacon and Cheddar Bread.  This recipe used back bacon, which is fried and chopped, mixed in the bread itself.  Of course, I had to make it.

I did modify the recipe slightly by mixing the all-purpose flour with some whole wheat graham flour for a hearty texture and nutty flavor.  I also replaced some of the regular milk with buttermilk because (shameful as it is) I ran out of regular milk!  Oops.
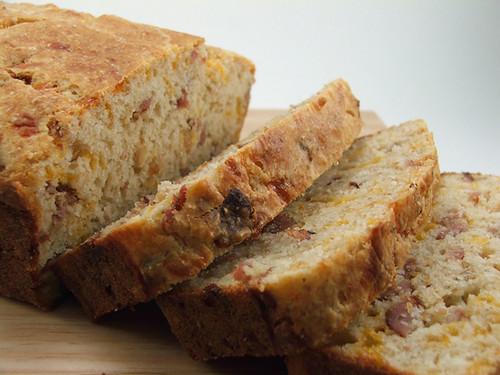
 Bacon Cheddar Bread Sliced

While the bread baked the house smelled like bacon mixed with Irish soda bread.   When sliced it had a tight knit crumb studded with bacon and streaked with cheddar cheese.   The flavor had the right mixture of tangy cheese and salty bacon.
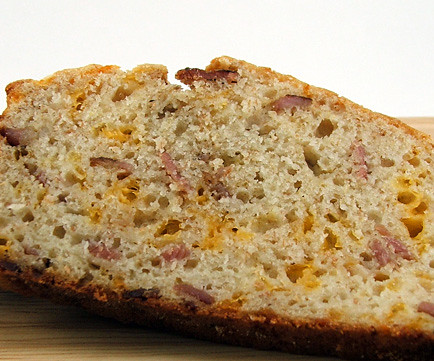
Bacon Cheddar Bread Crumb

You can, of course, make this with out back bacon.  Just use 6oz of Canadian bacon and 2 oz of regular streaky bacon chopped and fried together in a pan.  That should replicate the back bacon fairly well.

You really must try this!
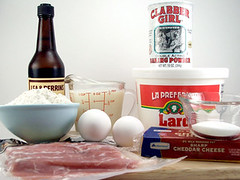
Bacon Bread Fixins' 

Bacon Cheddar Cheese Bread   Yield 1 - 10″ loaf
Adapted from The Bacon Cookbook

1/2 pound back bacon (or 6oz Canadian bacon and 2 oz thick cut streaky bacon)
2 cups all-purpose flour
1/2 whole wheat graham flour
1 1/2 teaspoon baking powder
1 teaspoon kosher salt
1 cup coarse grated extra-sharp cheddar cheese
1/4 cup lard
2 tablespoons sugar
2 large eggs, beaten
1/2 cup whole milk
3/4 cup buttermilk
1 teaspoon Worcestershire sauce

Heat the oven to 350 F and spray a 10″ loaf pan with non-stick cooking spray.
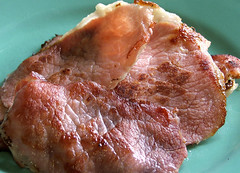
Back Bacon - Cooked Chopped Back Bacon

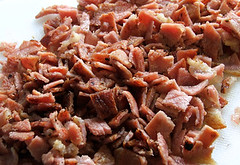
Cook the bacon in a skillet until crisp.  Drain on paper towels then chop into small pieces.  Set aside.
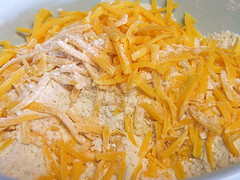
Cheese and Dry Ingredients Cheese and Dry Ingredients mixed

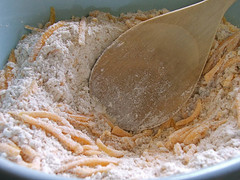
In a large bowl combine the flours, salt, baking powder, and sugar.   Add the lard and, with your hands, mix it into the four until it looks like coarse sand.  Add the cheese and toss to combine.

Wet Ingredients CHopped Bacon and Bread Dough

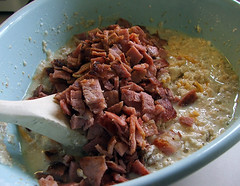
In another bowl mix the eggs, milk, buttermilk, and Worcestershire sauce.   Pour the wet over the dry and mix until the dry ingredients are almost incorporated.  Add the bacon and fold in, making sure to scrape the sides and bottom of the bowl.  Do not overmix.
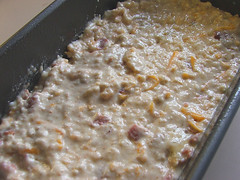
Bread - Ready to Bake 

Pour the batter into the prepared pan and bake for 45 to 50 minutes, or until the top of the bread is lightly brown and a thin knife inserted into the center of the bread comes out clean.
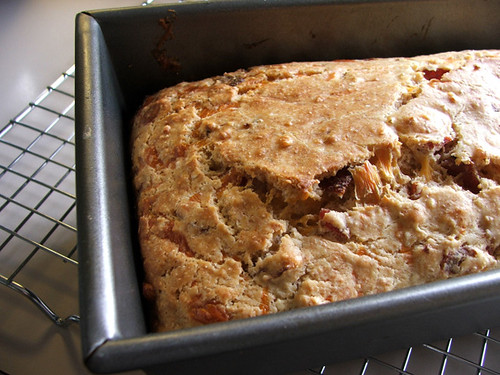
Fresh from the Oven   

Cool in the pan for 10 minutes, then turn out on a wire rack to cool. 

Bacon Cheddar Bread  

Serve slightly warm, with Irish butter if you can find it.  (I recommend Kerrygold).
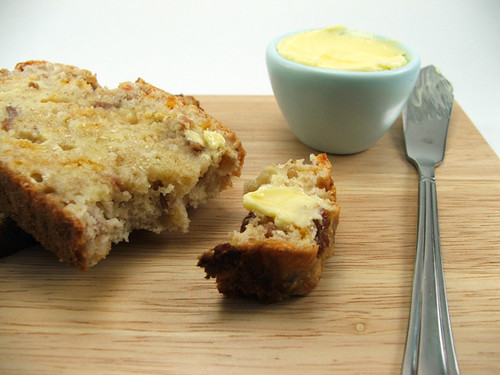
Bacon Cheddar Bread Buttered

mmdione's picture
mmdione

I've been spending most of my week-end baking since the first 'Bread from lesson 2'. It is so addictive! (but I love it).

Here is the bread I tried* on sunday night and it turned out great. The recipe is from Emeril (http://www.foodnetwork.com/recipes/emeril-lagasse/three-tiered-braided-christmas-bread-recipe/index.html). 

Here is the dough before the final rise:

The bread is just taken out of the oven... this is the biggest bread I've ever seen :)

Very flavourful!


*I did not use the kosher salt

Floydm's picture
Floydm

I recently set up m.thefreshloaf.com so that I could monitor the site while away from the computer.  It isn't perfect, but it works fairly well on cell phones or other portable devices like the Kindle

I'll be surprised if there is a huge audience for this but, then again, it could be handy if you want to pull up a recipe or a photo of one of your recent bakes when you are over at someone else's house.

gothicgirl's picture
gothicgirl

Published on www.evilshenanigans.com - 3/23/09

A few nights ago my husband and I had the opportunity to have dinner with a very old friend.  We had not seen him in a very long time and during our time apart he had gotten married to a lovely doctor who brought to the marriage her beautiful daughter.  A year and a half ago they had an adorable daughter of their own.  His family is beautiful.  He is very lucky!

Chocolate Glazed Chocolate Tart Fixins

He invited us to meet his new family and, of course, we agreed.  I asked what I could bring for dessert, as that is kind of my thing, and he said anything chocolate.  SCORE!  So, for the girls I made a batch of Cream Filled Cupcakes, and for the adults I made a Chocolate Glazed Chocolate Tart.

Chocolate Glazed Chocolate Tart

This tart is incredibly easy to make, it looks spectacular, tastes like chocolate heaven, and as our friend's wife commented it would be the perfect canvas for experimenting with different flavors.  We all agreed raspberry, orange, and mint would be lovely.  I also think some ground toasted hazelnuts in the filling would be nice for flavor and texture.

I did make a few changes to the original recipe.  I could not find the chocolate graham crackers, which I have seen before but not this visit to the store, so I used chocolate wafer cookies.  Because they grind up finer than graham crackers I used more crumbs but I did not increase the butter.  It did not need it.  I also reduced the sugar because chocolate wafer cookies are quite sweet on their own.

If you have someone you want to treat may I recommend this tart?   It is divine!

Chocolate Glazed Chocolate Tart    Serves 10

For the crust:
1 1/2 cups ground chocolate cookies
5 tablespoons unsalted butter, melted
2 tablespoons sugar

For the filling:
1 1/4 cups heavy cream
9 ounces bittersweet (no more than 65%) chocolate, chopped
2 large eggs
1 teaspoon pure vanilla extract
1/4 teaspoon salt

For the glaze:
2 tablespoon heavy cream
1 3/4 ounces bittersweet chocolate, finely chopped
1 teaspoon light corn syrup
1 tablespoon warm water

Chocolate Cookie Crust

Begin by mixing the cookie crumbs, butter, and sugar well and press it into a 9-inch round fluted tart pan.  Press the filling up the sides of the pan.  If you have a tart pan with 1″ sides only press it up 3/4 of the way.  (My tart pan has short sides, so I carried it to the top)

Bake at 350F for 10 minutes.  Allow to cool while you prepare the filling.

Chopped Chocolate

Heat the cream in a heavy pot over medium heat until it bubbles around the edges.  Pour it over the chopped chocolate and allow to sit for three minutes, then stir until it is well mixed and all the chocolate is melted.

Mixed Eggs and VanillaChocolate Tart Filling

In a small bowl mix the egg and vanilla.  Pour it into the melted chocolate and mix well.

Filling in the Tart Shell

Pour it into the prepared curst.

Tart - Ready to Bake

Gently tap the tart to break any air bubbles.

Tart - Fresh from the Oven

Place on a sheet pan and bake the tart for 20 minutes, or until the edges are just set and the center is still slightly wobbly.  Allow to cool for an hour.

As it cools make the glaze.

Heat the cream until it simmers and pour over the chocolate.  Stir to melt, then add the corn syrup and water.  Mix well.  Pour over the cooled tart, and gently tilt the tart to spread the glaze to the edges.  Let set for an hour at room temp before serving.

Chocolate Glazed Chocolate Tart


blackbird's picture
blackbird

This is a blog entry of a rye sandwich loaf.  Rye content is only one-third cup rye and two and two-thirds cup white bread flour.  My blog on a little rye is the opposite.

I'm using Eric's sandwich rye recipe to make larger loaves for sandwiches of normal size.  I have to make some changes due to my lack of experience and personal preference.  The recipe is a good starting point for me and I'll try to get closer to the original.  

I am not using any kind of starter at this point although I hope to improve as I have no real experience with starters. 

Overnight cold fermentation in the fridge is the main technique plus stretch and fold kneading which I'm learning.  I've learned my oven bakes unevenly so I'll rotate the loaf on the next bake.  My first loaf had caraway seeds.   Great oven spring.

I've obtained a spray bottle, a better thermometer instead of the large meat thermometer I've been using, and a dough scraper for my 2nd loaf of this type.  All nice to use.  I'm learning and will soon make my 2nd sandwich loaf.

Robert


proth5's picture
proth5

 For the few of you following this adventure in milling, I thought I would post the baked results.  I used my standard baguette formula which is posted elsewhere on this site, but briefly is all levain, 65% hydration with 15% of the flour pre-fermented with an inoculation rate of 25%.  This is a formula that I have been baking every week for years with fairly consistent results.  My standard baguettes are pictured elsewhere in my blog.

 The flour used for this bake was the first batch, milled on 25 February and has been aging in an uncovered plastic container since then.  It was about 70% extraction and contained very fine flecks of bran.  Since I could not get a Falling Number measurement on this flour, I did not attempt to correct the Falling Number by malting the flour.  Details on the milling process are posted in earlier blog entries.

 My first observation is that the levain build was somewhat different than that made at the same time with commercial flour.  I would have to say that it was more fluid than the commercial flour, and matured with larger bubbles.

 Although I was attempting to go strictly "by the numbers," after the autolyse phase the dough was very stiff and I added additional water.  The dough developed "pretty much like" my normal dough after that, and bulk fermented "about like you'd expect."  The color of the dough was distinctly more grey than normal, probably reflecting a higher ash content in the flour (since it did contain some bran.)

 After dividing, I shaped the dough as normal.  It was at this phase that it felt "different."  I would describe it as being just slightly less elastic than my normal dough.

The final ferment had a duration of one hour - which is the standard length for this formula's final ferment.  I felt that the dough was somewhat under "proofed" but wanted to try to keep the process as close to "by the numbers" as possible, so I went ahead to scoring and baking.

 The crumb was a bit tight - probably reflecting my skimping on the final ferment or the lack of malt - but not horribly so.  The taste is quite nice.  I'm not good at the "notes of grass" sort of language, but it tasted "more" than my normal loaf.  A bit more there there, as it were.  Again, it may not show well in the pictures, but the crumb color was a bit deeper than my normal loaf.

 The results are pictured below.  Despite all the good advice on these pages - photography continues to elude me, but I gave it my best shot (as it were.)

Hand Milled Baguette Crust

Hand Milled Baguette Crumb


Would I hand mill this flour again?  I might. It does not have nearly the taste impact of fresh milling a whole wheat or a near whole wheat flour, but it is a nice flour with nice baking results.  Next time I might add just a pinchlette of diastatic malt.

I will say that I normally dust my peel lightly with flour and this particular flour - being a bit more "sandy" than commercial flour makes a great flour for dusting the peel.

I ate a half baguette as I typed this up.  I usually have pretty good self control around my normal baguettes.  I'm guessing this one WAS pretty darn tasty.

Hope this is of some interest to those of you contemplating advanced home milling.  I still have my second batch of "pure white" flour to bake - hopefully next week.

Happy Milling!

Jw's picture
Jw

mixed breadbaking experiences, this weekend. On the positive sides: I was able to produce 'a lot of bread' and consume most of it (since we had visitors). In the picture: on the left sourdough from a few weeks starter (top), the others below were 'quick sourdough', I used a dried powder I bought in the store. The starter wins it by far with taste, according to the expert taster at home. In the middle simple buns, on the right pain d'ancienne (front) and plain bread.


In this crosssection picture you can see the better sourdough, the quick sourdough and the plainbread.


As for the tigerbread: that is clearly a trick I still have to master.
The first rise needs to be shorter and I have to wait with putting the paste on until the last ten minutes.


And since I saw a few pictures with dogso n TFL, : here is our faithfull bystander, her name is Bowie.
This dog went to the zoo (!) last saturday, and was ready to chase the real tigers there.

Happy baking. Cheers, Jw.


Pages

Subscribe to RSS - blogs