The Fresh Loaf

A Community of Amateur Bakers and Artisan Bread Enthusiasts.

Blogs

HeiHei29er's picture
HeiHei29er

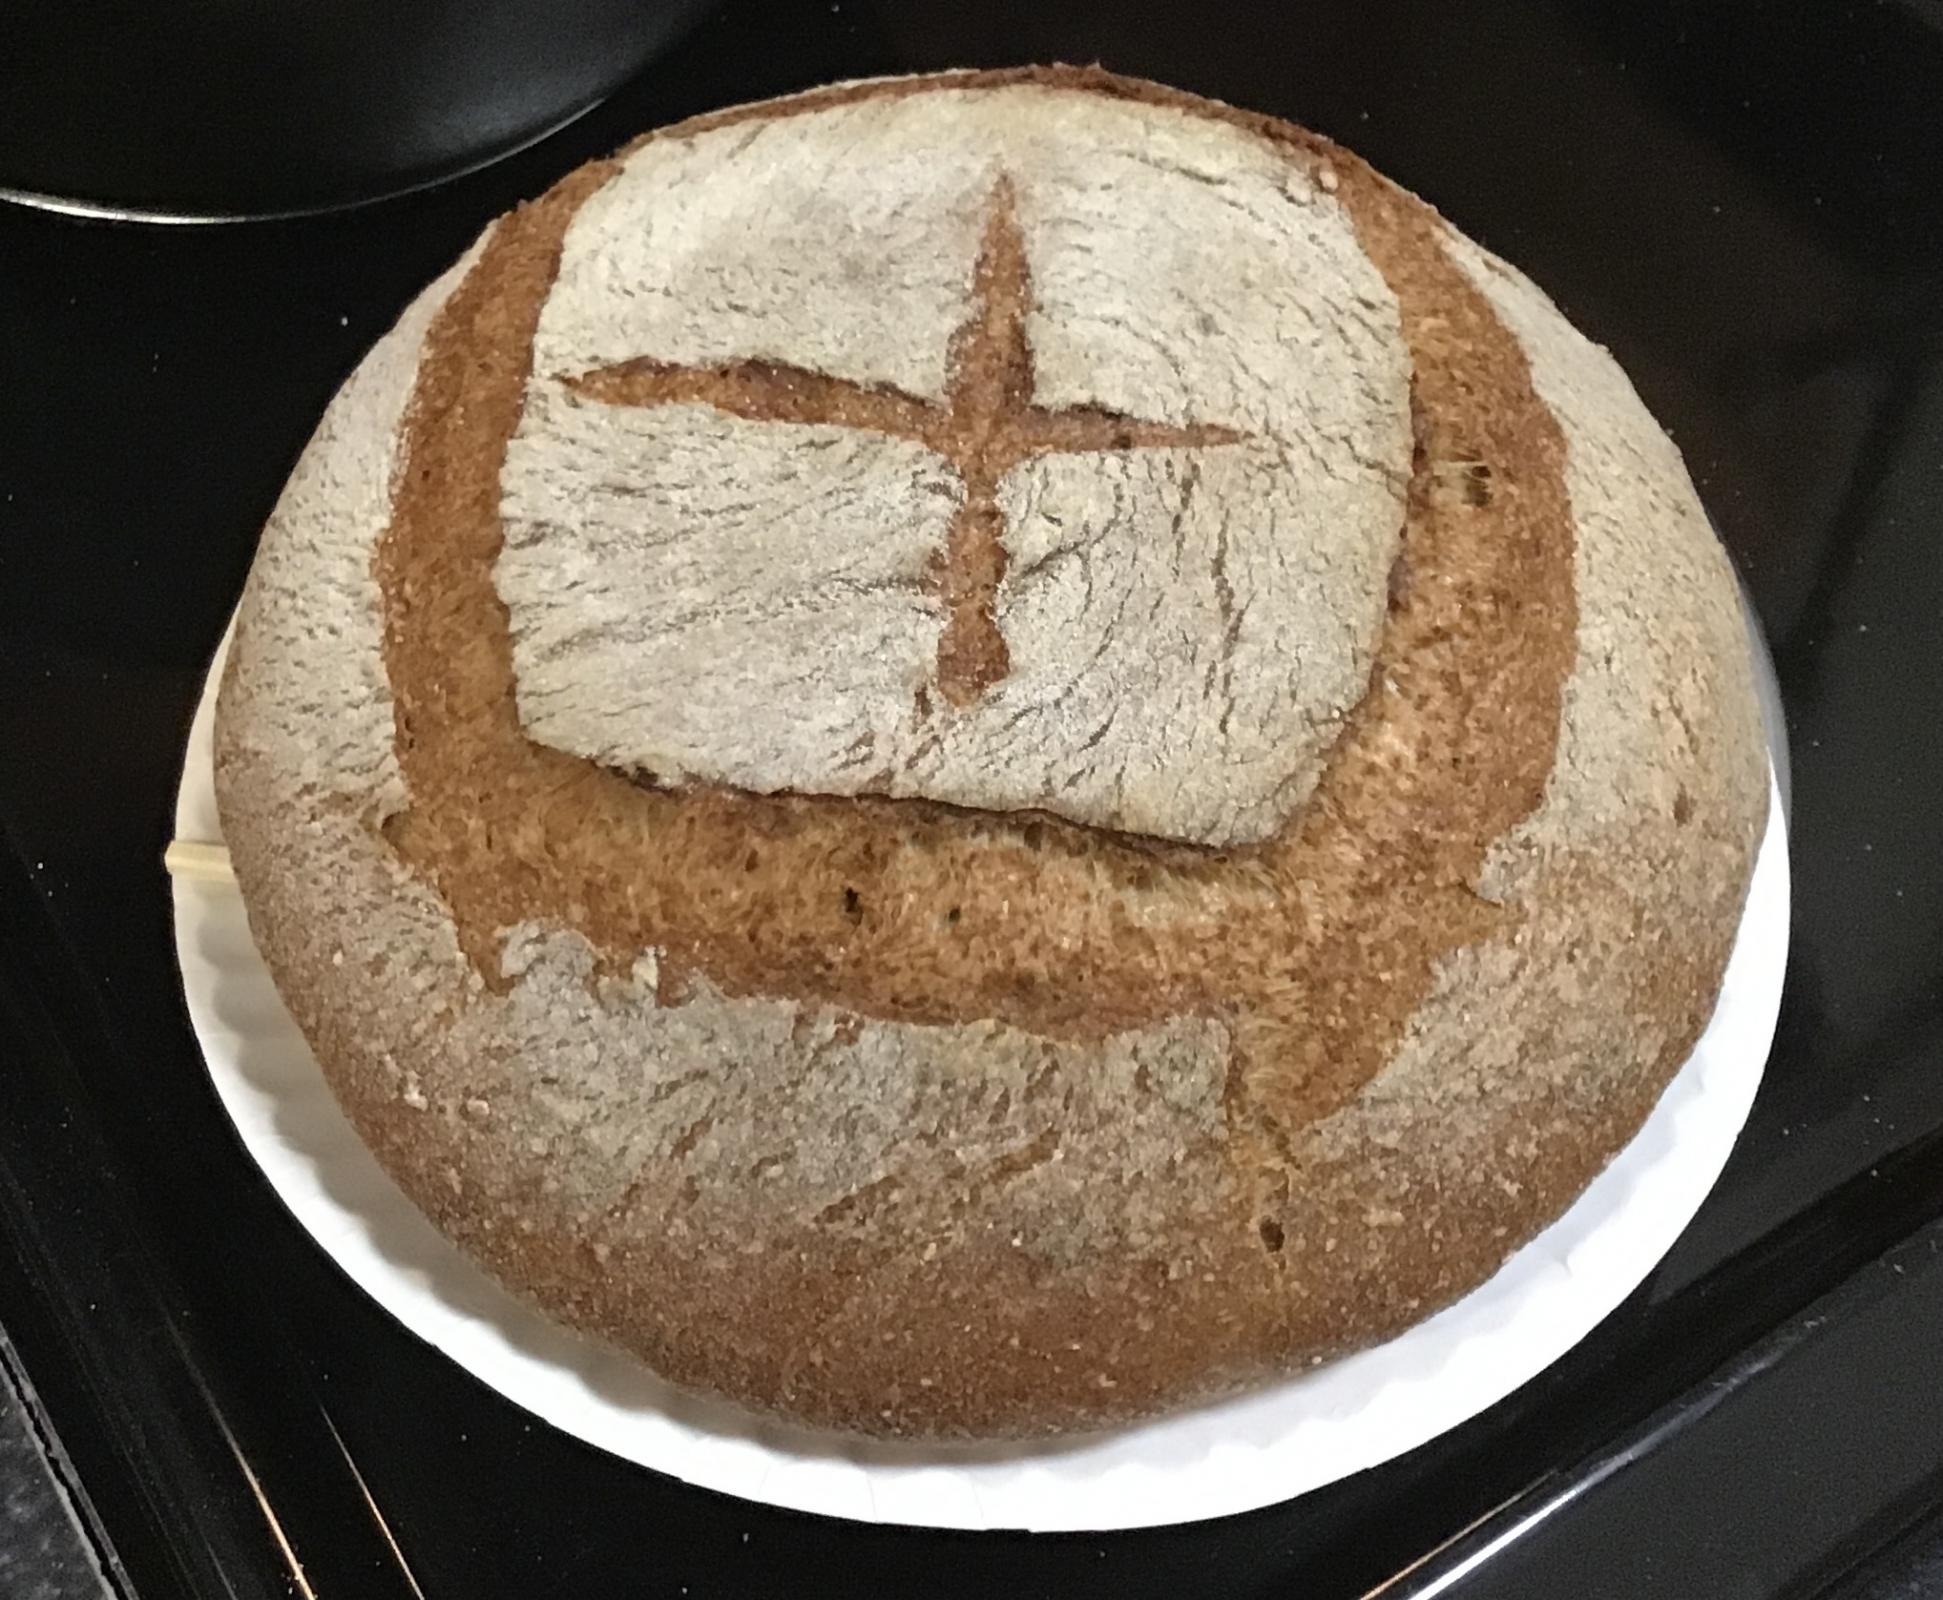
The basis for this recipe is from Hamelman's Bread (3rd Ed.).  Two main changes:  I used RYW (the one giving me "yogurty" levains) for half the pre-ferment water and I "caramelized" potatoes instead of roasting them.  With the baking steel, I have trouble with the starches from the potatoes burning the bottom crust, so this was cooked at lower temps and the top element shield removed after steaming to get color into the top crust.  Worked quite well.

Makes one loaf...

Total Dough
200g   All-Purpose Flour (50%)
140g   Bread Flour (35%)
60g    Whole Wheat Flour (15%)
40g    Raisin Yeast Water (10%)
240g  Water (60%)
9.6g   Salt (2.4%)
2.4g   ADY (0.6%)
100g  Gold Potatoes (25%)
3g      Butter (3%)

Pate Fermente (30% PFF)
120g   Bread Flour
40g     Raisin Yeast Water
38g     Water
2.4g    Salt
0.1g    ADY

Caramelized Potatoes
100g   Gold Potatoes (other potatoes should work fine) (uncooked weight)
3g       Butter

Final Dough
200g   All-Purpose Flour
20g    Bread Flour
60g    Whole Wheat
202g  Water
7.2g   Salt
2.3g   Yeast

 Method

The night before
1)      Prepare pate fermente by combining all ingredients and lightly knead until smooth.  Place in covered bowl and ferment for 12-14 hours at 70-72 deg F


The next morning
1)      Cut potatoes into 1/4" - 1/2" cubes and place in covered frying pan with butter on low heat.  Make sure to keep the heat low and slow to not brown the potatoes and slowly caramelize them.  Stir every 10-20 minutes to cook evenly.  Potatoes are ready when they start getting sticky and mushy (90-120 minutes).  Remove from heat and let cool.
2)      Weigh cooked potatoes and place them in a NutriBullet.  To that, add an equivalent weight of Final Dough water (ex. 85g potatoes and 85g of the Final Dough water). Make sure to keep track of the water used in this step and subtract it from the Final Dough water amount.  Blend the potato/water mixture in the NutriBullet until a pudding-like consistency with no potato chunks is reached.
3)      Dissolve yeast in remaining water.
4)      Combine all ingredients including salt and start to mix.  Add chunks of pate feremente while mixing to incorporate it.  Mix until flours are wetted.  Adjust hydration if needed.
5)      Fermentolyse for 20 minutes
6)      Develop gluten; FF x 25 (three sets with 5 minute rests); Bowl Kneading (two sets with 10 minute rests)
7)      Bulk ferment at 76 deg F until dough has doubled
8)      Degas dough and pre-shape into boule
9)      Bench rest for 15-20 minutes
10)   Final shape as oval and place in banneton with seam side down.  To shape, take rested dough and flatten into round shape while degassing.  Take edge closest to you and fold to the middle.  Take right side and fold to just past middle.  Take left and fold to just past the center.  Take side furthest from you and pull over to center.  Lastly, roll dough away from you so seam is on the bottom.  Using cupped hands, pull dough toward you gently a couple inches.  Rotate the boule 90 deg and repeat the gentle pull.  Repeat on all four sides. This is to round off the dough and get the seams on the bottom.  Once round, pull the dough toward you more firmly 2-3" to put tension in the surface of the dough.  Rotate it 180 degrees and repeat letting the dough extend into an oval.  Keep rotating 180 degrees and pulling dough to you until desired oval shape and dough tension is reached.  Once an oval shape is reached, spin the dough on the bench for 1-1.5 revolutions to help seal the bottom.
11)   Final proof at 76 deg F
12)   Pre-heat oven at 410 deg F for 1 hour with oven set for steaming and top element shield in place.  Turn dough out of banneton onto parchment paper and mist with water.  Let dough sit on bench until seams just start to show.  Place dough on oven steel with steam pan below it on bottom rack and add 3/4 cup boiling water to steam pan.  Bake at 410 deg F (20 minutes); vent oven and remove top element shield; reduce heat and bake at 400 deg F (20-25 minutes); internal temp target 208-210 deg F


Not sure where the large bubbles came from, especially the one near the surface.  I thought I degassed it pretty well, but maybe not.  Very happy with the size, texture, and uniformity of the crumb.  It's quite soft. 

alcophile's picture
alcophile

I had high hopes for this recipe from theryebaker.com. I really enjoy the flavors of rye and cornmeal and I liked the fact that the recipe wasn’t sweet like a Boston Brown Bread. Unfortunately, the recipe didn’t quite work out for me.

It begins with an overnight sponge of fine rye meal (Bay State Milling) and instant dry yeast.

The next day, the sponge is combined with whole rye flour (Country Life Natural Foods), scalded cornmeal (Bob’s Red Mill), and salt.

Scald:

Panned:

The dough proofs for about 1 hour and baked for 10 minutes at 230 °C (450 °F) and 40 minutes at 175 °C (350 °F).


I waited a day to cut the bread but I found the crumb to be very gummy.

I may have underbaked it or there was starch attack. It was probably the former even though the temperature was ≈93 °C. I tried toasting a couple of slices, but the flavor was bland. Several slices were dried to use as old bread (altus), although the cornmeal could be odd in a German rye.

idaveindy's picture
idaveindy

Feb. 19, 2022. 87th bake.

Goals: A boule with 500+ grams of flour to fit in the deep pot of a Lodge 3.2 qt combo cooker, and to fit the baked loaf in a one gallon plastic zipper-seal bag. Mostly home milled, but also use up some store-bought flours such as semolina and two kinds of durum. Mostly commercial yeast, but also use up a chunk of low hydration rye starter that I had set aside but didn't use as expected.

  • 25 g cracked coarse rye meal, from my 3-roller hand-cranked Shule brand mill. 
  • 25 g coarse rye flour, "Vitamixed" after cracking as above. 
  • 25 g coarse flour, hard red winter wheat, Vitamixed as above. 
  • 300 g Prairie Gold hard white spring wheat flour, Vitamixed as above. 
  • 37 g store-bought gritty semolina, from Patel Brothers. 
  • 10 g Sharbati whole grain wheat flour. Last of bag. 
  • 50 g Gold Medal bread flour. 
  • 10 g old fashioned rolled oats. 
  • 25 g roller-milled whole grain durum, Sher Brar brand, "Fiber Wala."
  • 25 g roller-milled durum atta, Golden Temple red bag. This is mostly refined flour, with some bran that the miller added back in.
  • 2.5 tsp bread spice. (Fennel, anise, coriander, caraway -- roasted whole, then ground. Measured after it's ground.)
  • 1/2 tsp whole dry caraway seed. 
  • 425 g bottled spring water. 
  • Finished mixing above at 12:35 pm. 

At 2:10 pm, mixed in:

  • 6 g of moist pasty gur/jaggery, not the chunky kind.
  • 1/2 tsp of instant yeast with expire date of Nov. 2019, last of jar. 
  • 1/4 tsp of instsnt yeast with expire date of Oct. 2020, just opened. 
  • 32 g water.
  • approx 27 g of 50% hydration rye starter. 18 g flour: 9 g water.
  • Did some kneading up front.

Hydration plan:  
438 g of whole grains @ 90% = 394 g water.
112 g of refined grains @ 62% = 69 g water.  463 g total water.

Total water added was 466 g.

Did several knead-and-turns during bulk ferment.

At 3:54 pm it finally felt like a cohesive and properly hydrated "dough". 

I forgot to note time when dough was folded, shaped, and put in 8" I.D. (8.6" O.D.) lined and dusted (rice flour and bread flour) banneton, and after a few minutes then in fridge.

PRE-HEAT:  Oven, dutch-oven, and a baking stone were pre-heated to 470 F, then gave it another 20 minutes for stone and dutch oven to come up to temp.   Baking stone was on the rack at the lowest position. Dutch oven on a rack 2 positions up.

While it was in banneton, base (facing up) of boule was dusted with cornmeal. Then covered with a round piece of parchment paper. Hot dutch oven pot was inverted and placed over it. They were then flipped over to load the dough into the pot. The dusting flour was brushed off and the dough scored in a # pattern. The skin was a bit loose, so the scores were sloppy.  The dough deflated somewhat upon scoring.

Total ferment/proof was from 2:10 to 5:47, only 3 hours 37 minutes.

Started bake at 5:47 pm.  Put the combo cooker in the oven and turned thermostat down to 450 F.

Baked, covered, 450 F, 15 minutes.

Baked, covered, 400 F, 15 minutes.

Baked, uncovered, 400 F, 20 minutes.  Good oven-spring.

Finished @ 6:37 pm, 209 F internal temp. Bottom thumps well.

I let the boule rest/cool for about 90 minutes covered with just a paper towel. Then it was placed in a 1 gallon zipper seal plastic bag, in which it barely fit.   I hope to resist the temptation to try some  until 24 hours after baking.


yozzause's picture
yozzause

I recently engaged with  Lance (albacore) about his lovely dough machines and mentioned that i had purchased a new machine so here is a little bit  about it and its maiden effort..

 A second present that i treated myself to arrived yesterday afternoon, it was a week earlier than i was expecting . It is a Chinese noodle dough machine, This one is from Sydney rather than the long wait from China, and significantly cheaper @ $129. The postage from China was more that the advertised price of the machine direct from China.

The machine was removed from its packaging and inspected and all good. the instruction booklet unfortunately is only in Chinese, so i have requested the English version from the supplier.Despite the heat i knew i was going to have to give it a test runi will put the link up at the end of the post and you can see the machine from the ebay page rather than me posting pictures of it. I decided to make a 1 kg dough with the view of turning that dough into 2 x 500g loaves. and here they are 50% Wholemeal with cousin Ray's failed stout making effort, which was over gassed but that's another story making up the liquid content and the lovely brown colouring. I was happy with the machines work, its action is similar to a bread maker but it doesn't do the baking although it does have a heater that will maintain the temperature for proving. In the dough that i formulated it was going to be an extended slower bulk fermentation period as i was using 2% fresh compressed yeast 5 hours in fact. My dough was fermented in a bowl not the machine. The final proof after shaping was 1 hr and 40 minutes and baking time was 40 minutes with terry towel steaming aid for the first 15 minutes. I managed to do something i have avoided for a while and that was to burn my thumb turning the baking tray around. my thumb was in cold water for the rest of the bake and once concluded i used some aloe vera from the garden which was very soothing. Bed time beckoned and was acknowledged and this morning in the glorious pre dawn cool of the morning and before the relentless sun applies the blow torch for another day i have sliced and eaten the two slices of a very nice brown bread. The 5 hour BF has probably added its attributes to what is a nice loaf. You might also see in the pictures the clean lines of the scoring with my new lame, it worked a treat and felt balance in the hand and even with the rolled Rye Flakes adorning the dough did a great job. Overall the dough machine has done a great job with dough development. the flours used were the Bakers flour from the bulk bin and Millers wholemeal in the 1 kg bag if you would like me to post the recipe for the 1 kg dough let me know. ebay USAhttps://www.ebay.com/itm/404118085058?BEAR Stainless Steel Electric Stand Flour Dough Mixer Pasta Noodle Machine - Picture 1 of 4   
pmccool's picture
pmccool

I've been intrigued by several recent posts that feature a 100% whole-wheat Hokkaido milk bread, such as this one by Benito.  So I decided to try my hand at it.  Almost.  The "almost" being that I changed it from a sourdough bread to a yeasted bread.

Actually, there were two variations from the bread that Benito posted.  First from sourdough to yeast, as mentioned above.  Second, I had no vital wheat gluten on hand, so subbed in flour in its place so as to keep the hydration more or less in balance.  The second change was the one that concerned me more since I wasn't sure how much the bread relied on the VWG for structure.  As you can see in the lead photo, it turned out quite nicely.

Rather than repeating the formula and process here, I'll refer you to Benito's excellent post.  My adjustments were quite simple.  I moved all of the levain ingredients to the final dough ingredient list, including the flour and water that were part of the 100% hydration starter for the levain.  I added 6g of active dry yeast in the final dough ingredients, too, since it was needed in lieu of the starter for leavening the bread.  My flour was home milled from hard red wheat.  Fermentation times had to be shortened, since the ADY moves quite a bit faster than the wild yeasts in a starter. 

The dough was very wet.  I realized, too late, that I hadn't followed Benito's advice about reserving some of the milk and had simply added all of it.  After a bit of thought, I added some more flour, perhaps 20g or so.  It was enough to turn the dough into something manageable but not so much as to require additional salt or yeast.  Between the dough consistency and the extended kneading that the bread requires, I decided to let the KichenAid mixer do all of the work.  Because I had to stop the machine occasionally to scrape down the dough from the walls of the bowl, I extended the mix duration about three minutes past the recommended time.  That developed the gluten in the dough very well.  The dough was about 85F coming off the mixer.

The dough was given 30 minutes for bulk ferment; it had expanded perhaps 50%.  After that, it was set out in our screen porch for another 30 minutes to firm up.  The temperature out there was in the 25F-30F range, so it cooled down quickly.  Then I followed Benito's process for shaping and placed each of the rolls in a greased Pullman pan for the final fermentation.  When the top of the bread was about 1cm below the pan rim, I started the oven preheating and egg-washed the top of the loaf.  A second coat of egg wash was applied just before the bread went into the oven.  The bread was baked in the pan and then an additional 10 minutes out of the pan, per instructions.  While I don't think the bread required the last 10 minutes to keep the sides from caving in when it cooled, it certainly helped remove some of the moisture.  I elected to forego brushing the top of the loaf with butter at the end of the bake.

There's a lot to like about this bread.  The finished loaf is about treble the height of the just-shaped loaf, so plenty of expansion between final fermentation and oven-spring.  As expected, the crumb is very fine-grained with evenly distributed and evenly sized small bubbles throughout. In spite of its loft, this is a substantial loaf of bread.  It isn't what I would describe as airy or cottony.  Though it yields easily to chewing, the crumb is firm and moist and feels almost cool in the mouth.  You can sense the presence of the bran, even though it is finely ground.  The sugar offsets the natural bitterness of the red wheat.  It is delicious with just a bit of butter, and toasted.

For a future bake of this bread, I'd be interested in trying an autolyse to see if that might have a positive effect on dough consistency and the ultimate tenderness of the crumb.  I'd also like to see how the flavor would shift when using honey as the sweetener.  One thing is certain: I will make more of this bread.

Paul


trailrunner's picture
trailrunner

I adopted multiple tips from this site in order to try and achieve a successful loaf. Paul said “ one bubble” see pic above top right is THE bubble . Dan said bulk in pan . I can’t remember who said make sure and bake thoroughly… will do tomorrow. I made two levain with YW one white one rye. All flour in the dough is Mock Mill ground to a more coarse setting than I usually do, another tip from someone here on TFL. A Community Bake for sure! 

Before bulk in pan : 

Kistida's picture
Kistida

This is the easiest (from a lazy person's pov: me) sourdough bread!

I've made the yeasted version of pain brié multiple times and have always wondered, using the old dough method (Pâte fermentée) must've been the only way considering no commercial yeast (discovered mid-1800's) was available as far back as the 14th century when such breads were made. So, I prepared a stiff starter and used it for the loaves.

Sourdough Pain brié
Stiff starter (60% hydration)
10g starter (100% hydration)
184g water
310g all purpose flour
10g sugar
1g salt

Dough
all of the starter
140g milk or 125g water
200g all purpose flour
80g spelt flour
5g vital wheat gluten
8g salt
50g unsalted butter
    

Prepare the stiff starter in a large mixing bowl. Cover and leave it to ferment at 21-23°C for 12 to 16 hours.

Whisk flours, salt together in a medium bowl. Add milk or water to the starter and slowly pinch the starter apart. Gradually add the flour mixture while mixing with a spatula or by hand. Mix until dough forms with no dry bits of flour. Do not add more milk or water. Cover and rest 30 minutes.

Add a few pieces of butter. Pinch and fold until they are absorbed before adding the next pieces of butter. Once all the butter is added, continue kneading the dough for 15 minutes on the counter. Do not add any flour. Spritz the counter with water if humidity is low (especially in the winter) and the dough surface appears to dry too fast. The dough will gradually become smooth and soft, but it will not feel like doughs with higher hydration. Dough temperature 24-25°C.

Shape the dough into a boule, lightly grease with oil and transfer it to a bowl. Cover and let it rise: First proof: 2 hours 21 - 23°C

Divide the dough into 3 to 6 pieces. Shape each piece to a boule, cover and let them rest for 15 to 20 minutes.

Shape each piece to batards or boules (No extra flour needed). Transfer to baking sheet. Cover with damn tea towels (spritz the top of the towel and then cover with damp another towel). Final proof: 1 hour 21-23°C

Preheat the oven to 190°C halfway through the final proof.

Score 3 to 7 parallel lines on each shaped loaf.

Place ice cubes or a source a steam beside or beneath the baking rack.

Medium loaves: 3 x approx 300g 200°C 15 minutes with steam, 10 - 15 minutes without steam or until internal temperature is at least 90°C.

Smaller rolls: 5 x 180g 190°C 30 to 35 minutes until internal temperature is at least 90°C.

Let the baked loaves cool in the oven (turned off) for at least 3 hours before slicing.


So, why did I say this is the easiest sourdough bread?
Low hydration, easy to handle.
Knead therapy? With little bit of time and some elbow grease, kneading this dough felt so good!
No sticky hands; well, sticky for a little while only.
Very easy to shape.
No need to check on the dough during its short first rise
Tight crumb - characteristic to this bread. The dough used to be pounded to achieve tight crumb
Once the starter is ready, buttery bread will be ready within 3-4 hours, all done at room temperature


The next loaf takes more time and effort but it was worth it!


What's great about rum raisins? They make amazing chocolatey treats! When I came across Maurizio's cherry & chocolate sd recently, I figured I'll have to do something with the jar of rum raisins I keep. So, instead of tempering chocolate, I just melted chopped dark chocolate with espresso powder and salt over steaming water real quick, drizzle onto a baking sheet and let it set for a few minutes. Then, sprinkle pat-dried drunken raisins all over the set chocolate followed by a thicker layer of dark chocolate on top. Let this set and within an hour or so, I get this super-easy and not-so-neat version of very tasty Jamaican rum raisin chocolate. Of course I've to make about a 1/8 sheet pan sized bar because some of that had to be "taste-tested".

Chocolate Sourdough with Rum Raisin Chocolate
200g lukewarm water, about 30°C
200g all purpose flour
70g Kamut flour
9g vital wheat gluten
15g sugar
70g starter (100% hydration)
5g salt
8g cocoa powder
1/2 tsp espresso powder
8g coconut oil
100g rum raisin dark chocolate

Bulk ferment 6 hours at 23°C
Cold retard overnight at 4°C
Score and bake at 230°C for 25 minutes with steam (or lid) and 20-25 minutes without until the internal temperature reads at least 90°C.

Last few pieces had lovely swirls!


During a lil hiccup in my braided masala loaf recently, Benny asked me to share some braiding methods. Here are some easy lattice-like braids. Once the simple over-and-under method is mastered from left to right followed by right to left (or the other way 'round), the logic of the braiding is quite easy.

4-strands

6 strands, braided like a 4-strand


5-strands


6-strands


7-strands


8-strands


Here's an easy challah made with sd discard that was braided using 6 strands but in the form of a 4-strand braid.


Challah loaf
Tangzhong
100g milk
20g all purpose flour

Dough
All of the Tangzhong
214g starter discard
50g honey
20g heavy cream
2 large eggs
210g all purpose flour
110g Kamut flour
3g instant yeast
5g salt
50g unsalted butter


Mix until the dough reaches windowpane stage, about 15 to 20 minutes.
Proofing time was longer than usual since my kitchen was cooler that day.
First proof 2 hours 20-21°C
Second proof 21-22°C 1 hour 30 minutes, 1” above the rim of glass 9”x5” pan.
Bake at 180°C for 45 minutes, covering with foil in the last 15 minutes, until internal temperature was 94°C. Let the loaf cool slightly in the pan, for about 10 minutes before removing to a cooling rack. Brush with a little butter and let the loaf cool completely before slicing, at least 3 hours.


That's all for now! :)

- Christi

HeiHei29er's picture
HeiHei29er

This is a recipe in Hamelman's Bread (3rd Ed.).  It was a straight forward bake and had a very nice sour apple aroma during the bake.  Haven't had a chance to slice it yet, but will have some in the morning for breakfast.  Recipe calls for Medium Rye, but says that Whole Rye can be substituted.  I proofed this seem side down for the natural score look.

Makes one loaf...

Total Formula
270g   Whole Rye Flour (fresh milled) (60%)
180g   Bread Flour (40%)
338g   Water (75%)
8.1g    Salt (1.8%)
4.5g    ADY (1%) (Optional)
45g    Flaxseed (10%)

Sourdough Pre-Ferment (40% PFF)
180g   Whole Rye Flour
144g   Water (80% hydration)
18g     Mature sourdough culture (10% inoculation)

Flaxseed Soaker
45g    Flaxseed
90g    Water (Boiling)

Final Dough
90g    Whole Rye Flour
180g  Bread Flour
104g  Water
8.1g   Salt
4.5g   ADY

1)   Combine ingredients for sourdough and ferment for 12-16 hours at 70 deg F
2)   Combine ingredients for soaker at the same time as pre-ferment.  Let come to room temperature.
3)   Dissolve ADY in Final Dough water
4)   Combine all ingredients and mix until flours just wetted.  Let rest 10-15 minutes.  DDT = 80 deg F
5)   Two sets of bowl kneading to develop some gluten.  10 minute rests between sets.
6)   Bulk ferment at 80 deg F for 40-50 minutes
7)   Shape into round or oval
8)   Final proof at 80 deg F for 40 minutes
9)   Pre-heat oven to 460 deg F; bake with steam at 450 deg F (10 minutes); 425 deg F (10 minutes); vent oven; 400 deg F (25 minutes)


Skibum's picture
Skibum

Peter Reinhart's NY Deli Rye! I have been baking this for years, but in the past always as a free standing loaf. For the first time I baked it off in a loaf pan and LOVE the result!

I did have to increase the bake time somewhat. My old GE electric oven blew the oven burner on Boxing Day and the part is no longer available. Sooo, I had to buy a new oven a high end GE Profile series. I LOVE it! Since buying this in early January, I have baked my best loves ever! the oven does make a difference. It is a beauty and cooks beautifully. The induction burners come up to temp almost immediately and it boils water for pasta faster than any stove I have used before.

Happy baking folks!

Ski

Pages

Subscribe to RSS - blogs