Before arriving at this recipe I made 3 more attempts and I treasure more the journey than the final success. Yes, my 4th attempt was the one that I was looking for, but the first 3 taught me more.
The final recipe (the 4th attempt) was:
- 180g sourdough starter (100% hydration). The starter was refreshed the evening before with 12g mother sourdough starter + 84g water + 34g spelt flour + 50g strong wheat flour.
- 600g strong wheat flour (14% proteins)
- 400g spelt flour
- 673g water
- 20g salt
The method:

1. The first attempt

I knew few things about spelt flour and what to expect from it. But it is only when you try it that you really feel the difference.
Spelt flour, compared to wheat flour:
- does not work well in the very hydrated dough. The spelt flour has less water absorbency.
- it is very extensible
- it has a low % of gluten while high protein content.
- ii has a weak gluten quality (The 2 components from gluten are unbalanced. Gluten in spelt flour is high in gliadins, meaning that its stretching is improved and is low in glutenin, meaning that the elasticity suffers and the structure to hold its shape is affected.)
- it rises quickly and over proofs at a lower volume increase
For this initial attempt, I tested first the recipe at 75% hydration (meaning 730g water). I performed 4 coil folds, shaped the bread at 50% volume increase but let the dough rise up until 75% before the overnight fridge retard.
The result showed that even with 4 coil folds, the structure was a challenge; the hydration was too high and I've got a very wet dough feeling when shaping; 75% volume increase looked over-proofed; the loaves were flat despite the above, the taste was fantastic.
2. The second attempt


3. The third attempt


As you may notice, the result was a lovely risen bread, with an impressive height. The ear in this case was less dramatically opened because the dough expanded to a good state internally during the proofing stage rather than in the oven and had very little power to push the ear up.The second loaf (not in these photos) was flatter with a less height than this one, making me think that passed a bit on the over-proofed side.Without even seeing the crumb, I could have easily guessed that this bread had an open crumb inside and I caught to bake it in the very last moments before starting to collapse.Oh, yes, this is what you can call an open crumb bread. The loaf is super light in your hands and you can guess even without cutting it that you get an airy crumb.For a round loaf, this is quite a nice crumb as usually, you get more chances of an open crumb using oval bannetons rather than round/squared.If my target was just the open crumb, then I would have stopped here with the recipe development. I love open crumb bread but I also know that this is a risky business. You need to extend the fermentation to the maximum and catch the dough at the very right moment to get it like this. The first loaf was great but I cannot say the same with the second one from the batch. It was flatter and less open crumb than the first one, although still a lovely loaf. What was the difference? Well, could have stayed more closer to the door of the fridge and it fermented faster. I would have then preferred to stay more on the safe side. I tried this bread at 50% volume rise and it was under proofed. At 75%, it was to the over-proofed limit. A perfect bread should have been fermented somewhere in the middle.
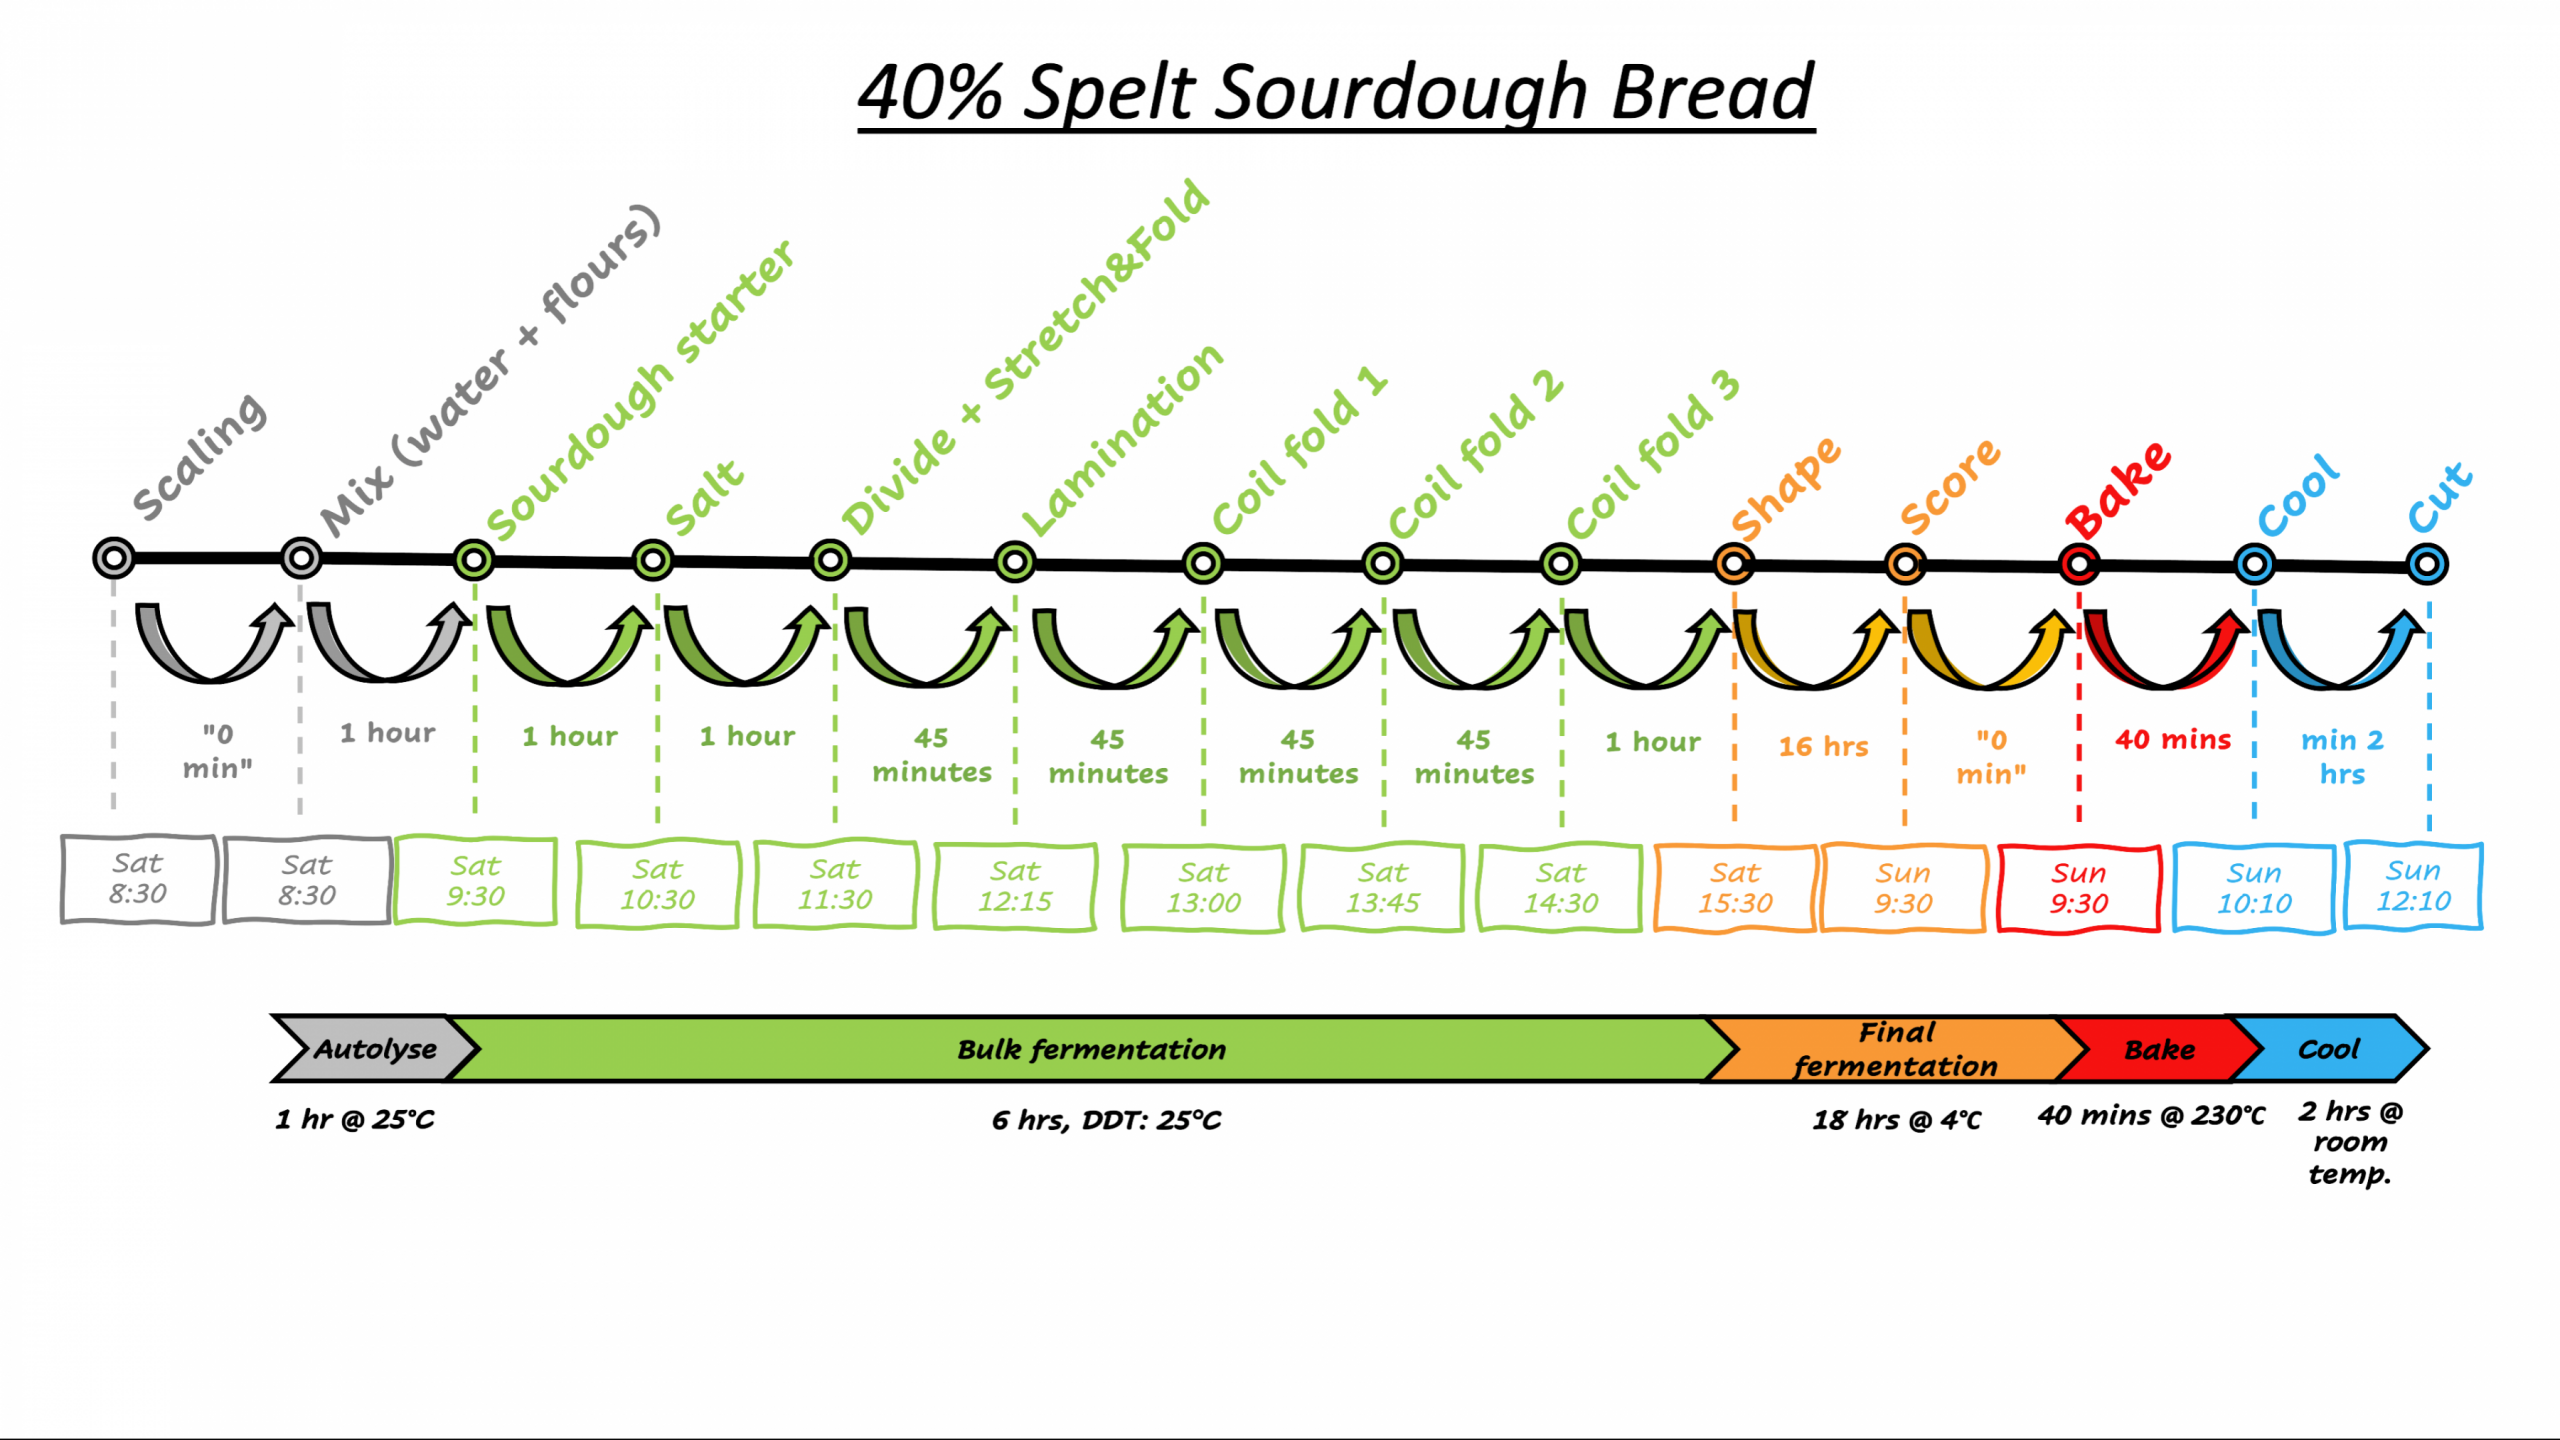
4. The fourth attempt (this recipe)


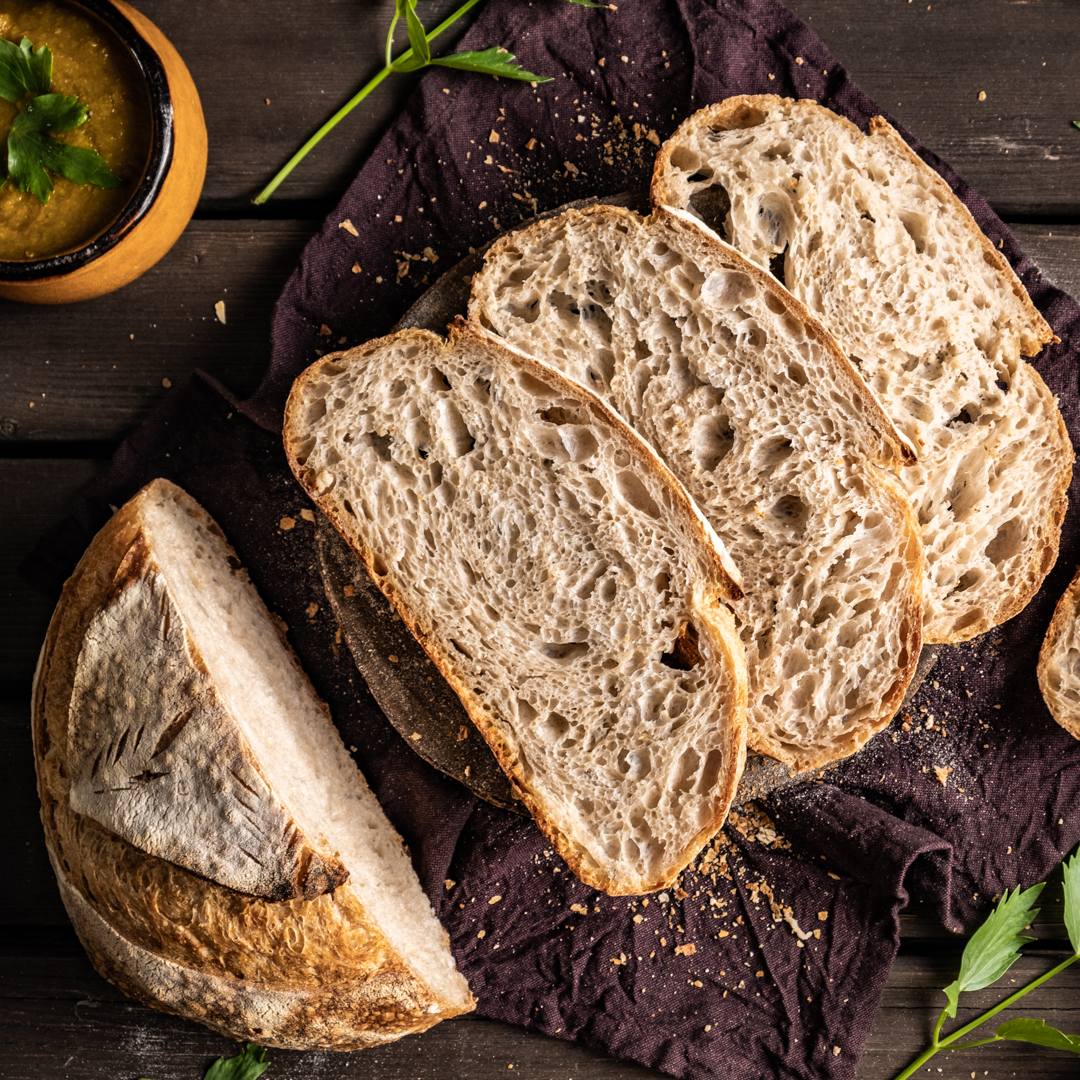
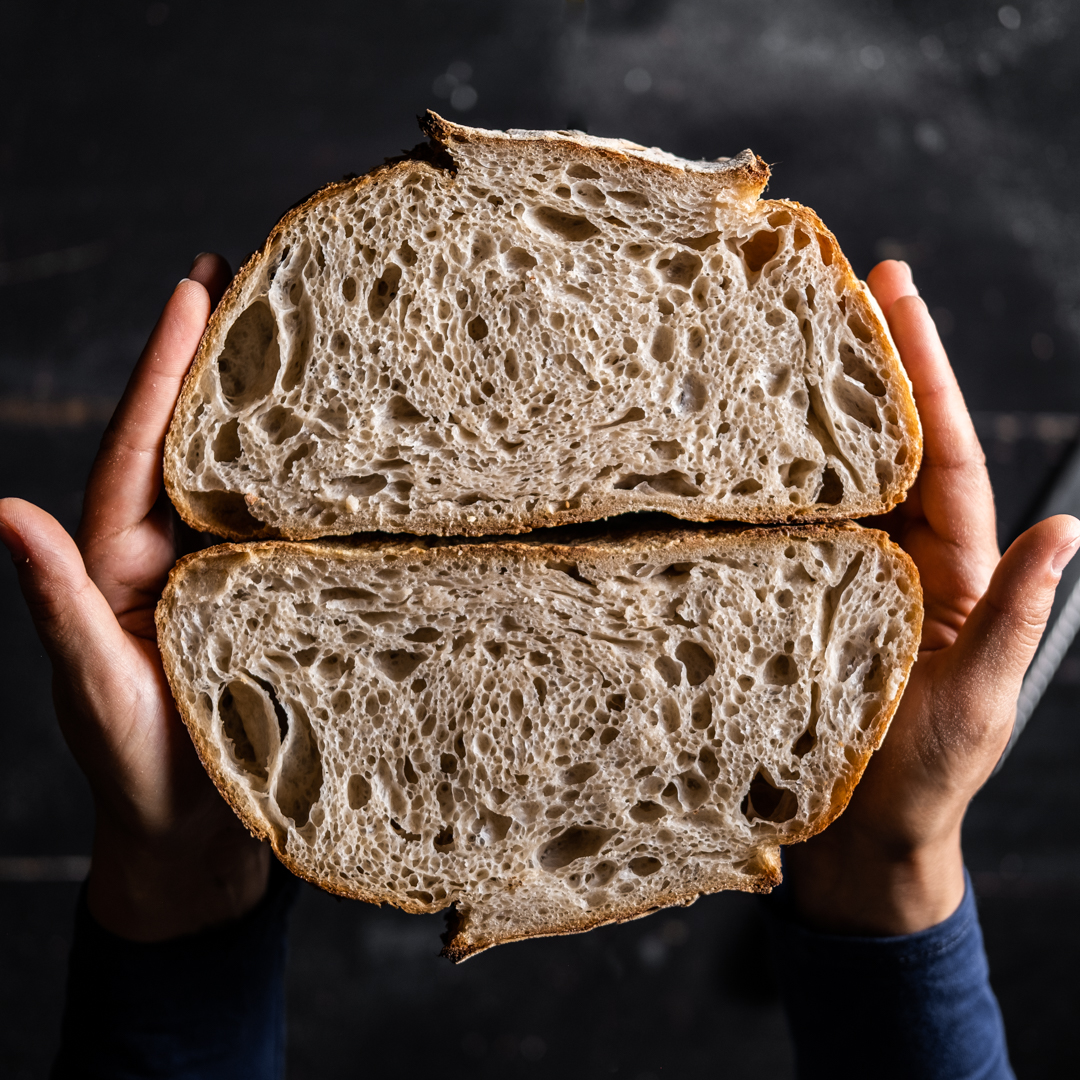
With my second attempt at this recipe, I saw that a 50% volume increase was not enough and bread turn out under proofed. With my 3rd attempt, I saw that 75% was at the limit of collapsing due to over proofing. I've learned my lesson and I had only to ferment it in a range of 50-75%. I picked 65%, but this may be a matter of preference. I wanted an open crumb (not a super open crumb) and I've got it. Spelt dough reaches the over proofing stage faster than wheat flour so then I had to find the sweet spot.There are some things I cannot show you with photos: the taste and flavour. There is a sweet taste and a nutty flavour that the spelt flour brings to bread. It reminds me of rustic/medieval loaves. I put together the process of the 4th attempt and the experiences I've got on the first 3 attempts in a video on youtube: I am sure that most of you making your own recipes have similar baking journeys. Is mainly when you try them yourself can really learn to bake amazing loaves. Denisa.
Great loaf and great work Denisa! I like your stepwise write up and you are tempting me to give it a try!
Was your spelt flour home milled or shop bought? Stone or roller milled, light or whole grain?
Lance
Thank you, Lance! I actually found an organic white spelt flour at my local supermarket and I wanted to give it a try. I was not disappointed. Otherwise, I have a 5kg bag of organic whole spelt from a local farm on my shelf that I cannot wait to test also :)
I triedmany recipes with different flours and different qualities of flour, but this one is a keeper for me. I hope you like it if you try it!
Denisa.
Wow. Down the line agree with albacore. Blown away, Denisa! Beyond how beautiful your bread looks, like albacore says, thank you for the extraordinary write up. Spelt berries sitting asleep in my larder......hmmm....
I bet the little microorganisms from your sourdough starter are eager to eat the goodies from the spelt flour sitting in your ladder. I also bet that you'll enjoy the flavour that these little creatures will create in your baked bread. Give it a try!
Denisa
Another wonderful set of bakes with the final being perfection Denisa. You are very patient with your recipe development and the results show. As always your photography is also top notch.
Benny
Benny, I admire your work also and not once you inspired and motivated me to bake bread! Thank you so much!
Beautiful loaf, but your presentations always take it to the next level. (I also love your nature photography).
Richard
Thank you so much, Richard! Baking bread and photographing nature/life are my greatest passions.
Bravo, your loaves are excellent and so are your detailed posts, they are a gteat way to learn more about mixed breads.
I just started my sourdough journey and it was hard to find qualitative content, I love this forum!
Trying to make wholegrain freestanding loaves has proven tough for me, I am in Ireland and up to now it was very cold (room temp 17 at max haha). I have a heating pad that helps.
I am trying a 60% spelt / 40% strong white. I tried a 62% hydration and just made a 68% (had to add water during first stretch and fold it was weirdly too dry). But none of the 2 flours I have hold hydration much. My partner also does not like breads too sour so I try warm proofing. I cannot seem to get a good crumb so far.
Below 23C the gluten collapses as it takes too long to rise (end up with a brick). I pushed to 24-25C with a similar process as yours, around 5hrs my aliquot is around 30% but my dough feels at the limit so I had to shape it.
As a result the rising is still low. I am using 15% stiff (quite yeasty starter that I fold in a bitbefore its peak to push rising more than bacterial activity). Do lamination, then 4 coild and folds.
This is the best I get, and I do not know how to improve it since when I leave it to ferment more it does not rise and seems dense. Any idea what I could be doing wrong?
It looks like you're over doing it. ie. Too much fermentation. Enjoy!
Hi, thanks for the input! Do you reckon if I ferment a bit less I will get a more airy crumb? (Since my flours cannot take high hydration I thought pushing fermentation to "the limit" would help). Wholegrain + medium hydration does give a denser loaf, I am trying to reach something like Hungryshots but it seems I cannot ferment as long either, I am in a bit of a pickle haha
What type of spelt flour are you using? Denisa was specifically using white spelt flour. If you use wholegrain spelt you won't get the same result. Also, her flour may have been roller milled (she never specified), which is another factor.
You need to follow her recipe exactly and you will get a good result - I did make this bread a while ago. Having said that, yours doesn't look bad!
Lance
Trying to match anothers work is a personal thing - one which I'll decline except to say good luck and keep trying. Enjoy!
Thanks to all for your help. I cannot believe I read those spelt recipes several times and missed it was white spelt.
I am indeed using wholegrain. The long will be long to reach a desired result haha. It is a 12.5% protein spelt flour from Oak Forest Mills (Dublin) - excellent taste and extensibility but delicate still.
@phaz I understand what you say. While I do not try to copy hungryshots recipe or exact results I think everyone has to have a goal in mind to improve. A crumb like this is what is missing from my bread at the moment. That is this specific quuality I am trying to reach (while understanding the factors to play with to get there).
Will keep at it and hopefully write my own post to share if I get a decent result