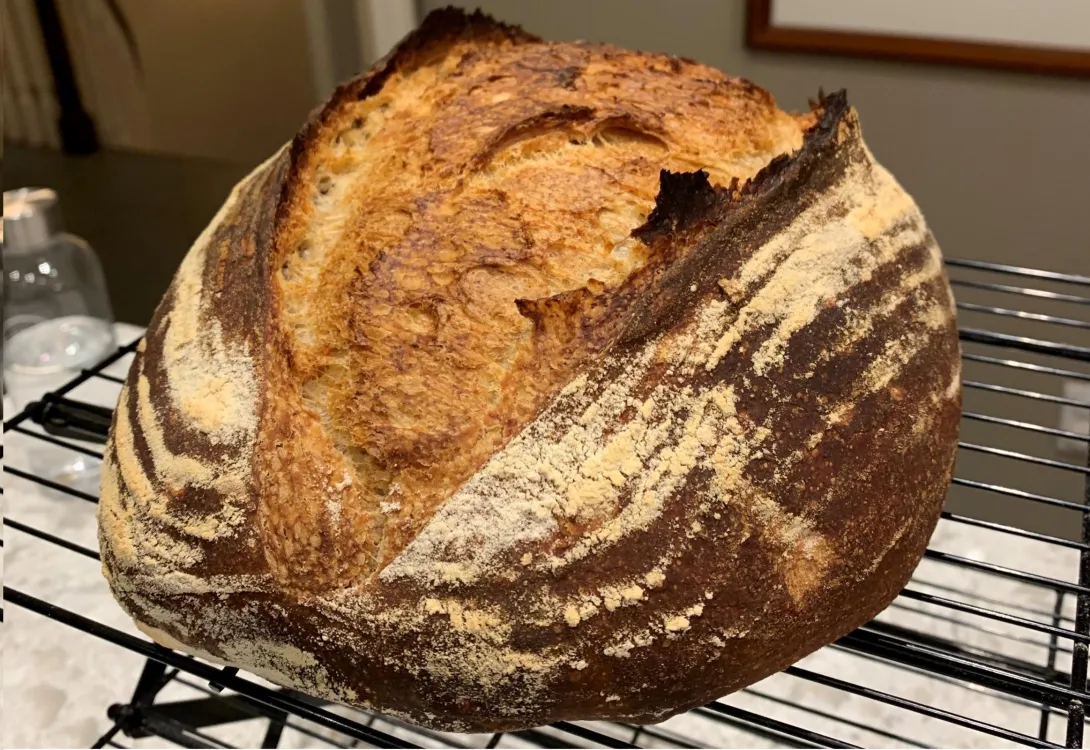
This is a process that I am currently refining and glad to share. The results are consistent in creating bread that is large in size, light and full with air bubbles. There are two versions: the same day version produce a more regular crumb while the overnight one gives a more irregular one. This process is true to my belief that making good bread should not necessitate endless steps.
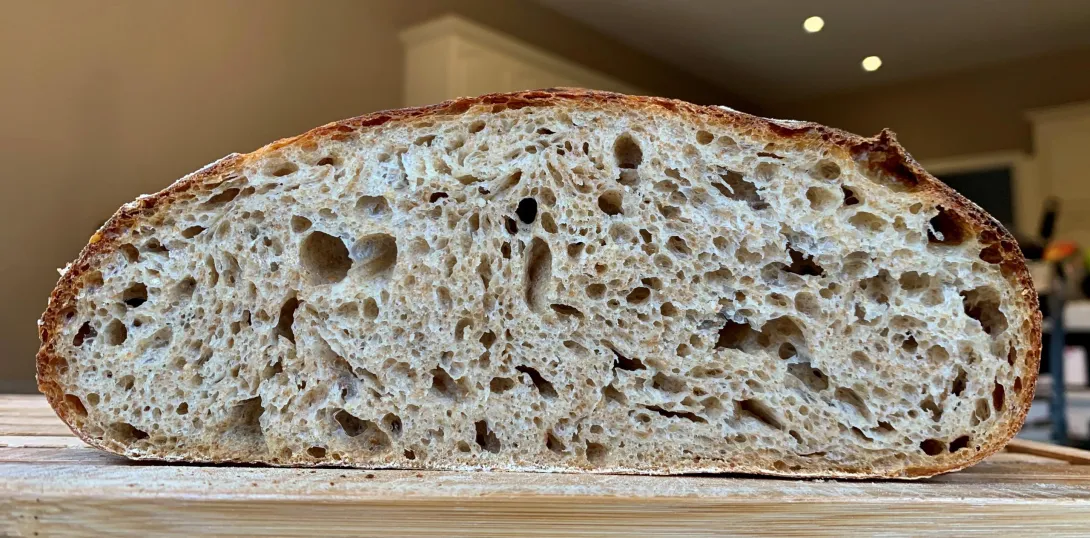
First picture shows same day crumb while the second one shows overnight crumb: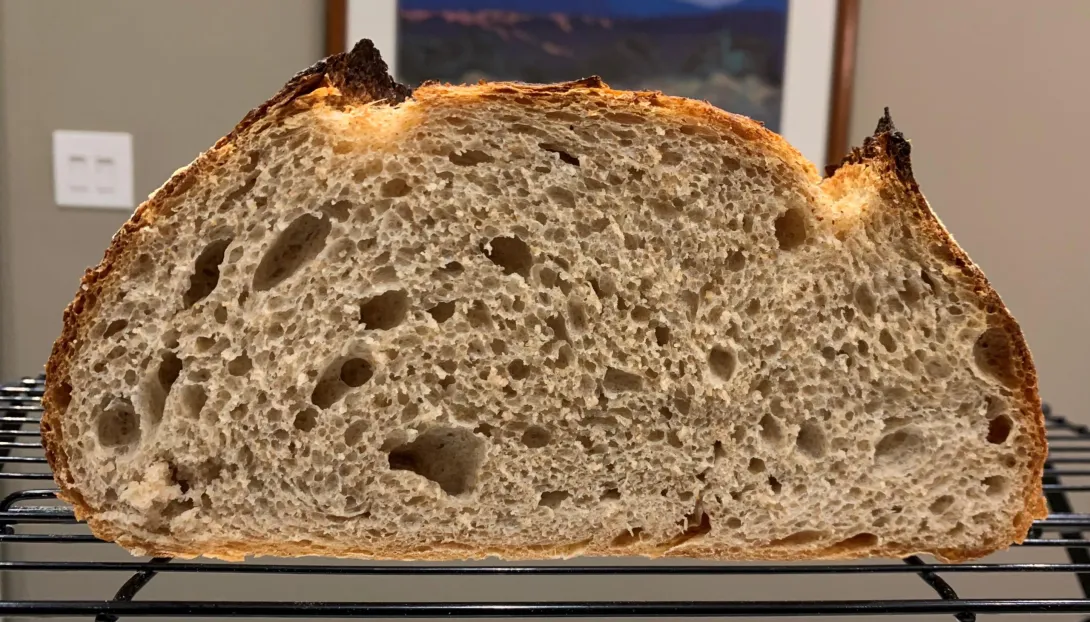
Formula
(33%) 166 gr bread flour
(33%) 166 gr Whole wheat flour
(33%) 166 gr stone ground spelt
(80%) 400 gr water @ 30 C
(2%) 10 gr salt
instant yeast, one of the following:
(0.4%) 2 gr for the same day version – 5 hours bulk
(0.16%) 0.8 gr for the overnight version – 12 hours bulk
Process
Important notes about time
When yeast is added to dough, it starts fermenting it. It continues fermenting as long as its alive and have food to consume. It is also oblivious to the names we gave to steps of bread making – bulk, benching, proofing. It is therefore important to note the total time lapse between adding yeast to the dough and until it gets into the oven. Once you find a total time that works well for your dough, keep it in mind next time you spend more or less time on any of the different stages, and adjust the length of the other stages accordingly.
It is better to use dough that is still on the rise and not yet deflating. So when making an overnight dough, select the beginning time of bulk fermentation and the amount of yeast such that the dough is optimal when you are ready to use it in the morning. Fermenting in a clean glass bowl will let you see if the dough receded from a previous height.
Mix and Autolyse
Mix well flours and salt for even distribution. Add water and stir with a fork as much as it is useful (about 1 minute), then continue squeezing and folding with your hand until all the flour is wet (another minute). Cover and let the dough rest at least 30 minutes and up to 3 hours according to your own convenience.
Add yeast and start bulk fermentation
Sprinkle the yeast over the dough. Fold the dough over the yeast. Add some quick folds and squeezes to distribute the yeast (2 minutes). Write down the time so you will not forget when bulk fermentation started.
Dough manipulations
It should be enough to do one or two of your favorite type of folds during the first hour. You will build the dough strength at the pre-shaping stage.
How long to bulk ferment?
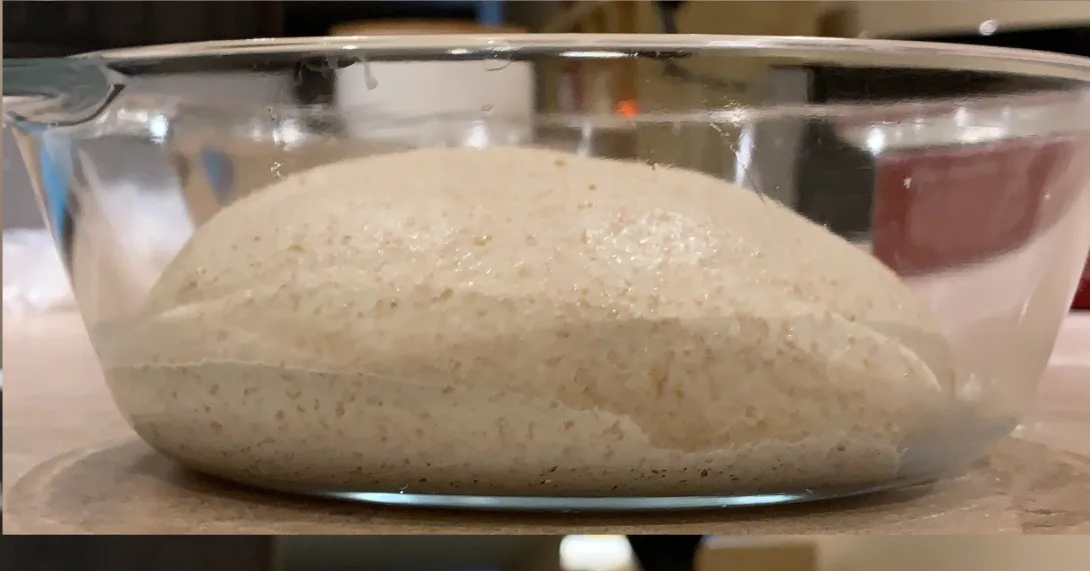
Take a hint from the following two pictures of before and after bulk fermentation. Think about it as almost like making poolish. Look at your notes to adjust the amount of yeast for the next bake
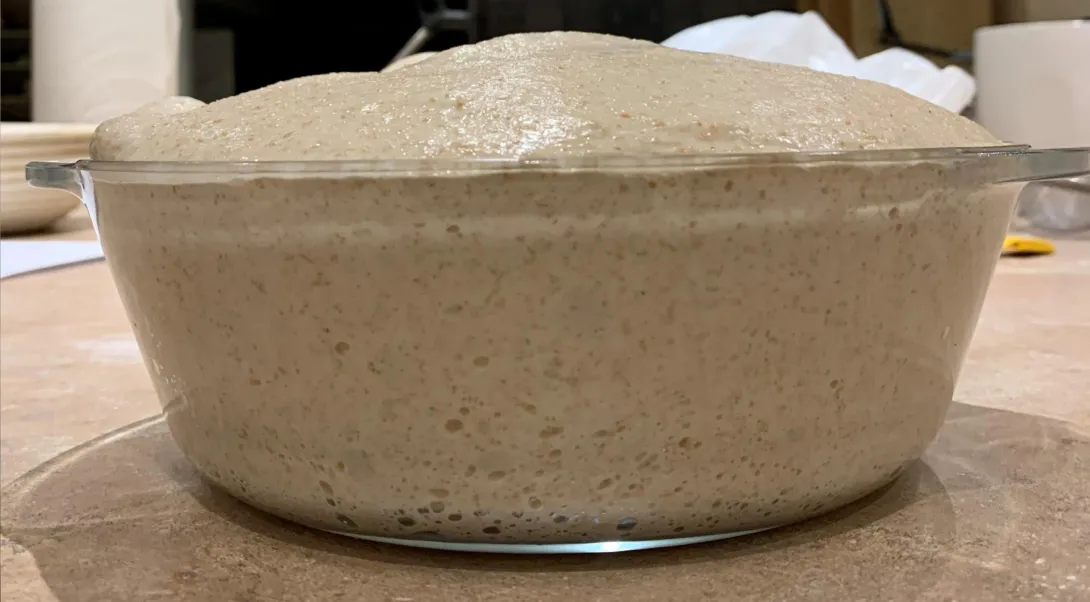
First Preshaping
Most probably, the dough now appears to be very weak. This is not the case. With this pre-shaping – do not think about the final shape, or any shape at all. Just use your bench knife to lift portions of the dough and do a nice and big stretch and fold from four directions. Flip the dough over and use a bench knife to round it a bit. Cover and let rest for 10 minutes.
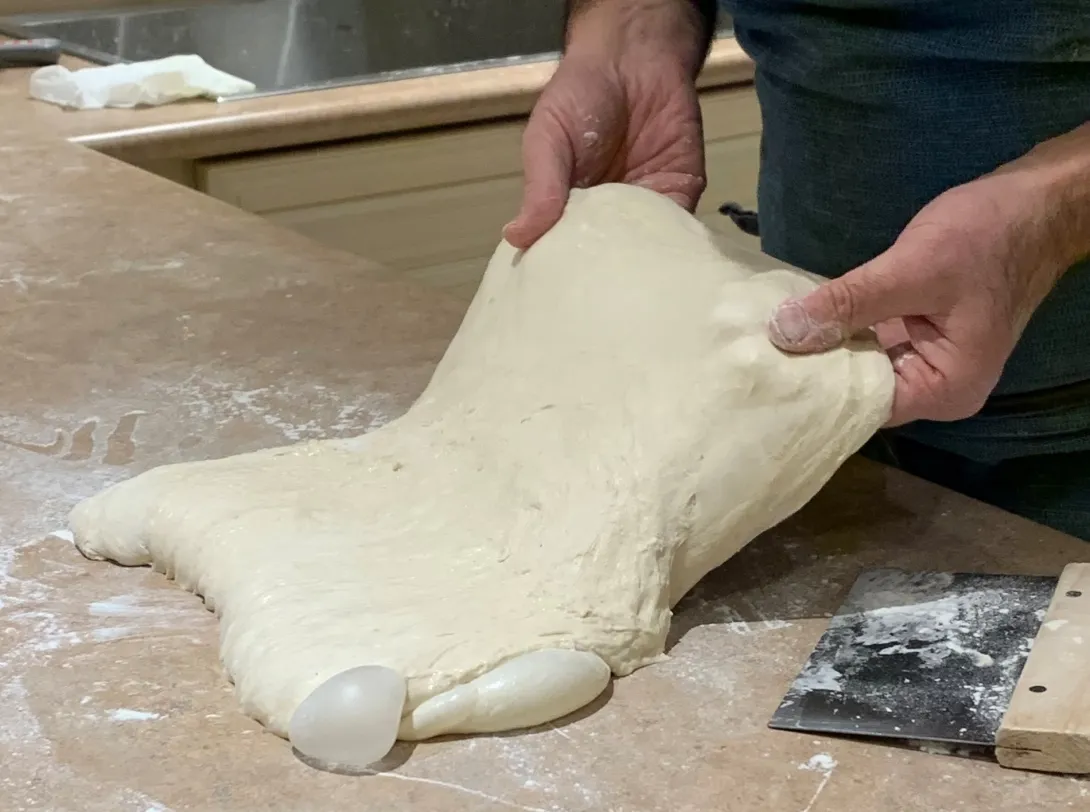
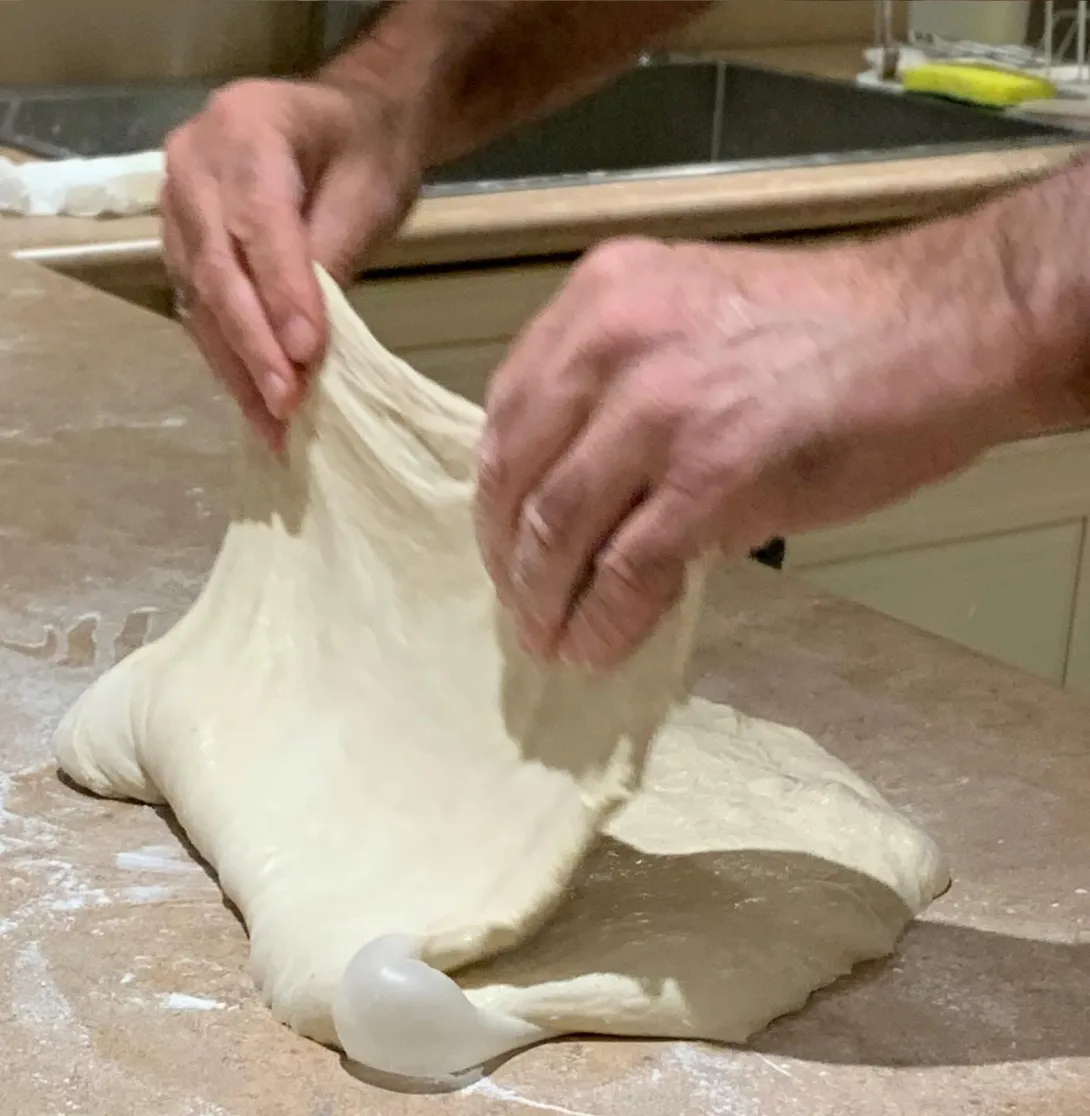
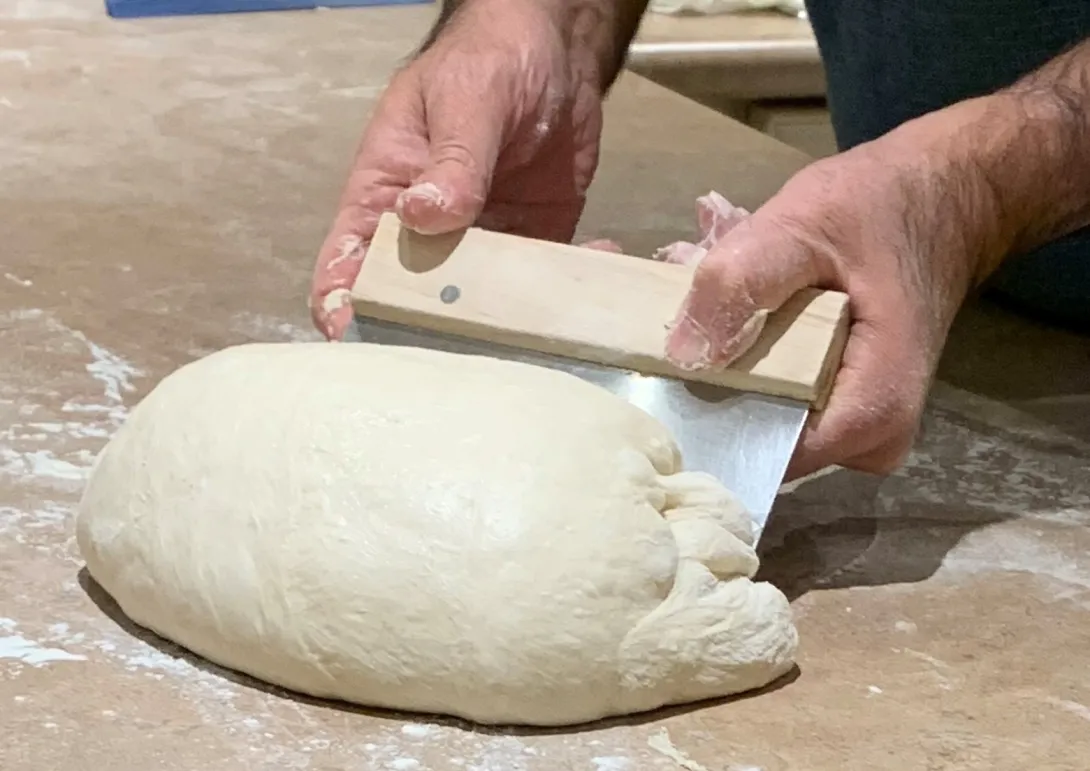
Second Preshaping - optional
If the dough appears to be weaker than desired, shape into a round and let rest for 10 minutes.
Shape, proof, score and bake
Following the pre-shaping, the dough is now very strong and does not spread much. Go easy on the dough when shaping as not to deflate it. I find it useful to make the stretches effect only the external layer of the dough and then fold very lightly over the dough (sorry – no pictures yet). Proof time is a bit more than 1 hours. I bake covered at 480F for 20 minutes and uncovered for additional 20 minutes at 450F
Beautiful loaves and well written! Thank you!
Spelt is not readily available to me . Is spelt crucial to the process or the texture? Can I replace it with either WW or AP?
Have you ever done this method with 100% WW? If yes, any changes to the method?
Thank you! In some of the photos, the dough looks suspiciously white since I used photos from different batches of dough, some of them just bread flour. So yes, definitely, use whatever flour you like and adjust the hydration. With only bread flour, better to try with 70% hydration (350 gr water) and see how it works for you. With 100% WW, 80% hydration might not be enough – really depends on your specific flour.
I live in Canada and also had hard time finding spelt. I eventually found it in bulk stores and fell in love with the taste. Some people say it is hard to work with this flour but I had only positive experience using it.
You can also notice that the texture is a bit more interesting with longer fermentation. I would like to improve it further, but did not have a chance to make more experiments yet.
The real takeaway, which surprised me, is that no matter what process you use, if the dough is very slack after bulk, one stretch and fold on the table will fix it. The interesting thing about the stretch and fold is that it does not deflate the dough so already after this pre-shape you get dough that is both inflated and keeping its shape.
Here I used 50% whole wheat and 50% bread flour with 85% hydration. Try 87% hydration with 100% whole wheat.