The Fresh Loaf

A Community of Amateur Bakers and Artisan Bread Enthusiasts.

oven steaming

varda's picture
varda

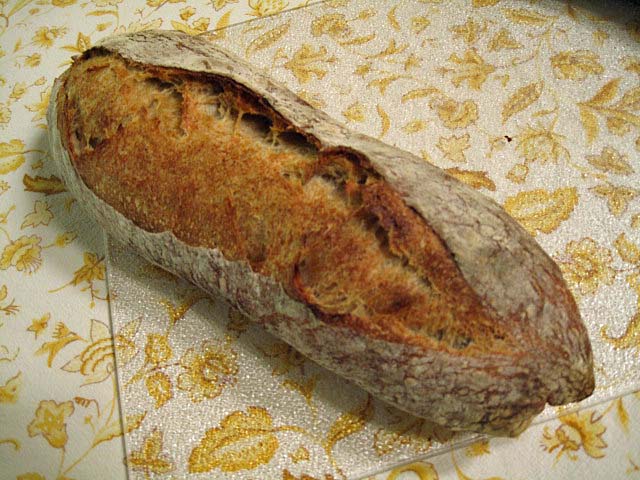
A recent blog post made me sit up and take notice.   http://www.thefreshloaf.com/node/22954/getting-grigne-observation shows two loaves; one made with steam at the beginning of the bake, the second steamed later in the process.   The first one looks better by a lot.   Lately I've been making batards with two cuts.   The most frequent outcome is that one of the cuts opens nicely and takes most of the bloom of the loaf, and the second opens a bit, and then seals over.   In trying to diagnose this I thought it might be either a shaping or a steaming issue.    So I changed my batard shaping so that instead of rolling toward me (a la Ciril Hitz) I roll away (a la Mark from the Back Home Bakery).   The latter method seems to allow me to get a tighter gluten sheath so I'm sticking with it.   However, it didn't seem to solve the problem.   Yesterday, I decided to see if more steam at the beginning of the bake would help.   I made a pain au levain (almost the same as Hamelman p. 158 but with higher hydration 69% vs 65%, higher percentage of prefermented flour 17% vs 15% and a lot less salt.)   The only change I made to my regular baking process was to add a dry broiler pan underneath the stone during preheat, and fill it with water at the same time as loading the loaves.   This is in addition to my usual loaf pans filled with water and wet towels which I place on each side of the stone.  Here is the result:


Not a perfect loaf by any means, but the first time in recent memory where my cuts opened evenly.   Should I attribute this to the extra steaming at the beginning of the bake?  I think so.


dmsnyder's picture
dmsnyder


The "San Joaquin Sourdough" is my own recipe. It evolved through multiple iterations from Anis Bouabsa's formula for baguettes. Most of my deviations developed in discussion on TFL with Janedo, who first suggested adding sourdough starter and rye, and, then, leaving out the baker's yeast and making it as a "pure" pain au levain.

I have tried many modifications of ingredients and procedures. The current formula uses the ingredients specified below.

Those who have followed the evolution of this bread will note that I have increased the levain from 20 to 30 (baker's) percent. I have also switched from a 75% hydration levain to a 100% hydration levain, reducing the water added to the dough to keep the overall dough hydration about the same.

Originally, all gluten development was by the “stretch and fold in the bowl” method. I have added a couple folds on the board and lengthened the bulk fermentation prior to cold retarding the dough.

These changes result in a somewhat tangier bread. I don't think they have changed the crust or crumb structure noticeably.

I made two other modifications of my procedures for today's bake: First, I employed the oven steaming method recommended for home bakers by The San Francisco Baking Institute.

The oven is not pre-steamed (before loading the loaves). A cast iron skillet filled with steel pieces (nuts and bolts, rebar pieces) is pre-heated in the oven along with two baking stones. One stone is placed on a rack above the stone and rack on which the loaves will be loaded. When the loaves are loaded, a perforated pie tin filled with ice cubes is set atop the skillet. As the ice melts, water drips through the perforations and turns to steam when it hits the metal pieces.

I deviated from the SFBI-prescribed method in two particulars: I used only a single baking stone, and my cast iron skillet was filled with lava rocks rather than steel pieces.
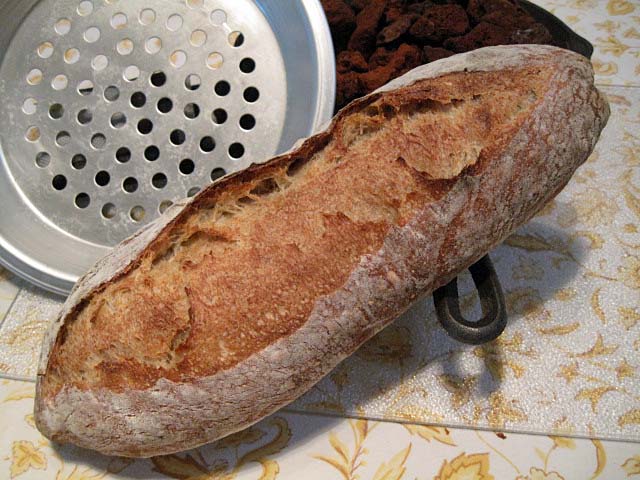
My second procedure modification was to open the oven door for a few seconds every 5 minutes during the final 15 minutes of the bake. This was to “vent” the steam rising from the loaves themselves in the hope this would result in a crust that stays crisp longer. It did result in less softening of the crust as the bread cooled. Methods to vent the oven and dry the crust during the last part of the bake warrant further exploration.


Ingredients


Active starter (100% hydration)

150 gms

KAF All Purpose flour

450 gms

BRM Dark Rye flour

50 gms

Water

360 gms

Sea Salt

10 gms


Procedures

Mixing In a large bowl, mix the active starter with the water to dissolve it. Add the flours and stir to form a shaggy mass. Cover tightly and let rest (autolyse) for 20-60 minutes.

Sprinkle the salt over the dough. Using a plastic scraper or silicon spatula, stretch and fold the dough 30 times, rotating the bowl 1/5 turn between each stroke. Cover tightly. Repeat this stretch and fold procedure 3 times more at 30 minute intervals.

Fermentation After the last series of stretches and folds, scape the dough into a lightly oiled 2 quart/2 liter container and cover tightly. (I use a 2 quart glass measuring pitcher with a tightly fitting plastic lid manufactured by Anchor Glass.) Ferment at room temperature for 90 minutes with a stretch and fold after 45 minutes, then place in the refrigerator and leave it there for 21 hours.

Dividing and Shaping  Take the dough out of the refrigerator and scrape it gently onto a lightly floured work surface. Gently pat it into a rectangle. Divide as desired or leave in one piece. To pre-shape for a bâtard, fold the near edge up just past the center of the dough and seal the edge by gently pressing the two layers together with the ulnar (little finger) edge of your hand or the heel of your hand, whichever works best for you. Then, bring the far edge of the dough gently just over the sealed edge and seal the new seam as described.

Cover the dough with plastic wrap and/or a kitchen towel and let it rest for about 60 minutes, with the seams facing up. (The time will depend on ambient temperature and how active your starter is. The dough should have risen slightly, but not much.)

To shape a bâtard, fold the near edge of the dough and seal the edge, as before. Now, take the far edge of the dough and bring it towards you all the way to the work surface and seal the seam with the heel of your hand. Rotate the loaf gently toward you 1/4 turn so the last seam you formed is against the work surface and roll the loaf back and forth, with minimal downward pressure, to further seal the seam. Then, with the palms of both hands resting softly on the loaf, roll it back and forth to shape a bâtard. Start with both hands in the middle of the loaf and move them outward as you roll the loaf, slightly increasing the pressure as you move outward, so the bâtard ends up with the middle highest and the ends pointed .

Preheating the oven One hour before baking, place a baking stone on the middle rack and put your steaming apparatus of choice in place. Heat the oven to 500F.

Proofing After shaping the loaf, transfer it to parchment paper liberally dusted with semolina or a linen couche. Cover the loaf with plastic wrap and a kitchen towel or a fold of the linen. Proof until the loaf has expanded to about 1-1/2 times it's original size. (30-45 minutes) Do not over-proof, if you want good oven-spring and bloom!

Baking Pre-steam the oven, if desired.

Slip a peel or cookie sheet under the parchment paper holding the loaf or transfer to a peel, if you used a couche. Score the loaf. (For a bâtard, hold the blade at about a 30 degree angle to the surface of the loaf. Make one swift end-to-end cut, about 1/2 inch deep.)

Transfer the loaf (and parchment paper, if used) to the baking stone. Steam the oven. Turn the oven down to 460F.

After 12-15 minutes, remove the loaf pan and your steaming apparatus from the oven. Rotate the loaf 180 degrees, if it is browning unevenly. Close the oven door.

Bake for another 12-15 minutes, then remove the loaf and place on a cooling rack. Check for doneness. (Nice crust color. Internal temperature of at least 205F. Hollow sound when you thump the bottom of the loaf.) If necessary, return to loaf to the oven to bake longer.

Cooling Cool on a rack for two hours before slicing.


David

Submitted to YeastSpotting
 

dmsnyder's picture
dmsnyder

When I took the Artisan I workshop at the San Francisco Baking Institute last August, Miyuki demonstrated the method of oven steaming they recommend for home bakers.

The oven is not pre-steamed (before loading the loaves). A cast iron skillet filled with steel pieces (nuts and bolts, rebar pieces) is pre-heated in the oven along with two baking stones. One stone is placed on a rack above the stone and rack on which the loaves will be loaded.

When the loaves are loaded, a perforated pie tin filled with ice cubes is set atop the skillet. As the ice melts, water drips through the perforations and turns to steam when it hits the metal pieces.

I had a hard time finding the perforated pie tins, so I hadn't been able to try this method until today. I did two bakes: One was two loaves of a very familiar bread – Hamelman's “Vermont Sourdough with Increased Whole Grain” from “Bread.” The other was a new bread to me - Chad Robertson's “Basic Country Bread” from “Tartine.” I made two large boules of the Country Bread. One was baked using the “Magic Bowl” technique and the other with the SFBI steaming method, minus the second baking stone and using lava rocks in place of metal pieces.

My current baking method is to pre-heat the oven to 500ºF with the baking stone and skillet in place. When I load my loaves, I turn down the oven to whatever temperature the recipe specifies, using the conventional bake setting. After 10-15 minutes (depending on the total length of the bake), I change the oven setting to convection bake but 25ºF lower. I find, in my oven, conventional baking retains steam well, but convection dries the crust better.

Using the SFBI steaming method, the Vermont Sourdoughs came out substantially similar to how they come out with my previous method – pouring boiling water over the lava rocks. I could not detect any difference in oven spring, bloom, crust color or the texture of either the crust or crumb.

Vermont Sourdough with Increased Whole Grain

Crust Crackles

Vermont SD with Increased Whole Grain crumb

The Basic Country Breads were different from each other. The one baked in under a stainless steel bowl was a bit shinier. The crust softened quicker with cooling. It did not sing when cooling. I don't think there was any real difference in oven spring or bloom.

Basic Country Bread baked with the "Magic Bowl" method

Basic Country Bread baked with the SFBI steaming method

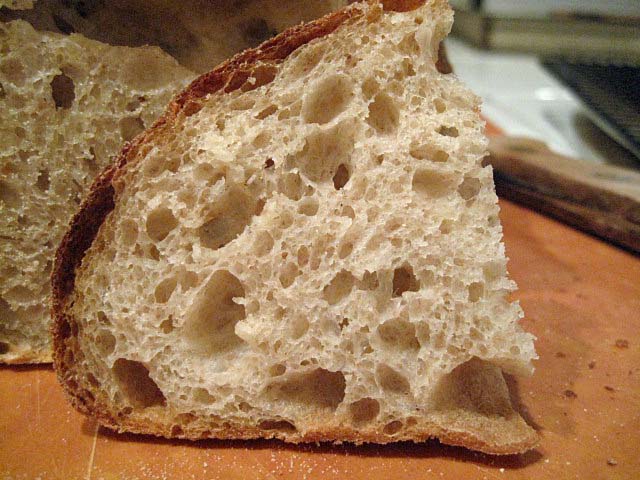
Basic Country Bread crumb

My conclusion is that the SFBI method is effective. It does not require that water be boiled and poured into the hot skillet. To me, it seems a bit easier than the method I've been using. That said, the breads baked using the SFBI method for steaming the oven seem pretty much identical to those I get using my previous technique.

I don't have the kind of covered cast iron skillet/shallow dutch oven that Chad Robertson recommends be used to bake his Basic Country Bread. I do have enameled cast iron ovens that should perform similarly. Perhaps I should try one of them, although my expectation would be that they perform similarly to the "Magic Bowl" method.

David


breadbakingbassplayer's picture
breadbakingbass...

So you want that thin crust that shatters when you cut/bite into it...  You also want your loaf to spring fully.  You've tried all of those other steaming methods, spray bottle, cast iron steam pan, crazy contraptions to get and keep steam in the oven...  I suggest you take a trip down to your hardware or home store and get a bag of lava rocks.  I got mine in Brooklyn for $5.34 including tax.  People in Manhattan don't know what they are...


Take the lava rocks, empty them into whatever pan you have just to get the amount correct.  I have a pan that is about 9"x13"x2".  Wash the rocks and put them into a pot of water and boil them for a while, 30 minutes to sterilize them.  Preheat your oven to 500F while you are boiling them.  After you are done boiling them, place them into your pan and put them into the oven and let them dry out.  You can turn your oven off and just leave them there over night...


So when you are ready to bake, place the pan with the lava rocks on your oven floor, if you ahve a gas oven, or on a lower rack if you have an electric oven and have it stick out a few inches from below your baking stone on the side.  This allows you to take a small cup, preferable with a spout, and just pour the water in with out moving things around...


So when you are ready to bake, your oven is preheated to the correct temp, before you load the oven, put 1 cup of water in the lava rock pan, and close the oven.  Prepare your loaves to be peeled into the oven, directly onto the stone...  Open the oven, put your loaves in, add 1 more cup of water to the lava rock pan, and close...  1/2 way through your bake, open the oven, let all the steam out, rotate your loaves, and finish your bake...


Also, having a convection oven helps too, especially if you are baking on 2 levels...

ArieArie's picture

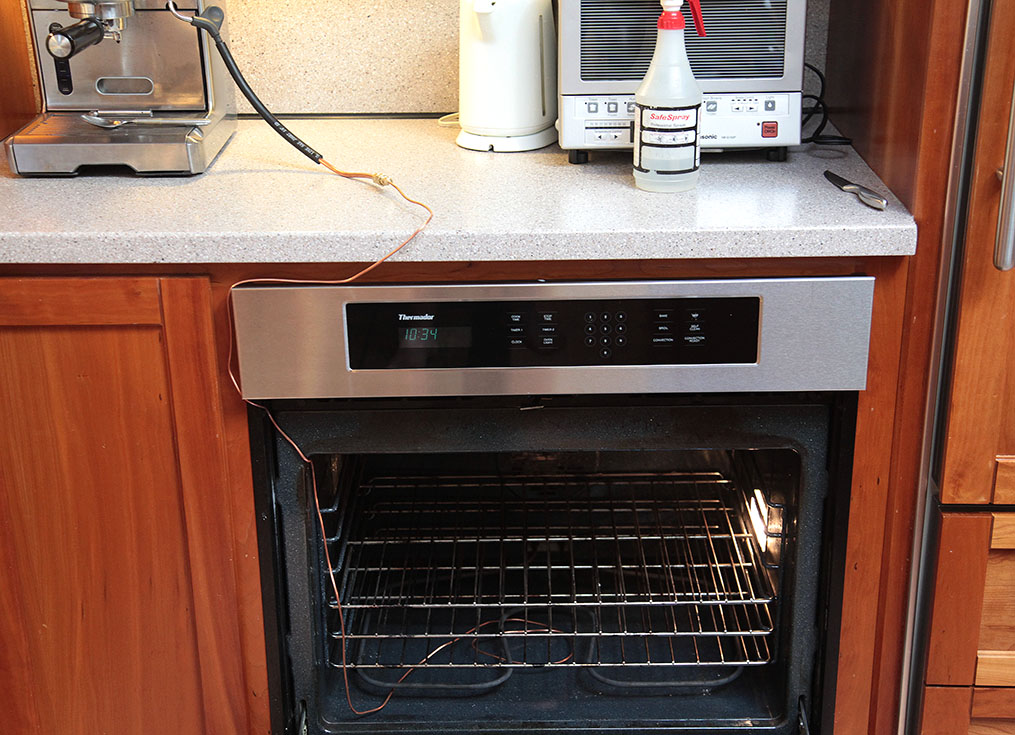
My new steaming apparatus..

November 28, 2009 - 11:39pm -- ArieArie

I find that ssteaming is not working as well as I like. Spraying works well, but opening the door every time, and the oven drop 50f. 

I was using a metal dish with water placed very close the the heating element but it didn't produce the blast of steam I wanted.


so here is my contraption:

I use the Espresso machine to push, first steam, and then hot water and the hot tubing makes a lot of steam at one time.. 


dmsnyder's picture
dmsnyder


I made a couple of sourdough boules today. I'm quite happy with them. I used a slightly different formula, but the exciting thing to me was the effect of a modification of my oven steaming method I've been meaning to try for some time.


Ingredients

Amount

Baker's percentage

High-gluten flour

450 gms

90

Whole rye flour

50 gms

10

Water

362 gms

72

Salt

10 gms

2

Levain (1:3:4 - S:W:F)

100 gms

20

Total

972 gms


194


I used KAF Sir Lancelot flour and Bob's Red Mill “Dark Rye” flour.

Procedures

  1. Mix the flours and water to a shaggy mass. Cover and let rest for 20-60 minutes.

  2. Add the salt and levain and mix to moderate gluten development.

  3. Transfer to the bench and do a couple of folds, then transfer the dough to an oiled bowl and cover it. Note the volume the dough will achieve when doubled.

  4. After 45 minutes, do another stretch and fold, then allow the dough to double in volume.

  5. Divide the dough into two equal pieces and pre-shape into rounds. Let the pieces rest, covered, for 10-20 minutes.

  6. Shape each piece into a boule and transfer to well-floured bannetons, seam side up. Place each in a food-grade plastic bag, seal the openings.

  7. Allow to proof for 30-60 minutes (less in a warmer environment), then refrigerate for 8-14 hours.

  8. Remove the loaves from the refrigerator 2-4 hours before baking (depending on how risen they are and how warm the room is). Allow to warm up and expand to 1.5 times the loaves original volume.

  9. 45-60 minutes before baking, pre-heat the oven to 500F with a baking stone on the middle shelf and a cast iron skillet filled with lava rocks on the bottom shelf. (I suggest moving the stone ove to within one inch of the oven wall on your non-dominant side. Place the skillet next to the wall on your dominant side.)

  10. When the loaves are ready to bake, pour 1/3 cup of boiling water over the lava rocks and close the oven door fast. (Strongly suggest holding the kettle wearing an oven mitt!)

  11. Transfer the loaves to a peel or to parchment paper on a peel, and load them onto your baking stone.

  12. Immediately pour ½ cup of boiling water over the lava stones and quickly close the oven door.

  13. Turn the oven temperature down to 460F and set a timer for 10 minutes.

  14. After 10 minutes, remove the skillet. Reset the timer for 20 minutes.

  15. The loaves are done when nicely colored, thumping their bottoms gives a “hollow” sound and their internal temperature is at least 205F.

  16. When the loaves are done, turn off the oven but leave the loaves in the oven with the door ajar for 7-10 minutes to dry the crust.

  17. Cool thoroughly (2 hours) before slicing and serving.

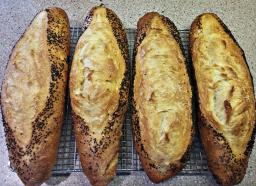
The crust was remarkably shiny when it came out of the oven. This effect, due to starch that is gelatinized early in the bake, I have only achieved before with breads baked under a stainless steel bowl for the first half of the bake. I also got quite satisfactory oven spring and bloom in these loaves which I had feared were a bit over-proofed.

It is evident that using the skillet with lava rocks for both pre- and post-loading steaming is superior to either a) pre-steaming by throwing ice cubes in a hot metal loaf pan or b) compensating for insufficient pre-loading steam by over-steaming post-loading. Some methods of steaming, when used to excess, actually interfere with the cuts opening and produce pale-colored loaves.

The bread I tasted has a delightfully crunchy crust and a chewy crumb with what I would regard as medium-strong sourness – just how I like it best.

As far as I'm concerned, this experiment was a success.

David

Submitted to Yeast Spotting


Subscribe to RSS - oven steaming