The Fresh Loaf

A Community of Amateur Bakers and Artisan Bread Enthusiasts.

Blogs

Isand66's picture
Isand66

3APR

I needed to make some nice soft buns for sandwiches and hopefully burgers if it ever stops raining.  I’ve made a version of these several times and they never fail to disappoint.

I really love the grains I’ve been getting from Barton Spring Mills and replaced the rye in the original formula with Rouge de Bordeaux freshly ground Whole Wheat.  I’ve been doing 2 passes through my Mockmill 200 sifting with a #30 and then a #40 to get a real fine whole wheat flour.

The butter and ricotta combination really made for a wonderful soft and open crumb.  These rolls came out excellent with toasted onions, smoked cheddar and black sesame toppings for a nice variety.

These are a rather high hydration dough when you take the water content of the ricotta cheese and eggs into account so be warned :).

Tangzhong is the technique of heating a portion of the flour and liquid in your recipe to approximately 65C to make a paste (roux).  At this temperature the flour undergoes a change and gelatinizes.  By adding this roux to your final dough it will help create a soft, fluffy, moist open crumb.  It is also supposed to help prevent the bread from going stale.

It is not very difficult to do a Tangzhong.  Use a  5 to 1 liquid to solid ratio (so 250g liquid to 50g flour) and mix it together in a pan.  Heat the pan while stirring constantly.  Initially it will remain a liquid, but as you approach 65C it will undergo a change and thicken to an almost pudding like consistency.  Take it off the heat and let it cool before using it in your recipe.  Some people will refrigerate it for a while but you can use it right away as soon as it cools.

Levain Directions Build 1 (Using AP Starter at 66% Hydration for Seed)

Mix all the levain ingredients together  for about 1 minute and cover with plastic wrap.  Let it sit at room temperature for around 7-8 hours or until the starter has doubled.  I used my Proofer set at 81 degrees and it took about 4 hours.

Main Dough Directions
Prepare the Tangzhong per directions above and allow to cool to room temperature.

Mix the flours, Tangzhong, eggs, ricotta and water together in your mixer or by hand until it just starts to come together, maybe about 1 minute.  Let it rest in your work bowl covered for 20-30 minutes.  Next add the salt, butter, and starter (cut into about 7-8 pieces), and  mix on low for a minute.  I have a Ankarsrum mixer and mixed on low speed for about 20 minutes until I had a nice smooth dough.  It may take less time if using a Kitchen Aid so mix as needed.

Remove the dough from your bowl and place it in a lightly oiled bowl or work surface and do several stretch and folds.  Let it rest covered for 10-15 minutes and then do another stretch and fold.  Let it rest another 10-15 minutes and do one additional stretch and fold.  After a total of 2 hours place your covered bowl in the refrigerator and let it rest for 12 to 24 hours.  (Note: I have a proofer set to 80 degrees F. and only let it proof for 1.5 hours.)

When you are ready to bake remove the bowl from the refrigerator and let it set out in a warm place around 80 F temperature still covered for 1 hour.   Remove the dough and cut into equal size pieces and shape into rolls.  Place on a baking sheet lined with parchment paper and cover with moist tea towels or plastic wrap sprayed with cooking spray. (Note: I made these 150 grams each on average)

The dough will take 1.5 to 2 hours depending on your room temperature.  Let the dough dictate when it is read to bake not the clock.

Around 45 minutes before ready to bake, pre-heat your oven to 450 degrees F. and prepare it for steam.  I have a heavy-duty baking pan on the bottom rack of my oven with 1 baking stone on above the pan and one on the top shelf.  I pour 1 cup of boiling water in the pan right after I place the dough in the oven.

Right before you are ready to put them in the oven, using a simple egg wash brush each roll and sprinkle on your topping of choice.   Next add 1 cup of boiling water to your steam pan or follow your own steam procedure.

After 1 minute lower the temperature to 435 degrees.  Bake for 20-30 minutes until the rolls have some nice color and the inside is around 200 degrees F.

Take the rolls out of the oven when done and let them cool on a bakers rack before for at least 1 hour before eating.

yozzause's picture
yozzause

As you may be aware i have been having some fun with Red wheat here in Australia of late and have been keen to know the gluten strength of the flour. i was sent info on a test by Lance (Albacore) from Lancashire and its referred to as a hand washing test. The test info is in   https://bakerpedia.com/processes/gluten-washing-tests/ i took 50 grams of the milled Red Wheat flour andthe test calls for 25g of water to make a dough, but l found at that rate i wasnt able to form a good dough so i added about 10g more so that i could make a well developed dough ball. The resulting dough ball is then placed under water from 20 to 60minutes i opted for 30, its then just a matter of washing the starch and in this case the bran and germ particles away from the dough ball. i did this in a large bowl and sieved the water from the bran flakes and small bits of gluten. I collected as much of the gluten shreds that i could see and continued rolling the gluten ball around in the palms of my hand where the flakes of bran could be felt coming away. at the end when i was satisfied that i had removed as much as was possible i weighed the Wet Gluten and recorded 10.2 g this equates to 20.4 for Wet gluten value. in the test The Cereals and Grains Association (AACC International) has a value of 30 - 45 as the highest and good bread making functionality. There is also a dry gluten value also so i dried the gluten out in the oven and recorded 5.34g from the 50g of flour used which would equate to 10.68% gluten. Another very learned friend said that she felt that the very best test is the resulting bread, and we have already seen that it has made a very good loaf. it might be interesting to repeat this exercise but sieve off the bran and germ in the dry stage and use 50 grams of the resulting flour!  dough ball formed almost matches the bench top   dough ball submerged for 30 minutes    washing out starch in a bowl  sieving out and collecting bran germ and gluten strands,  The bran with is Vibrant colour and some small shards of gluten   The final gluten ball that resulted from the 50gram 100% home milled flour sample of Australian grown Red Wheat.

Martadella's picture
Martadella

My old trusty recipe with tiny modification

7 am

Preferment 

160g old starter

160g warm water

160g rye flour

Mix , cover and place in a warm place (I put it in the oven alongside a pot of very hot water or leave the oven light on) 


Scald, 7 am

80g rye flour 

240ml boiling water

1 tbsp ground coriander 

Mix until smooth, wait until no longer hot but stil very warm,  add 1 tbsp rye flour,  mix in, cover, place in the same spot as the preferment


3 pm

Dough 

The preferment should start collapsing 

The scald should be smooth and have a pleasant gently sweet taste and smell 

All preferment

All scald

18 g salt

480 g rye flour 

320 g warm water

Sweetener and spices as desired ( I didn't use any this time, I wanted simplicity )

Mix into soft, sticky, smooth dough

Cover, leave at rt 


Bulk ferment 1½ -2 hours 

Place in prepared pan ( it's a lot of dough, use a large pan )

Final proof 1-1½ hours 


Bake without steam 

5 min 490°F,  30 min 425°F, 25 min 390°F or until brown and sounds hollow when thumped on the bottom

The modification was adding 30 g of toasted grains, scalded with all 340g of hydration water.  I did this in the morning and left together with preferment and scald until afternoon, when I made the final dough. This small amount of grain provided interesting taste nuance: bread smells and tastes a little bit like gingerbread with subtle caramel notes. Really nice 😋

Martadella's picture
Martadella

I used 500g Prairie Gold whole wheat flour and, initially, 400g water, 4 g yeast and 10g salt. After autolyse decided to gently and gradually add 100g more. 

Really funny dough, not too easy to work with,  but manageable. Nice taste, and not too chewy 🙂

agres's picture
agres

People made very good bread for a long time before they added Vitamin C to their flour.

I do think the effect of Vitamin C is detectable to a careful hand baker. However, hand bakers can easily compensate by using a slightly wetter dough or longer fermentation times.

At this point, I think Vitamin C is added for professional bakers using mechanical dough mixing and handling equipment on a tight production schedule.  

The other side of of this is that I now prefer flour without Vitamin C in it - something I would not have discovered without asking the question, "Would adding Vitamin C to my flour improve it?"  It was a fun experiment - lots of pizza for everyone.

JonJ's picture
JonJ

This was an experiment to see what happens if Benny's 100% WW Hokkaido is done without dairy. The method was fairly faithful to the original recipe with a direct substitution of 'plant butter' for the butter and commercial almond milk in place of milk, even in the tangzhong.

Egg was still retained, I need to give some thought of what I'd replace the egg with (aquafaba?) if this bread is to be made completely vegan. Will probably try another experiment without egg one day, any egg substitution recommendations?

It's interesting, it made a good bread. The taste is a little sweeter, with more of a vanilla edge to it, this probably comes from the almond milk that I used. In fact, I think I prefer the flavour, it goes better with the wholewheat and scent of the wholewheat.


However, somewhat unsurprisingly, the texture of this bread made with butter was better, it didn't 'ball up' in my mouth in the same way, although this difference is still somewhat minor and I only noticed it because I was looking for it. The 'plant butter' that I used is really a fancy margarine, with good marketing, and although suitable for baking, it didn't contain as much avocado (1%), olive (1%) and coconut fat (6.5%) as the pictures on the packaging suggest. In fact, I'm also thinking of trying this one as well with one of the new breed of vegan butters I've seen around lately, those that are high in coconut oil and that include a large amount of nuts like cashew.

-Jon

trailrunner's picture
trailrunner

Edited to add : I think my bread is trying to tell me something!!! Huge!!!  Unprecedented! Amazing! Ok enough. No egg wash. I can’t tolerate the smell after having Covid 😩😬. Fragrance and powerful growth . Same flour as I brought it with me as well as the YW so everything is the same. Will bake it probably one more time in 2 weeks. Keep ya posted. 


First picture is YW and flour just the one feeding. 2 nd picture is a “ glop” of YW levain from home and YW and flour just one feeding. They are extremely fresh smelling and huge bubbling. More later. Headed out cycling to the Y via paved bike paths and then swim in the heated saltwater pool. Have to honor priorities! 

tv


StevenSensei's picture
StevenSensei

I recently read and enjoyed Tartine Bread by Chad Robertson. I was pleasantly surprised as I was reading it that my method of baking sourdough is very similar to the process outlined in the book. With that in mind I figured it would be easy to pick up any of the recipes in the book and go to town with some very mild adjustments or experimentation. All of the variations of breads listed had my mouth watering and I was (and still am) keen to try some things beyond a standard sourdough. 


I settled on going first to the Rosemary Polenta Pumpkin Seed Sourdough. The Recipe as Written (RAW) on this one is a HUGE failure. Let's step back a bit first and try to explain what happened and where it all went wrong.

I am no stranger to high hydration bread. In fact thanks to a transcription error to a notebook I keep in the kitchen I spent more than a year baking sourdough with a 91% hydration. That was a learning experience in how to build dough strength and be able to shape a boule or batard successfully. The day I realized that I had made that transcription error and went back to making 75% hydration bread I was startled at how easy it was to manipulate, shape, and produce bread with a reasonable hydration level. 

This recipe however it a whole other beast. To start, Chad recommends that you begin with a recipe for the "Basic Country Bread"

White Flour                              90%

Whole Wheat Flour                 10%

Salt                                          02%

Leaven / Starter                      20%

Water                                      75%


Not accounting for the water or flour in the starter this is just a standard 75% hydration bread. Nothing of concern. Straight forward. This should be easy.


To a full recipe using 1000g of flour we then add the following after the first stretch and fold with no other adjustments:


1 cup roasted pumpkin seeds

1 cup polenta

2 cups boiling water (used to hydrate and soak the polenta)

3 Tbsp corn oil

1 Tbsp chopped fresh rosemary


Not using my acute sharpened mind and superior reasoning skills I blindly followed the recipe and this is the result. 

The basic dough felt great after mixing. The soaker preparation went as planned and the polenta gladly soaked up all of the water. Look at how lovely it appears when ready to be mixed into the dough. 

Once incorporated the dough smells AMAZING but is very very wet and sticky. That's ok though, we still have lots of stretch and folds to do to build up the dough strength. In fact, over the series of stretching and folding some dough strength was build up and came close to a window pane. Good enough to move onto the final bulk before shaping.   


90 min later the dough has grown 50% and is ready for shaping. However, this is where my fears come roaring into view. The dough is still super super wet, and in fact not able to be shaped. As I round off the dough the edges are not flat and are able to keep a rounded edge on the board, but it is still far to wet and sticky to actually do any real shaping or producing the correct tension in the dough. The chance of actually forming a full boule is slim to none. 
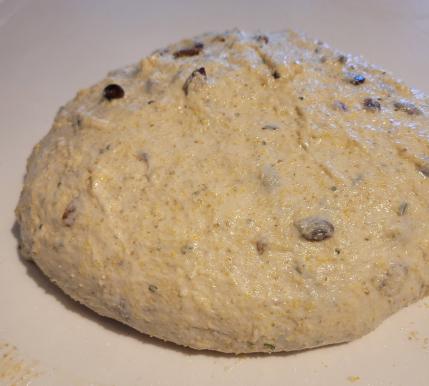


Refusing to be completely defeated and also refusing to not have bread for the week it was time for PLAN B!

Or rather PAN B - When all else fails, don't waste dough, pan it up and see what happens.
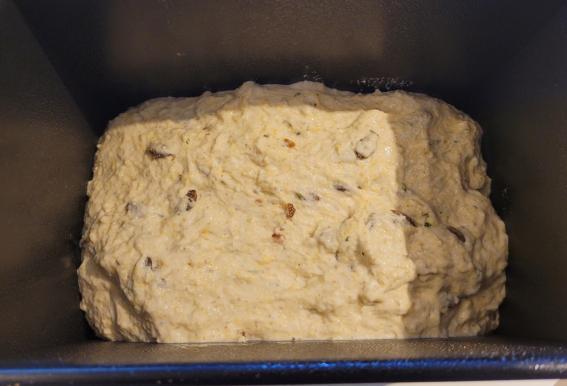
 

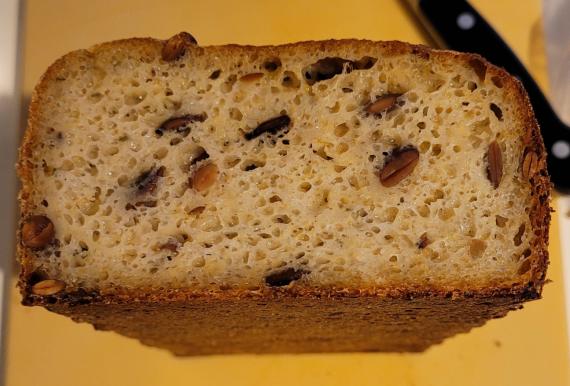
After an overnight in the fridge and a normal bake routine (About 5 min longer) we end up with this. I made sure to take a temp measurement to make sure the dough was fully cooked. 


The crumb is very moist and springy. It is not gummy. If anything it reminds me of a mass produced crumpet. The smell is still divine. I had a slice as is and found the texture to be strange, which honestly is not a shock. I wouldn't use this for a sandwich. It might make excellent croutons.
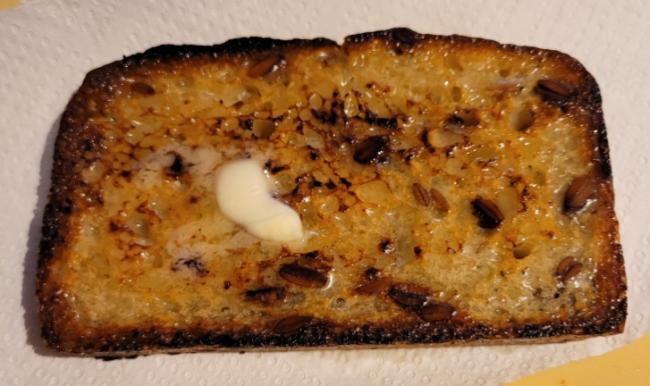
As toast it works well. The crumb developed a nice crunchy crust and the interior crumb is quite soft and creamy. I can only imagine how good this would be if it had the proper hydration, shaping, and bake. But for now that must remain in my imagination. 

So what went wrong? Obviously the hydration here is WAY WAY OFF! Normally a soaker just hydrates grain and doesn't add an appreciable amount of liquid to the overall recipe. Or at least most recipes that use a soaker have accounted for this additional liquid.  In this case it did just the opposite. What were we actually working with? 

If we add the water from the soaker into the overall dough recipe it means we are dealing with 122.5% Hydration!

If we treat the corn oil as a liquid addition instead of a fat we are up to 126.4%

Finally, if we treat the polenta as "Flour" in the recipe we are still at 108.2%


Yikes!


To the internet! After a bit of searching it appears that this is an issue that I am not the first, nor will I be the last to experience issues with this recipe. In fact this blog post describes exactly what I encountered. 


It appears that this recipe would benefit from quite a few alterations including but not limited to:

Reducing Base Hydration and keep the soaker the same

Cooking the polenta instead of just soaking

Count the polenta as flour and adjust total hydration


Sensei's Report Card

Tasting Notes: The rosemary is not too strong and if anything is more of an aromatic. The roasted pumpkin seeds are a nice textural addition and add a slight nutty flavor. I don't taste the polenta but I assume it is part of the creaminess I get when the bread is toasted.  The bread, even in this "failure" state is still pleasant. I'm really curious what it is intended to taste like. 

Time/Effort: Time seems completely on point for my usual routine. The effort at 120+% hydration is not acceptable. 

Would I make it again: NO! FAILURE. F, full stop. Not Acceptable. Report to my office! That said, you will get another chance but will require some major revision to achieve a passing score. 


UPDATE: Revisited this and came up with a tweaked formula. Crispy Crust, Great flavor, Crumb is acceptable but not as open as I want so a minor needs improvement. See the new post HERE. 

Ilya Flyamer's picture
Ilya Flyamer

Last year Rus Brot posted a series of videos in an attempt to reproduce and demonstrate how bread was, or at least could have been baked, "in the old times" in Russian villages: https://youtu.be/meVg13NtnPw. "Yeast-less" refers to a fad in Russia about how using commercial yeast is bad for you, and sourdough bread is marketed as "yeast-less", which is of course absurd (and he's made fun of this multiple times on his channel). For a long time I couldn't be bothered to try following these instructions, except for using his proposed way of creating a liquid rye sourdough starter ("kvass"). That worked exceptionally well for me back in Moscow, to create a very strong starter within two days.

Now that I am sort of settled here in Basel and got all my equipment including the heating pad for temperature control, I finally decided to try and follow all instructions from the start (create a new starter again) and actually bake some bread with that technology. It did seem interesting: instead of maintaining the starter, a little portion of mature dough is dried by rubbing 1:1 with flour to preserve for a long time. Then this dry starter crumbs are used to inoculate a liquid starter "kvass", which is used for pre-dough and dough. And again a small portion of the dough is dried up for the future.

Unfortunately, for some reason, my attempt to make the starter here didn't work out, my suspicion is the water I used was too hot (normally for refreshing a starter this temperature would have been perfectly fine, but perhaps to start a new one it was too much). To be on the safe side in case actually it was the flour, when repeating I used rye schrot mixed with barley malt instead of whole rye flour, and some raisins, and then everything went perfectly.

Bread Nr 1

The first bread he recommends baking is 100% whole rye. Which I did. On the outside it looked great!

And it tasted nice too, just simple robust whole grain rye. But it had these weird cracks inside, I've never seen this before, very curious where it could have come from...

The bread was huge (from 1 kg flour), and quite dense, so best eaten in thin slices, so it's been three weeks and I still haven't finished it, since I am temporarily here on my own. While it's a bit dry on the outside under the crust now and hard to cut, inside it's still moist, and no signs of any mold are visible. Today toasted some small peaces in olive oil with salt, pepper and garlic powder, they were great as croutons in a salad.

Bread Nr 2

Now after almost three weeks of no bread baking I was bored and although I still haven't finished this bread, I decided to bake the next bread following his instructions. Dry dough is resuspended in warm water with flour and malt extract, and left to ferment for 20-24 hours at 25-26C. I mixed it in the morning before work, and when I came back home the starter was already bubbly and frothy - but not at all sour yet. So I just stirred it vigorously, and then once more before bed. Then it had a bit of acidity and more complex smell. In the morning about 23 hrs later it must have overfermented, because there were no bubbles at all! Must have consumed all the food and gone quiet.

I assumed the yeast and bacteria were all still there, and just proceeded with the pre-dough (5.5 hrs at 28-29C - I gave it extra 30-40 min to account for the sleepy starter, and also I tend to like a touch more sour bread than his default recipes), and the final dough (1.5 hrs at 30C), shaping and final proof. Like in the video I used some high extraction wheat flour in this recipe (I used ~17% Ruchmehl, in place of his 15% grade 2 flour). The dough was very pleasant to work with, easy to shape and I had a good feeling about it - the only second thought I had was it didn't seem quite as airy as . I final proofed for 40-45 min above a tray of hot water, air temperature was around 35C. Then applied liquid dough, docked and baked - all just like in the video. Just this time I split the dough into to loaves, planning to give one away, so I don't end up eating it all again on my own for three weeks.

The loaves looked good, the only thing they had these back spots, which from experience I know show bubbles just under the crust. But what does the presence of these bubbles mean about the dough? I don't know.

Then net day (today) I cut into one of the loaves. And was greeted with this crumb:

Had it been a wheat bread, I would have assumed it was underfermented, with denser areas between large holes. But I've never seen anything like that in rye bread! Would one expect the same crumb structure defect from underfermentation? Or is that another issue? The crumb is not sticky, and not crumbly, can be cut with a serrated bread knife without leaving any marks on it. But the caverns are a clear issue... Tastes good - just like I remember simple mostly rye bread tasting in Russia. Nothing too special, just sturdy with a prominent taste.

Curious what other might think about the issues with these breads, and what could have caused cracks in the first bread, or caverns in the crumb in the second bread.

HeiHei29er's picture
HeiHei29er

We recently spent a week in Hawaii, and while I couldn't bring back any fresh fruit, I was able to bring back some good macadamia nuts (Sea Salt Roasted).  Wanted to use some of them in a bake and came up with the following idea.  I used the Sourdough Cinnamon Roll recipe from Breadtopia's Sourdough Cookbook for Beginners (Pg. 102) as the basis for the recipe and then developed my own filling using the macadamia nuts.  Gave a few to friends, and the early reviews are great!  

Sweet Stiff Starter
90g   AP Flour
30g   Sourdough Starter at 100% hydration
40g   Water
30g   Granulated Sugar

Final Dough
450g   AP Flour
50g    Spelt Flour, fresh milled
130g  Scalded Milk
86g    Unsalted Butter, cubed
120g  Granulated Sugar
10g    Salt
6g      Vanilla Extract
150g  Eggs (3 large eggs)

Filling
150g  Granulated Sugar
75g    Chopped Macadamia Nuts
2 tsp  Orange zest
1 tsp  Orange juice (fresh squeezed)
3/4 tsp Cardamom
1/2 tsp Myer's Dark Rum
1/2 tsp Vanilla Extract

Icing
2 cups  Powdered Sugar
1 tsp     Myer's Dark Rum
1/2 tsp  Vanilla Extract
2-3 TBSP  Milk

Morning Before
1)  Combine ingredients for Sweet Stiff Starter and kneading a few times to completely mix/hydrate flours
2)  Ferment 6-12 hours at 76 deg F until dough has doubled in size

Night Before
1)  Mix all Final Dough ingredients including Sweet Stiff Starter with paddle attachment until dough just comes together.
2)  Knead dough using dough hook attachment for 10-15 minutes on medium speed (I was unable to fully develop dough and keep it from sticking to bowl.
3)   Scrape dough into greased bowl and ferment at 76 deg until at least a 75% volume increase. Will take 6-12 hours. (I was able to get 100% in 10.5 hours) 
3)  Combine Filling ingredients in a bowl and mix thoroughly to wet the sugar (should have wet sand consistency).  Cover and refrigerate to allow flavors to come together.

Day Of
1)  Roll dough on a lightly floured surface into a 24" x 12" rectangle keeping corners relatively square and to a uniform thickness.  If dough sticks to counter, lightly flour the top side and flip the dough.  Lightly flour the new top side and continue rolling.
2)  Place filling on dough and evenly distribute it.  Leave about 1/2" of open dough along the top edge to seal the roll.
3)  Roll dough away from you keeping the roll as tight as possible and uniform in shape/thickness.
4)  Grease a 13" x 9" x 2" baking dish.
5)  Cut the roll into 2" long sections and place cut-side up in the dish.  Evenly space the 12 rolls in the dish.
6)  Cover the dish and let rise 3-5 hours at 75+ deg F.  Dough will expand significantly and the rolls will touch each other.  (I stopped final proof at 3.75 hours (76-77 deg F)).
7)  Pre-heat oven to 350 deg F and then another 15 minutes
8)  Bake at 350 deg F for 25-30 minutes until edges are light golden brown and filling is bubbling (I went a couple minutes too long).
9)  Combine ingredients for icing and mix until no sugar lumps with a whisk.  Add milk/sugar as needed to get desired consistency.
10)  Remove rolls from oven and let cool in pan for 5-10 minutes.  Drizzle icing over rolls and let the icing firm up.


Rolls after Final Proof

Pages

Subscribe to RSS - blogs