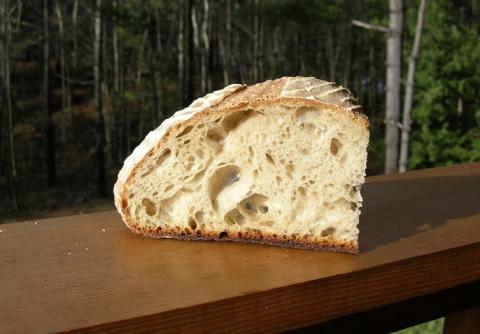
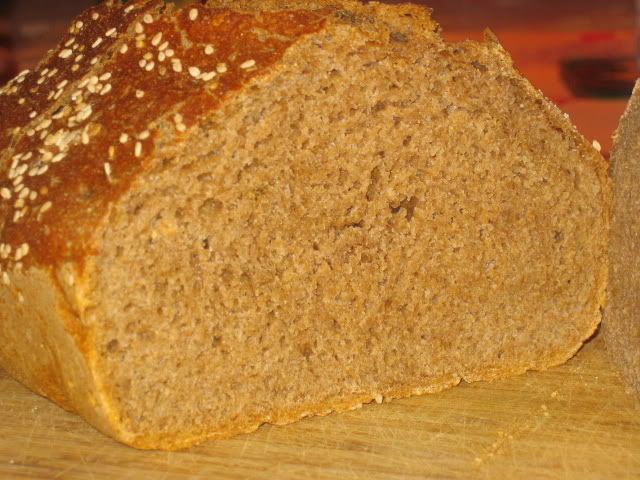
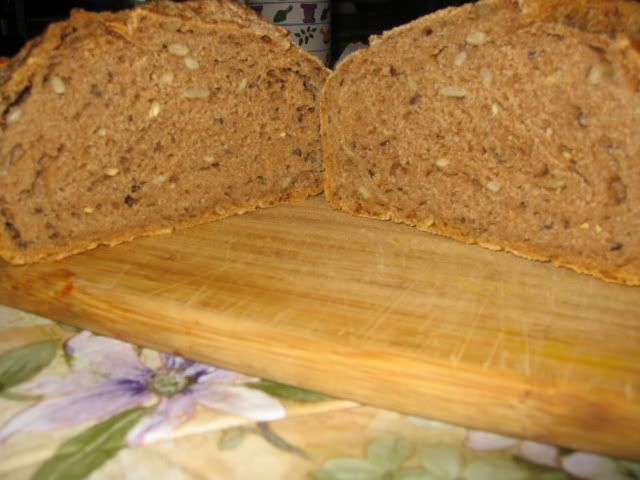
The Fresh Loaf

A Community of Amateur Bakers and Artisan Bread Enthusiasts.

Blogs

Floydm's picture
Floydm

We're housesitting for my parents up on Puget Sound for the next few days. Before leaving, I fed the pets, watered the plants, and, of course, fed the starter. While doing so it dawned on me that I could take a pinch along and try baking something up here; homemade sourdough would go great with the fresh seafood (like the clams we picked up on the way up). I figure if the pioneers could keep a starter culture alive for weeks on a wagon train, I could keep one alive for four hours on the interstate, eh?

It'll be interesting to bake in another kitchen. No baking stone, no scale, an unfamiliar oven. I'll definitely blog the results.

Abigail's picture
Abigail

Yesterday I made Rose Beranbaum's Cracked Wheat Bread, everything went well until I slashed the risen loaf, which promptly subsided to half the size. I baked it and now I have another paving brick. What can I do to prevent this happening again.

Srishti's picture
Srishti

Hi all,

I think it was about time I shared some pictures of some of my disasters (which are increasingly getting better.)

12/02/2006: Whole Wheat. These breads are kinda sourdoughs... I starter only sat for 3 days, I do remember there were some bubbles, but I doubt it was a fully functional starter. Despite of that loaves rose a lot when proofed overnight and had a tremendous oven-spring! (At that time I didn't know what the terms proofing and oven-spring meant ;) The crust was a bit dry but the loaves were good and kept a long time if I remember right. You can see the "tunnel where the baker (that would be me) sleeps" as Peter Rinehart would say. Ha.....

 01/11/2007: Whole Wheat. My first NYT No-knead bread. Yeasted and whole wheat. Beautiful and crisp crust. No-holes in the crumb though :-(  Though I think that is the best looking bread I have ever made. I like baking in the covered lay pot which you can see in the background.

 01/14/2007: Whole wheat. Yeasted. with flax and sunflower seeds and rye flakes. I think the dough didn't develop enough gluten maybe because it wasn't wet enough, and oh, I tried doing Jim's slap and fold (French fold) on this one, which was not so good on this wet, crumbly textured, seeded dough. It wasn't so bad, No holes though. You can see I am complaining about No-Holes.... But I know whole wheat is infamous for that.

 01/19/2007: Whole Rye + Whole Wheat + a cup of white bread flour. Ok, I started making an all rye starter but with the ever increasing volume, and me hating to dump half of it every time, On the 3rd or 4th day of starter I threw everything (2-3 cups) really wet rye levain in the bowl with 3 cups of whole wheat and started kneading it... It was sooooooooo sticky, and I was afraid it wasn't going to rise, I mixed 1/2 tsp of yeast with white and kneaded that in. and baked the whole thing after a few hours.... Well it was so strongly rye.... It was quite good! No holes, of course.

 01/22/2007: All white ha ha Well, now I really wanted to make something from BBA. So here are some French baguettes and epi's. All white and yeasted....made with pate fermente overnight. And guess what, No holes again. It didn't taste like much either.... So I don't think I'd doing any white baking anymore.... except for cakes, cookied etc. I feel better on the real stuff.

01/26/2007: Sourdough Whole Wheat NYT No-knead I finally made a real starter from SourDoLady's Orange Juice starter and so I named him OJ. So here is the first creation from OJ. A no-knead whole wheat, sourdough bread baked in my favorite pot :) which I baked today. It was nice and sour and really moist and flavourful. I put in 2 cups of wet whole wheat starter with 2 cups whole wheat flour and a cup of water + flax seeds + freshly tamari roasted sunflower seeds, mixed it up and let it rise for 16 hours, folded it and benched it a couple more hours. It turned out really well, and even had traces of holes in it... Yoo Hoooo.

So that's all the pics I have so far... I'll keep posting them here and keep youall updated.

Thanks again to all Floyd, SourdoLady, Jim..... amd so many others

Srishti

pmccool's picture
pmccool

Since we had a big Italian dinner lined up with friends last weekend, I volunteered to bring bread.  One, it gave me a chance to try the Italian Bread formula from BBA; two, I decided to take another crack at ciabatta, also from BBA; and three, these people love homemade bread.

The Italian bread was pretty straightforward--and delicious.  Here's a photo:


The crumb was fairly close-textured and chewy, but not tough.  Great flavor, too, from the biga's overnight ferment in the refrigerator.  Gotta work on the slashing, though.  The loaf on the right came out pretty well, but the one on the left was definitely off the mark.

Bouyed by that success, I launched a poolish for the ciabatta.  That went well enough, but the final dough was more of a struggle.  Everything I read about ciabatta dough mentions how wet the dough is (the words "soupy" and "pour" seem to feature prominently).  This is the second time that I've used the BBA formula, carefully weighing all of the ingredients.  And, for the second time, I wound up with a very dry dough.  Even after working in another ounce of water, it was still able to stand up unsupported, although it could at least be stretched and folded.  I used bread flour, as listed in the formula.  The flour was from a newly opened bag that had been purchased less than a week previously.  I suppose it's possible that the flour was drier than usual because of the low humidity, but I can't fathom that there would be that radical a difference.  Anyway, I soldiered on with the bulk ferment, shaping the loaves and letting them rise.  When they were ready, I slid them onto the stone in the preheated oven, put water in the steam pan and this is how they looked when they came out:

The oven spring was fantastic.  At about 8 or 9 minutes into the bake, they had tripled in height.  These turned out far better than my first, sorry, attempt.  When we cut into them at dinner, I was surprised to find that the crumb was quite moist, almost cake-like.  Not at all what I had expected from the apparent dryness of the dough.  The texture was a combination of smaller and larger holes, not nearly the wide-open crumb that I was looking for (sorry, none survived long enough for pictures of the crumb).  It was thoroughly baked, since the instant-read thermometer indicated an internal temperature of 205F.  There are a couple of potential contributors to the moistness of the crumb. I probably turned the oven temp down a few minutes sooner than necessary and maybe I should have pulled the steam pan out at about the 10-minute mark.  Ah, well, better next time.  They tasted wonderful, especially with a drizzle of a fruity olive oil.

grepstar's picture
grepstar

After a full 3x feeding of Francesca Fiore (my hydrated sourdough starter) for a day of baking last weekend, I found myself with an extra blob of her that I didn't want to just throw out. Flipping through Nancy Silverton's Breads from the La Brea Bakery, I saw the English Muffins recipe and was reminded of Sunday mornings when I was kid, waking up early with my Dad and munching on Thomas' English Muffins slathered with butter and strawberry jam. I decided to give them a shot.

I'll start with her recipe:

SPONGE:
18 oz White Starter
2 cups milk
8 oz unbleached white bread flour
3.5 oz dark rye flour

DOUGH:
Sponge
10 oz warm water (85 degrees)
0.9 oz fresh yeast
1/4 cup wheat bran
1/4 cup wheat germ
1/4 cup flax seeds
1/4 cup rye chops
1/4 cup raw sunflower seeds
8 oz unbleached white bread flour
1/4 cup barley malt syrup
1/4 cup vegetable oil
1 tbs sea salt
Rice flour for dusting
2 tbs unsalted butter, melted
Semolina flour for dusting

Here are the ingredients that I used based on what I had on hand.

SPONGE:
18 oz White Starter
2 cups plain soy milk
8 oz unbleached white bread flour (high extraction - 14% protein)
3.5 oz dark rye flour

DOUGH:
Sponge
10 oz warm water (85 degrees)
0.3 oz of SAF instant yeast
1/4 cup oat bran
3 tbs wheat gluten
1/4 cup flax seeds
1/4 cup coarse rye flour
1/4 cup raw sunflower seeds
8 oz unbleached white bread flour (high extraction - 14% protein)
1/4 cup (minus a smidge) agave nectar
1/4 cup vegetable oil
1 3/4 tbs kosher salt
Cake flour for dusting
Semolina flour for dusting

I made the sponge on a Sunday, but did not have the time to actually make them that night so I put it immediately into the fridge to ferment overnight. The next day, I removed it and it was nice and bubbly with a good odor.

I assembled the dough, let it ferment at room temperature for about an hour before I realized I wouldn't have time to bake that evening either. Into the fridge it went and the next day I set out to bake it. I let it come back to room temperature and then put in on a cutting board dusted with cake flour to rest, dusting the top with semolina flour for good measure.


At this point, the recipe calls for 15 muffin rings to be buttered and placed on a parchment-lined baking sheet, muffin rings are not in my baking arsenal (butter is). Instead of emptying out cans of tuna on both ends and washing them (as Silverton suggests), I opt for the less fishy route and construct my own rings out of parchment paper.


Paper rings


I thought this was pretty smart, since I didn't have to waste the butter to coat them. Once the muffins were done, I could just peel off the paper and enjoy the deliciousness of fresh English muffins. I placed the rings on baking sheets dusted generously with semolina flour and then filled with the dough. Here's where my paper rings idea started to collapse--literally.

Collapsing rings

Although they were having trouble containing the dough, they did a good job of maintaining the basic muffin shape and I was happy with that.

I wish I had captured the moment when one of my cats jumped on the pan of resting muffins landing a foot in at least two of them and then proceeding to track dough across the entire kitchen. Luckily, I caught him before he hit the rugs.

After an hour of rest, I dusted the muffins with semolina flour and put them into a preheated 400 degree oven and baked for 20 minutes. I then removed the pans, rotating them and flipping the muffins over. I was a bit discouraged at the look of the muffins after the first 20 minutes; they were turning out like giant biscuits. But sally forth, home baker!

After another 20 minutes of baking, I pulled them out of the oven set them out to cool. They were definitely looking more like English muffins and less like biscuits. About an hour later, I removed the parchment paper rings and laid them out for a photo shoot.


Time to pull apart and taste!

I'm a bit ashamed here. I couldn't even wait to take the picture before biting into one. They were/are pretty tasty little devils, but almost nothing like a Thomas' muffin. To my palate, much better tasting. The texture of the crumb was a little gummy, however, and I'm guessing it was because I used a bit too much rye flour in the dough and perhaps because of the extra time I gave the dough to ferment. If I had known I wasn't going to bake them the day I made the dough, I would have left out most if not all of the instant yeast. My substitution of the wheat gluten for the wheat bran was a mistake as well. In hindsight, I should have used some oats or millet. The agave nectar imparts an interesting sweetness to the muffins, but I could have cut it down to 2.5 tbs for a better flavor. The texture with the seeds is great. I'm definitely going to try these again with some small changes.

gothicgirl's picture
gothicgirl

I tend to dive head first into projects that are of interest to me.  At the moment, and it should come as no surprise to anyone, my obsession is bread.

Now, we are not talking about the homogeneous loafs of bland white sandwich bread that line the shelves at the super-mega mart.  What we are talking about is the hand crafted, rustic loafs of bread with distinct flavor, crustiness and unique texture. 

I had some minor success with cibatta bread (tasty, but the crumb was too tight and can be improved with a longer final proof ... see below), and I also made two tasty baguettes that were far superior to anything I could buy despite not having quite the texture I would have liked.  There were a little dry, and I need a better recipe I think.   

As you can see below, the crumb on the ciabatta is pretty tight.  That is because I put it into the oven with out a good long final proof.  My husband, who is a real doll most of the time, was tired and wanted to go to bed.  It was either bake the bread after only an hour of proofing, or listen to my darling whine. 

The bread lost.  It was still really tasy, however and had a good crunchy crust.  Gotta love that steam!

And here is my French Baguette that I made for Sunday dinner.

And ... turnovers that I made for dessert.  They had an apple filling, and I glazed them with flat icing when they were cool.  I used blitz puff pastry and I am thinking of doing a little photo demo of the process.  It is really very easy and far superior in flavor to frozen puff. Yeah, it may  not get as much puff, but for a turnover or a Napoleon it is just fine.

mountaindog's picture
mountaindog

 Hole-y-ness:

I've been asked how I get the big holes, and how I fold. Whether you are working with a bread dough that uses commercial yeast, or with sourdough, the same principles seem to apply from what I've experienced. Obviously, there are others here more experienced in sourdough who may have different techniques. It depends on what works for you.

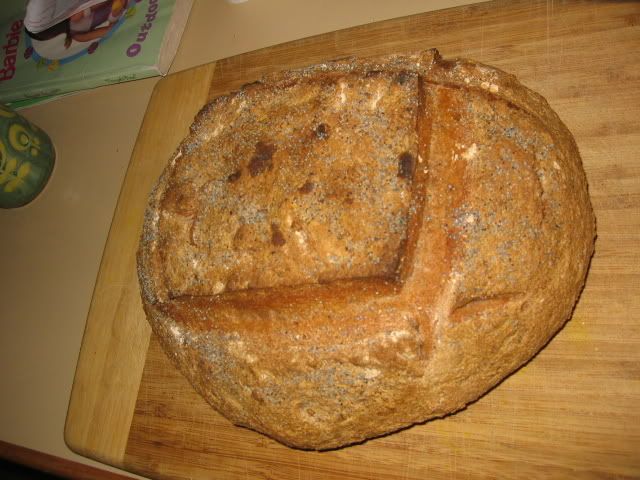
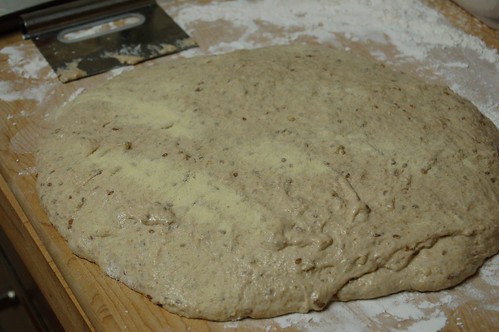
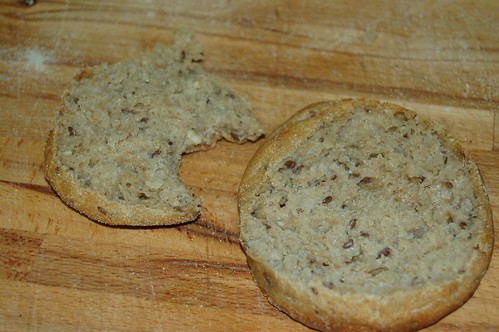
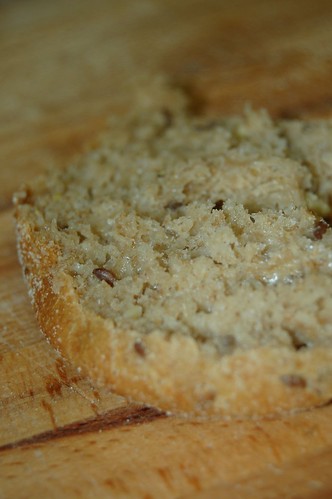
What gives me the big holes is to use a very wet, soft dough, fold it 2-3 times for the first 60-90 minutes of fermenting to strengthen the gluten, and when you're ready to shape, VERY GENTLY pour it out onto your counter, VERY GENTLY fold the sides into the center to gather it up into a boule without degassing it in the least, flip upside down in your hand and tighten it into a boule by pinching the seam underneath closed. Then place it smooth-side down (seam-side up) into a floured banneton or proofing basket. Do not skimp on the rising time - if it needs 5 or 6 hours rather than the 3 stated in the recipe, let it rise all the way, and make sure your starter is very active.

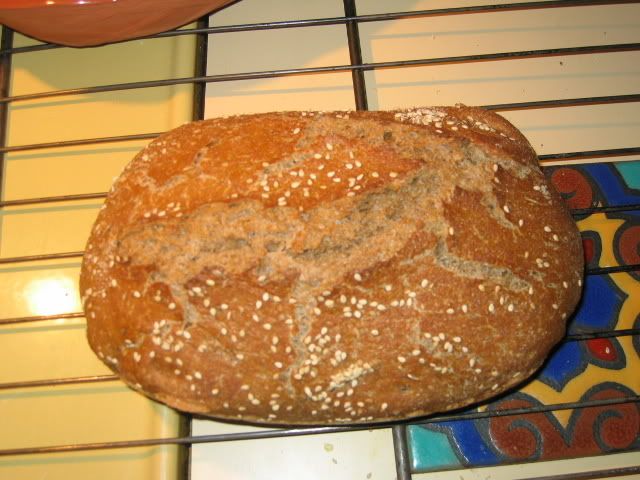
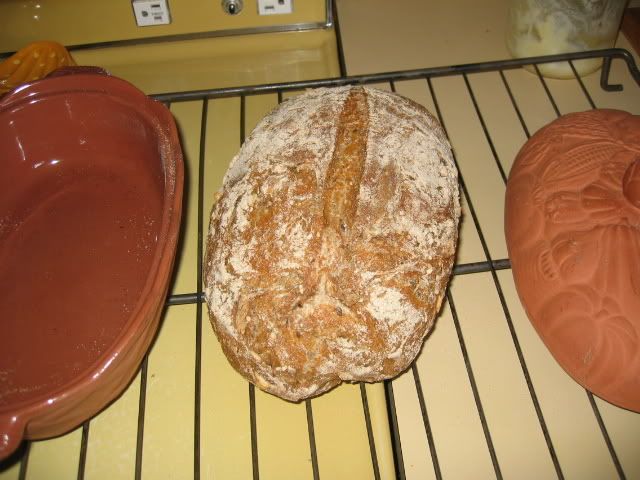
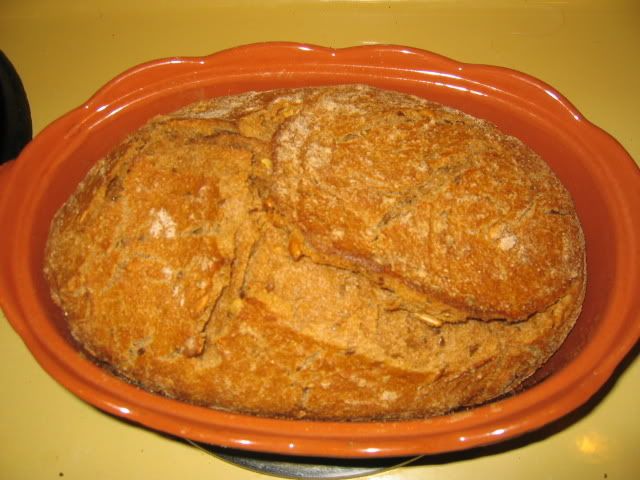
I really like this bread, I just made it again this past weekend and it came out equally well as it did in the photo at top. It had more of a sour bite to it this time from the wet rye starter.

Thom Leonard’s Country French Bread (from "Artisan Baking" by Maggie Glezer)

Makes one 4 lb. (1.8 kilo) loaf

Time: about 18 hrs. with 30 minutes of active work


The evening before baking make the Levain as follows:

45 g ( 1 oz) fermented rye sourdough starter refreshed 8-12 hrs before (I use a batter-like starter made with equal weights water to rye flour, not a firm starter. If you only have a white flour starter, use that and just substitute 30 g of the white flour in the final dough with rye flour)

120 g (3.3 oz) lukewarm water

140 g (5.3 oz) unbleached all-purpose or bread flour (see my note below on flour)

Dissolve starter in the water in a small bowl, then add flour and beat this batter-like dough until very smooth. Place in covered container and ferment at room temp (@70F) until doubled, 8-12 hrs.

NOTE: I use only King Arthur All-Purpose flour rather than bread flour as it has a high enough protein content and a high ash content compared to other all-purpose flour. The high amount of protein found in most “bread flours” makes the crumb too tough for my taste.

Next day make the final dough as follows:

100 g (3.5 oz) Whole Wheat Flour (if you like your bread a little darker add up to 350 g whole wheat here and use 250 g less white flour below)

1030 g (36 oz) unbleached all-purpose flour (King Arthur has best protein and ash content. If using a white flour starter in the levain rather than rye, substitute 30 g of the white flour here with 30 g rye flour)

660 g (24 oz) warm water

all the fermented levain you made the night before (305 g or 10.6 oz)

23 g (0.8 oz) sea salt (preferably grey Celtic sea salt if you can find it, often sold in health food stores)

Mix By hand: combine all flours in large bowl. Add the warm water to the fermented levain to loosen it from container. Pour the watered levain into the flours and mix with spoon, dough whisk, or hands until just combined. Cover with plastic wrap and let rest (autolyse) for 20-30 minutes. Turn dough out onto work surface, knead for 10 minutes, then add salt, and knead for another 5 minutes until salt has dissolved and dough is very smooth and shiny.

Mix By stand mixer: same as by hand except leave in mixer bowl after autolyse, then mix with dough hook on lowest speed for 5 minutes. Add salt and knead in mixer at low speed for another 4-5 minutes until very smooth and almost cleans the bottom of the mixing bowl.

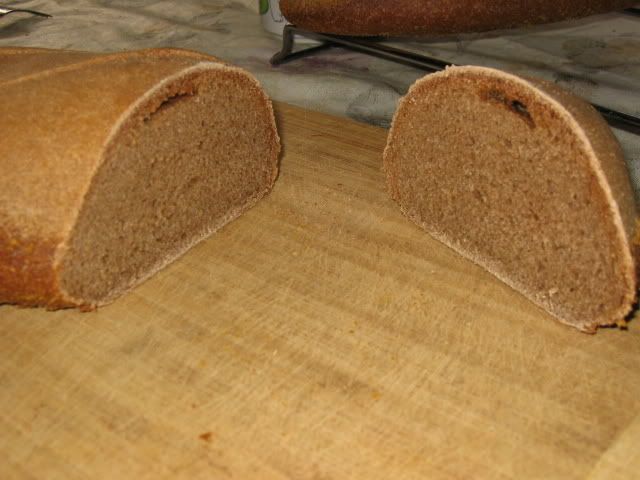
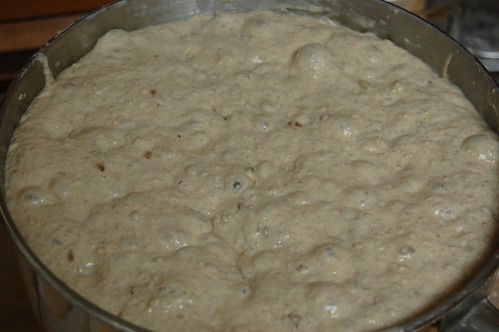
The dough should feel soft, sticky, and extensible at end of kneading. If it is too stiff and dry, add a few more drops of water until dough just barely clears bottom of mixing bowl at end of kneading if using a stand mixer, or until dough feels soft and stretchy, and slightly sticky, if hand kneading. Softer, wetter doughs give you larger air holes in the baked loaf, which also gives the bread more flavor.

Fermenting: Place dough in lightly-oiled bowl at least 3 times its size and cover with plastic wrap. Let ferment for 3 hours at room temp (@70F) until well-expanded but not yet doubled in bulk. Turn dough 3 times at 30 minute intervals by gently folding like a business letter and flipping upside-down, (that is, turn once at 30, 60, and 90 minutes into fermenting time), then leave the dough undisturbed for remainder of time. OR: for even more flavor, ferment at room temperature for one hour (turning 2 times, once at after 30 and once after 60 minutes), then retard overnight in fridge, warming up again next day at room temp. for 2-3 hours before shaping.


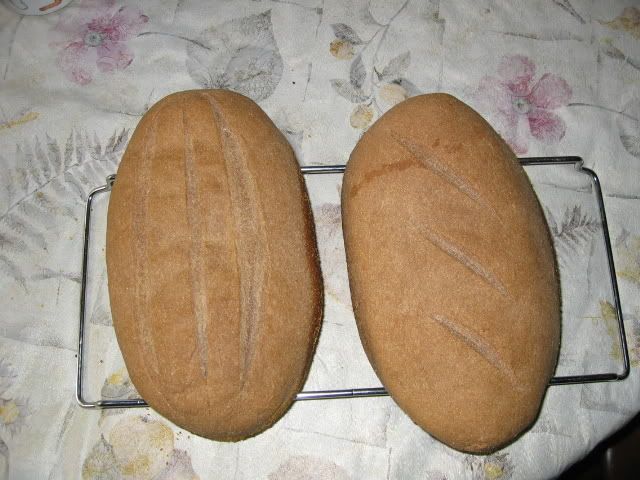
Rounding and resting: Turn dough out onto floured work surface, and very gently round it into a tight boule. Cover with plastic and let rest for 10-15 min. to relax the gluten. While resting, prepare your basket or banneton by dusting with flour. If you’d rather make 2 smaller boules than one large one, divide the dough in half with a dough cutter, and gently form each piece into a tight boule.

Shaping and proofing: Shape the dough into an even and tight round loaf (or leaves if making 2 smaller boules) without deflating it. Place dough topside down into the floured basket or banneton. Lightly sprinkle the top of the dough with flour, cover with plastic wrap and proof for 4 to 4.5 hours at room temperature (@70F) until at least doubled in volume and a slight dent remains when pressed with finger.

Preheating oven: At least 45 minutes before dough is fully-proofed, preheat oven with baking stone on middle rack to 500F.

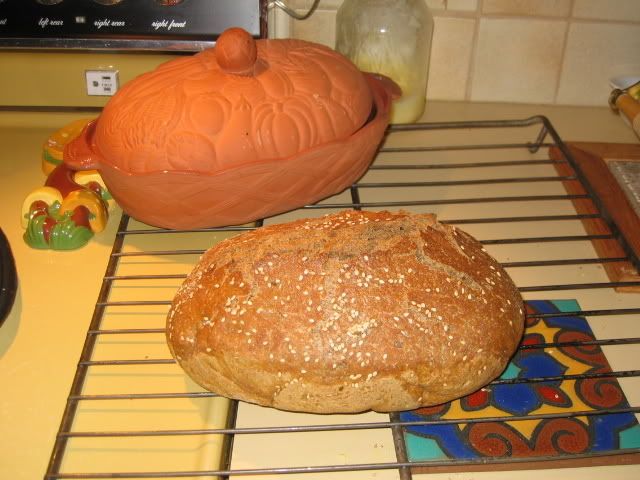
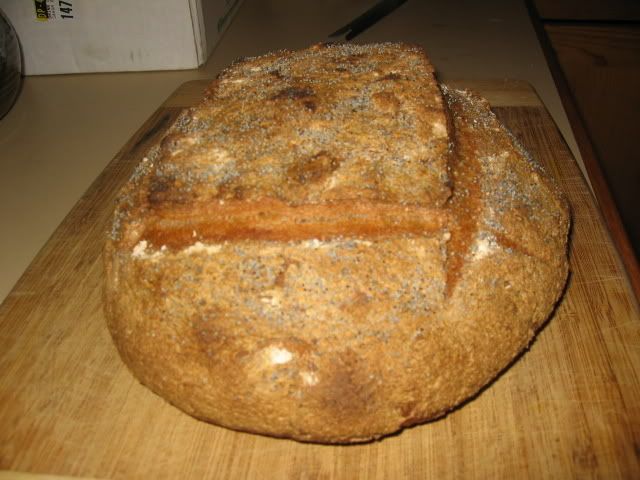
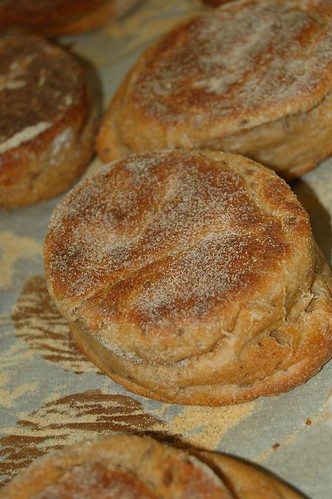
Bake: Gently flip the dough upside down to release it from the banneton/basket onto semolina-dusted parchment on an over-turned baking sheet or wooden peel, or directly onto a semolina-dusted peel if not using parchment. Slash the boule with a razor in a pound sign (#) design, or in a spiral, cross, or any other desired pattern, as long as the slashes go completely across the top to allow for even expansion during baking. Slide parchment onto hot baking stone in oven, or onto semolina dusted baking stone if not using parchment, and quickly mist side walls of oven with water in a mister (do not spray near the oven light!) and quickly shut the oven door to prevent heat and steam from escaping. The steam helps the dough rise very quickly in the hot oven (called “oven spring”) and also makes the crust more brown and crisp. Turn oven down from 500F to 400F and set oven timer for 30 minutes (20 minutes if making 2 smaller boules). Continue misting every 30 seconds just 3 or 4 times for first 2 or 3 minutes of baking, then leave to bake. When first 30 minutes are up, open oven and rotate loaves around to even out browning. Set timer for another 30 minutes (20 minutes for 2 smaller boules) and check the loaf when that time is up. If it is still a light color brown, leave in for another 5-10 minutes until it is a deeper brown but not burnt, then probe center of loaf with instant-read thermometer, loaves are done when thermometer reads at least 205F in center. If they are getting burnt but center is not done, your oven is too hot, turn it down another 25 degrees or so next time. Let cool thoroughly on rack before cutting as the centers are still cooking, at least 2 hours.

breadnerd's picture
breadnerd

This weekend I was very happy to find Harvest King Flour at my local grocery. I used Harvest King in my baking classes, and convinced my boss to use it at the bakery I helped start up. I liked its creamy color, and that it was formulated for longer, cooler rises and artisan breads. I'm hoping to find the retail variety similar in quality--so far, so good.


Since Mountaindog has inspired me to look at the Artisan Baking book (I think I'll just start calling it ABAA!), I re-read the ciabatta recipe and found it different than most. Like the Essential Columbia recipe, it has a little wheat and rye flour, and uses a firm pre-ferment (this time a biga). I've been using a wet poolish (or my sourdough levain).


I was pretty good at following the ciabatta formula, though I did use a little more yeast as it's cold here and things have been moving slowly in my house. Of interest, the recipe calls for dissolving 1/4 teaspoon of yeast in a cup of water, and then using only a teaspoon of that liquid! I felt it was safe to use an entire tablespoon of the yeast-water--and my biga did perform pretty much as described (just about tripled in size in 24 hours at cool room temperature). Actually it could have been more developed, it was risen but not very light or airy once I pulled it apart. The dough in the formula is described as "gloopy" and they're not kidding. I thought I had my ciabatta dough wet enough in the past, but this was extreme--nearly batter. There's no way I could have benched this as I normally do, so I left it in the bowl for several "turns" (which were in fact more like stirring with a spatula). After a few turns it was starting to develop into dough--much like the NYT no knead bread in texture. The last turn I could do on a floured bench, and I returned it to the bowl for another hour or so of rising. I divided it into four loaves (instead of 2 per the recipe) and made an error in my final proofing--I forgot to put the seam-side down. So, my final loaves were baked 2 seam down, and 2 seam up to compare. In any case I was very happy with the results:


I forgot to take a "crumb shot" but the texture was much better--larger holes, but not too large or out of control. We had roast beef sandwiches for dinner which were literally to die for :) I do like the flavor I get from using the levain, so I might try that next time, with the new techniques learned on this batch!


Also on the hearth this day was a batch of Vermont Sourdough (as I have BREAD checked out from the library):


Apparently trying to video yourself scoring loaves causes some performance problems! I'm going to try to compile a video of slashing and find a way to post the edited version---Anyway, this loaf has some nice ears but the round loaf behind it has a definite "blow-out" that I've conveniently hidden from view!

Wayne's picture
Wayne

 With floydm's assistance, I think I finally figured out how to post pictures.  Hope this one posts ok.  This recipe is courtesy of "Artisan Breads" featuring Kossar's Onion Bialy's.  Thanks Floyd for your help.

beanfromex's picture
beanfromex

Last week I continued the experiments I have been doing since I learned about this method of bread baking.

I doubled the original recipe and followed the rest of the instructions but for using cornmeal instead of wheat bran ( I had none ).

I was even happier with this loaf. Doubling the recipe will be the norm for me from now on. I might even try tripling it.

I also kept the oven temperature as high as possible, probably about 500F. The crust was deep golden brown tinged with dark brown bits and looked great.

The four women to whom I served this bread have since asked me to teach them to do it. They also devoured the entire loaf, this kind of bread not easily being available here in southern mexico.

For ease, I cannot imagine improving on this method and recipe.

Now that we are going into a warmer season, my bread will be in the fridge, as my kitchen is now about 80F.  

now, if only I can get my ciabatta to work as well......

 Hasta luego.

Pages

Subscribe to RSS - blogs