San Joaquin Sourdough
The "San Joaquin Sourdough" is my own recipe. It evolved through multiple iterations from Anis Bouabsa's formula for baguettes. Most of my deviations developed in discussion here on TFL with Janedo, who first suggested adding sourdough starter and rye, and, then, leaving out the baker's yeast and making it as a "pure" pain au levain.

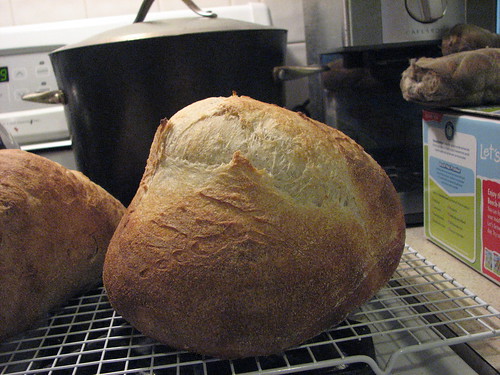
I got a pretty nice ear and grigne on this one.

- Log in or register to post comments
- 33 comments
- View post
- dmsnyder's Blog