|
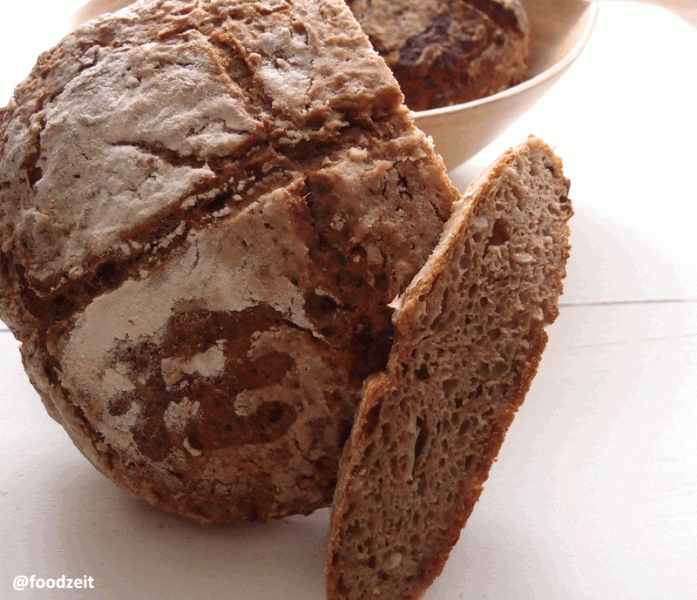
bread fresh from the oven |
After seeing
this wonderful recipe over there - inspired by Chad Robertson - (it is really great and even includes the timing for the preparation and I got the inspiration to do so from there of course) and after having read many times about the overnight storage of the bread in the fridge in order to increase the flavor profile, I decided to try this as well. I am referring to the recipe that I found over here, but it can be found on many blogs in the blogger sphere as well. After trying this bread, I have to say that this was my first, but not my last time to make the bread using the long overnight fermentation. I definitely will also try to create my own recipes using this way of increasing the flavor because the flavor of this bread is just the most intense bread flavor that I had so far, ever, since I started making my own breads. It shows me again why I am using the slow fermenting pizza dough in order to make
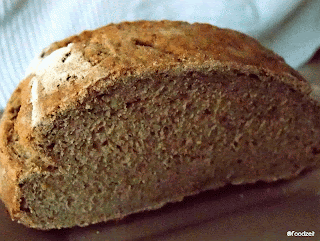
my favorite pizza as well. In this recipe I replaced the different wheat and spelt flours by the only type of flour that I had available, whole wheat flour.As I know that my sourdough is not the most active one, I added some yeast to the recipe and last but not least, I added a good portion of Rosemary to it as we just love herbs and spices in our bread. All in all my dough was a bit drier than the one in the description and for sure I did not get a crumb nearly as good as the one on the picture. But honestly, I think I must use more liquid next time because liquid dough’s tend to develop bigger holes in the crumb then dry ones. That being said, I know very well that I need to put more effort and research in how to make a crumb with bigger holes in the future. But still, I am very happy with the bread and it won’t be the last time I made it. Here is my version of the recipe.If any of you has any hints and tricks for the crumb development, I am always open for your great suggestions
Ingredients and timing: Day 1 – Midnight-40 g of wheat sourdough starter
-53 g water
-73 g wheat flour
Mix all the ingredients and leave them over night ferment on a warm place (ideal would be 25 degrees Celsius), 12 – 16 hours.
|
sourdough before fermentation |
Day 2 – morning 10:30Sourdough part 2
-132 g water
-165 g wheat flour
Mix everything and let it ferment on a warm place in the house (same place as before, 25 degrees Celsius)
|
sourdough after fermentation |
13:15:-593 g whole wheat flour
-66 g rye flour
-330 g water
-2 g dried yeast
-2 g rosemary
I added yeast to the recipe in order to get more activity in the development of the crumb; I also added some rosemary as well as we love to have herbs on our bread. Let everything rest of half an hour
|
fresh kneaded dough ball |
13:45:We add 13 g salt to the dough and mix it with the sourdough. We really mix and knead the dough well until it is soft and the gluten developed in the dough. That can be that you need to knead about like 10 – 15 minutes. At this stage I had to add some water as the author said that the dough is VERY soft and mine was not so soft but still a bit dry. Here I just think that it is due to the flour that I am using instead of the kinds of flour that is suggested by the author of the recipe.
|
adding the salt to the dough |
14:15:Let the dough rest till 18:15. During the resting period make sure that you stretch and fold the dough every 45 minutes in order to increase and develop the gluten in the dough.
|
before folding the dough |
|
folding the dough 3.rd time |
|
folding the dough 3.rd time |
20:15:Shape the dough and let it rest in the fermentation basket
|
cutting the dough in half to make two breads |
|
shaping the breads and resting them in my fermentation basket (plastic cups) |
20:15:Place the dough in the fermentation basket in the fridge until the next morning so the flavors are developing overnight.
Day 3 – in the morning:Now I drop them upside down from their bread baskets on my permanent Teflon baking foil on which I already sprinkled a bed of flour. I also cut the bread and sprinkle a layer of flour on top of the bread before putting in the oven. The oven should be pre heated on 250°C. Now pour a cup of hot water in the oven (if you do not have this inbuilt steaming program in your oven at home), pop the bread in the oven and also place a cup of water on the floor of the oven to give some additional steam later on. Quickly close the door so the hot steam will be caught within the oven. Having all that steam in the oven is, like mentioned many times before, extremely important for a scrumptious crust and a great consistency of the bread.
Bake the breads for 10 - 15 minutes like this until it reached the right brown color that you are looking for in a bread crust, then open up the door, let the steam out, lower the heat on 200°C and continue to bake the bread for another 35 - 40 minutes. Now switch off the heat, keep the door open and let the bread cool down slowly. I always spray a bit of water on top of the fresh loaf when it's still hot. It gives a nice and shiny surface the fresh baked crust.