The Fresh Loaf

A Community of Amateur Bakers and Artisan Bread Enthusiasts.

mountaindog's blog

mountaindog's picture
mountaindog

I decided to revive my dormant Carl Griffith's 1847 Oregon Trail starter last week, so I had a lot of nice ripe starter by the end of the week on hand that I wanted to use up. I used an excel spreadsheet I made up for Flo's 1-2-3 sourdough to use up any amount of excess ripe sourdough starter, except in this case, I needed to increase the hydration since I was using all whole wheat flour in the final dough, so it became 1-2.25-3 bread (78% hydration final dough). The reason I made this as 90% whole wheat is simply because the excess starter I had was made up of about 25% whole wheat and 75% AP, so even though the final dough is all whole wheat, there is about 10% AP in the overall formula due to the large amount of starter.

One other thing that I got away with that I don't usually do is that all the starter used in this formula was actually ripe the day before I made the dough, but I got busy and just put it in the frig, so it was not as strong as it could have been since it was past peak, but the bread still came out with great flavor and a nice soft open crumb, chewy dark golden crust, not at all dense.

This is also the first bread I've made with my new big bag of organic Meunerie Milanaise flour from Quebec, and I notice a distinct difference in taste compared to either the King Arthur WW or Bob's Red Mill WW that I usually use (it handled very differently as well, very extenisble and silky dough). The Milanaise flour had absolutely no bitter whole wheat aftertaste, it was sweet, I imagine this must be what freshly-ground whole wheat flour tastes like, and this bag was milled on January 8 I think (thanks to Tete au Levain's tip on how to determine the milling date on the bag I had).

After mixing the final dough with my dough whisk just long enough to get everything incorporated, I let it rest 30 minutes, then did about 2-3 minutes of folding in the bowl with dough scraper, rest another 30 min., then 2 stretch & folds 30 min. apart, then just left it in it's bucket to bulk ferment overnight in my 62F basement Thursday night.  Friday morning before I left for work, I shaped the loaves and placed them in a couche in my 50F basement refrigerator until I got home from work, then baked them as soon as the oven was preheated. They came out flatter than I had hoped, but since it is a wet dough, and mostly whole wheat, that may be expecting too much. To me the most important thing was the open crumb and great taste these had, much better than the desem bread I attempted 2 years ago.

I am happy enough with this result and the taste that I plan to make this our weekly bread from now on, since I'd like to reduce the amount of white flour we are eating these days. The Oregon Trail starter is a very strong and fast riser, so I was hoping it would do well with whole grains, and I think it did. I will try this formula again with my home-made starter to see if it does as good a job rising this dough as "Carl" did. I also hope using a starter that is at peak (as opposed to older discarded starter past peak as used here) will improve the volume.

mountaindog's picture
mountaindog

I was inspired from Teresa at her Northwest Sourdough website to try her sourdough cinnamon rolls pictured there, but the closest actual written recipe I could find to that was her Festive Hawaiian Roll recipe. After studying a lot of other sweet dough recipes and brioche recipes, I decided to make a hybrid dough with what I thought were the best aspects of each, that would also use only sourdough starter as the leavening agent. The main differences from NWSD's recipe is my addition of eggs and buttermilk, plus I added 4 times the amount of butter, bringing the butter content up to 11%, which is still not as high as many sweet doughs and not nearly as high as brioche.

This recipe will make about 16-24 large and airy, but rich and tender Cinnamon Rolls. We don't like excess cinnamon flavor in our rolls and so use about half the amount of cinnamon usually called for in the filling of similar recipes. We are also not *fond* of white fondant glaze, so I made up this cream cheese/buttercream glaze to provide a more flavorful topping that complements the flavor of the rolls well. I also did not use any nuts in these, but they could also be added to the filling if desired.

Beware of these rolls: Due to the potato and buttermilk in the dough, these are by far the richest, most moist, tender, and flavorful cinnamon rolls we've ever had, the dough itself is fragrant with vanilla and butter, it almost does not need the filling or icing. The sourdough made these extraordinarily airy and puffy with no commercial yeast added. Because these are so rich, they will be reserved for special occasions or special visitors in our house, they are far too addictive to keep around otherwise. Because they are also so light and billowy - similar to a good sourdough waffle, they are not overly filling and heavy in your stomach.

The total preparation time is about 36 hours to allow for the long cool ferments. If you want to serve these rolls on a Sunday morning, you need to build the levain the preceding Friday evening.

Approx. 12 hours before making the final dough, build the levain as follows:

Levain Build:

grams          Item
150       100% hydration sourdough starter, recently fed and ripened
340       Lukewarm water
340       AP flour
850       Total Wt.


Let this mixture sit at room temperature until doubled (usually overnight, if your starter is fast and the levain is active early, keep it in the frig. until ready to make dough). Meanwhile, make a small amount of mashed potato by boiling or microwaving (covered) 1 medium peeled & sliced potato in a little water until soft. Mash with fork and a little milk until smooth.

Final Dough:

grams     Item
113       1 stick Unsalted butter, softened
225       3 large eggs
42        1 ½ TBSP Honey
24        2 TBSP Vanilla Extract
130       Mashed potato
195       ¾ c. Buttermilk or whole milk
850       Levain
700       AP flour
21        Salt
2300       Total Wt.


Once levain is ripe, make the final dough. First cream the softened (not melted) butter by hand or in mixer with paddle attachment, then beat in eggs, honey, vanilla, and mashed potato and continue mixing. Stop to scrape down sides of bowl with spatula as needed and continue to mix just until well-blended. Switch to dough hook and add buttermilk and levain until blended, then gradually add flour and salt and continue mixing with dough hook until well-blended. Scrape down sides of bowl with spatula, cover, and let rest 20 min. After rest, uncover and continue to mix with dough hook another 2-3 minutes (or by hand, fold in bowl with plastic bowl scraper for 3 min.). This will be a very soft, sticky dough, around 71% hydration if you count the liquid from eggs and milk, but not counting the butter.

Place the dough into a container sprayed with cooking oil, cover, and bulk ferment in a cool location (55-65F) until doubled, approx. 8-12 hours depending on temperature and how fast a riser your starter is. Every few hours, give the dough a stretch and fold, for a total of about 2 folds.

Meanwhile, make the filling as follows:

Filling:

grams       Item
170       1 ½ sticks Unsalted butter, softened
85        Cream or half&half
300       Dark brown sugar
180       Raisins
3         1 ½ tsp. Cinnamon
12        1 TBSP Vanilla extract
750       Total Wt.


For the filling, add all above ingredients to a medium sized saucepan and bring to a low boil over medium heat while stirring. As soon as the mixture boils, take off heat and chill to a spreadable consistency before using.

After dough has doubled, divide it into 2 pieces on a flour-dusted surface (it may be sticky even though the butter should be solid from the cool temps), then roll out each piece of dough into a rectangle shape about 10 x 16 inches across. Spread the filling across each rectangle of dough, leaving 1 inch clean where the outer seam edge of the roll will be and then taking the opposite edge, roll up the dough gently but firmly and seal the seam.

Slice each log into 8 or 12 rolls (depending on how big a rectangle you rolled out and how large you want the rolls to be) with serrated knife and place them just barely touching each other on baking parchment on sheet pan. Don't worry if log gets flattened as you slice each roll, you can straighten them out once placed on the sheet pan, and they should rise very high and straighten out when proofing. Spray tops of rolls lightly with cooking spray, cover with plastic wrap, and slowly proof rolls overnight or up to 12 hrs. in the refrigerator or cool place between 45 and 55F until the dough is about doubled and puffy looking. Bake right out of frig. at 400 degrees for about 25-35 minutes until light golden, or until the center of dough registers about 195-200F on instant-read thermometer. Do not let the rolls get very brown. Melt about 4 TBSP of butter in microwave and as soon as rolls are out of oven, brush them with the melted butter to keep crust soft before icing them.

Here are the rolls right out of oven and after being brushed with butter, they had a great amount of oven spring and rose tremendously during the bake:

While rolls are baking, make a glaze/icing as follows:

Cream Cheese Glaze:

grams       Item
56        ½ (4 TBSP) stick Unsalted butter, softened
56        4 TBSP. Cream cheese
165       ¾ c. Confectioner's sugar
65        ¼ c. Milk, whole
2         ½ tsp. Vanilla extract
344       Total Wt.


Microwave the butter and cream cheese together until very soft but not melted. Whisk them together while adding the vanilla, powdered sugar, and enough milk to thin out the icing to a drip-able consistency.

Let the rolls mostly cool before glazing them with icing. Dip a wire whisk in the icing and drizzle across surface of each roll in crisscross pattern. Serve and enjoy.

(NOTE: I've not yet tried this, but it should also be possible to chill the un-sliced logs in frig overnight and slice just before baking, or freeze the logs for up to 1 month, take out the night before baking and defrost in frig. Next morning, remove from frig., slice, and let warm up at room temp about 1-2 hours before baking.)

It's a good thing we had a house full of guests this past weekend to help us put away not only the cinnamon rolls, but also these Vermont Sourdough boules, and cherry-sunflower-seed levains.


mountaindog's picture
mountaindog

This is in response to Trailrunner's questions on a mixing discussion over at Hansjoakim's blog here on a fantastic-looking crumb he has on his Hazelnut bread.

Lately I seem to get best results with a combo of warm shorter bulk ferment with frequent early folding and long cold final proof. No mixer, no kneading with flour, no repeated French-folding. (warning, this could change as soon as I read of a better method, so please take with a grain of sea salt!):

  • Hand mix all the ingredients with a large dough whisk in large bowl (incl. salt)
  • Cover and let rest (autolyse) for 30 min. (I know you are supposed to leave out the salt but I find it easier to mix everything initially if not using a standmixer)
  • After 30 min. rest, use plastic dough scraper to fold dough onto itself in the same bowl, just like what Mark does in his video here. I count to about 100 as that takes me just about 3 min., and that has seemed to develop the dough well.
  • Next round up the dough with scaper and place it into a clean, lightly spray-oiled lidded dough bucket - or for large-size doughs where I double or triple the formula, I use a big square clear plastic food service container with lid.
  • Let the dough sit for 30 min. (preferably at 76F location), then do a single stretch & fold as per Hamelman: if dough is in smaller bucket, tip the dough out onto a lightly spray-oiled counterstop, stretch it out into a rectangle, and letter fold it onto itself once, rotate 90 degrees, letter fold again, and put it back in the bucket for another 30 minutes. If dough is in big square container, just fold it right in the container and turn upside down when done.
  • Repeat step above 2 more times for a total of 3 folding sessions spread 30 min. apart. Then leave the dough to finish bulk-fermenting at 76F, usually for another 90-120 minutes until just doubled (my home-made starter is not that fast a riser).
  • Next shape loaves, then I place the shaped loaves in a 45-50F location (my unheated mudroom) to retard overnight or 12 hrs min.
  • After cold retarding I place the proofed loaves in my room temp (65F) kitchen while I preheat my baking stone for 45 min. and bake with steam right after that, usually the loaves are proofed enough after all that time retarding, and the oven spring is great.

Here are results of a less slack dough (65% hydration pain au levain 10% whole wheat), not huge holes like you'd get with a very wet dough, but large enough and evenly distributed, and very flavorful crumb, chewy but not gummy:

I still need to try SteveB's double-mixing technique he describes here. If anyone sees any error in my ways with how I've been doing this, I'm all ears! I'm sure I'll revise this after I read Advanced Bread and Pastry, due in soon.

mountaindog's picture
mountaindog

I've always liked the walnut raisin pain au levain Dan Leader sells at Bread Alone Bakery near me, and I've been wanting to try something like this for awhile and finally got around to it this week, but with cherries and pecans.

Both Susan's yeasted version on her Wild Yeast blog and SteveB's version on his Bread Cetera blog gave me a craving for cherry pecan bread when I saw their photos....thanks for the ideas you two, your baked goods are so mouthwatering and professional looking...(I am unworthy of breadblogging in the same sphere as you two!)

I made this as a sourdough-only version and mixed about 30% whole wheat and 2.5% rye with AP flour. This mix gave a nice dark-colored but light-textured open crumb that tasted good with the fruit and nuts. You could obviously substitue rasins and walnuts, or anything else you can think of. I find it especially tastes great sliced, toasted, and served with cream cheese, and lasts a long time.

I soaked the cherries for a bit too long as they were a little too mushy and a some color washed out, but the bread tasted great, I'll be making this again a lot I think. It was very easy.

Here are the loaves just before slashing and loading into the oven, after their overnight cold retarding:

Here's the formula:

Pecan Cherry Pain au Levain

Makes 2 large 2.5 lb batards or oblong loaves.

Levain Build

% flour of levaingrams
starter (100% hydration with WW flour) 32.1% 45
warm water 85.7% 120
All-Purpose flour 100.0% 140

Final Dough

% flour final doughgrams
All-Purpose flour 66.4% 750
100% whole wheat flour 31.0% 350
100% whole rye flour 2.7% 30
flour subtotal 100% 1130
 
warm water 69.5% 785
sea salt 2.0% 23
ripe levain 27.0% 305
dried pitted sour cherries, soaked   240
toasted pecans   240

1)  12 hours before making final dough, create the levain using some ripe starter that has been fed and doubled. Mix well and cover in bowl until levain has risen to over double but has not yet begun to collapse, aprox. 10-12 hours at 65-70F. Toast the pecans at 350F for 10-20 minutes and let cool, then coarsly chop and set aside. Soak dried sour cherries in water overnight and strain next morning before making final dough.

2)  When levain is ripe, create final dough by mixing warm water with levain to dissolve. Mix all flours and salt in large bowl until evenly distributed, then add watered levain to flour mix with dough whisk, spoon, or hands until well combined. Cover and let rest for 1 hour at @ 70F. Tip dough onto counter, knead in the cherries and pecans lightly, and french fold for approx. 10 minutes with short 1-2 minute rests as needed to scrape together dough or relax it, and tuck in the fruit/nuts. The cherries and pecans may fall out and it will be quite messy at first, but eventually the dough will come together into a neat lump after 5-6 minutes or so. At end of kneading, round out the dough so that fruit/nuts are tucked inside and good skin of dough is on outside. Place dough in lightly oiled container and cover to rest for 30 min. After 30 min., turn out dough onto lightly oiled counter to give it one good gentle stretch and letter fold, then place dough back into oiled covered container. Repeat one more stretch and fold after another 30 minutes, then let dough continue to rise until doubled at @ 70F (approx. 2 more hours).

3)  Shape dough into 2 batards, place batards in floured couche, cover well so loaves don't dry out, and let loaves cold proof overnight at 40-50F for approx. 8-10 hours. Next morning, place loaves in warmer area (65-70F) while oven preheats for 45 minutes to 450F. Bake loaves on oven stone with steam (I pour 1 cup hot water from tea kettle into pre-heated cast iron pan on oven floor) at 450F for 15 minutes, then turn heat down to 400F for another 30-35 minutes until center registers 200-205F with instant read thermometer and crust is well-browned.

On a slightly different note: my last few batches of bread have been coming out smelling and tasting better than ever, I think it may just be this new flour I was able to pick up in a 50lb bag from Bread Alone Bakery down the road from me. It is an All-purpose flour from Canada with 11.5% protein, not sure about ash content. Anyone ever used or heard of this Oak AP flour before?I like it a lot. It handles nicely in dough.

mountaindog's picture
mountaindog

It's been quite a long time since I've actively participated on this forum, but I have the flu this week and am cooped up inside with plenty of time to bake and web surf, so thought I'd provide an update on how I think I've improved on some of my old sourdough techniques, as well as show some fun results with brioche.

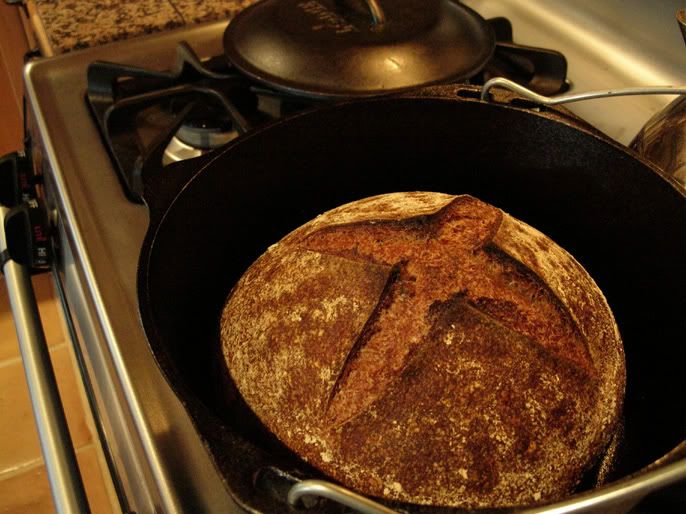
French Fold on Sourdough

After all these years, I still find that my favorite sourdough formulas are either the Columbia or the Thom Leonard boules from Glezer's Artisan Baking. I always return to them over again, and often make some of each in a given week, as they have some different qualities that I like in both.

I've posted the formulas for these breads here a few years ago, but I've since changed my methods a bit. For quite a long time, over a year, I abandoned my KitchenAid Pro 600 stand mixer and started using the no-knead technique as many here have used, extending the bulk fermentation to overnight at room temp, and giving 3 good stretch-and-folds the first 90 minutes into the first bulk ferment before going to bed at night. That sure made things easy, and I was able to fit it into my busy summer schedule especially, but it didn't quite give me the open and flavorful crumb I really wanted. I think the dough just wasn't getting quite developed enough via that method.

I don't think my dough hook on my stand mixer, however, was really doing such a great job developing the gluten as well, so recently I began really studying the French Fold in more detail, and I really find Richard Bertinet's video extremely helpful for this, thanks to people on this site pointing me there when I lurked earlier this Fall. To make my sourdough I now continue to do it all by hand, relatively quickly, with really superior results to what I got before using no-knead or even stand mixer.

Here's my long-ferment adaptation of the Columbia Sourdough from Maggie Glezer's Artisan Baking:

Makes two 44-ounce (1250 g) round boules or four 22-oz batards (original recipe doubled)
Time: about 36 hrs. with 20 minutes of active work

This method works well if you are busy with work during the week and don't want to be baking all day Saturday either. I begin this process on Friday Morning. Once you get comfortable with it, you could even begin it Thurs. evening and make the final dough before work on Friday morning, letting it rise while at work and shaping as soon as you get home.

Approx. 30 hours before baking (e.g. Fri. Morning) make the Levain as follows:
90 g ( 2 oz) fermented white/wheat-flour sourdough starter refreshed 8-12 hrs before (I use a batter-like starter made with equal weights water to flour, not a firm starter.)
140 g (6.6 oz) lukewarm water
320 g (10.6 oz) unbleached all-purpose or bread flour

Dissolve starter in the water, then add flour and knead this stiff dough until smooth. Place in covered container and ferment at room temp (@70F) until doubled, 8-12 hrs.

That evening (e.g. Fri. Evening) make the final dough as follows:
1200 g (42.4 oz) unbleached all-purpose flour
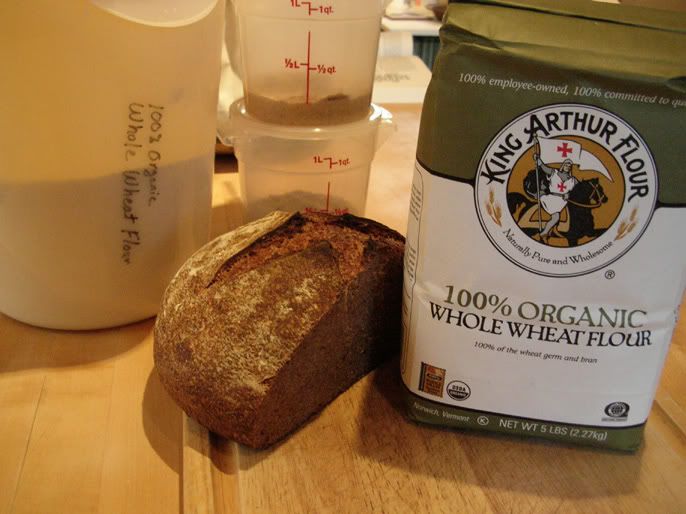
110 g (3.8 oz) whole-wheat flour, finely ground
30 g (1 oz) whole-rye flour, finely ground
40 g (1.4 oz) toasted wheat germ
40 g (1.4 oz) non-diastatic barley malt syrup (This is sold in most supermarkets or where home-beer-brewing supplies are sold.)
970 g (34 oz) warm water
all the fermented levain you made the night before (550 g or 23.2 oz)
32 g (1 oz) fine sea salt

Mix By hand: combine all 3 flours, wheat germ, and salt in large bowl, and mix thoroughly with rubber spatula or mixing spoon until all dry ingredients are perfectly distributed. Measure the warm water first and while it's sitting in a container on your scale, use a clean tablespoon to scoop a little syrup at a time into the water until the correct weight (40g) is added to the water. If you accidentally spoon in too much, just scoop a little syrup out of the water before it dissolves, stir well to dissolve. Pour the malted water over the ripe levain and mix well until dissolved, then pour the water/levain liquid over the flour mixture and mix with spoon, dough whisk, or hands until just combined. Cover bowl with plastic wrap and let dough rest 1 hour at room temp. (@60-70F).

So, my dough handling method now is:

1) mix all dry ingredients together in large mixing bowl: flours, salt

2) add water to the ripe levain to dissolve and mix in its own bowl

3) add watered levain to flours in large mixing bowl and mix until well-combined by hand with my trusty King Arthur dough whisk (or use spoon or hands).

4) cover bowl and let rest for 1 hour.

5) tip rested dough onto clean counter (no flour, no oil, no water) and begin the French fold a la Bertinet. I do this for at least 5 minutes before giving it a rest, scraping the dough together with a bench scraper, and continuing for another 5 minutes. It is amazing how well this works even for very wet doughs. The first minute or so, it is tough, you feel the dough tighten and not stretch yet still be sticky and you're ready to give up, but keep at it and all of the sudden, the dough starts to stretch while simultaneously becoming less sticky, you can really feel it change. By the second 5 minute stretch, it really starts to look like in the video andd tightens up really nicely, leaving almost nothing sticking to the counter.

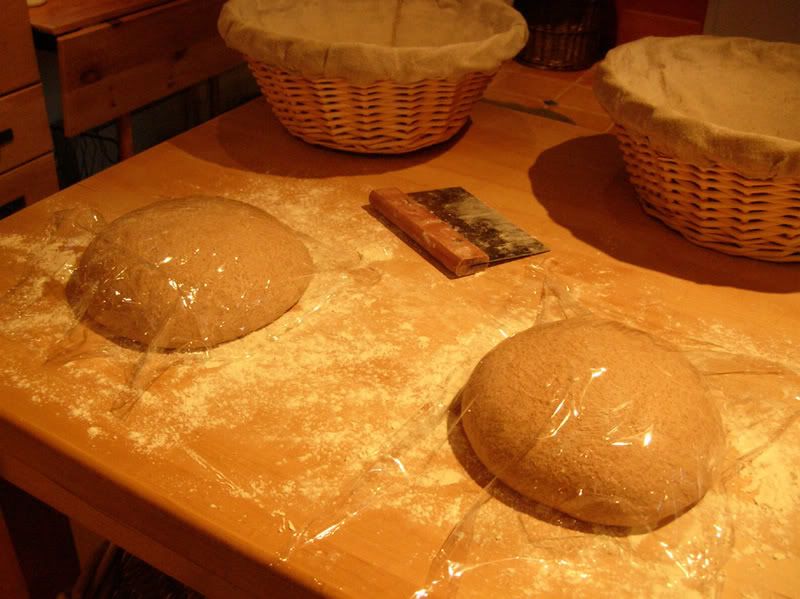
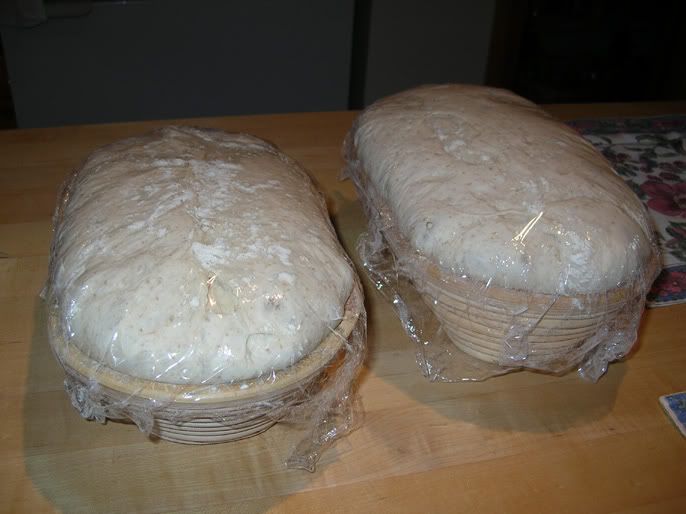
6) After 10 min. of the French fold, place dough ball into lightly oiled container and cover, let rest 30 minutes, and then do a regular gentle stretch and letter fold after 30 minutes. Repeat this rest and stretch-fold 1 more time, then let dough bulk ferment overnight in cool location (50F-60F) until a little more than doubled in bulk.

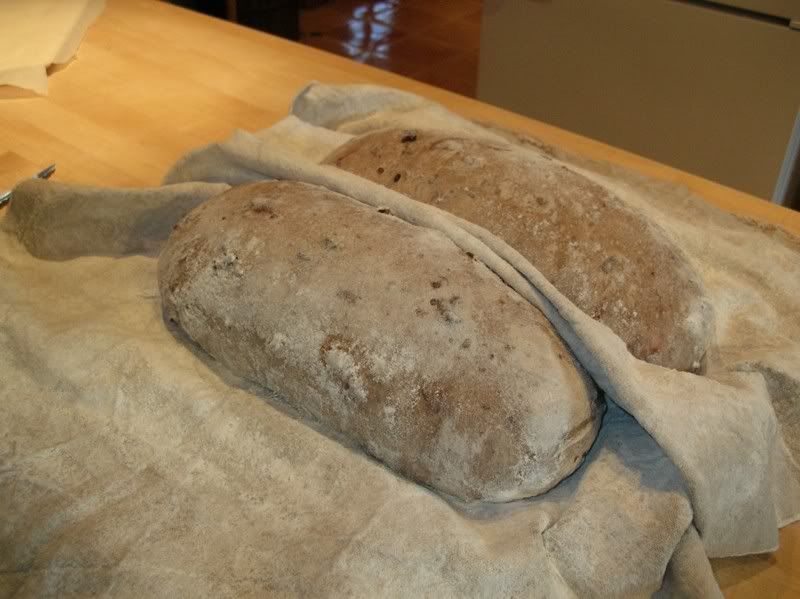
7) Next morning, shape dough into loaves as desired and let rise until doubled again, around 4-5 hours in my chilly 60-65F house. Bake as usual.

This total 10 min. French fold develops the gluen just as well as traditional hand kneading with added flour for 15-20 min. and I think works better than my stand mixer ever did. The benefits are less time kneading, no added flour to toughen up the dough, but better gluten development, and easier to work with large batches that don't fit in my stand mixer anyhow.

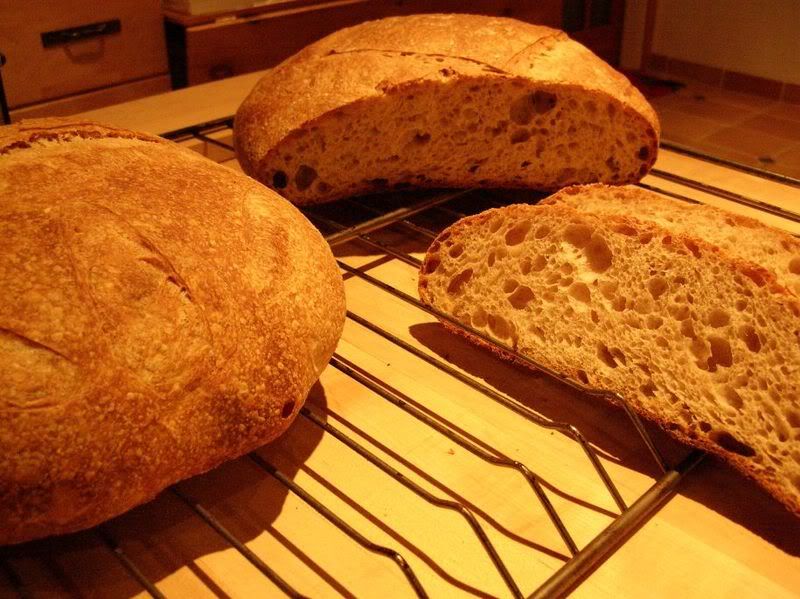
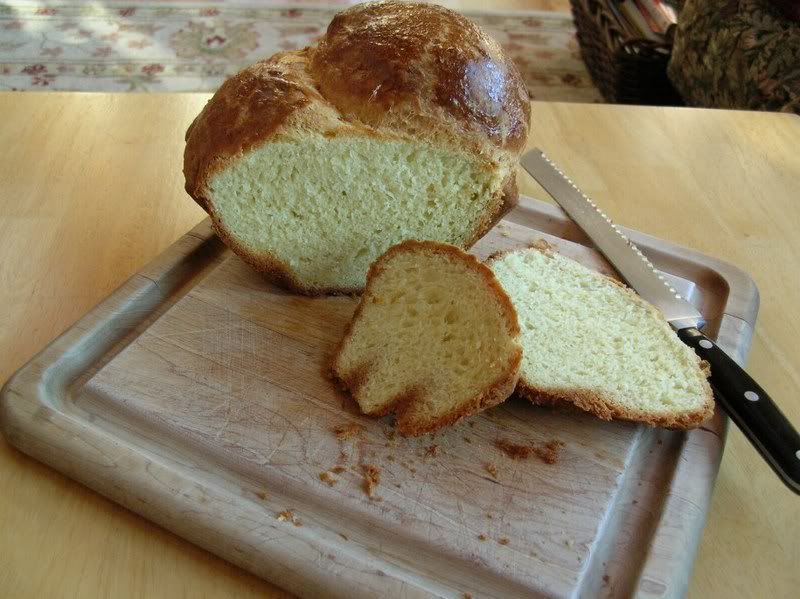
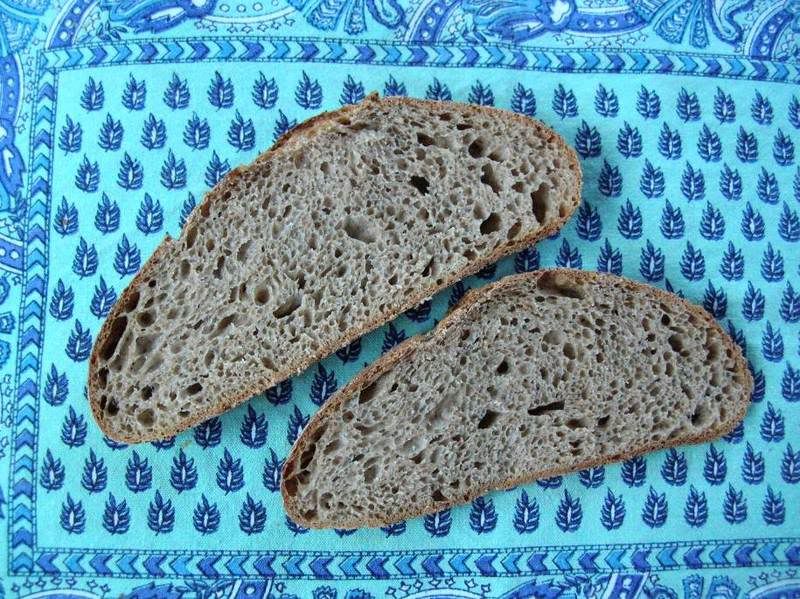
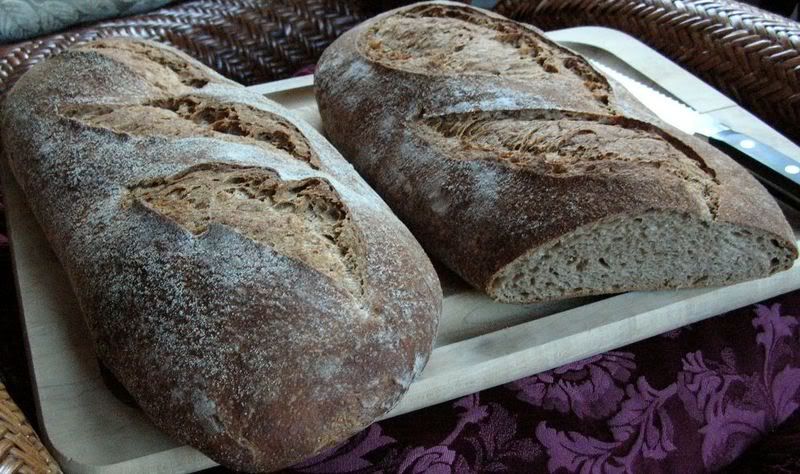
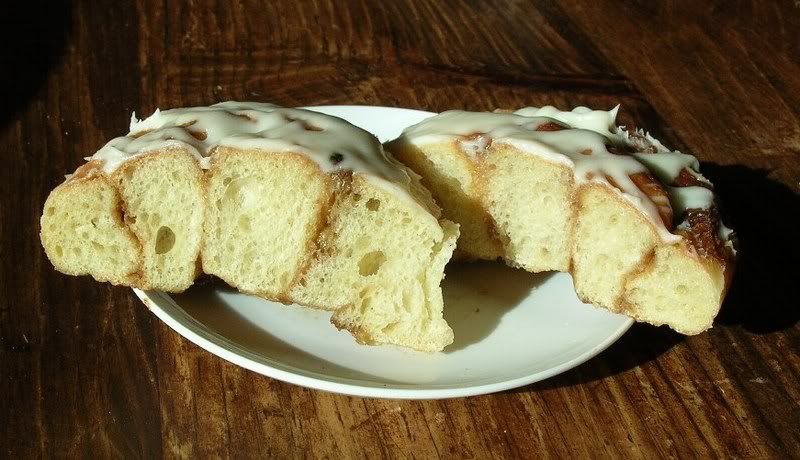
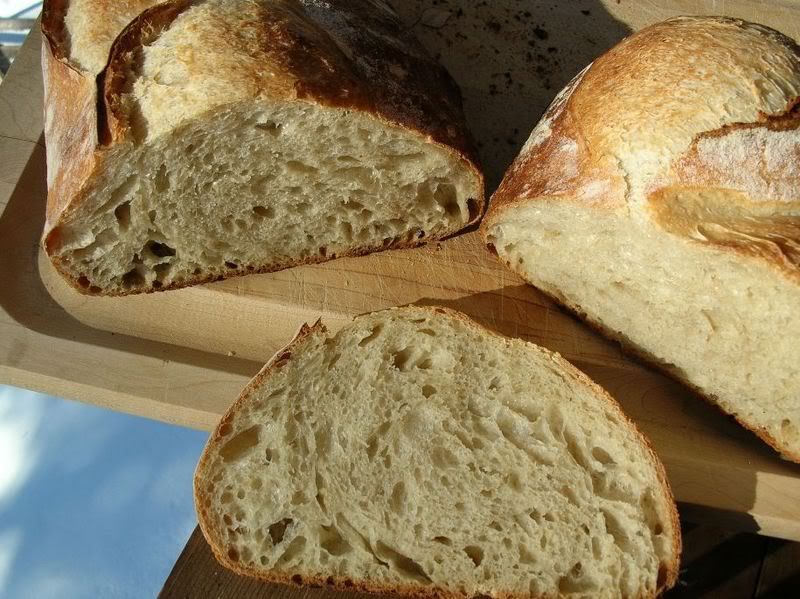
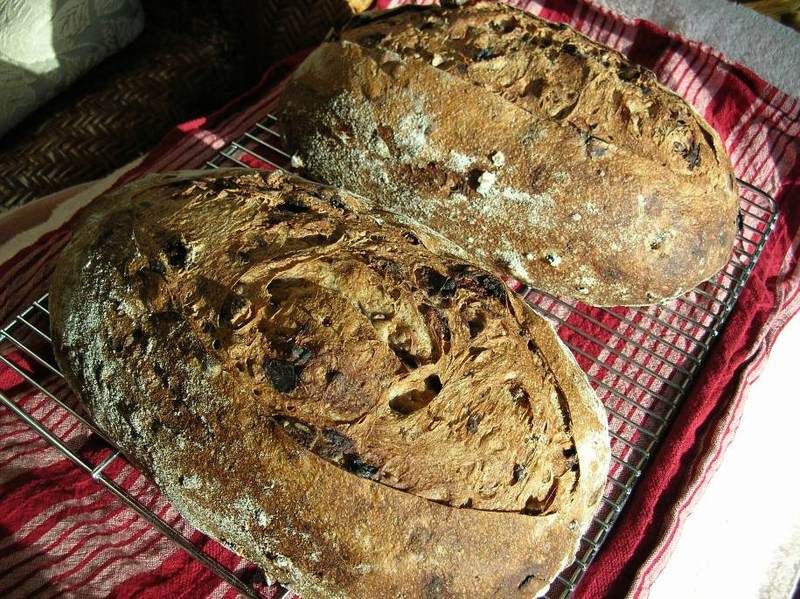
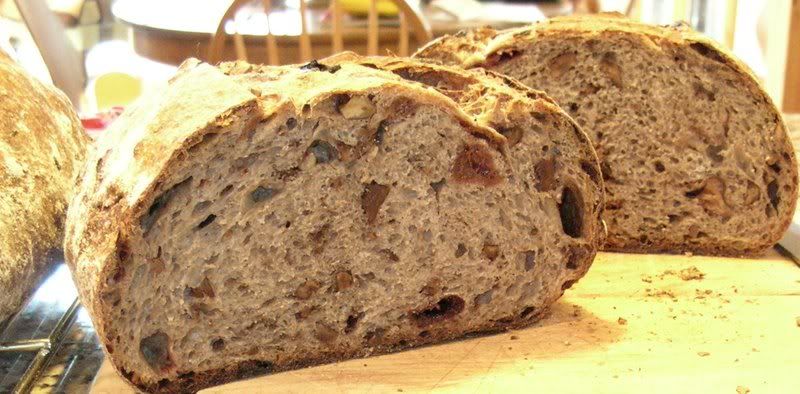
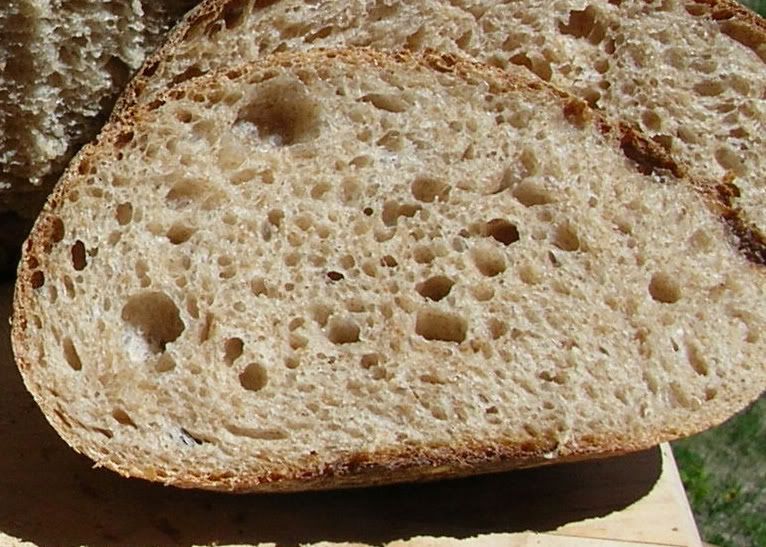
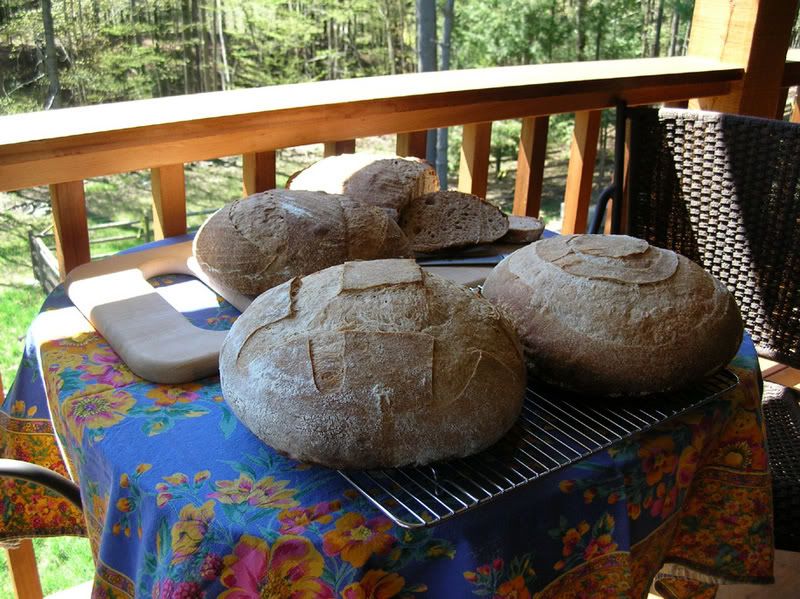
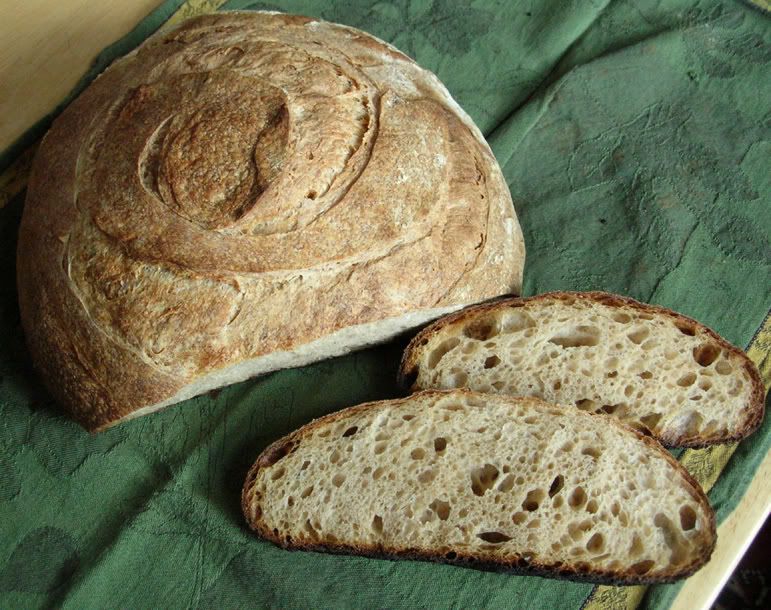
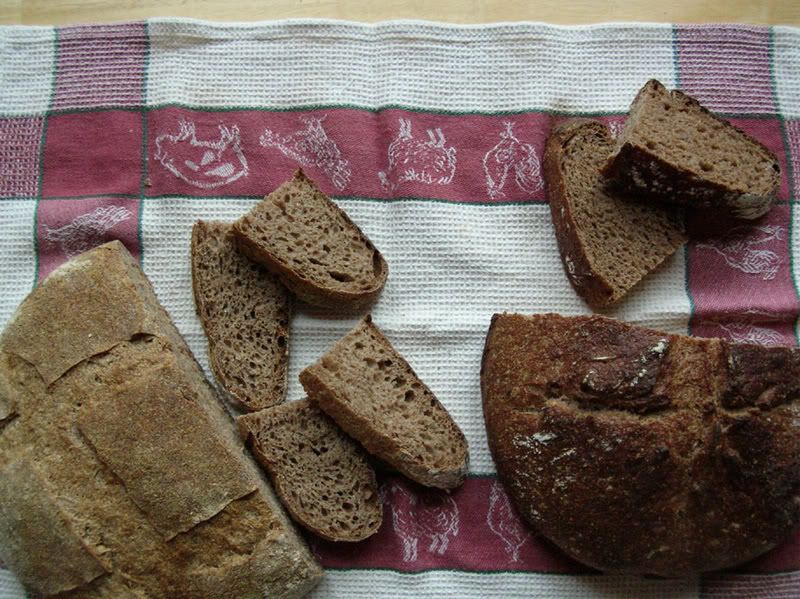
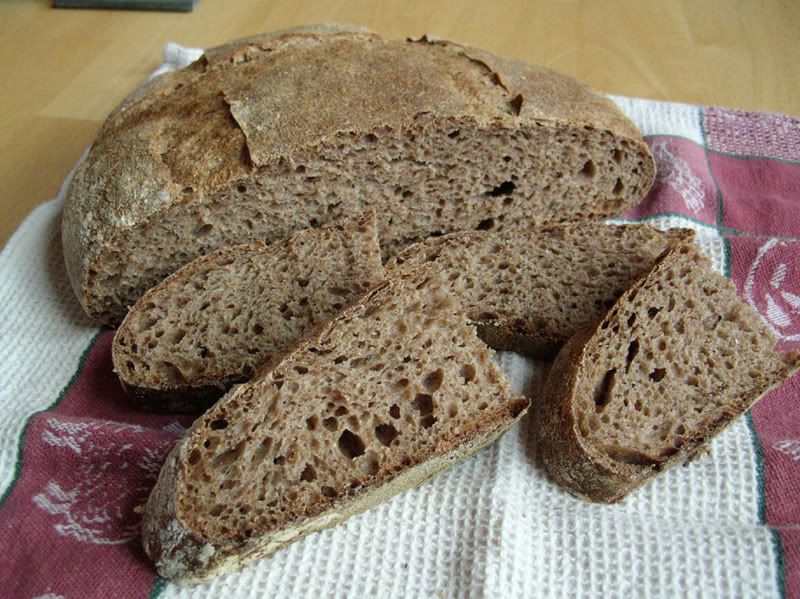
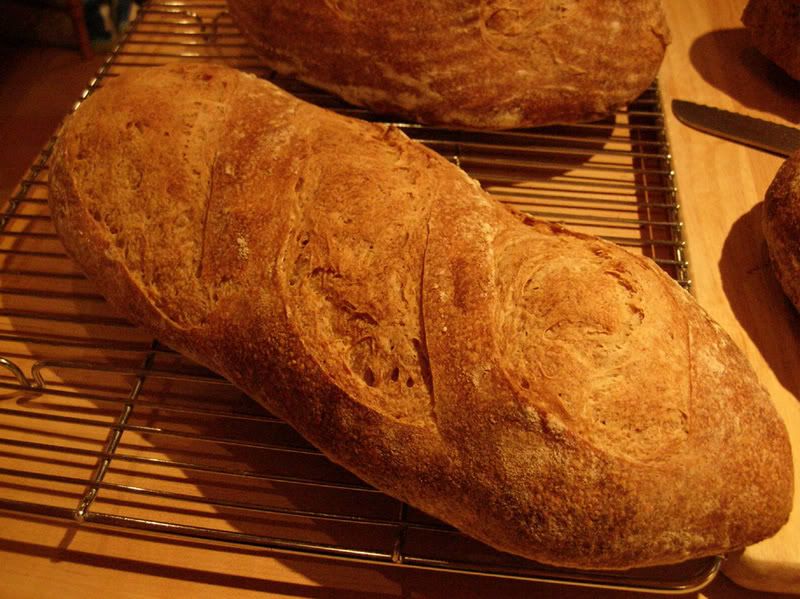
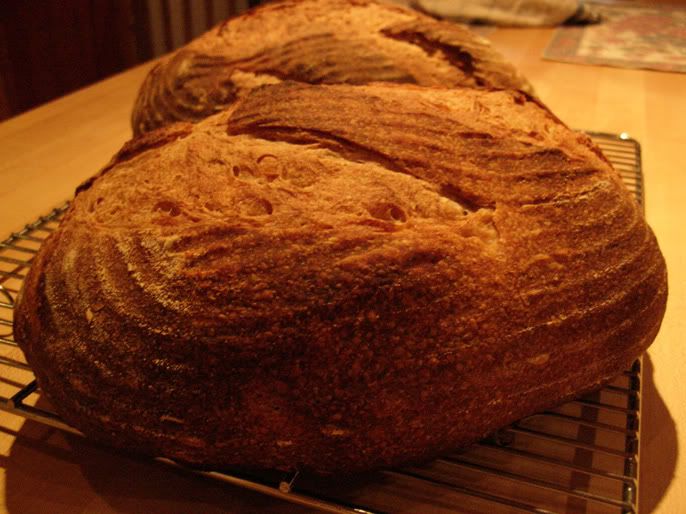
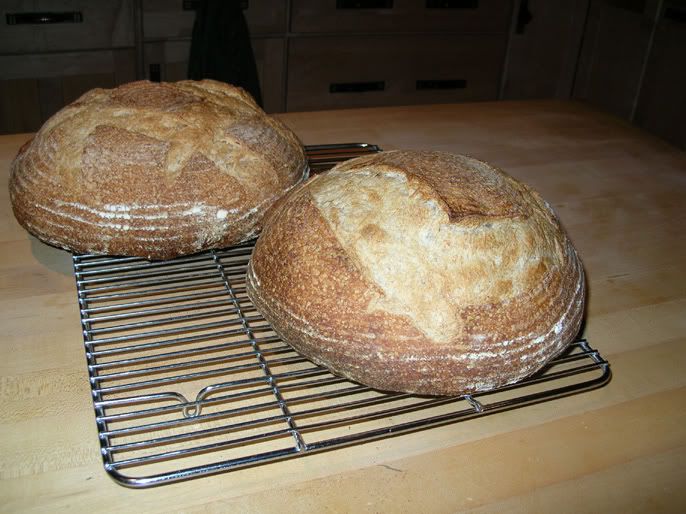
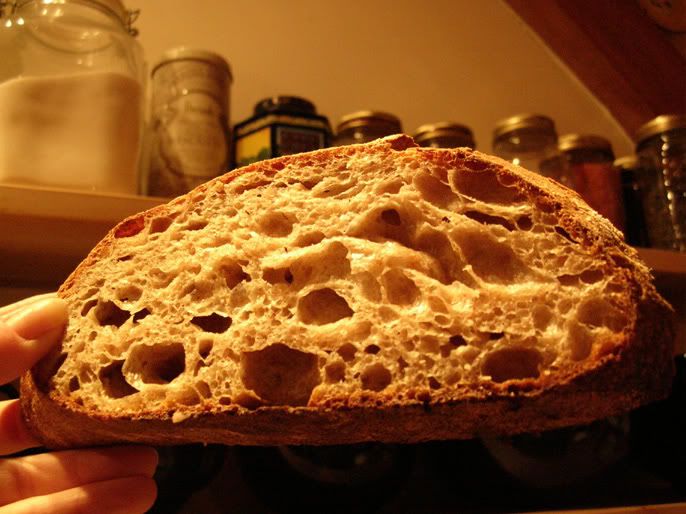
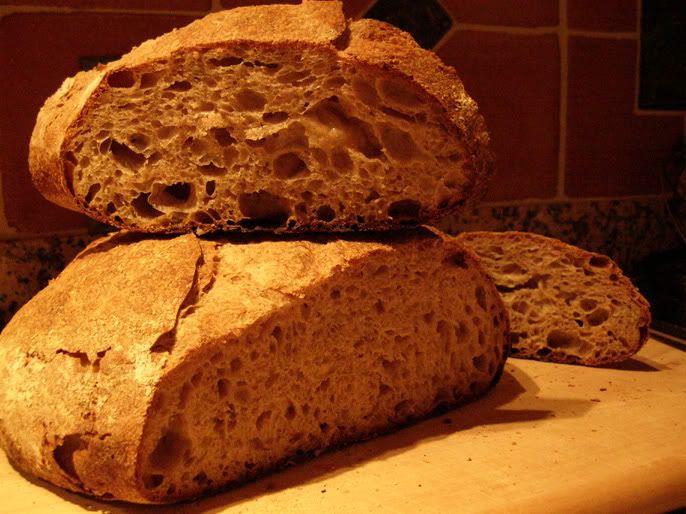
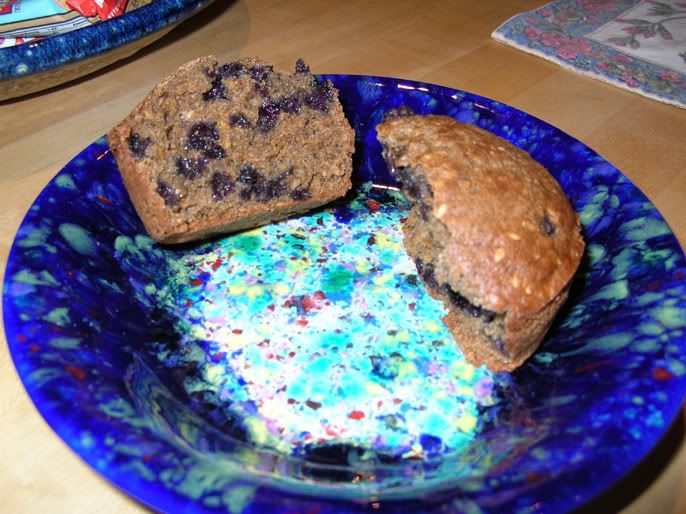
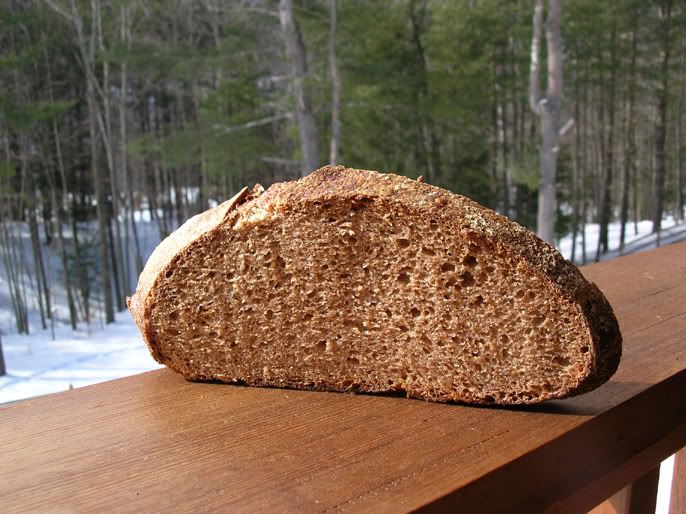
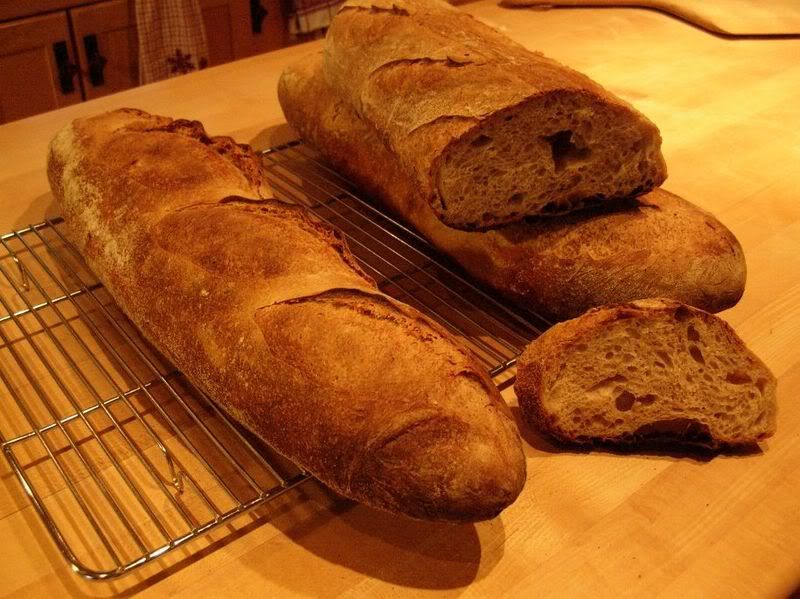
The Thom Leonard boule (above) crumb from the French Fold. This was a wet dough and I had not yet studied David Snyder's scoring video when I baked these. After seeing David's scoring tips, my Comunbia batards (below) turned out with better ears, even though those were also wet doughs. (Oops, my batard shaping still needs practice as I left a "baker's cave" in there).

FYI - my adaptation of the Thom Leonard boule (also from Glezer's Artisan Baking) is the same mehod as above for Columbia, just different formula and quanitity of dough, as follows:
Makes one 4 lb. (1.8 kilo) large boule or two 2 lb boules.
Time: about 36 hrs. with 20 minutes of active work

The evening before baking make the Levain as follows:
45 g (1 oz) fermented white/wheat-flour sourdough starter refreshed 8-12 hrs before (I use a batter-like starter made with equal weights water to flour, not a firm starter. If you are using a rye-flour starter, substitute the 30 g of the rye flour in the final dough with more white AP flour.)
120 g (3.3 oz) lukewarm water
140 g (5.3 oz) unbleached all-purpose or bread flour

Dissolve starter in the water in a small bowl, then add flour and beat this batter-like dough until very smooth. Place in covered container and ferment at room temp (@70F) until doubled, 8-12 hrs.

Next day make the final dough as follows:
250 g (8.8 oz) Whole Wheat Flour (If you like your bread a little darker add up to 350 g whole wheat here and use less white flour below.)
30 g (1 oz) whole-rye flour, finely ground (If using a rye-flour starter in the levain rather than wheat, substitute the rye flour here with 30 g more white AP flour.)
850 g (29.9 oz) unbleached all-purpose flour
780 g (27.5 oz) warm water
all the fermented levain you made the night before (305 g or 10.6 oz)
23 g (0.8 oz) fine sea salt or course Celtic Grey Sea Salt
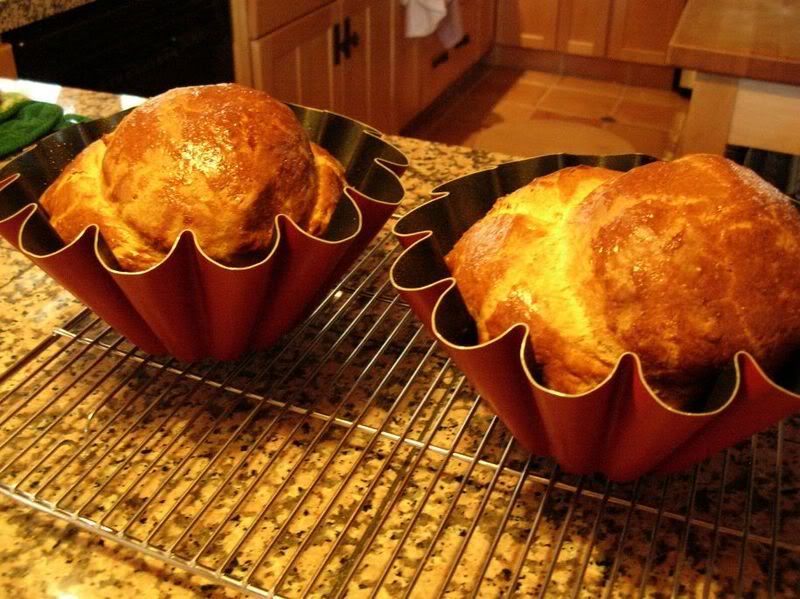
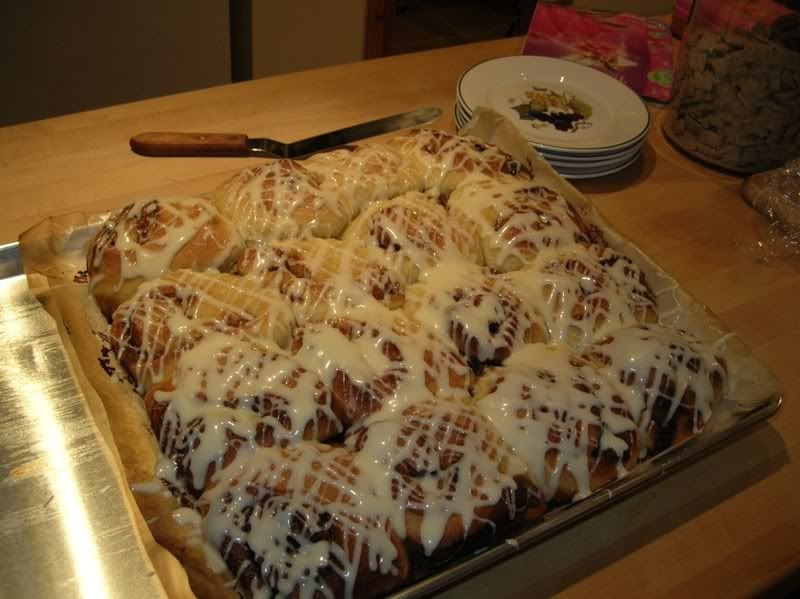
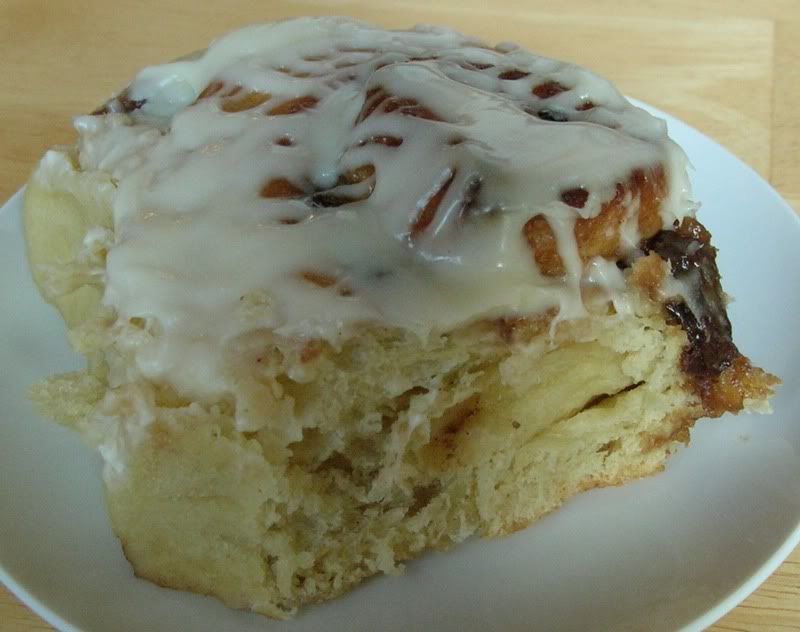
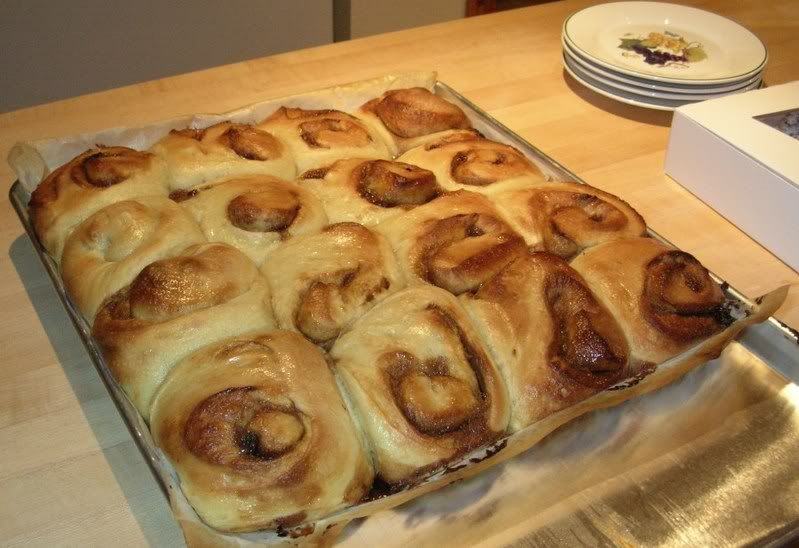
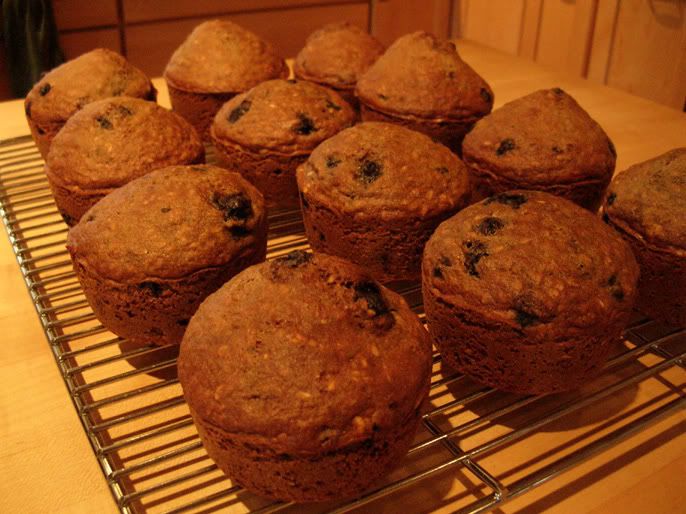
 

Brioches a Tete

Since my husband's family are visiting here from France this winter, I decided to make some brioche, which I have't done in a long time, using some lovely non-stick molds they brought me from France. I made Peter Reinhart's Rich Man's Brioche from the BBA, and I also used Bertinet's French Fold method to mix and knead the dough, but this dough was really too wet and full of butter to do this properly (really like a cake batter), still, I persisted, and it eventually did come together a bit, and turned out nice and light, despite having a fine-textured crumb. I think next time I will try Peter's middle-class brioche, which has about half the butter. This version here was heavenly with a good cup of coffee on a cold snowy winter morning though  :-)

mountaindog's picture
mountaindog

With warm weather and more time spent in the garden than in the kitchen these days, I finally decided to give the "no-preheat" method a try since ehanner, crumb bum, sourdough-guy, and many others seem to like the results and the ease (not to mention energy savings).

I must admit I have been very skeptical of this method, it goes so against the grain of how I have made bread my whole life - I couldn't bring myself to do it for the longest time after carefully making each batch of dough, not wanting to sacrifice it, and I was convinced people who liked this method didn't require a thick, crispy crust like my family does - maybe it works fine for sandwich loaves, but crusty, chewy hearth loaves? Bread is sacred to my French husband and not something to be trifled with (he often hovers about the kitchen while I'm baking to make sure I hear the oven alarm and don't ruin the precious bread...)

So this past weekend I made a double batch of both the Thom Leonard and the Columbia (both from Glezer's ABAA) and decided to try the Leonard as the no-preheat and compare it to the Columbia which I would do on the hot baking stone as usual. First, as I mentioned to Zolablue in another blog, this weekend's bake was different than any previous sourdough bake I've done since starting back in November in that with the warm weather and warm house temps (70-75F) my starter was incredibly active and I've never seen these same doughs rise as much in the same time period as they did this weekend, they nearly blew the lids right off the dough buckets I use.

So I was a little worried the dough would be over-proofed, but when I slashed the Thom Leonard loaves after flipping them out onto a cold parchment covered baking sheet they seemed to hold their shape well. I put them in the cold oven on the middle rack (baking stones removed) and turned the oven on to 425F to bake the whole time, no steam or mist (needless to say, my husband was probably more nervous than I was...). I kept the light on to watch, and I noticed the slashes opening up and the loaves spreading - and I thought "great, I'll end up with pancakes", so I was extremely surprised to check back about 10 min later to see the loaves had bloomed and rose up very high - good oven spring - I was impressed! I left them in for about 15 min. before I opened the oven and rotated the loaves, then let them get nice and brown for another 15-20 minutes. I took them out when they looked nice and brown and the internal temp was about 204 . The crust felt nice and hard as they always do when you first take them out of the oven, but I knew the real test would be once the loaves cooled and we could cut into them and taste them. I should also mention that I have a gas stove, so the oven pre-heated and reached 425F pretty quickly without the stones in there.

Results below: we were very pleasantly surprised at the oven spring and open crumb, and the crust was crispy, but thin. Still, I could live with that considering how easy this was to do, no waiting for the stone to heat up, no misting, etc.


For comparison, below in front are some Columbias that I baked on a hot stone that I let heat up to 500F after the oven was already hot from the previous bake, then turned down to 400F after misting first 2 minutes. No-preheat Leonards are in the back. I made these Columbias as very large 3 lb boules rather than the usual batards (I like this large shape as it seems to keep the bread fresh longer throughout the week with just the cut side wrapped partially in foil). These Columbias also had tremendous oven spring, height, and open crumb, in fact they had better height and more open crumb than the no-preheat Leonards, and they also had a very thick crisp crust, which we prefer over the thin.

That said, I am still very happy with the no-preheat results given how easy it is, and will continue to use this method throughout the hot weather when I'm using the oven less anyhow. So I tip my hat to Sourdough-guy, ehanner, crumb-bum, and others who use this method, I've learned much from your advice before, but on this particular one I was skeptical, I'll never doubt you again...

Still, in cooler weather we cook so much on the weekends in the oven that I prefer to keep the stones in place, and my husband definitely prefers the resulting thick crust. Here is a crumb shot of the Columbia baked on the hot stone.

mountaindog's picture
mountaindog

Seeing everyone make such beautiful whole grain breads lately inspired me last weekend to finally try Jane's lovely sourdough technique (Jane's results here), with tips by JMonkey and Tomsbread as well - thanks guys!

I converted some of my mixed white/WW starter into a 100% hydration WW starter, followed Jane's techniques and made a rather wet dough of about 80% hydration, kneading in my stand mixer for about 12-15 minutes on speed 2. I did not ferment the dough in the frig as Jane did though, I just left it in my cool room temp kitchen for maybe 3-4 hrs for the first ferment - it rose nicely. Then I divided the dough, rounded, rested for 10 minutes before placing in bannetons for final 80-85F proof near the woodstove (this was the day the big Nor'Easter started so we were getting 5 inches of wet snow, good reason to have a fire going and good weather to stay in and bake bread).

Since I had 2 loaves of rather wet dough, I decided to do a little experiment and bake one in my 5 qt cast iron Lodge dutch oven to hopefully keep it from spreading too much, while I baked the second one right on the hot baking stone after the first was done. I was surprised at some of the differences between the two. The loaf on the left in the photo below was baked on the preheated to 500F stone which was immediately turned down to 400F, and the one on the right was baked in the dutch oven at 450F entire time (lid removed after 25 min.):

I was surprised at how much darker the crust was on the dutch oven loaf. On the other hand, the dutch oven loaf did not rise much higher, probably because it sort of collapsed after an awkward flop into the oven from the banneton, hence the crumb was slightly more dense than the free-form loaf's crumb. I'll try the dutch oven again but try to be much more gentle in getting it into the oven, maybe using parchment like Susan did in her posts of her beautiful "football bread".

I am really happy with how the free-form loaf came out, the crumb was much hole-y-er than any 100% WW I've done so far, not as hole-y as Jane's, but next time I'll try an even higher hydration with a little more folding and see how that comes out. Seems like the key for me was wet wet dough and very very gentle handling - I didn't shape the boules as tight as I normally do, I kept them much looser.

This was also the best tasting WW sourdough I've made yet, it tasted better than the last desem I made. It had a nice tangy SD taste rather than a bitter wheat taste, probably from the long cool bulk ferment and also long warm final proof. In fact, the reason the second free-form loaf may be so much lighter is because it was slightly overproofed so the crust did not carmelize as much, but it still tasted very good and it lasted all week! We are still enjoying this loaf made last Sunday (5 days ago), it has stayed fresh-tasting and moist just sitting on the cutting board with a piece of foil covering the cut end. It did not get dried out and hard like other lean WW breads I've made before.

The same weekend, I also made a batch of Columbias and Leonard boules. I hadn't made the Columbias in awhile, and this time my batartd-shaping and slashing showed significant improvement over the last few times making this recipe, where the batards used to collapse at the slashes. Thats's thanks to Floyd's batard-shaping and slasher video! Giving the dough the extra folds also helped it get much better height and oven spring than my earlier attempts. These did not last the weekend and got eaten right away.

mountaindog's picture
mountaindog

I've been real busy the past few weeks so have not been online much, but did make time to bake each weekend.

Back in Feb., I was lamenting that my Thom Leonard boules, which I had been making successfully for weeks, were suddenly getting overproofed and collapsing when hitting the hot stone (thread here). I was wondering if it was my switch to 100% organic King Arthur Artisan flour, or if my starter is getting too strong and acidic. I took the advice people here gave me about folding the dough more and paying attention to shaping better. So I did a test to see if the flour played a role or not, but also incorporated the advice given on folding, and I was careful to ferment them at about 70-75F rather then 80-85F as done earlier. To see if my flour switch played a role, I bought some regular King Arthur AP flour and made two batches of the Leonard loaf side by side, one batch with KA organic artisan flour and the other with the KA AP. I folded each batch 4 times, 30 minutes apart during the first bulk fermentation. I also carefully shaped each loaf into a tight boule, rested for 10 min., then placed in the bannetons, and I could not believe how high the loaves rose during the final proof, after only 3 hours:

I was in for even more surprise when I baked them - the oven spring was HUGE. Here are the loaves made with the King Arthur 100% organic artisan flour on the left (oval shape), and to the right are the ones made with the King Arthur AP flour (round shape). No discernable difference in the quality of the rise, oven spring, or crumb structure, they all came out excellent, and all because I paid a lot more attention to proper folding and shaping, and note that these were wet doughs:

I also retarded 2 of the loaves in the frig for about 6 hours before baking right out of the cold frig and into the hot oven, and got equally huge oven spring as for the ones I did not retard.

Here is the crumb shot of yet another batch a week later done by the same folding/shaping method, but using King Arthur organic whole wheat flour for 30% of the flour in the recipe (I have not been able to get that yin/yang symbol again in my bread that JMonkey likes though, ha!):

Conclusion of the experiment: My earlier overproofing problems were not due to the KA organic flour. It performed equally as well as the KA AP flour. The extra folding of the wet dough, and tighter shaping of the boules seemed to make all the difference, plus probably cooling the fermenting temps down to 70-75F I think helped. Thanks especially to gt and Bill Wraith for pointing out my lack of folding as being the main culprit. I've been having consistently great outcome with this recipe ever since.

I also made some sourdough spelt blueberry flaxseed muffins. These rose nice and high, but needed a little more sweetening and perhaps a bit more salt than my usual recipe calls for, probably because of the extra liquid and flour brought in by the sourdogh levain, otherwise they were quite nice. Somehwhat dense due to 100% spelt flour, including in the levain. The regular recipe for my muffins is here, but I modified it by expanding my regular batter white SD starter with 1 c. spelt flour and 1 c water (similar to how the King Arthur baking book makes a levain for sourdough waffles), which replaces the same amount of flour and liquid (oil) in the original recipe. Then followed the orginal recipe using baking soda rather then powder to get even more rise. Next time I will add a bit more oil, brown sugar, and salt:

mountaindog's picture
mountaindog

I posted this somewhere here a long time back, but thought I'd post again to make it easier to find. I'll try to remember to get some photos next time I make them before they get all eaten! I may try to make these into a sourdough recipe like JMonkey did here in order to use up excess starter...I'll report on that when I do, but for now, these just use baking powder.

This is a recipe I developed about 2 years ago that people seem to love. I make it with whole organic spelt flour as I like the nutty taste of spelt - an ancient form of wheat that has very little gluten, so it's not as good for rustic breads but great in quick breads. You can also use whole wheat flour equally well but may need to adjust amounts depending on humidity. I added the whole brown flaxseeds for roughage, texture, and hopefully some health benefits, although the most benefit is derived from raw ground flax.

What I like about this recipe is it does not contain dairy - which I am allergic to (although it does have eggs so it's not vegan). It is also a little less sweet by using dark brown sugar rather than white, and is not too spicy as I omit nutmeg or clove, opting for the combo of cinnamon and ginger instead. I also make this same basic recipe with bananas or frozen blueberries or chopped apple rather than pumpkin and all come out equally great. If you like a sweeter muffin, add more brown sugar. Obviously, this can be made in a loaf pan as well as in muffin tins, but adjust baking time and temp. accordingly:

Spelt Flaxseed Muffins


Ingredients (makes 12 large muffins or 24 small muffins): 

Wet:

4 Large Eggs

1 c. Vegetable Oil (Sunflower, Safflower, or Canola)

1 c. Dark Brown Sugar (maple syrup also tastes great as a sub but need a little more)

2 tsp. Vanilla

1 c. Whole Flax Seeds 

Fruit of choice:           

For Blueberry Muffins: 2 c. frozen or fresh blueberries           

For Pumpkin Muffins: 2 c. canned pureed 100% pumpkin           

For Banana Muffins: 3-5 overripe bananas, depending on size (I usually freeze them once they get too ripe so I always have some on hand)           

For Apple Muffins: 4 apples, cored, peeled, and chopped into small pieces 

Dry:

3 c. Whole Spelt Flour (or substitute mixture of 2.5 c. whole wheat and unbleached white flours, if no spelt available. Wheat flours are drier than spelt, so use less or mixture will be too stiff, resulting in dense, heavy, “hockey puck” muffins).

1.5 tbsp. Baking Powder

1 tsp. Salt

2 tsp. Ground Cinnamon

1 tsp. Ground Ginger 

Directions:

1) In a large bowl, beat the eggs, then mix in the remaining wet ingredients, then mix in your fruit of choice and the flaxseeds.

2) In a separate bowl, mix together all of the dry ingredients.

3) Pour the dry ingredients into the wet, and stir. If batter comes out too dry, depending on humidity levels, flour type, or fruit size, then add about 1/8 cup of water or fruit juice. Finished batter should be stiff enough to spoon into muffin tins without it dripping all over, but not so stiff that the batter forms peaks.

4) Grease 12 large muffin cups (or 24 small muffin cups) with canola oil-type cooking spray.

5) Divide the batter up into the cups with a ladle or large spoon and rubber spatula.

6) Bake at 350 degrees F for 40-50 minutes for large muffins, or around 30 minutes for small muffins. Tap on top for doneness -  they should be firm and crusty, not too soft or mushy.

7) When done, flip muffins out of pans onto cooling rack and let cool.

8) Use within a day or two, or refrigerate in plastic bags for up to 10 days or so. Freeze the rest for up to 6 months. Just reheat in a toaster oven and enjoy!

mountaindog's picture
mountaindog

After posting a forum question here on desem a few weeks back, I got some helpful hints from gt, JMonkey, pumpkinpapa, northwestsourdough, and maki (thanks all). I studied the recipes in The Laurel's Kitchen Bread Book and The Bread Builders, and improvised between them and what JMonkey posted here. I converted an existing vigorous batter starter to a stiff whole wheat one to make the desem starter, then fed it for the past 2 weeks more or less according to Laurel's method, burying it in fresh whole wheat flour, storing it in my cool 59F basement in between 1:1:2 daily feedings. After 2 weeks, the desem starter seemed nice and spongy, so I decided to give making a desem loaf a try this weekend.

Here is my little ball of desem just brought up from the basement ready to be expanded. It no longer needs to be buried in flour at this point, so as per Laurel, I keep it wrapped in 2 layers of clean linen inside an airtight container.

The inside of the ripe desem looks nice and spongy...

For this recipe, I used Allan Scott's weight ratios in The Bread Builders, just dividing his recipe by 6 for two smallish loaves rather than 12. I took about 230 g (8 oz) of my ripe desem, tripled it by adding 150 g water and 300 g flour, to give me 680 g (1.5 lbs) of expanded desem starter. I took 230 g (8 oz) of that and wrapped it up for storage as the starter, while the remaining 460 g (1 lb) was left at room temp. to ripen for 14 hours for making the final dough.

The just-fed desem starter ready to go back into the cellar:

Here is the final dough recipe I used (makes two smallish loaves):

453 g ( 16 oz) ripe desem starter

726 g (26 oz) organic whole wheat flour

631 g (22 oz) cool water

14.2 g (0.5 oz) sea salt

Dissolve the ripe desem starter (refreshed or expanded 14-16 hours before) into the water and mix well. In large mixing bowl, combine salt and flour, then add water/starter mix and knead with dough hook on stand mixer until blended. Continue to knead at speed 2 for 12 minutes. Dough will be softer than starter dough, but smooth and slightly tacky/sticky at the end of kneading. Place dough in covered bowl or container and let rise for 4 hours at 65-70F. Dough should have risen slightly, turn it out onto counter after 4 hours and divide in half, give each half a stretch and fold, and form into two tight boules. Place each boule in a floured banneton and cover with plastic to proof for 2.5 hours at 80-90F.

(Here is where I had a slight dilemma - I had to unexpectedly leave for the rest of the afternoon/evening just as I shaped my loaves to proof, so I put them in the frig overnight, took them out at 5:30AM the next morning, and let them warm up for a few hours until they rose enough and looked ready to bake - I did not want to over-ferment them since the recipe's final proofing time is rather short).

I preheated my oven to 500F and placed a lightly oiled 5 qt. Lodge cast-iron dutch oven inside to preheat as well. When the oven was ready, I flipped the firm dough out of the banneton and into the hot dutch oven, slashed the top, and covered it with the lid - no misting/steaming necessary. I baked it at 500F for 20 min. covered (it smelled great while baking...), then turned it down to 450F and baked it for another 20 minutes uncovered, after which it was nicely browned and the internal temp. measured 204F. So far things look pretty good:

I could hardly wait to cut into it to see if I had a brick or something worthwhile. It felt lighter than I expected when I placed it on the cooling rack. After 1.5 hours, I sliced in, and was very pleased with the result. Although I didn't get big holes, the crumb was not at all dense or heavy, instead it was very light. The crust was exceptional - very crispy on the outside, while the crumb was light, moist, and slightly chewy, with a nice flavor and no whole wheat bitterness.

A few more slices...it was delicious...

...crumb shot...

I am hooked - this bread was great, despite having my process interrupted and having to retard it overnight. I look forward to making it again, and hope that it will be even better as the desem starter matures over time. Maybe I'll even get bigger holes someday, but if not, this is still a delicious, light bread for a lean 100% whole wheat one. I am especially pleased with the results the Lodge dutch oven gave - the crispy crust and the high domed shape of the loaf - and no metallic taste, probably due to proper seasoning. I picked it up thinking I'd try a no-knead bread at some point, but have not got around to it yet - nice to know it is useful in this way as sort of a la cloche as well.

This is the flour I used for the desem - maybe someday I'll grind my own wheat berries to make fresh whole wheat flour like Allan Scott and Laurel Robertson do, but for now, I am pretty happy with King Arthur.

Pages

Subscribe to RSS - mountaindog's blog