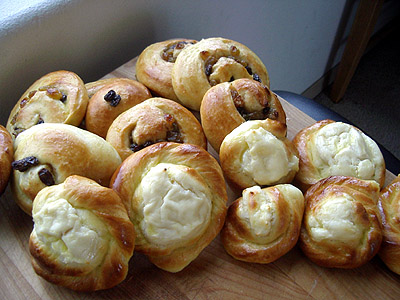
Authentic Pain Aux Raisins are one of my favorite treats. Rich and sweet without being cloyingly so like your typical donut or danish, they make the perfect accompaniment to a good cup of joe.
Reading The Village Baker I came across a recipe for them and was surprised at how simple they are to make. So last weekend I tried making them and have been blissed out eating them all week.
The one type of danish that I have a weakness for is a cream cheese danish. Wouldn't you know it, the next recipe in the book is for a cheese danish. It even uses the same base recipe. I couldn't resist.
Without further ado, the recipes.
I lied: a little further ado.
If you don't have powdered milk in the house, don't sweat it: just replace 1/2 cup of the water with milk.
Note that this Pain Au Lait is essentially a Poor Man's Brioche. If you want you snails to be richer you could substitute a higher class (more butter) Brioche recipe. I find these to be plenty rich for my taste.
Pain Au Lait
1 package (2 1/2 teaspoon) active dry yeast or 2 teaspoons instant yeast
3/4 cup water
3 1/2 cup all-purpose unbleached flour
1 1/2 teaspoons salt
2 Tablespoons powdered milk
4 tablespoons sugar
3 eggs
6 tablespoons butter, softened
If using active dry yeast, proof it in 1/2 cup of warm water for 10 minutes. If you are using instant yeast, as I did, it can just be mixed in with the dry ingredients in the next step.
In a large bowl combine the flour, salt, powdered milk, and sugar. Add the yeast, water, and eggs and mix until ingredients are combined. Add the softened butter and mix or knead until the ingredients are thoroughly combined (Ortiz doesn't describe an extensive kneading step in this recipe, so I guess it is unnecessary). You should have a fairly sticky, satiny dough.
Place the dough in a greased bowl, cover with plastic wrap, and allow the dough to rise until doubled in size (approximately 1 to 1 1/2 hours). Punch the dough down, return it to the bowl and cover it again, and place it in the refrigerator overnight.
In the morning, divide the dough in half and, while still cold, use each half to prepare one batch (8) of each type of snails (or two batches of one of them, if the other doesn't interest you).
Before beginning, you'll need to make a simple egg glaze that you will use in both recipes:
Egg Glaze
1 egg
1 tablespoon milk
Whisk to combine.
Cream Cheese Snails
(makes 8 snails)
Filling:
3/4 cup cream cheese
2 tablespoons sugar
1/2 teaspoon vanilla extract
1 tablespoon egg glaze
Roll the dough out into a large rectangle, approximately 8 by 12 inches. Slice the rectangle into 8 long strips.
Stretch each strip as long and thin as you can (Ortiz says out to 24 inches. I only got mine about 12 to 15 inches long but they were still fine). Twist each strip and then curl each up to make a snail shape.
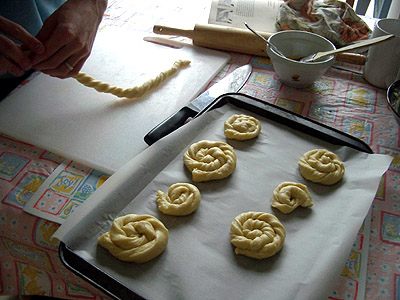
Place the snails on a parchment-lined or well greased baking sheet and brush them gently with the egg glaze.
Use your fingers to create a well in the center of the snail and then place one tablespoon of the cheese mixture on top. Ortiz also recommends adding a tablespoon of jam, but I find the cheese alone the be plenty sweet.
Let the snails rise for 1 to 1 1/4 hours until they are puffy. Preheat the oven to 385 degrees and bake the snails for between 15 to 17 minutes, until they are golden brown.
Immediately after removing from the oven, paint then with a light sugar glaze:
1/4 cup water
1/4 cup sugar
1/8 teaspoon vanilla extract
If you like them to be extremely sweet, you can dribble them with a fondant glaze (1 to 2 teaspoons of hot water combined with 2/3 cup of powdered sugar) after they have cooled. I did not.
Pain Aux Raisins
(makes 8 snails)
Filling:
1/4 cup sugar
1/2 teaspoon cinnamon
1/3 cup raisins
Roll the dough out into a large rectangle, approximately 8 by 10 inches. Coat the rectangle with the egg glaze and then spread the cinnamon, raisin, and sugar mixture over it.
Roll the the dough up into a large log and then slice it into 8 pieces. Place each of the pieces onto a parchment-lined or well greased baking sheet, press down on them with the palm of your hand to flatten them, and then paint them gently with the egg glaze.
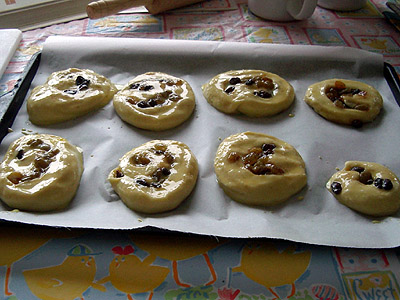
Let the snails rise for 45 minutes to 1 hour until they are puffy. Preheat the oven to 385 degrees and bake the snails for between 15 to 17 minutes, until they are golden brown.
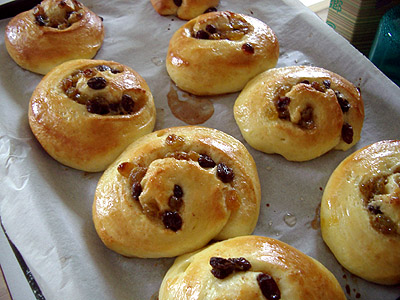
Immediately after removing from the oven, paint then with the same sugar glaze you painted the cream cheese snails with above. Once again, If you like them on the sweet side dribble them with a fondant glaze (1 to 2 teaspoons of hot water combined with 2/3 cup of powdered sugar) after they have cooled. I did not think this was necessary.
Comments
Question about the water?
I just made up the dough, and noticed in the listed ingredients it's
3/4 cup water, but in the instructions, you say 1/2 cup of water. I'm
keeping fingers crossed that it's 3/4 cup, because that's what I used
with the instant yeast.
Thanks for a great site! There are so many knowledgeable people
here, and I love looking at all the wonderful pictures.
Thanks for your help!
Mine didn't not turn out as well, but I think I've found
out what my problem is. Flour! Most of my baking is
cakes, cookies, sweets, and I've been using White
Lily for a couple of years with great results. It wasn't
until I started branching out that I experienced flops. I
have had problems with pizza dough, it won't brown and is
tough. The cream cheese snails dough was so soft, I couldn't
twist it. I did add extra flour, but I wasn't pleased with the outcome.
I've bought some different flours to experiment with, and will try again.
Thanks for a great, informative board. I enjoy all the photos, and lessons
are very helpful!
I made these yummy snails this morning - a batch of cream cheese and a batch of cherry (my husband's favorite). I need a little pratice but the results were delicious! Thanks Floyd! I'm learning so much from this site and trying things I never thought I could manage. Tomorrow---the blueberry cream cheese braid which husband and I will take to our respective work places on Monday. I have the BBA Sourdough barm warming now and will bake later today. I'll let you know how it turned out...
Here are the snail pictures: 1 and 2 are the cherry snails after baking, 3 is the cherry rising, 4 are the cream cheese done, 5 are the basic snails after forming and 6 is the cream cheese rising.
[URL=http://i169.photobucket.com/albums/u208/trishinomaha/cherrysnailsdone.jpg]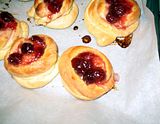 [/URL]
[URL=http://i169.photobucket.com/albums/u208/trishinomaha/cherrysnails2.jpg] [/URL]
[URL=http://i169.photobucket.com/albums/u208/trishinomaha/cherrysnailsrising.jpg]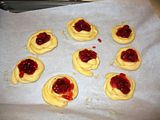 [/URL]
[URL=http://i169.photobucket.com/albums/u208/trishinomaha/Creamcheesesnailsdone.jpg] [/URL]
[URL=http://i169.photobucket.com/albums/u208/trishinomaha/justformedsnails.jpg]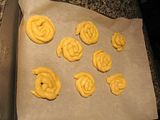 [/URL]
[URL=http://i169.photobucket.com/albums/u208/trishinomaha/snailsreadytorise.jpg]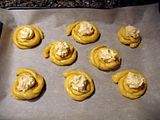 [/URL]
I'm working on the sponge for the blueberry cream cheese braid now....
Trish
I cheated and just used cherry preserves from the grocery store - pretty easy. The cherries in the preserves are sweet I'm sure but homemade sour cherry preserve in these rolls would be to die for!
Trish
I just got around to making these yummy Pain Aux Raisins. I mixed them in my bread machine, tho' and then refrigerated over nite. Made them in the morning rather late . They are magnificent as others have said. I can't imagine the dough being too wet to work with; mine was good. I don't think the kneading in the machine hurt them. Wishing I had a camera to show them to you all. Ruth Redburn
Hi Floyd, I tried your recipe and it's fantastic. You can see the result on my italian blog ( http://croce-delizia.blogspot.com/ ).
Many thanks!
Bonsoir Floyd,
I took half a day off and tried this recipe. The only change I made was switching the sugar with maple syrup.
Here is phase 2... before glazing...
and the final result...
Thanks again Floyd!
Phase 1...
Et voila!
The cream cheese snails sound like they would be amazing with a sour balsamic cherry sauce added on the top or after baking. I will have to save this recipe and plot.... I would add balsamic vinegar to everything if I could!
Thank you for the recipes! Great results here. Remember to oil your bowl for risings even if the notes don't mention it. Yes, the dough was a bit wet, but I just added a little flour and it turned out fine. Also, I made this during a day rather than overnight -- just substituted a 90 minute rise and then an hour in the refrigerator, for the overnight sojourn in the chiller.
Can't get my pics to show up in this post but they are BEAUTIFUL! -- see http://www.facebook.com/photo.php?pid=726217&id=1086300264#/photo.php?pid=726218&id=1086300264
I meant, they are beautiful because the recipes are great!!! :)
I just made these this weekend and my fiance loved them! So I made a second batch and took them to my bakery on late Monday night/morning. The head baker ate two of them and just loved the dough!
Next time I am thinking about doing cream cheese and strawberries, since the pictures above made me really crave something a bit more heavy than raisins.
Its just on noon, and I've been up since 5:30 am and am hungry and what do I find, but gorgeous pictures of yummy (bad for me as a diabetic) food!
They look soooooo good! Will definitely have to try some, and see if I can fob them off on my husband (the rat with perfect health) I am sure he will take them in a flash, as he just called to rave about the bread I baked for him yesterday.
I made these today, with a few changes. I used half the shortening, used Splenda instead of sugar (in dough and cream cheese), but otherwise they were the same as the recipe above. I used the white of the fourth egg as a wash on the dough, and used the yolk in the cream cheese filling. Even with my changes, the finished snail were light and fluffy and sweet, and the filling was absolutely wonderful. My husband and I don't care for the sugar coated kind you get from the grocery store, so these ended up being a real special treat. I made 13 rolls and figure they were only 200 calories each.
...but I did this morning, and they are wonderful! I made them with no substitutions, and they turned out looking just the way they do in the photos, and tasted so good. These are really very easy to make, too. I can see trying out a few substitutions for fun and maybe just a little variety. Thanks for posting the recipe!
This is my 3rd attempt at making this. I loved how simple the recipe is and so delicious. Learn a lot from reading the forum and all your comments. Will definitely be making this again and again. :) Thank you.
Just pulled these out of the oven and they taste great! Looking for some advice, though. I had the worst time with the dough sticking to my floured surface when I went to roll them. It almost destroyed the whole roll. I'm sure it was a user error but I'm not sure what I could have/should have done differently? It was still very cold and the surface was lightly floured. Also, when I cut them and placed them on the parchment, they became extremely loose and almost turned into a pile of moosh while transferring. I'm wondering if I should place the roll in the freezer for 10-15 minutes before cutting and placing? Thanks!