
Gravity-Defying Country Boule ~ Eureka! Eureka! Eureka!

Just when I'm about to give up. God gave me this method to use for baking lean breads without an oven. This is my last attempt for "European style hearth breads" though pretty good, look-wise and taste-wise it still wasn't the same. It had a burnt "muddy" taste with slightly underdone crumb that is tight despite a very wet dough but I'm pretty contented with it. Although I've said that I will try various flavor combos, honestly I haven't made a lean bread again because of fear of the same results. I don't how I've thought of this method, I just remember I woke up from sleep and I thought of it. I said I will try it as soon as I can but it took almost half a year before I did it because I'm fed up with the results I get while pursuing this style of bread.
A lot has influenced me to come up with this method. My labor intensive double cook method, a failed loaf, the tandoor and this oven are my biggest inspirations. I study the bread baking process of lean hearth breads closely too. In a nutshell, the bottom is cooked by conduction and the top is cooked by convection in that's why the loaf expands, scores open and the crust very crispy. My only problem now in my clay pot is the top crust needs to be cooked by convection and radiation, NOT by conduction which is how I made it in my "best/last" attempt. When those are done, my theory is I will have a bread that's just like a good loaf baked in a wood fired oven, NO soft pale crust with charred hard areas and squished score marks.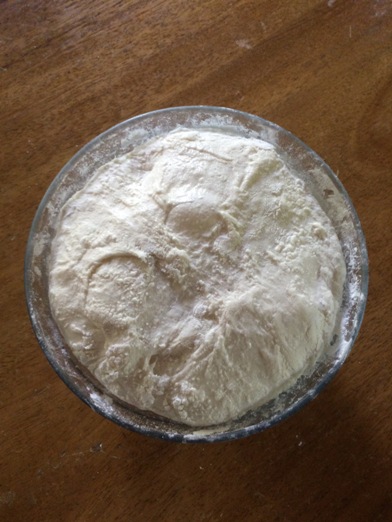
First got the idea from a failed rye loaf. It was so sticky that it stuck to the llanera even if it was oiled liberally. Out of my frustration of I just tossed it forcefully to the clay pot and did not care for it anymore. Little did I know that it ended up upside-down and the top of the loaf faced the heat source directly and got a pretty even brown from the hot air and radiant heat. I was so surprised by the gorgeous accident! It has only one pitfall, it can't be unmolded so the pretty bread has to be "destroyed" to be eaten. I said to myself, if I can only replicate this without a mold, it will be BOOM! Then I remember the tandoor, where the bread is stuck to the sides of and face the hot coals directly, maybe I can apply that but I only saw flat breads baked in it successfully. That was shattered when I saw Taiwanese pepper cakes, filled buns are baked in a tandoor like oven with no issues. I had another bit of courage but my clay pot is not built like a tandoor, impossible to stick bread to the sides. Finally, when I saw that oven from Central Asia, everything just came together to work like magic!
The dough is just a straight high hydration (maybe 70%) dough with a bit of instant yeast and salt. I used pure AP flour this time to lessen chewiness because my loaves with all or part bread flour are a bit too chewy for my liking. No autolyse or preferments, I'm concerned more with the technique than the flavor so if it goes wrong, only a little effort and ingredients are wasted.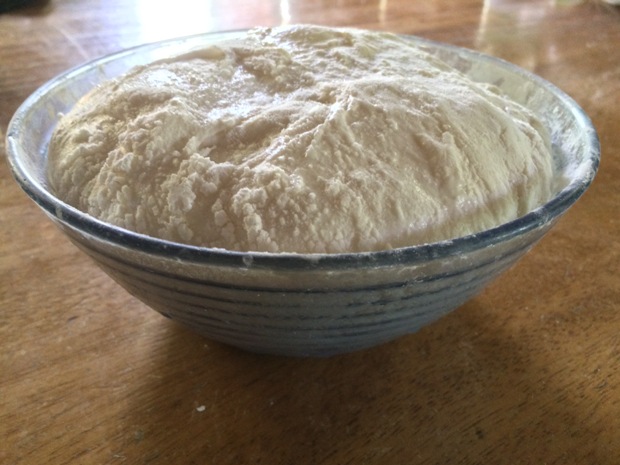
I gave it 3 sets of folds in 30 minute intervals in its 2 hour bulk rest at room temperature. I have a new technique too, I just fold it in the bowl like what Trevor does in his Champlain sourdough. I pre-shaped it into a boule and let it rest for 20 minutes. I then shaped it into a tight boule and put it into a bowl dusted with rice flour seam-side up for a cold overnight proof. This is my first time to do a retarded proof, I normally retard during bulk then shape and proof the next morning before baking. I might stick to this one from now on for convenience and less stress on baking day.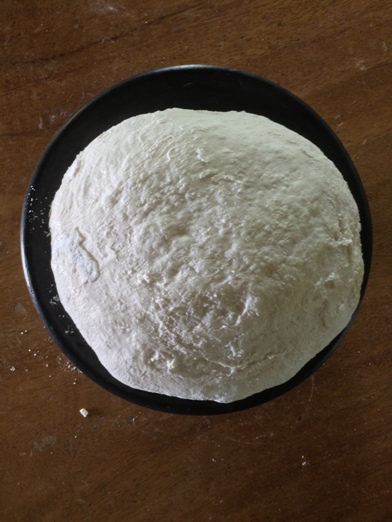
I pre-heated my pot over a wood fire for 20 minutes until blazing hot. In to the very hot lid, I inverted the dough wetted first with water to ensure sticking. This is contrary to oven baking where you want no sticking when you slide the dough to the stone from the peel!
Using rice flour is like magic, first time to unmold a fully proofed free form loaf from a bowl without sticking. I then scored it using a razor blade with just a straight cut down the center. With limited practice, I'm not the best person to score this wet dough. I am not even trying to get an ear, I just want the loaf to expand properly.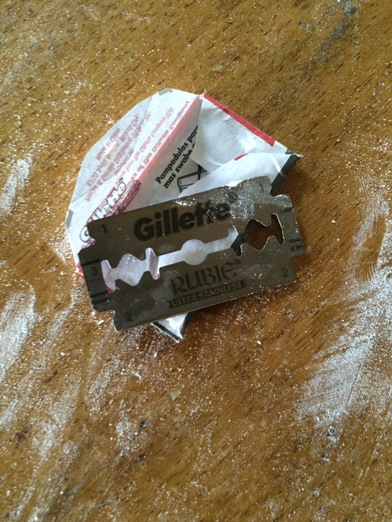
After scoring, I rushed this to the very hot fire so the yeast can have a feeding frenzy and the trapped gases expand well to cause a great spring even if the dough looks like a flat pancake now.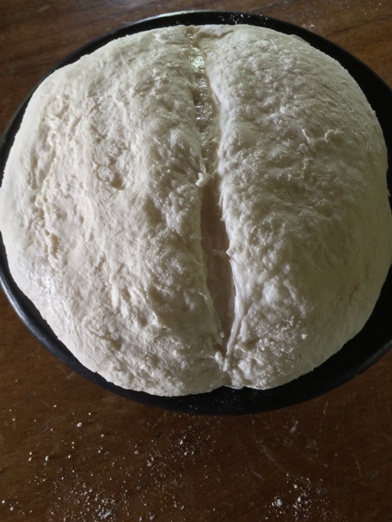
Here is my method. The lid will act now as the bottom of the pot so the bottom of the loaf will cook from conduction. The very hot clay pot "body" will now act as a lid to trap the heat and steam to cook the top of the loaf. It is somewhat physically demanding because of the temperatures of the things I need to hold, a great deal of care must be made. No need to steam the pot too, the steam generated by the dough is enough. It is like baking a full batch of bread in a WFO, in my clay pot a single loaf is a full batch!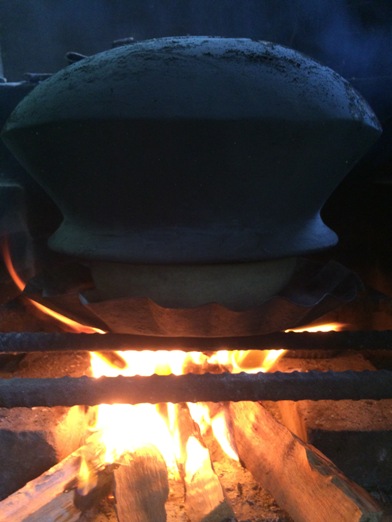
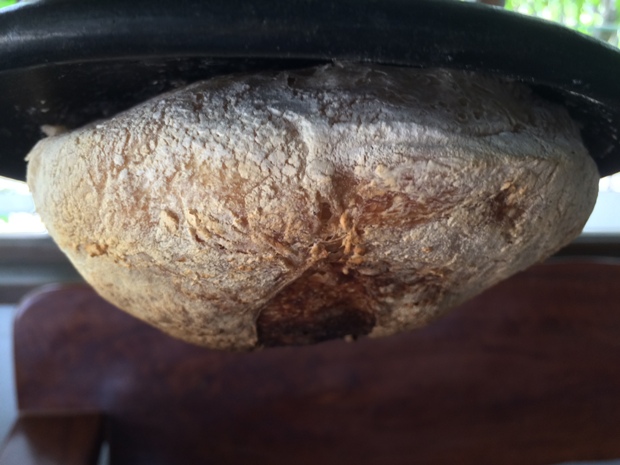
I put the lid on another pot that is meant for direct fire cooking so it won't soot like the bottom of the pot. After 30 minutes, the final spring has stopped and the structure is set, I flipped the whole pot with the bread still sticking to the lid to brown the top of the loaf with the very hot air and intense radiant heat from the bottom of the pot. I planned to go straight to this process at the start of the bake but I thought that the bread is still heavy and dense and will be too fragile to support itself while hanging down and may collapse, fall or tear ending in a huge mess. I haven't taken a photo of the loaf at this point because this scene was too intense, there are so many things going on.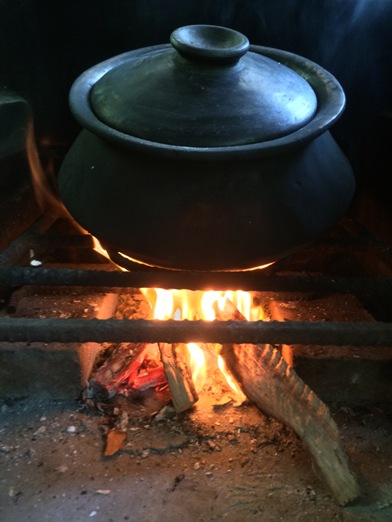
I angle the pot too so the sides will also face direct heat because it is not perfectly flat. The rounded bottom of the Palayok is a great help with this because it's easy to maneuver on top of the wood stove. After another 30 minutes, it was done!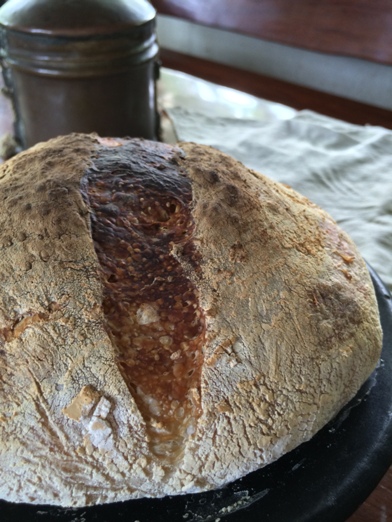
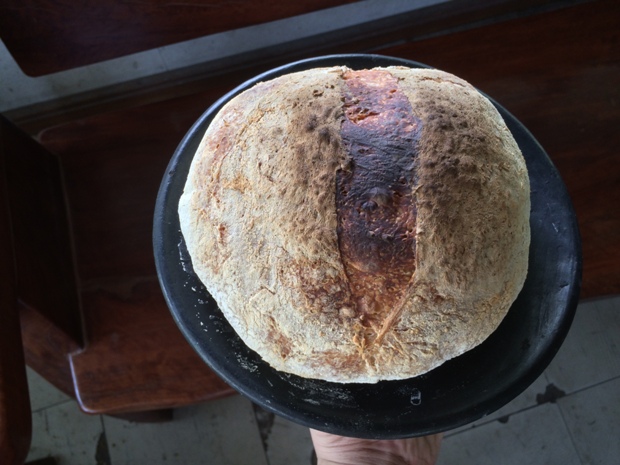
This is what I say gravity defying!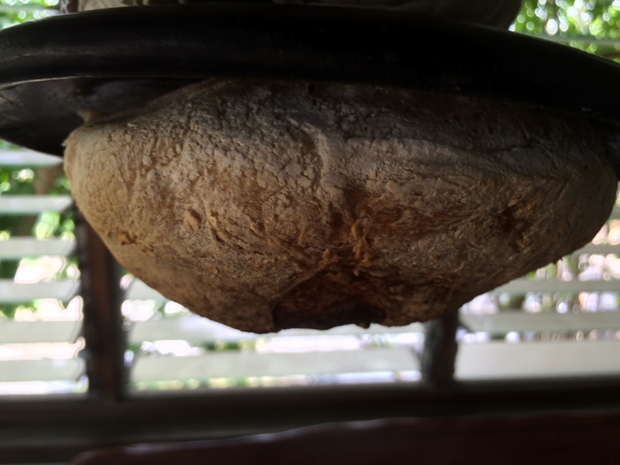
Removing it from the lid is easy because the bottom crust is already dry and there are no raised edges on the lid unlike a tin mold. It was just stuck to a few places particularly on the center. I just used a spatula and it came out smoothly leaving just a few crumbs.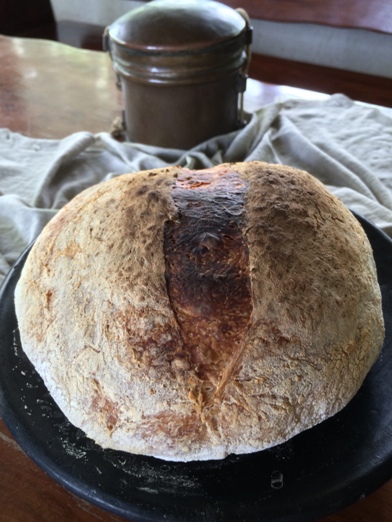
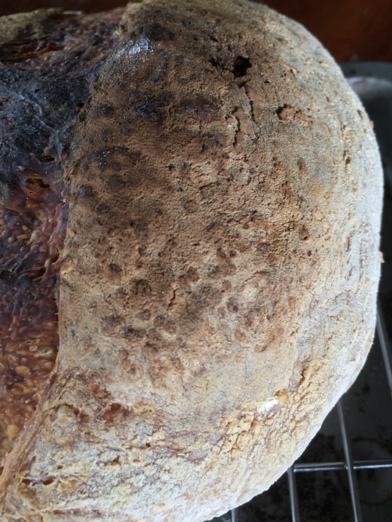
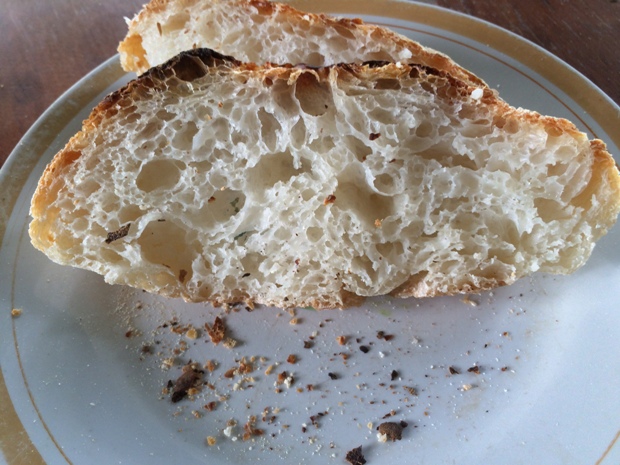
Crust:
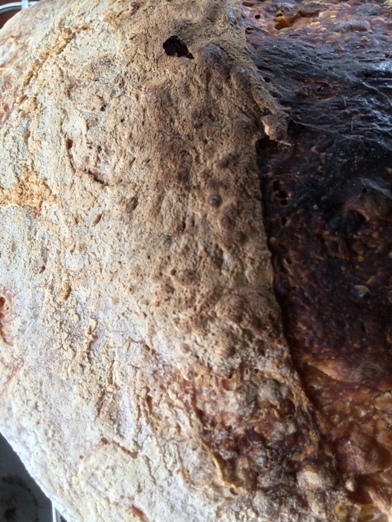
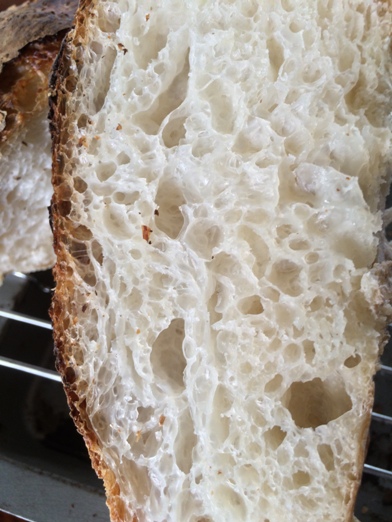
Close-up from different parts of the crust. If you look closely, the score is the one with blisters! It looks more like the crust of this type of breads rather looking closer to the crumb. I guess this is because it is the closest to the heat source, I must tilt the pot earlier next time. It is really a bold bake disguised by the tremendous amount of flour that I did not dust in fear of damaging the structure of the loaf I worked so hard to achieve. It is very crispy and a mess to cut but softened a bit during the night and softened more the next day.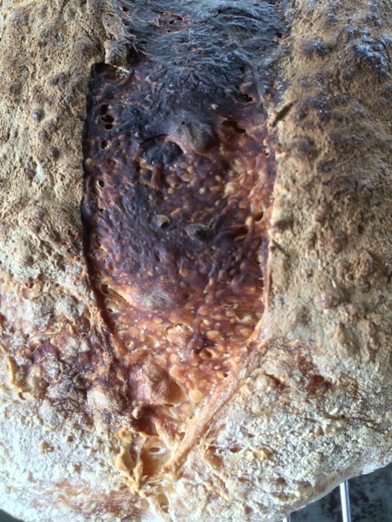
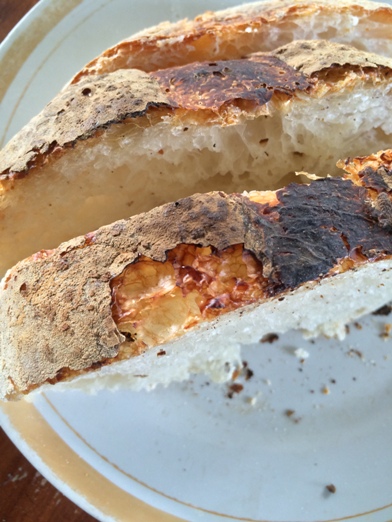
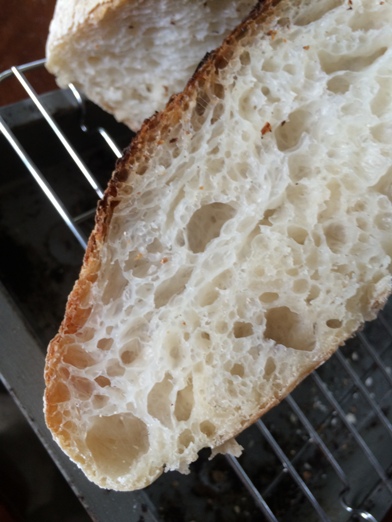
Crumb:
It's pretty open, the most open I've ever achieved but somewhat even. I want a more random distribution of larger holes but when it's this pretty, I have nothing to complain. It is soft and not chewy at all due to the AP. It is moist but not underdone which is the biggest stumbling block to the edibility of my loaves of this kind. I think I got the timing right, an hour or more is fine in the clay pot. You can see the bottom crust is underdeveloped because the lid is thick, I might let the bottom cook for 45 minutes next time rather than 30 minutes.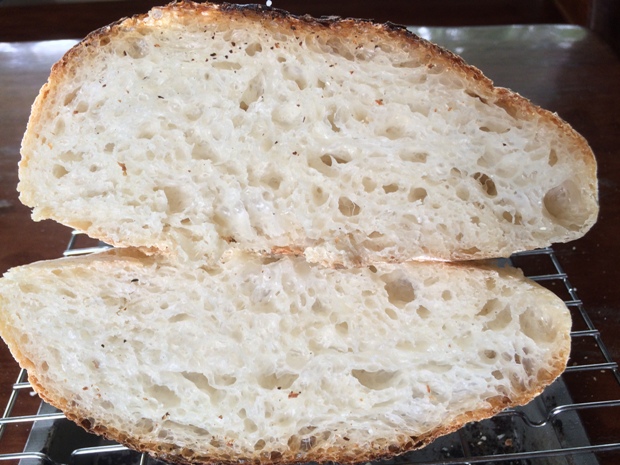
The flavor is nice and full of character because of the cooking process, just like a good bread baked in a WFO. What more if it's sourdough?! For me, the taste is still a bit flat; the tang of SD works well especially in hearth loaves because of its kind of "bland" flavor that is meant to be eaten with anything and everything. The sourness just makes you want to eat more. I once had a sourdough that I really like but the crumb of my loaf is more open and less dense and the crust has a more complex flavor. I just can't imagine if I made this SD! I will work double time to establish a sourdough starter.
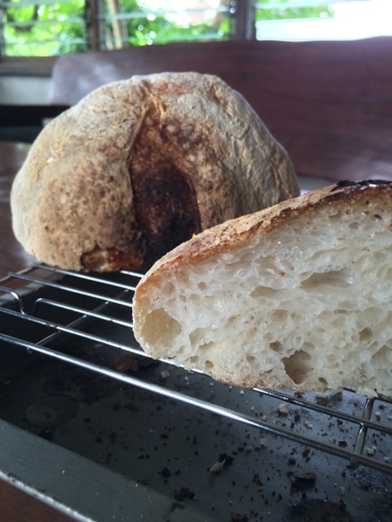
Again I will say this again. I can't believe this loaf came out of my clay pot! It's so beautiful! I know you want to see my clay pot in action and as proof that it can bake great bread, here it is! Ang aking Palayok!
Clay Pot Hearth Bread
So now that my clay pot has a vast repertoire and here is the checklist, here's what I can say:
- "ASIAN STYLE" ENRICHED LOAVES- (✓) CHECK
- "EUROPEAN STYLE" LEAN HEARTH LOAVES- (✓) CHECK
- LAMINATED BREADS- (✓) CHECK
- QUICK BREADS- (✓) CHECK
SOURDOUGH, YEAST WATER, WHOLE GRAINS, WAIT FOR ME Y'ALL! With this technique under my belt, I will conquer you in no time! I am accepting FOR NOW that I cannot make pizza or baguette but we never know what a creative mind can do! Ecstatic on how this one turned out! Thank God for giving me this solution!
Thank you very much! Job