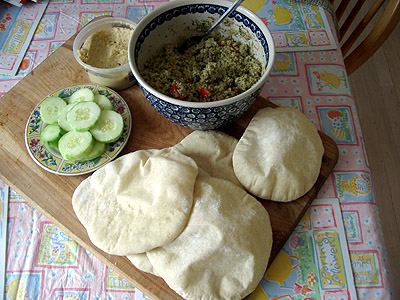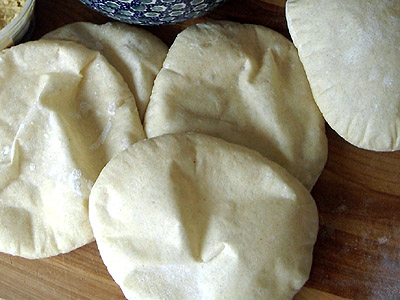
Pita bread is a great bread for beginning bakers or for making with kids. The entire process of making them only takes about two hours too, so it is also a great one for people on a tight schedule.
Flat Breads
Flat breads can be made in dozens of different ways. They can be made from grains other than wheat, such as corn in corn tortillas. They can be made with no leavening, such as matzo or flour tortillas, with chemical leavening (baking soda or baking powder) such as pancakes or crepes, or with yeast, such as naan or pita bread. They can also be made from a starter. And they can be baked (pitas), fried (fry bread), grilled (zebra bread), and, I would imagine even steamed (I'm drawing a blank... anyone?). Flat breads of some sort exist in just about every culture on the globe.
Anyone who grew up in a household where flat breads are an essential part of every meal knows will attest that they are a hundred times better when baked fresh than when bought from the store wrapped in plastic and already two or three days old.
I wasn't brought up in such a house, actually, but a year or two ago I started going to a local Lebanese restaurant solely for the fresh pita bread that they baked. After draining my wallet by eating lunch there every day for a week, I realized pita bread must be pretty simple to make at home. So I tried it and was extremely pleased with the results. I still visit the Lebanese restaurant for their pitas every few weeks, but I've cut back and saved myself a ton of money.
About The Ingredients
There are only 6 ingredients in this recipe for pita bread, and you even have quite a bit of flexibility in choosing which of those to include. I'll go through the ingredients one-by-one:
- Flour - I like to use one cup of whole wheat flour and 2 cups of all purpose unbleached flour. It gives the pitas a heartier flavor than using all white flour. You can use any combination of the wheat flours you have around the house, from 100% white flour to 100% whole wheat flour. You could probably even use flour made from other grains, though I'd suggest trying it with wheat flour the first time before getting too crazy.
- Salt - Salt is necessary to retard the yeast (slow it down) and to flavor the bread. Without salt bread is pretty... blah. I used kosher salt for this, but any type of salt you have in the house will work just fine.
- Water - Plain old tap water, assuming your water is drinkable. If not, bottled or distilled water. Something close to room temperature (warmer than 50 degrees fahrenheit, cooler than 100 degrees) works best.
- Sugar - A touch of sugar or honey provides a little more food for the yeast and will make the bread brown faster when it caramelizes. It also can add a touch of sweetness to the dough. You can safely omit it from the recipe and it will turn out fine, or add more if you like it sweeter.
- Yeast- I use instant yeast, which is also know as Rapid Rise or Bread Machine yeast. Instant yeast is a little more potent than active dry yeast and can be mixed directly in with your dry ingredients and will have no problem waking up when the water is added. Active dry yeast works just as well as instant yeast, but requires being activated in a little bit of warm water before being added to the rest of the ingredients. If you are using active dry yeast, read the instructions on the package to figure out how to activate the yeast before adding it to this recipe and reduce the amount of water you add later in the recipe by the amount of water you proof the yeast in (i.e., if you activate the yeast in a half a cup of water only add 3/4 to 1 cup later).
- Oil - Oil or fats soften the bread and keep it fresher longer. Olive oil is the most traditional oil to use in Mediterranean and Middle Eastern cooking, but if you do not have any you can use whatever you have in the house. And, in the worst case, you can even omit it.
Pita BreadMakes 8 pitas
3 cups flour
1 1/2 teaspoons salt
1 Tablespoon sugar or honey
1 packet yeast (or, if from bulk, 2 teaspoons yeast)
1 1/4 to 1 1/2 cups water, roughly at room temperature
2 tablespoons olive oil, vegetable oil, butter, or shortening
If you are using active dry yeast, follow the instructions on the packet to active it (see the note on yeast above). Otherwise, mix the yeast in with the flour, salt, and sugar. Add the olive oil and 1 1/4 cup water and stir together with a wooden spoon. All of the ingredients should form a ball. If some of the flour will not stick to the ball, add more water (I had to add an extra 1/4 cup).
Once all of the ingredients form a ball, place the ball on a work surface, such as a cutting board, and knead the dough for approximately 10 minutes (or until your hands get tired). If you are using an electric mixer, mix it at low speed for 10 minutes.
(The purpose of kneading is to thoroughly combine the ingredients and to break down the flour so that the dough will become stretchy and elastic and rise well in the oven. A simple hand kneading technique is to firmly press down on the dough with the palm of your hand, fold the dough in half toward you like you are closing an envelope, rotate the dough 90 degrees and then repeat these steps, but whatever technique you are comfortable using should work.)
When you are done kneading the dough, place it in a bowl that has been lightly coated with oil. I use canola spray oil, but you can also just pour a teaspoon of oil into the bowl and rub it around with your fingers. Form a ball out of the dough and place it into the bowl, rolling the ball of dough around in the bowl so that it has a light coat of oil on all sides. Cover the bowl with plastic wrap or a damp kitchen towel and set aside to rise until it has doubled in size, approximately 90 minutes.
When it has doubled in size, punch the dough down to release some of the trapped gases and divide it into 8 pieces. Roll each piece into a ball, cover the balls with a damp kitchen towel, and let them rest for 20 minutes. This step allows the dough to relax so that it'll be easier to shape.
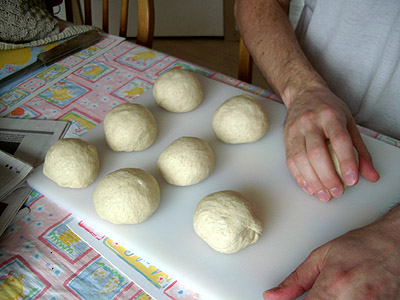
While the dough is resting, preheat the oven to 400 degrees. If you have a baking stone, put it in the oven to preheat as well. If you do not have a baking stone, turn a cookie sheet upside down and place it on the middle rack of the oven while you are preheating the oven. This will be the surface on which you bake your pitas.
After the dough has relaxed for 20 minutes, spread a light coating of flour on a work surface and place one of the balls of dough there. Sprinkle a little bit of flour on top of the dough and use a rolling pin or your hands to stretch and flatten the dough. You should be able to roll it out to between 1/8 and 1/4 inch thick. If the dough does not stretch sufficiently you can cover it with the damp towel and let it rest 5 to 10 minutes before trying again.
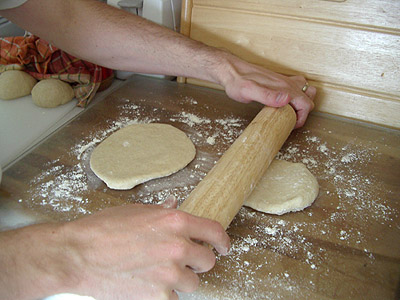
If you have a spray bottle in the kitchen, spray a light mist of water onto your baking surface and close the oven for 30 seconds. Supposedly this step reduces the blistering on the outside of your pitas. I've skipped it many times in the past and still been pleased with my breads, so if you don't have a bottle handy it isn't a big deal.
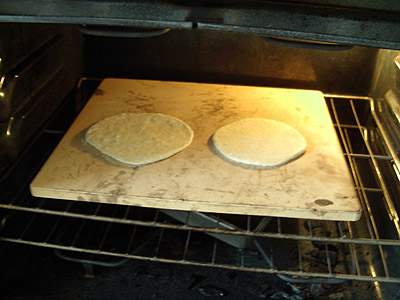
Open the oven and place as many pitas as you can fit on the hot baking surface. They should be baked through and puffy after 3 minutes. If you want your pitas to be crispy and brown you can bake them for an additional 3 to 5 minutes, but it isn't necessary (in the batch pictured here I removed them at 3 minutes).

That's it. They should keep pretty well, but we almost always eat them as soon as they come out of the oven.
If you have any tips on baking pitas or have a recipe you'd like to share, please add a comment below.

