Just when I'm about to give up. God gave me this method to use for baking lean breads without an oven. This is my last attempt for "European style hearth breads" though pretty good, look-wise and taste-wise it still wasn't the same. It had a burnt "muddy" taste with slightly underdone crumb that is tight despite a very wet dough but I'm pretty contented with it. Although I've said that I will try various flavor combos, honestly I haven't made a lean bread again because of fear of the same results. I don't how I've thought of this method, I just remember I woke up from sleep and I thought of it. I said I will try it as soon as I can but it took almost half a year before I did it because I'm fed up with the results I get while pursuing this style of bread.
A lot has influenced me to come up with this method. My labor intensive double cook method, a failed loaf, the tandoor and this oven are my biggest inspirations. I study the bread baking process of lean hearth breads closely too. In a nutshell, the bottom is cooked by conduction and the top is cooked by convection in that's why the loaf expands, scores open and the crust very crispy. My only problem now in my clay pot is the top crust needs to be cooked by convection and radiation, NOT by conduction which is how I made it in my "best/last" attempt. When those are done, my theory is I will have a bread that's just like a good loaf baked in a wood fired oven, NO soft pale crust with charred hard areas and squished score marks.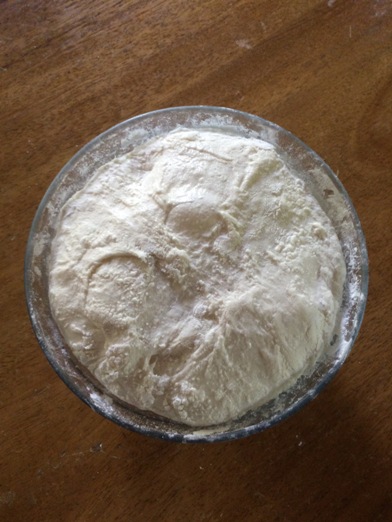
First got the idea from a failed rye loaf. It was so sticky that it stuck to the llanera even if it was oiled liberally. Out of my frustration of I just tossed it forcefully to the clay pot and did not care for it anymore. Little did I know that it ended up upside-down and the top of the loaf faced the heat source directly and got a pretty even brown from the hot air and radiant heat. I was so surprised by the gorgeous accident! It has only one pitfall, it can't be unmolded so the pretty bread has to be "destroyed" to be eaten. I said to myself, if I can only replicate this without a mold, it will be BOOM! Then I remember the tandoor, where the bread is stuck to the sides of and face the hot coals directly, maybe I can apply that but I only saw flat breads baked in it successfully. That was shattered when I saw Taiwanese pepper cakes, filled buns are baked in a tandoor like oven with no issues. I had another bit of courage but my clay pot is not built like a tandoor, impossible to stick bread to the sides. Finally, when I saw that oven from Central Asia, everything just came together to work like magic!
The dough is just a straight high hydration (maybe 70%) dough with a bit of instant yeast and salt. I used pure AP flour this time to lessen chewiness because my loaves with all or part bread flour are a bit too chewy for my liking. No autolyse or preferments, I'm concerned more with the technique than the flavor so if it goes wrong, only a little effort and ingredients are wasted.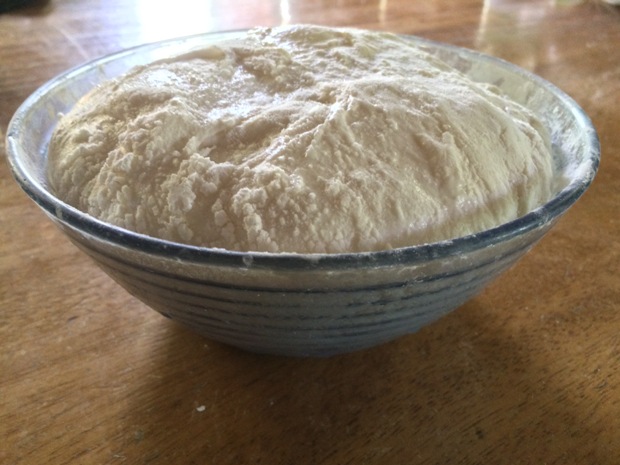
I gave it 3 sets of folds in 30 minute intervals in its 2 hour bulk rest at room temperature. I have a new technique too, I just fold it in the bowl like what Trevor does in his Champlain sourdough. I pre-shaped it into a boule and let it rest for 20 minutes. I then shaped it into a tight boule and put it into a bowl dusted with rice flour seam-side up for a cold overnight proof. This is my first time to do a retarded proof, I normally retard during bulk then shape and proof the next morning before baking. I might stick to this one from now on for convenience and less stress on baking day.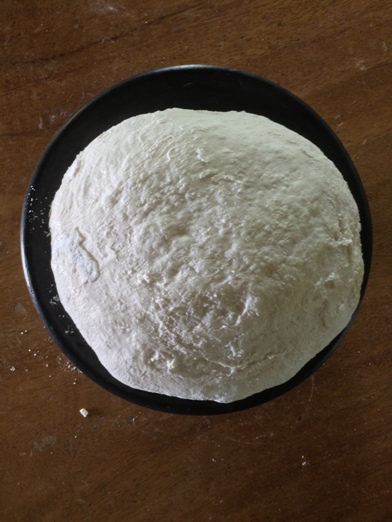
I pre-heated my pot over a wood fire for 20 minutes until blazing hot. In to the very hot lid, I inverted the dough wetted first with water to ensure sticking. This is contrary to oven baking where you want no sticking when you slide the dough to the stone from the peel!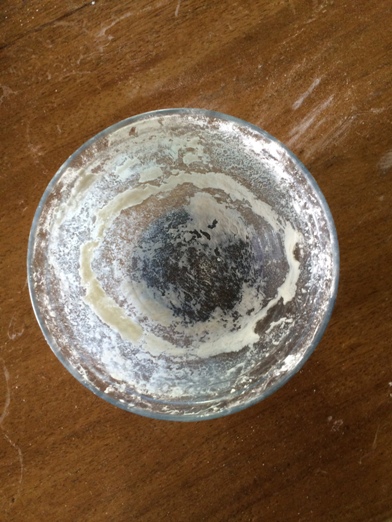
Using rice flour is like magic, first time to unmold a fully proofed free form loaf from a bowl without sticking. I then scored it using a razor blade with just a straight cut down the center. With limited practice, I'm not the best person to score this wet dough. I am not even trying to get an ear, I just want the loaf to expand properly.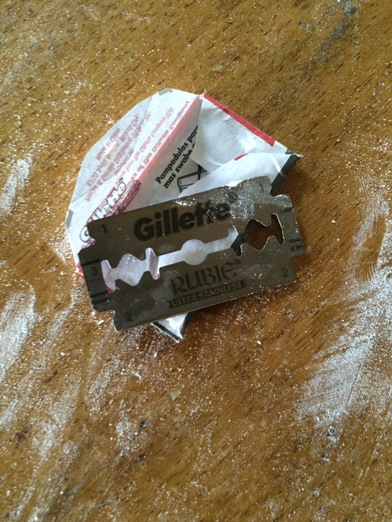
After scoring, I rushed this to the very hot fire so the yeast can have a feeding frenzy and the trapped gases expand well to cause a great spring even if the dough looks like a flat pancake now.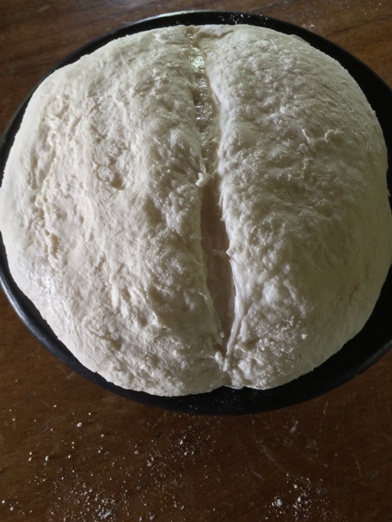
Here is my method. The lid will act now as the bottom of the pot so the bottom of the loaf will cook from conduction. The very hot clay pot "body" will now act as a lid to trap the heat and steam to cook the top of the loaf. It is somewhat physically demanding because of the temperatures of the things I need to hold, a great deal of care must be made. No need to steam the pot too, the steam generated by the dough is enough. It is like baking a full batch of bread in a WFO, in my clay pot a single loaf is a full batch!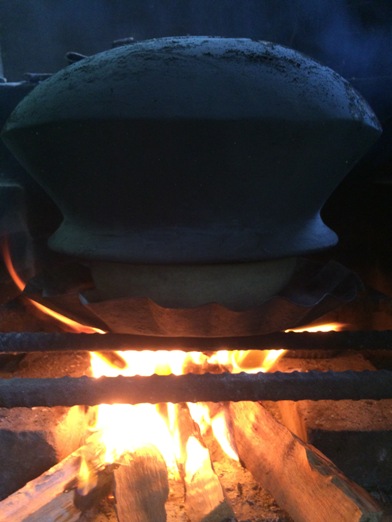
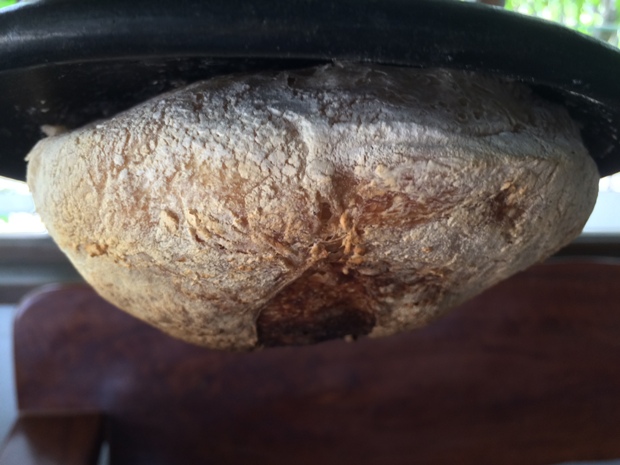
I put the lid on another pot that is meant for direct fire cooking so it won't soot like the bottom of the pot. After 30 minutes, the final spring has stopped and the structure is set, I flipped the whole pot with the bread still sticking to the lid to brown the top of the loaf with the very hot air and intense radiant heat from the bottom of the pot. I planned to go straight to this process at the start of the bake but I thought that the bread is still heavy and dense and will be too fragile to support itself while hanging down and may collapse, fall or tear ending in a huge mess. I haven't taken a photo of the loaf at this point because this scene was too intense, there are so many things going on.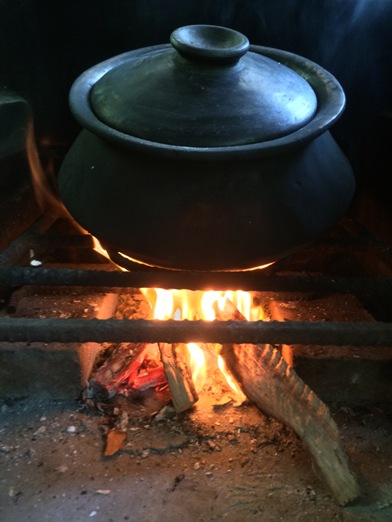
I angle the pot too so the sides will also face direct heat because it is not perfectly flat. The rounded bottom of the Palayok is a great help with this because it's easy to maneuver on top of the wood stove. After another 30 minutes, it was done!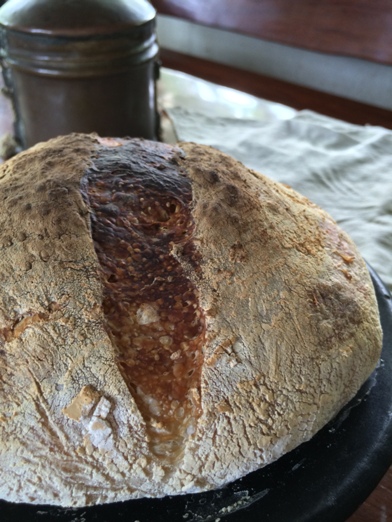
This is what I say gravity defying!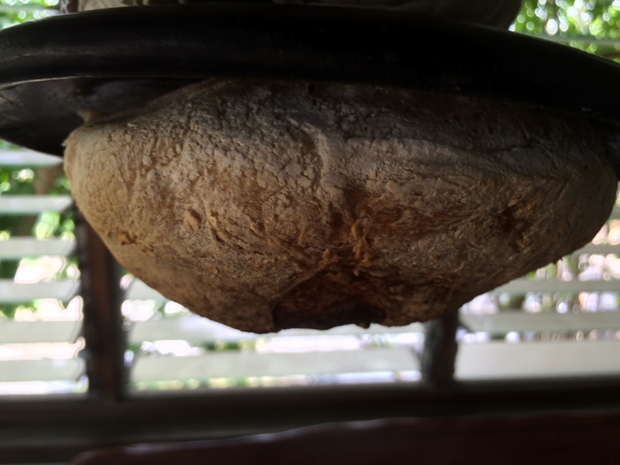
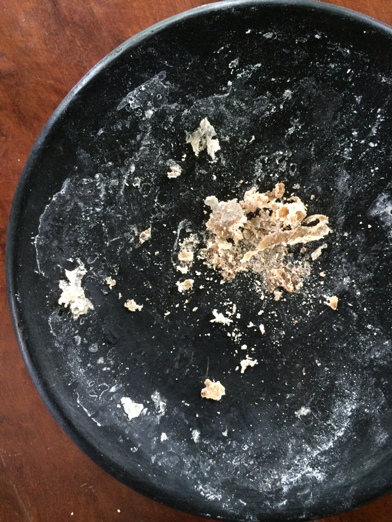
Removing it from the lid is easy because the bottom crust is already dry and there are no raised edges on the lid unlike a tin mold. It was just stuck to a few places particularly on the center. I just used a spatula and it came out smoothly leaving just a few crumbs.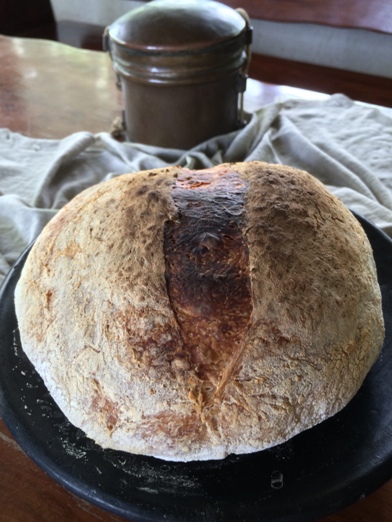
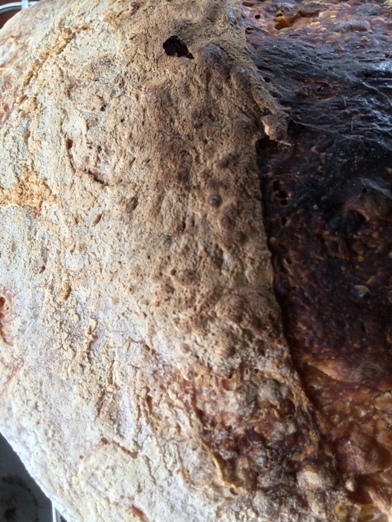
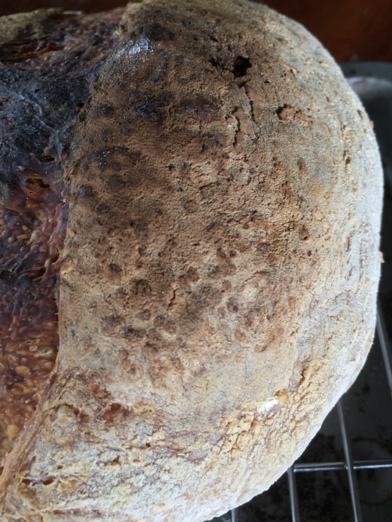
Crust:
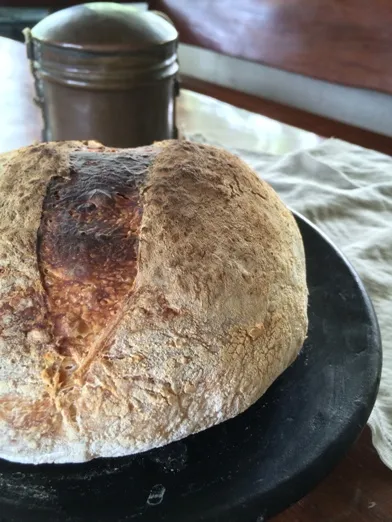
Close-up from different parts of the crust. If you look closely, the score is the one with blisters! It looks more like the crust of this type of breads rather looking closer to the crumb. I guess this is because it is the closest to the heat source, I must tilt the pot earlier next time. It is really a bold bake disguised by the tremendous amount of flour that I did not dust in fear of damaging the structure of the loaf I worked so hard to achieve. It is very crispy and a mess to cut but softened a bit during the night and softened more the next day.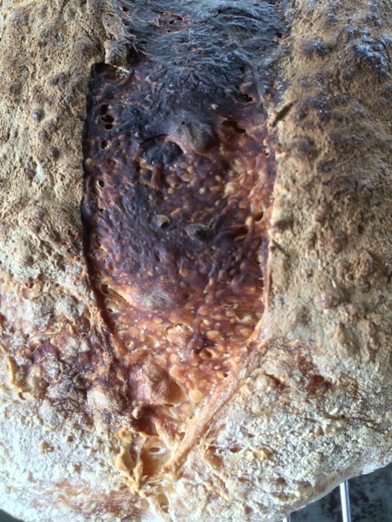
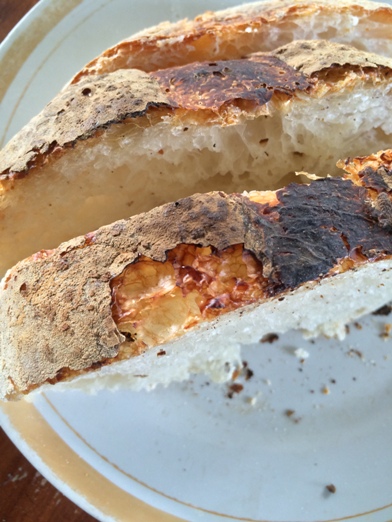
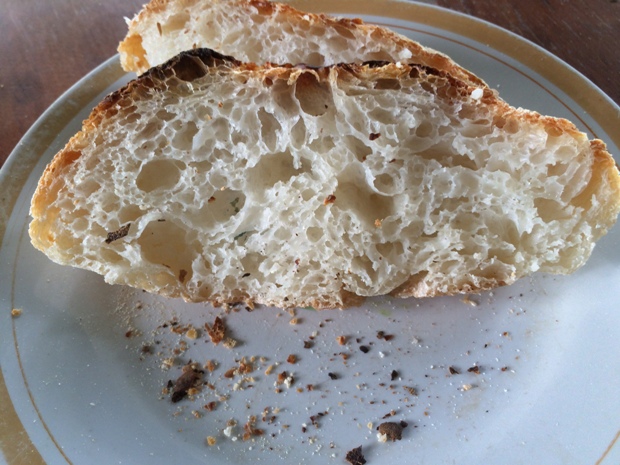
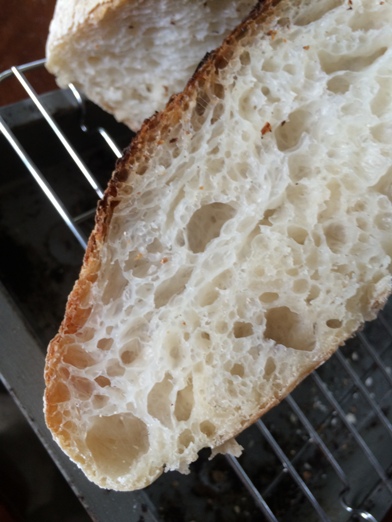
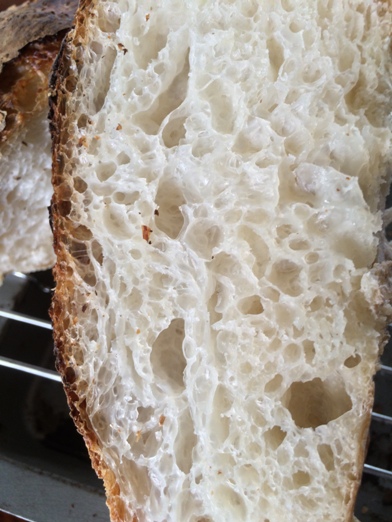
Crumb:
It's pretty open, the most open I've ever achieved but somewhat even. I want a more random distribution of larger holes but when it's this pretty, I have nothing to complain. It is soft and not chewy at all due to the AP. It is moist but not underdone which is the biggest stumbling block to the edibility of my loaves of this kind. I think I got the timing right, an hour or more is fine in the clay pot. You can see the bottom crust is underdeveloped because the lid is thick, I might let the bottom cook for 45 minutes next time rather than 30 minutes.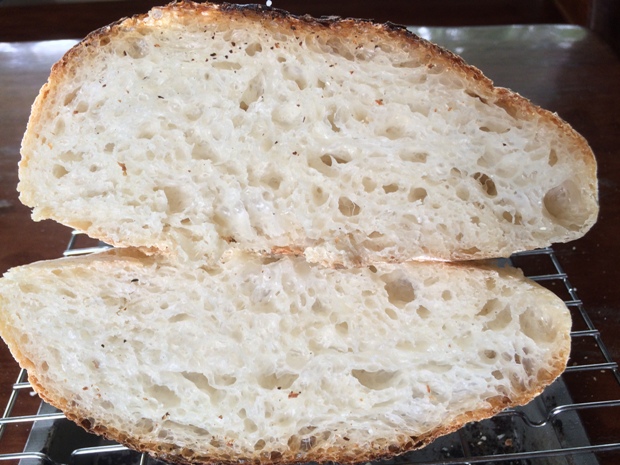
The flavor is nice and full of character because of the cooking process, just like a good bread baked in a WFO. What more if it's sourdough?! For me, the taste is still a bit flat; the tang of SD works well especially in hearth loaves because of its kind of "bland" flavor that is meant to be eaten with anything and everything. The sourness just makes you want to eat more. I once had a sourdough that I really like but the crumb of my loaf is more open and less dense and the crust has a more complex flavor. I just can't imagine if I made this SD! I will work double time to establish a sourdough starter.
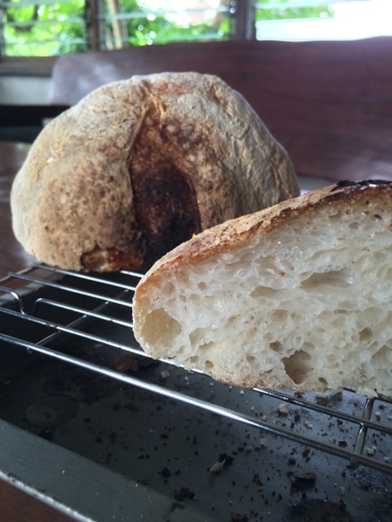
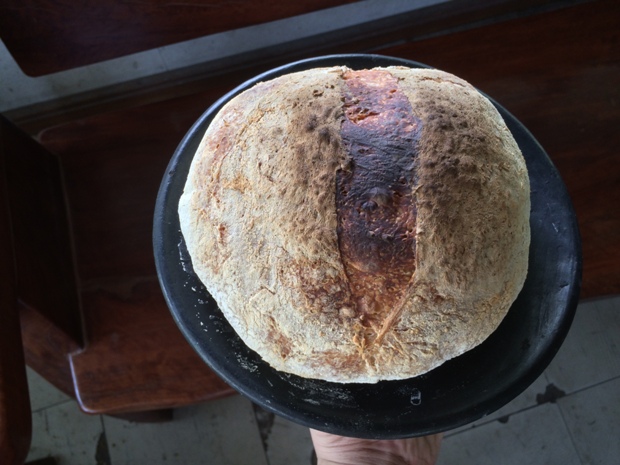
Again I will say this again. I can't believe this loaf came out of my clay pot! It's so beautiful! I know you want to see my clay pot in action and as proof that it can bake great bread, here it is! Ang aking Palayok!
So now that my clay pot has a vast repertoire and here is the checklist, here's what I can say:
- "ASIAN STYLE" ENRICHED LOAVES- (✓) CHECK
- "EUROPEAN STYLE" LEAN HEARTH LOAVES- (✓) CHECK
- LAMINATED BREADS- (✓) CHECK
- QUICK BREADS- (✓) CHECK
SOURDOUGH, YEAST WATER, WHOLE GRAINS, WAIT FOR ME Y'ALL! With this technique under my belt, I will conquer you in no time! I am accepting FOR NOW that I cannot make pizza or baguette but we never know what a creative mind can do! Ecstatic on how this one turned out! Thank God for giving me this solution!
Thank you very much! Job
- PalwithnoovenP's Blog
- Log in or register to post comments
You can't expect it to have the full deep and complex flavor of a SD bread white bread with 30% whole sprouted grains. This one would be very bland in comparison but still a huge achievement with your baked on the lid of a clay pot on a wood fire.method. Well done and
Happy baking Job
I want to give a shot to one of your breads knowing that I have a reliable method now. Defying gravity really fits this method and my baking life in general. just like how the song goes in the musical Wicked; I just read the lyrics when I accidentally found it and I can say it fits me. Many would have doubted me but my parents were always there for me and our great community here. Thank you for always giving support and encouragement!
Looking forward to more adventurous bakes. Happy baking!
Hi Pal,
I've wanted to comment on your selections and methods for quite a while now. You seem to have solved the nooven aspect of life with some creative ways of doing things. What a coincidence that your last name is nooven!!! The crumb on this boule looks amazing. Congratulations.
There are many foods that you feature that I have no familiarity with, not being native the American diet, so I'm intrigued by what you use in your (what I'll guess are) traditional foods and shaping - King and Queen of Dice for example.
I also like how you take the time to walk us through your technique. And yes, making pizza this way might be a little messy!
Thanks, alan
Thank God I discovered the different skill sets and conditions for baking different types of bread without an oven. This is the most elusive one! My user name is just a made-up one, I have a very Spanish sounding real name.
Most of the unfamiliar goods I present here are oriental or mostly Chinese pastries. I was influenced by my dad to have a taste for them because he worked in Chinatown for almost 20 years. I like traditional foods but most of the time I break tradition and come up with my own spin. You won't find the dice monarchs I made even in my place, it's a combination of different pastries. Here is the original recipe of the dice hopia common in many bakeries here but we don't like the crust so I merged it with a different crust from another pastry similar to this one. and only applied the cooking method of the dice hopia because I thought that it will result in a better pastry. You can make your own using the recipes above and just fill them with store bought red bean paste. If you don't want to go through the trouble making it, maybe you can go to Chinatown to have a taste. Just look for su pi yue bing (酥皮月餅) or Teochew mooncakes/ chao shi yue bing (潮式月餅) and you will find a pastry with similar taste just different looks.
I would love to give recipes so everyone can try what I eat and make but I cook and bake without exact measurements and I don't even have measuring equipment.
Thanks for the interest and I hope you will like them.
Both for the creative technique and for the finished bread. Well done, indeed!
I wonder if the degree of browning on the crust might be easier for you to control if the fire has burned down to coals, instead of baking over flames. The heat from the coals is usually more even and not so intense as the heat from the flames. Yet another experiment to add to your list, I suppose. If you purchase a Dutch oven-style cooking vessel, that would allow you to place coals on top, as well, for radiant heating from above.
I'm much impressed by what you have accomplished.
Paul
I am considering browning the top over coals next time. I still need to play a bit on the timing but it's easier from now on because this method is fairly reliable.
I tried to find one of those dutch ovens where you can put coals on top to no avail and I think if I ever have the chance to find one, it will be very expensive; I got my clay pot for just under $5.00.
I'm sitting here, completely amazed! Wow!
Your loaf looks absolutely beautiful, Pal. The crumb and crust are great!
I definitely agree with you that SD tastes better! Have you got a starter already?
Determination and practice (and a fair amount of bravery since your technique looks kind of dangerous with all that fire and hot heavy pots!) have paid off :)
Very very nice bake Pal!!
Can't wait to see what you come up with next.
This technique is really revolutionary! From all the adversaries and dangers, it's so nice and fulfilling harvesting the fruits of my labour.
Have failed many times trying to raise a starter but No Retreat, No Surrender! I'm sure in the fullness of time I will have one raising many of my breads just like how I waited patiently for this method to make delicious and beautiful hearth breads.
I saw you are from South Africa, what languages do you primarily speak? I love getting exposed to different languages, it's my biggest interest next to food. :-)
BBD is my next agenda. I can't wait to see the creations of those who will join.
with no problems using Dab's method. This is what he told me ...
"Take 40 g of whole rye and 30 g of water. Mix and cover and let sit at 75-82 F. 24 hours later add 40 g of whole rye and 30 g of water and let the larger mix sit for 24 hours. Split the mix in half and feed each half 40 g of whole rye and 30 g of water. Stir down every time it doubles - probably 4 times in 24 hours. Feed each again 40 g of flour and 30 g of water. When one rises 25% put it in the fridge and feed it once a week - this is your mother starter and when the other one doubles you can use that in your first loaf of rye bread. Rye needs the acid in SD to make the structure to trap gas and make the bread rise. "
I maintain it using his "no muss no fuss" method and it works brilliantly.
I live in SA, but i'm originally from Zimbabwe. I speak two languages fluently (english and shona, which is my mother tongue) and i'm learning the basics of Zulu and Sotho (South African languages).
Here's a sample of Shona...
Chingwa chako chaka naka chaizvo!
Your bread is very beautiful!
What languages do you speak?
I would definitely try that! I only found whole grain flours in the capital city 2 hours away from where I live. They're 6-8x more expensive too than normal white flour. Why 10 days? From your description, I think it's just 4 days.
Oh cool! First time to meet someone from Zimbabwe and hear about the Shona language. What does chaka mean? Here it is a slang for "ugly". I searched Shona and I can say it's very difficult for me.
I'm from the Philippines. I speak 2 languages fluently, English and my first language Filipino/Tagalog. I also speak Bicolano, my mother's language but not as fluently as her although enough to hold conversations for hours. Our country is an archipelago and each province/region has its own language. My mother's province is worse; each town has a language that is mutually unintelligible with the language of the next town but my mom knows all of them. She said she learnt them while travelling to different parts of her province.
My full post in Tagalog with English translations.
I'm also intermediate in speaking and reading Mandarin, still struggling with writing especially the stroke orders for 2 different scripts of Chinese characters. I'm very basic in French still remembering conjugation patterns of verbs and pronunciation which are not features of any language I know but I can understand simple sentences especially relating to food! :P
Finally, little tidbits of Cantonese, Hokkien, German, Spanish, Italian, Norwegian and Russian especially greetings because I took up something related to Hospitality in College. I even considered taking Linguistics or International Studies before going to university but my love for food and travel dominated me. In my practicum I found my knowledge of several languages is a great help.
because my starter had a leuconostic bacteria problem for about 3 days. That's why some methods encourage using pineapple juice instead of water, it makes the starter acidic quicker which kills the leuconostic bacteria and means the wild yeast starts thriving faster. I just used water so i had to wait for a couple of extra days for the pH to get low enough to kill off the bacteria. I made my first loaf on day 10.
But i don't think this happens to all starters, maybe that's why Dabs method could give you a starter in 4 days.
Chaka doesn't mean ugly, i think you're confusing it with "shata" which does mean ugly. Chaka in the context i used it means "is".
A direct translation of what i said is...
chingwa (bread) chako (yours) chaka (is) naka (beautiful/pretty) chaizvo (very).
Wow! Your Tagalog post was very cool! Maybe i'll post in shona one day :)
Happy baking Pal !
For now, I'll just drool over SD loaves posted all over here!
What I mean is "chaka" is a slang for ugly in our language. I noticed that our languages have very different word orders when compared to English so direct translation is impossible!
Please do post in Shona some time even just a short one or just one paragraph. I think many would love that and certainly I will.
Happy baking too!
the same way. You an use have pineapple juice for the water for the first 2 feedings if you want - no worries. You can also be making bread with the Joe Ortiz method of WW starter using a bit of milk and cumin from the get gotoo - very Spanish due to Joe. I make bread in 5 days using that one.
http://www.thefreshloaf.com/node/29320/joe-ortiz-pain-de-champagne-rye-and-ww-sprouts
Will try this when I have my chance to go to the capital. No more whole grains to be found in our town.
Pal:
I'm so proud of you! And congratulations!
Best,
Yippee
Only sourdough and yeast water to make this better! I'm glad too you are making your progress, let's keep baking together!
Let's do that, together!
somehow this reminds me of the life in the book <Walden>. I like it
It's just that I can't understand some of the details here....even with 百度 and google..
It's very similar to the life here especially the much simpler life 40 years ago. I see some familiar scenes here that are also described in the chapters of the book. I think, I will read it. Thanks for pointing me to a good book.
I really have a tendency to be wordy and give so much details. Sorry. I love writing to paint vivid images but I guess you felt the message even in the pictures. In the future I will try to write in Chinese if I learn more vocabulary and I hope you will find it a good read too. I have many Chinese friends too and I make Chinese pastries for them.
Because i was fascinated with life in that book...and life of Tasha Tudor.expecting more blogs from you.
Don't worry about the writing. I came here to learn both baking and English :-)
两天以后我要做一些蛋糕。希望您在这里学习得非常好啊。