
There have been a lot of discussion here on TFL regarding covered baking, ranging from covering dough on stone with a roasting pan, to baking in a dutch oven like a no-knead dough, to baking in a "combo-baker" as Tartin Bread Book suggests. I recently got a 2.5 quart oval enamel cast iron pot at a very good price (William Sonoma winter sale is a gold mine!), so I finally can try my hand on covered baking.
This light rye recipe is from "Tartine Bread Book", with only 15% rye, and some ww, this is really just a country loaf. Hydration is nearly 83%, so the dough is very wet and sticky. This is actually my main motivation for using the pot, such wet dough tend to spread a bit on stone, before it gets a change to spring up. I have so far work around the problem by baking smaller loaves (500g to 600g rather than 1000g+), and manage proofing/dough strength very carefully, however the covered pot does seem to have an advantage over baking stone in that regard.
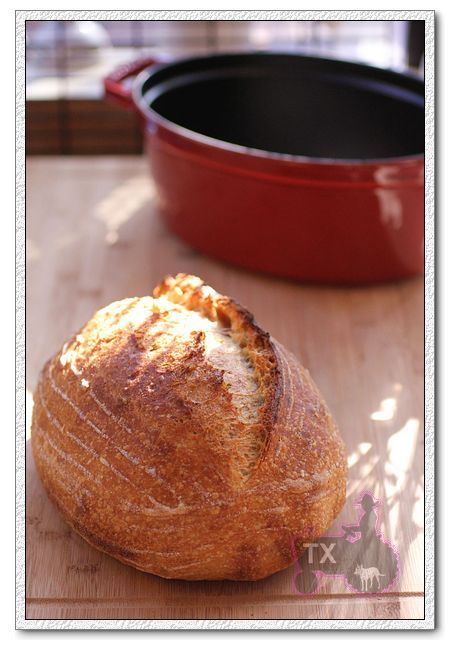
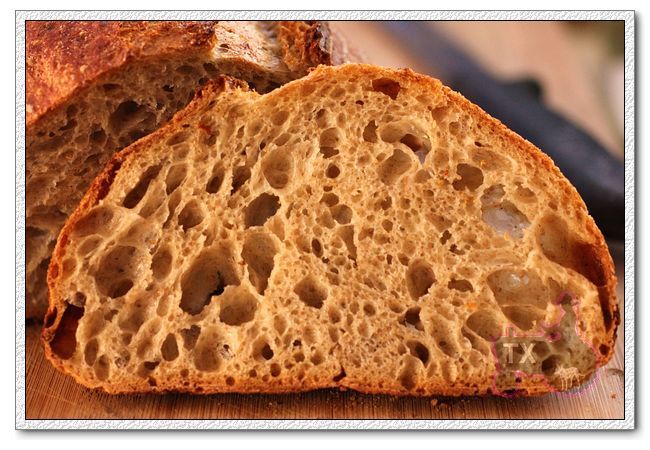
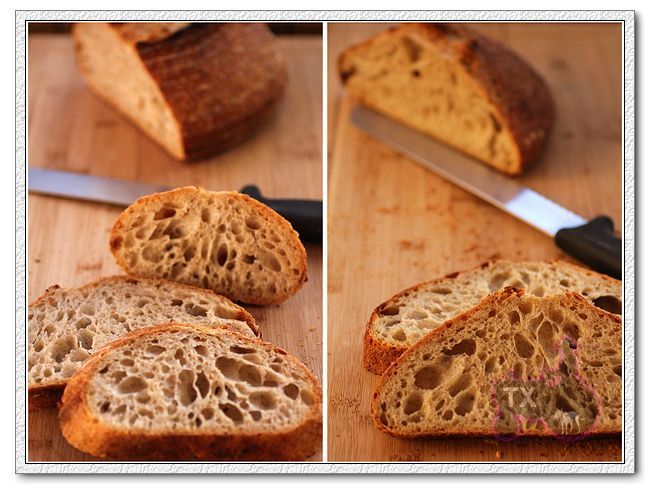
Moist and open crumb:
Here're my thoughts on baking in a cast iron pot so far:
Pros:
- Better volume and shape due to a)more direct heat all around the dough rather than just from the bottom; b)limited spreading space, which means the dough size and the pot size need to be matched well. This is especially significant with high hydration doughs.
- No need to steam. This is less important to me since the "hot water in cast iron pan trick" has always worked great for me.
Cons:
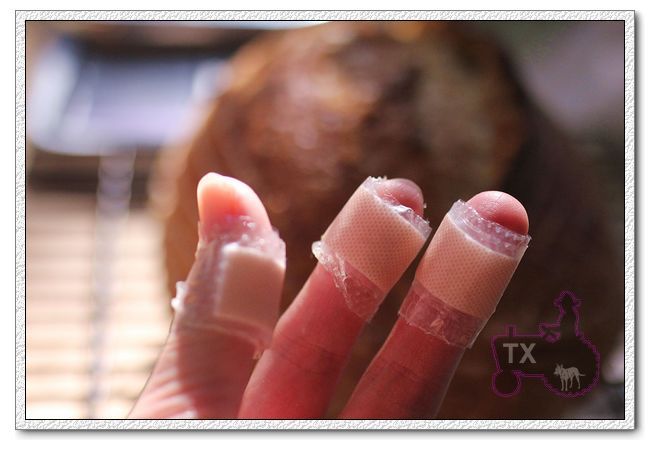
- it's dangerous (much more so than steaming the oven IMO) to handle a hot hot hot pot/lid, while trying to drop a "nearly same size" dough into it without losing too much heat. I have never used a cast iron pot before, so my head dosn't grasp the idea of "it's REALLY a bad idea to grab the lid with your bare hand after preheating it at 550F for over an hour"! Here's the damage, OUCH!
- The size and shape of the dough are very restricted. This 2.5quart one is a bit small, I have gotten a 5.5 quart one (also on sale, yipee!) online, with the bigger one I will be able to bake larger loaves with high hydration, which is the best reason to bake breads in a pot IMO.
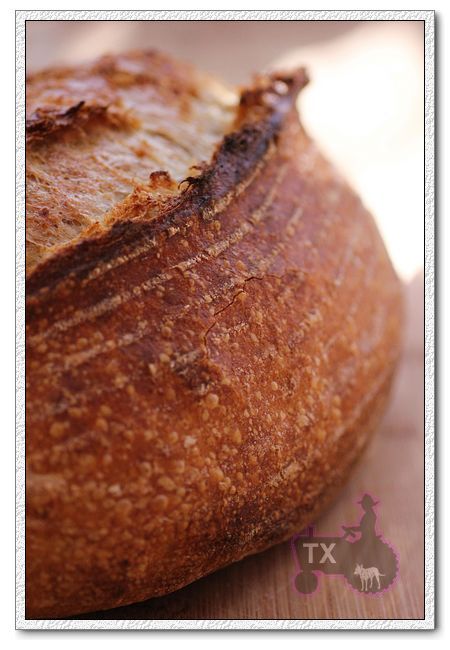
- It's a bit tricky to play with time/temp to get a crackling crispy crust, especially with such wet dough. Here's my procedure that finally worked: preheat at 550F for over an hour, with lid on; drop in dough, cover (with a glove!), keep at 550F for 5min, drop to 450F for 15min, take out lid, bake for another 20min, turn off oven, crack the door open a little, and let the pot/dough sit in oven for another 10min. With that procedure I got a crust that cracked, singed, and remained crispy after cooling down. This is for a 600g bread, for larger loaves, I imagine more time would be needed.
Notes:
- The instruction in the book says to drop the dough from proofing basket directly into pot, then score, this seems impossible to me. Maybe because my pot is quite deep, and the one in book is quite shallow, but there's no way I can flip the dough in there without sticking to something, or missing the pot, or most likely both. So I first flip the dough out of the brotform onto a parchment paper, cut the paper quite close to the dough size, score, THEN lift the corners of the parchment paper and drop the whole thing into the pot. It was scary, but worked, the parchment inside didn't seem to negatively affect the crust.

- The pot I used was Staub, the reason I like it better than other brands is that the metal handle on the lid (the one that burned off my 3 fingers) can take heat up to 500F accoding to the manual. I called their customer service, and was told it actually can take 550F. This is a lot higher than the plastic handle on some of other brands, including Le Creuset.
- I actually baked another loaf using baking stone and normal steaming method (side by side with the pot). Since the pot was covered when I steamed the oven, I don't think it affected the dough in the pot. The following is the result for baking stone, dough size is 500g, stone was preheated at 550F for over an hour along with the pot/lid, loaf was loaded 5min after the pot, so 15min with steam at 450F, then 20min without steam at 450, also stayed in the oven for 10min after it's turned off. Good volume and crust, but it did spread a bit on the stone. Since the shape and scoring are all different from the one in pot, I can't really draw too much conclusion from it, but I imagine a well fit cast iron pot would make it rounder and a little higher.
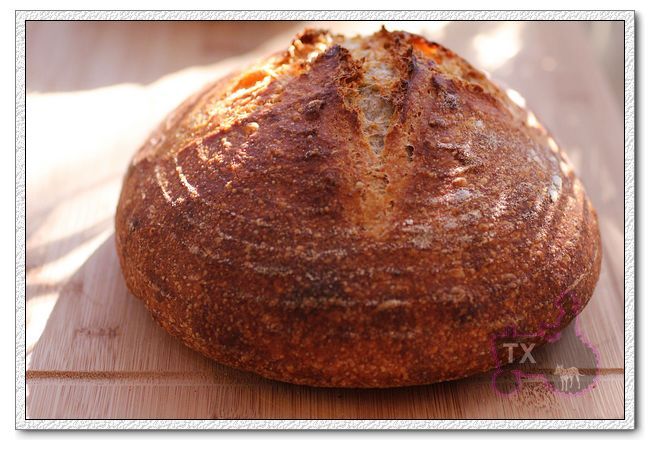
- The following is a side by side comparison of crumb, they are identical IMO
In summary, the "baking in a pot" experiment is a success. I would definitely use thise method for very high hydration doughs, IF their shape and size match the pots I have. For the other breads, I would stick to baking stone and steaming.
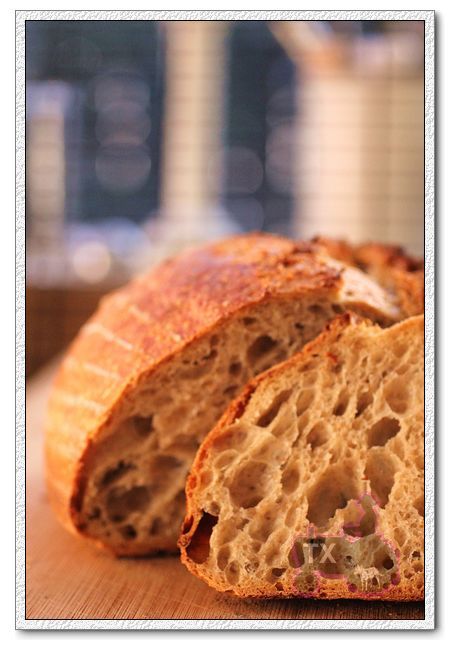
Sending this bread, along with 3 well cooked fingers, to Yeastspotting.
- txfarmer's Blog
- Log in or register to post comments
Gorgeous loaves Txfarmer, but very sorry to hear about the burns.
There is a safer way to do it if you have a spring-form ring you don't mind using at these high heats. Instead of putting the loaf in the pot itself, put the lid upside down on top of the spring-form ring so the handle is suspended above the oven rack. Then heat the lid and pot as per the directions. When the dough is ready for the oven, slide the loaf on to the lid part and place the pot over the lid and bake. Same basic method but easier, safer, and less heat loss than lowering a loaf into a smoking hot pot.
Franko
Good idea! I thought about doing it upside down but the handle was in the way, the ring idea is genious! Thanks, definitely will try that next time!
So smart!
and move it over the lid. Might as well just use a stainless steel mixing bowl - a cold one ;)
But I find cold pot vs. preheated pot makes a significant difference in ovenspring. I tried both, prefer the preheated pot - both bottom and cover. It's a dangerous move anyway.
cold vs preheated pans/pots, Cloches, etc. Most people do not seem to appreciate a difference. Mine rise beautifully in a cold Römertopf. Hope you heal quickly.
Best,
anna
Txfarner,
Glad you like the method but wanted to give you a heads up on what I've learned so far over the last several times of using it. It really pays off to pre-plan exactly how you're going to execute the move and set things up accordingly so that it's quick and efficient. Make sure you have enough clearance that you can lift the pot without getting hung up on the top side of the oven. With my oven I put the rack on the lowest setting and pull it out just enough that I can get the pot on and off easily. When you preheat the DO, have the pot placed so that one of the handles is facing towards you so that you can grasp it easily. Sounds like common sense I know, but easily overlooked when you might be more interested in what the dough is doing than how to get it in the dutch oven. It's all about minimal heat loss and being safe while doing it, so sketching it out beforehand I've found helps a lot
Hope this is useful to you for your next bake with the dutch oven.
Franko
Thank you for sharing your thinking about how to best use the dutch oven for bread baking.
I didn't understand Franko's method before, but now I get it. Very nice!
Some one has also let the loaves proof in the oven, if the size and shape are compatible. Of course, then you aren't pre-heating the dutch oven, and this wouldn't make scoring the loaves less awkward.
David
I actually tried once without preheating the pot. Much easier and safer, especially since I proofed the dough smooth side up in it too, but the ovenspring was not satisfactory to me.
My sympathy for your burns.
Oven mitts are recommended. Get in the habit of using them.
When you forget, apply an ice cube to the burn immediately. Cold retardation of scorched flesh stops the cooking from going too deep. I will refrain from posting photos of all the burn scars on my hands.
David.
This is a gorgeous loaf and I have it on my long to do list!
Oh my, I'm sorry about that burn. I did that once only the pot was sitting on my stove cooling and I forgot it was hot and grabbed the handle...my stovetop sits in the island right behind my walloven and hot pots go right there for an easy reach and convenient cooling, never again, now I lay a thick oven glove on it, just as a visual reminder it's hot.
I have several of the deep pots with the metal knobs, but they are a pain...the only and best solution I have seen for using these types of pots would be the way Franko suggests...I just prefer using my lodge iron combo cooker, just enough for me to handle weight wise, it holds a good size loaf..apx. 2lbs..I do pre-heat both for the oven warmup...and the lid is heavy to lift off and on, but I manage and wear heavy gloves, taking my time and caution with a good firm grip...this thing drops, it would probably land on my glass oven door and give me a heart attack.
Sylvia
Now that I am introduced to the wonderful world of cast iron pots, I considered to buy that lodge iron combo cooker, it's not even that pricy comparing to the enamel cast iron duch oven I have. However, my kitchen is very small, just don't want to have another piece of equipment just for baking bread, when baking stone+steaming has been working well for me.
I thought it's a lot more dangerous and nerve wrecking to handle that steaming hot iron pot than my normal steaming method - to drop that damn dough into the deep pot I couldn't wear gloves, after it went in, I was so relieved and in a hurry to close the door, I simply forgot to put the glove back on. OUCH! I am just glad that I didn't drop the lid onto the glass oven door like you said, that would've sucked!
Both of those are beautiful, inside and out.
I looked at those ovens at Williams-Sonoma. They might be good for cooking, too [smileyface].
Glenn
Cooking? Really? People do that? Aren't bread enough?!
:P
A very simplified version of Coq au Vin.
red cabbage in there ? oh yummmmm !
No cabbage, you are probably seeing the red onions?
good :)
Yikes! Beautiful loaves but so sorry about your fingers.
I agree with you that, personally, I find the steam in the oven less scary/dangerous than the hot pot method. Both can obviously be dangerous though so please, readers, use caution!
Yeah, I have been slightly burned by the hot steam before too, but never BBQed my finger like this before. Let's just say I feel for the bread crust - literally.
Yikes is right. Be careful out there!
Beautiful high hydration loaves.
Re the covered cooker, I find that the safest method is to load the loaves onto the pan, preheated or not, and cover it with the pot. I endorse all the admonitions to use oven mitts.
I don't have the combo cooker, so there's no "pan", just the lid. But Franko's method of stablizing the lid on a ring to use it as a "pan" is great, I will try that next time. Yeah, oven mitts are a must! :P
Human nature bites! Sorry about the fingers. I've done the same thing multiple times with different applications. I think the enamel slows down the heat transfer. The Lodge CC produces nearly identical results pre heated or not.
Eric
Jeeze, now I am tempted to buy that Lodge CC again, Eric! :P
BTW, can you tell I am doing my best to finish breads when there's sunlight? At least once during weekend.
Thanks for another great post. I'm beyond inspired to bake from Tartine Bread now! I can't find your 2.5 quart oval enamel cast iron pot at Williams-Sonoma. W-S only has this one that's closest:
http://www.williams-sonoma.com/products/staub-4-quart-oval-cocotte_51/?pkey=ccookware-staub|ckwstbred
Wondering about this and if you have any thoughts to share on this larger pot?
1. It's pricy! The 2.5quart one was only available in real shops, 99 bucks. And I ordered this set as well: http://www.cutleryandmore.com/staub/oval-dutch-oven-2-bonus-mini-dutch-ovens-p117118 - 1 5.75quart oval pot and 2 mini ones for $170.
2. 4 quarts is an awkward size for me - not large enough to braise a whole chicken, with enough veggies, but too big for individual servings. 2.5 quart is good for a 500g - 600g loaf and one meal for my family, 5 quart+ is good for a 2lb loaf, and a big roast.
3. As others have suggested, you don't need an enamel cast iron pot just for breads, you can get the Lodge Combo Cooker for much less money.
That's good advice Franko. Thinking it through helps me to not grab a hot pan or cast iron handle. I leave the deep side in the oven and set the shallow part on the oven door when loading the dough. Then after scoring I set the shallow part on the end of the shelf and cover it with the deep part, then slide it in towards the center.
txfarmer, I see the natural light shining through. Just a little natural light makes all the difference. Great post!
Eric
https://secure.lodgemfg.com/storefront/product1_new.asp?menu=logic&idProduct=4082
I put the top upside down and put the loaf in it. Then I have the two handles for the botom of the pot and can use two hands (covered with oven mitts) to place the bottom of the pot upside down covering the bread. Works much better for me because I can use both hands to work the pot off the loaf. Also the lid is shaped so that it actually supports the loaf better than the other Dutch Ovens do. Works very well.
I offset the the handles so that they point 4 directions. That way it is easier to lift off.
Thanks for the tip, as I've said to others above, I want to get the Lodge CC but still trying to resist. :P
Just beautiful crust, spring, ear, color, and crumb. How perfect both results are. I burned my fingertips Sunday, after placing two loaves back in the oven for more time. The thump didn't sound right, even tho the temp. indicated well done. I popped them back in the oven on cooling racks, a short time later removed them, then I touched the cooling racks which weren't very cool. My oven was not nearly as hot as yours however, so I have forgiven myself already. Ray
this guy's method for putting loaves into a cast iron pot seems to work pretty well. He uses a flexible plastic cutting board:
http://www.youtube.com/watch?v=bwv89Vjw5yw
skip to the 1:45 mark to see him slash the loaf and load it into his dutch oven. I'm thinking of getting a staub DO as well. Have your experiences with your Staubs all been as good as this one?
Thanks for the video, however, it seems that his pot is not nearly as hot as mine. Mine had been in the oven (preheated to 550F) for an hour! That plastic thing would melt for sure, unless that's magic high heat resistant plastic material. 2nd thing is that his dough looks a bit stiffer as well.
yeah, I have been really happy with my Staubs, highly recommending those for both baking and cooking. As long as you are careful :)
its all about the parchment paper. thats always how I transfer a loaf into a hot cast iron pan. not only does it allow you to avoid bunrs but it also lets you place it in the pot very gently.....good luck.