Lesson Five, Number 0: Practice!

Profile picture for user Floydm


What else can be said? Baking is one of those things you just have to try to learn how to do right. I don't think you can know how slack a dough you can handle, what happens if you lower the rack in the oven a couple of notches, how little yeast can you get by with, or any of these other things without just trying it. Sometimes you'll be pleasantly suprised.

And sometimes you won't: some of your loaves will come out better than others, of course. But even once you get down how to do it right, it is still fun to experiment with tweaking a few things to see how it changes the outcome. Baking is fun and extremely inexpensive, so why sweat making a few mistakes? Have fun with it, experiment, and don't get bent out of shape if a few of your loaves fail to rise. All of us have parts of our lives where mistakes are not tolerated, such as on the job. Unless you are a professional baker, when you are goofing off in the kitchen isn't be one of those times. So have a good time.
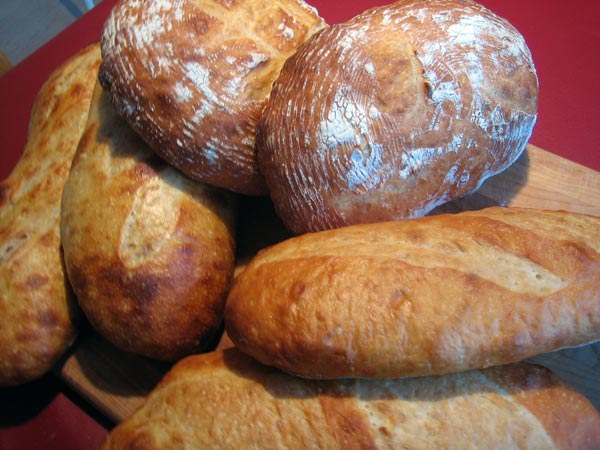
many loaves

Happy baking!

If you have tips that I missed, please post them!

Comments

Floyd, Responding to your request for potential 'Missed Tips', you left out what I consider to be the most important tip of all; mix the dough to the proper degree of development. When I have a problem with my breads, it can almost always be traced back to improper mixing. For example, if you plan on a long, slow first fermentation, you may want to mix the dough so that the gluten is not fully developed. If it is, the long fermentation can result in a dough which is overdeveloped and 'bucky', making it difficult to shape properly without tearing. Conversely, undermixing of the dough will result in a dough which hasn't nearly enough gluten structure to trap the CO2 produced during fermentation, resulting in a dense, heavy bread. A simple concept... but, in my experience, one of the hardest to master on a practical level.
Good advice, and this is a tip I would say I clearly do not have enough experience to say I've mastered. At this point I don't think I can read a dough well enough to know for certain whether it is under or over mixed. I don't think I've ever overmixed a dough, but perhaps I have and just couldn't recognize the symptoms. I may have to try an experiment some weekend where I split a batch of dough into two and beat the heck out of one half and under mix the other just so I can learn to recognize the symptoms of each. I've tried in the tone of this article (and the site in general) not to speak as "I'm a baking expert and here is my advice" as much as "I am an enthusiastic but not terribly good baker. Here are some things I've learn from my numerous mistakes. Hopefully you can learn from them too (and if you don't learn from them, at least learn not to be afraid of making mistakes)." I (and other amateur bakers here) would love to hear more baking wisdom from yourself or any other experienced bakers reading the site.
Floyd, I, too, am an amateur home baker, having been baking for only about 2 years. Believe me, I am nowhere near a 'baking expert'. I hope I didn't come off sounding like one. I have noticed, however, that small changes in mixing time can have dramatic effects on one's loaves and thought your readers might be interested. For example, when mixing the dough for today's French batards (see photo section), my initial mixing time, after ingredient incorporation, was to be 3 minutes. After stopping the mixer after the elapsed time and checking the dough, I saw that it was just slightly underdeveloped so I continued the mix for an additional 30 seconds. In just that short bit of time, the dough reach its proper development, hence my predilection towards carefully monitoring mixing times.
Ha ha... Dang. No, you didn't sound arrogant or anything. You just sounded like you might have a lot more baking experience than I do. It sounds like you've definitely got a better grasp of mixing than I do though (and shaping and scoring, judging by your batards, which are beautiful). Any tips on how to recoginize proper gluten development that you can offer us would be appreciated.
That's a tough one, Floyd. However, the extremes are relatively easy to identify. Using the 'windowpane test' (taking a small bit of dough and slowly stretching it between your fingers), if the dough quickly shreds as it is being pulled, it is too underdeveloped; if it pulls into a thin sheet but feels too 'rubbery', then it is overly developed. For a standard baguette dough with a 2 hour first fermentation (with 1 turn at 1 hour), I look for the dough to pull into a thin sheet which will tear relatively smoothly (few ragged edges) as the pulling is continued. I know that sounds pretty subjective but I'm afraid that mixing dough is a pretty subjective endeavor. The only way I know how to develop a 'feel' for the dough is to bake, bake, and then bake some more! :)
Just wanted to tell you I made your Onion Bread today and it was awesome!! My braiding though..left something to be desired. I just couldn't figure out from your pics how to do it. I had my husband and step son trying to help me!!! To an untrained eye..it looked pretty impressive but I won't be winning any prizes soon for my technique. Thanks for the recipe!
I stumbled across your site several weeks ago. I've been baking loaf-pan breads for about 20 years but a year ago I started experimenting with baking freeform loaves using a preferment (poolish/biga/pate fermentee). about a year ago. It's definitely been a learning process. I thought the lessons were excellent - thanks for taking the time to develop and post them.
Very interesting. Many of the "must nots" I've been doing for years! Preheating the oven? I've only started because I have a tiny oven now and I burn just about anything I bake in it unless it's warmed up first five minutes. One hour pre-heating sounds like a waste of energy. Have you tried parking that baking stone on a dark baking sheet with an edge? Makes a good place to pour a cup of boiling water. For my one kilo loaf, heavy moist european style crust crack bread, I forget the final rising, wait about 10 minutes after shaping and place on a flowered cookie sheet or a fry pan (handle removed) and put into a cold oven, set at 220°c and come back in an hour. Cool on a rack over a large bowl and cover with a dish towel. When I score the top of my bread I use a scissors. Not only can the children do it, it's easy and can get very fancy! More control and easy clean-up. Baking Bread should never turn into stress! Now with my little oven, about one cubic foot, I am really challenged. I started reading your blog looking for tips and the garden pot bell over bread could be a solution. Americans have very large ovens so I don't know if anyone has tips for me. I'm down to a 1/2 kilo loaf: one cup of water, 11 grams yeast,one teasp sugar, one teasp salt and 2-3 cups flour. I'm back to letting it rise before baking as the coils are so close to my loaf. I used to get a lot of lift as the oven warmed up to temperature. Today I'm trying to make a loaf for toast in a reflective stainless steel (salad bar) form with lid. It just barely fits into the oven. I will remove the lid half way through. Wish me luck:) By the way, If you're wondering, I've been baking bread for over 30 years and all over the world. This oven is the largest I could find in rural China. I am most interested in making French Baquettes albeit short. Mini Oven

To celebrate, I went looking for my first post and found it here under lesson 5 ... tips.  How appropriate.  Sort of took the tip thing to heart and over the last five years scattered  tips are all over the site.   It's fun sharing and discussing.  Those of you with baking stones are smart enough not to try my stone in a baking sheet/boiling water idea and realized I was kidding.   Baking sheets, frying pans and stacked woks are my preference.  

The end of July brings the end of the work in South Korea.   The tidal power project is southwest of Seoul and already producing power from 4 turbines with high tides giving a new definition to "moonlighting."   I am proud for my husband and S. Korea, this is the largest of it's kind in the world right now.  Renewable energy is the way to go.

Live long and prosper,  Mini 


Happy anniversary and thank you for your many contributions, including some hearty laughter!

Now I'll have to look to see how close I'm getting to that milestone.

Paul


That is very cool about the tidal power project.  I know we have a few tidal power pilot projects off the coast here in Oregon but I don't think there is anything in production here yet.

Congrats, and thank you, on your anniversary.  Your contributions, both in substance (solid baking advice) and in defining the spirit (humorous, helpful) of the community, can't be overstated.

-Floyd

Welcome to the "challenging oven" club! I'm sure there are many potential members of this club from all over the world on this site :) I am living in Argentina, and my oven is the same size as yours. It also has the added challenge of a very "vague" temperature control knob that I still haven't quite made peace with and would welcome any suggestions from other members with similar ovens (right now I try to look at and/or listen to the flames to decide what the temperature might be...). So far I have mastered "very hot" and "not so hot". May 31 041 I just like to think of it as an added challenge to the whole bread-making process...I also find that since I can only bake one small loaf at a time it is an opportunity to see how different rising times etc. affect the final product ;) Another thing I sometimes do if I have a loaf that I expect to rise a lot is start the loaf with the oven rack at its lowest level, then when the loaf size seems set, I quickly open the oven and move the rack up so the bottom won't burn. I'm sure is a HUGE "no-no" as far as affecting the oven temperature etc., but to me it is better than having the scrape the top of the loaf off the oven roof (even though it has resulted in a few finger blisters despite my not-so-protective oven mitts...) :) I am also intrigued by the flower pot technique and enjoy making "mini-baguettes" :) I hope your loaf turned out well...I would love to see some photos of your fancy scissor-slashed loaves!
My dial goes from 100°c to 250°c. During the baking, total of 30 min. last 10 min I removed lid to brown. Very interesting loaf. Looks more like I fried it. Flat top but nice color. I think I'm dealing with overly refined floor too. It's enough to make me change to 10 oz of water and add milk powder. Well my stainless steel pan is getting darker and I'm temped to grease it up good and bake it till the whole thing turns brown, never again to be used on a salad bar. Makes the flower pot idea all that more interesting but I might go one step more and use 2 pots of egual size, one inferted on the other with a piece of baking paper over the bottom. The moisture that collected inside the steel container would be reduced in porous ceramic. (We got to find another name for it, cloche is not quite the correct word, a cloche is normally transparent and used in gardening as a mini greenhouse over plants or a woman's bell shaped hat.) I don't have a home Depot store, but I make up for it in creativity and determination. I bet I could find a potter to make me what I need plus 10% shrinkage and lots of grog. Like you, the first loaf burnt on the bottom, then I left the baking pan (black, inside 25.5cm x 22.5cm) in the oven and put another cake pan (round black inside diameter 21.5cm) onto that but not after I had covered it with aluminum foil and poured 1/2 cup boiling water into the pan. This worked, got steam and removed aluminum foil after 20min. All at 200°c. When I use more water, the bottom is too pale. I've dusted my pan with oatmeal also with corn meal. Before the week end my husband presented me with a Microwave Oven delux, haven't figured out how to use it yet but I suppose that won't take long when I decide I need it. The best thing about it was the dishes that came with it. There is a steamer plate, alu, 21cm across and it fits perfectly onto my cake pan! Now I don't have to cover with alu foil and remove! I just put it on, park my banana bread on lowest rack (rack is 28.5cm x 24.5cm and 4cm up from coils) in cake pan with aluminum steamer (full of holes, sorry no picture but I'd say 50% protection) plate on top, 40 min at 175°c. I'll try it on bread next. Set on upper and lower heat. Scoring with a scissors I've been doing, for a long time, people who know me say I use a scissors more than a knife. I love the control. I point the open scissors perpendicular to dough and snip, If the cut should be longer than the open sissors, I cut it twice. My little round buns, get it in a 5 point star but don't let the cuts touch: First I cut in shape of a Y and then fill in the spaces. Goes fast and sometimes I smear my buns with a mixture of egg yolk and oil (or water) remove yolk sack and stir in small dish. Then they brown fast, 200°c I have to admit I don't have to do that for my mini oven. Everything browns! (I also cut pizza with a scissors, try it.) I have a difficult time with plain white bread. Here are some of my additives in the first liquidy stages of my dough: Oatmeal, oatflour, cornmeal, shot glass of caraway seed, ground coriander and caraway, instant potatoe flakes, instant milk powder, grated nuts, musli, fresh grated potatoe and ground caraway, oregano (pizza), cooked rice, green onion. I have even taken a weakly spiced loaf of black bread, thrown it in the blender with water, added yeast and flour and lot more spice and come out with 3 loaves of excelent tasting dark bread. Bread recycled? Yes! Forget the mouldy stuff though. Happy baking!:) Mini Oven

Not sure where you are located, but if you can purchase or borrow the _Artisan Bread_ video from King Arthur Flour I would highly recommend watching it. Before I received that video as a gift I was in the same position as you: I could make most pan breads, but I could not make an artisan bread on the stone.  Kneading in particular was frustrating. After watching the video I have about a 90% success rate with artisan recipies and techniques.


sPh