The Fresh Loaf

A Community of Amateur Bakers and Artisan Bread Enthusiasts.

fresh ground flour

bryoria's picture
bryoria

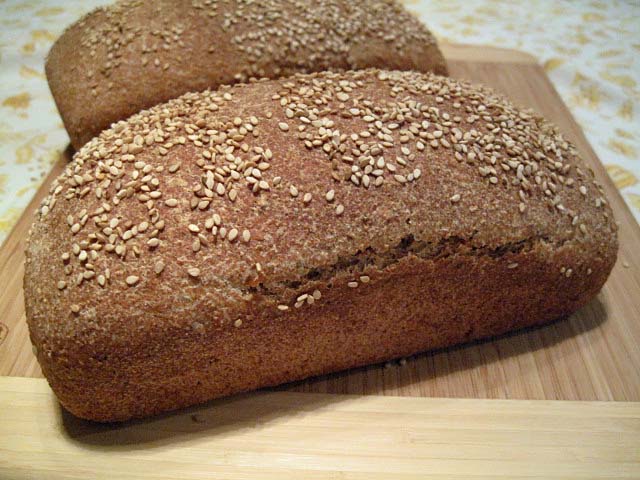
I made another batch of 100% whole wheat buttermilk bread from Laurel's Kitchen Bread Book yesterday.  This time I used freshly ground flour (hard red spring wheat) measured by weight, mixed all the ingredients except the butter for 2 minutes and then let the dough sit for 40 minutes in an attempt to hydrate the fresh ground flour a little bit.  Next time I would attempt this without the salt added as per the various threads on this site regarding autloyse - but yesterday I didn't come up with the idea until after I'd already added everything.

After the 40 minute rest I mixed it for 4 more minutes on speed 4 on the KitchenAid and added the butter in cold, small, pieces as per the recipe.  The butter didn't mix in very well so I moved the dough to the counter and kneaded the butter in for another minute or two, then let the dough sit in a covered bowl (in a cold oven with the lights on for warmth).  I let it rise for 2 hours and 15 minutes, giving a stretch and fold every 45 minutes.  Then divided it into two equal pieces, rounded them and let them sit for 15 minutes before forming them into pan loaves. 

I let the loaves rise for 1 hour, then baked them in a pre-heated 350F convect oven for 35 minutes.  They rose in the oven a little more and ended up the perfect size for sandwiches. 

This bread is always delicious and my family loves its softness and flavour for sandwiches and toast.  The fresh-baked heels are amazing and we usually snitch those from the sliced loaf before we freeze it - no one ever wants the heels for toast or sandwiches later anyway!

bryoria's picture
bryoria

This is what happens when one tries to make the Oatmeal Bread from the Laurel's Kitchen Bread Book on a day that turned out to be too busy to make bread! 

The night before, I had cooked 1 1/3 cups of Roger's Porridge Oats* in 2 cups of boiling water, adding 1 Tbsp of salt once the porridge was off the heat.  I left the porridge to cool overnight in a glass bowl covered with plastic wrap. 

*Roger's Porridge Oats are a blend of rolled oats, oat bran, wheat bran and flax

In the morning, not as early as I'd hoped, I ground some fresh whole wheat flour and mixed up the dough as per the recipe.  The flour was straight out of the grinder, still warm.  I found I had to add more water than the recipe called for to make the dough come together.  The dough was still extremely stiff, but because the recipe insisted that the dough would absorb moisture from the oatmeal as it was kneaded, I didn't add more.

Right after mixing, I unexpectedly had to leave the house for a couple of hours.  I hadn't had time to knead the dough (by hand) for more than 2 minutes, and I never did add more water to soften it up.  I put the stiff ball into a bowl, covered it with plastic wrap, and left it on the counter.  The house temp was 17 degrees C.

When I got back a couple of hours later I only had a few minutes before I had to leave again.  The dough had risen about one and a half times.  I put the dough on a board, flattened it gently, folded it a couple of times, made a ball and put it back in the bowl.  It was so stiff that there was no stretching and folding possible - just a patting out, then folding to the middle.

When I came home again 2 hours later, the dough had risen to about one and a half times again and it was almost supper time.  I had no idea how to fix or amend the dough at this point, so I figured I'd get it ready for baking and see what happened.  I divided the dough into two and kneaded each piece briefly.  It tore pretty easily.  It was still quite stiff.  I don't know if that's what I should expect from 100% whole wheat loaves or if the dough does eventually get stretchy if it is handled properly.  I let the two pieces rest for 15 minutes or so, then formed them into loaves and placed them into two loaf pans brushed with pan grease. 

I put the bread to rise in the oven with the lights on and a pan of hot water.  It had been sitting in a cold, dry house all day and I thought I'd finally give it some warmth.  Once it was just over the edge of the pan, I brushed the loaves with warm milk and topped them with more porridge oats that had been soaked in milk for a few minutes.  I removed the steam pan, turned the oven to 400F, and baked the loaves with the cold oven method for 45 minutes, turning the heat to 350 after 20 minutes or so.

The loaves never did rise very well, but the bread turned out very moist and flavourful - way better than I was expecting after having to abandon it for most of the day.  It makes delicious toast.

 Things I was left wondering:

  • Should the dough have been softer?  It was so stiff that kneading was a real chore.
  • If I had kneaded it for more than the 2 minutes I had available, would it have ended up stretchy and gluteny and stopped tearing, or is that too much to expect from a whole grain dough?
  • Did sitting all day help, or hinder, the dough?
  • Could I have amended the dough after it sat all day, when I finally came home for the evening?
  • Can the seeds in the oatmeal actually cut the gluten strands during kneading and ruin them?  Should I use plain oats next time?
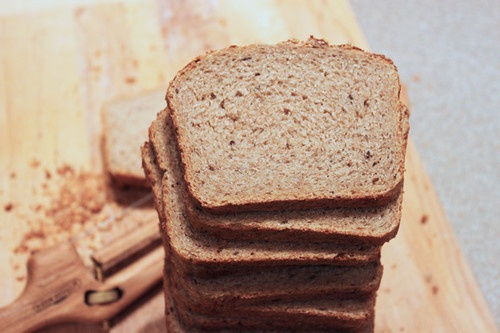
  • What can you tell about my bread from looking at the crumb in the photo above?  I don't know anything about "crumb" and that's what I find most intimidating about this site.  Can you experienced bakers take one look at my sliced bread above and shudder and know everything I did wrong in a mere glance? 
dmsnyder's picture
dmsnyder

A couple days ago, I tested my new KitchenAid Grain Mill's output with a formula calling for about 30% whole grain flour. It was very good. In fact, the flavor of that bread has improved over two days. Even as I dipped my toe in the home-milled flour waters, I knew that the real test, for me, would be how the flour performed in a 100% whole wheat bread.

Most of my breads are made with levain, but my favorite whole wheat bread has remained the “Whole Wheat Bread” from BBA. This is made with a soaker of coarse ground whole grains and a “poolish” made with whole wheat flour. I have used bulgur for the soaker in the past. Today, I used coarsely ground fresh-ground hard red winter wheat, the same wheat was used finely ground for the poolish and final dough. The formula can be made as a lean dough (plus honey) or can be enriched with oil and/or egg. I used both.

The KitchenAid Grain Mill does a great job with coarse grinding. I found that, with the first pass, the particle size is rather variable. It seems to even out by putting the flour through the mill again at the same setting.

I ground the rest of the grain at the next to finest setting. I put it through 3 passes of increasing fineness, actually. The flour ends up somewhere between semolina and AP flour fineness, at least by feel. This slightly coarse flour, fresh-ground, seems to absorb a bit less water than the KAF WW flour I usually use. I ended up adding about an extra tablespoon of flour to adjust dough consistency during mixing.

Bulk fermentation, dividing, shaping and proofing showed no differences I noticed from the behavior of this bread made with KAF WW flour. However, there was a remarkable difference in the aroma of the bread during baking and cooling. It filled the kitchen with a wheaty smell that both my wife and I found absolutely lovely. (As I write this, the bread is cooling. I hope it tastes as good as it smells!)

Another remarkable difference is that the color of the loaves is quite a bit lighter than loaves made with KAF WW flour and exactly the same other ingredients and the same baking time and temperature. I thought this might be because the KAF WW has malt added, but it is “100% hard red whole wheat,” according to the ingredient list on the bag.

The flavor of the bread is just perfect, to my taste. It has a wonderful whole wheat flavor with not a bit of grassiness. It is very slightly sweet. I used a very mild-flavored clover honey, and I cannot find any distinct honey taste in the bread. The flavor is bolder and more complex than this same bread made with KAF WW flour. I'm sold!

As I've written, above, Reinhart's whole wheat bread from BBA has been my favorite. I've made other whole wheat breads from formulas in Hamelman's “Bread” and Suas' “Advanced Bread & Pastry” that I found less tasty. I am now wondering how they would be if made with fresh-ground flour. Hmmmm …. This is shaping up to be a project.

David

Nickisafoodie's picture
Nickisafoodie

Sourdough Rye with Seeds – cast iron bake

First, thanks to Eric Hanner for this post providing inspiration to explore covered cast iron cooking recently:  http://www.thefreshloaf.com/node/21006/my-combo-cooker-experiment.  This is my second bake with cast iron and I like the results!  Flavor and texture were awesome!

I already owned a 5 qt Wagner Dutch oven with a glass lid that has been in the family as long as I can remember.  The diameter is the same as the 3 qt. Lodge combi cooker - the higher capacity of the Wagner being due to taller height.  So I had vessels that would allow two similar sized loaves to be baked at once- albeit with one having glass and one having cast iron cover.  Both loaves came out identical


Sourdough Rye Recipe for two loaves (2,066gr or 2.3 lbs prior to baking)

Overall Formula:

60% bread flour (697gr)

25% fresh ground whole wheat (293gr)

10% fresh ground whole rye (114gr)

5% Oat bran (I tend to add to all of my breads for health reasons - 58gr)

23 grams sea salt

20 gr molasses (approx 2 tbs)

10 gr malted wheat powder (approx 2 tbs) – sprouted, dried and ground into flour (malted barley would substitute)

40 gr mixed seeds: Flax, charnushka/black caraway, sesame, poppy seeds (approx 4 tbs)

72% hydration ratio: 834gr water including starter build up.


Build Stages:

1.      Stage 1 - build rye starter (100% hydration) to 228 grams (11% of recipe).  This uses all of the rye flour.

2.      Stage 2 – add 293gr of whole wheat, 58gr oat bran, 38 gr white bread flour, all of the seeds, 389gr water.  This approximates 39% of the total formula.  When combined with Stage 1 equates to 50% of the total recipe.  Let proof 8 hours at 78° (oven off light on gets works well).

3.      6pm: incorporate remaining ingredients other than salt.  40 minute autolyse.

4.      Add salt, mix 6 minutes on low speed.

5.      Stretch and fold 3 times at 45 minute intervals.  Keep at 78° between folds.

6.      10:00 pm: Preshape loaves, rest 25 minutes, shape into final loaf and place in floured banneton (actually: $1.50 colander from the dollar store lined with a microfiber dinner napkin and lightly dusted with flour- micro fiber wicks away moisture and releases fine with modest dusting)

7.      Place in plastic bag, leave overnight in refrigerator.

8.      Preheat oven 1 hour at 500° - include Dutch ovens and lids

9.      Plop dough into hot vessels, spray with water, score, and cover.  In they go.

10.  Reduce heat to 450° after 5 minutes

11.  Remove cover after 30 minutes

12.  Baked another 5 or so minutes until internal temp is 195°.  Shut oven until internal bread temp was 202°. 

Note: While the loaves came out nice, the crust is not rock hard as Eric was striving for and as was pointed out in his post/link above.   While my crusts were not rock hard after a 30 minute cover, I am still happy with the outcome.  

Perhaps next time I will leave the temp higher and in the oven longer to see what impact that has on the crust. And not spray dough after putting into Dutch ovens?  Or perhaps shut the oven sooner and leave until 210° or so internal?  Any suggestions on that elusive crust would be appreciated!

bwraith's picture
bwraith

Recently, I've been attempting to grind and sift my own flour. The grinding is straightforward with a Retsel Mil-Rite, an excellent home stone buhr mill or my new Meadows 8-inch stone mill. However, the mysteries of sifting the flour have been less straightforward. A subsequent blog entry will deal with my progress on grinding and sifting my own flour. The sifting project motivates the need for measuring the ash content of my flour.

Ash Content

Ash content in general is the percentage of inorganic matter in a sample of some material. It is used in many different ways to analyze agricultural products, at least, based on some cursory sampling of articles on the internet.

About.com says defines ash content as:

The nonvolatile inorganic matter of a compound which remains after subjecting it to a high decomposition temperature.

A traditional method for determining ash content is to place a sample of known weight in a furnace at high temperature (600F or higher) for a number of hours (12 hours, for example) such that all the water, volatile compounds, and organic matter either evaporate or burn. After that, the remaining material is weighed. Ash content is the weight of remaining "ash" expressed as a percentage of the original weight of the sample. The remaning mass will be the inorganic non-volatile compounds that were in the original sample.

Flour ash content in Europe is measured using a dessicated (dried out) sample  of flour, so the original weight of the sample doesn't contain any water. In the US, a moisture content of 14% is assumed (typical for white flour before it is dried out), so US numbers for ash content differ from the same European measure by the amount of water in the original sample.

An Important Characterizing Measure of Wheat Flour

Ash content is widely used in Europe to classify flours. When you see "type 55", for example, the 55 refers to the ash content, which would be 0.55% of dry matter in this flour. In the US, it is often available by searching a manufacturer's or supplier's web site for flour specifications (often hidden somewhere hard to find), or more often, by calling someone in their testing department.

Why Ash Content

The inorganic matter in a wheat berry is heavily concentrated in the outer layers, such as the bran, various seed coatings, and the germ. As you traverse from the outer coatings to the outer endosperm and then to the inner endosperm, the concentration of inorganic matter steadily drops.

During milling, the flour is ground, then sifted, then ground again, and sifted again repeatedly. When the milling process is complete, a large number of bins of product will result from very coarse to very fine, and from very dark to very light flours. The whitest flours will have less ash content, and the darker flours will have more ash content. At this point, various grades of flour may be created by blending the flour from the bins.

Ash content then summarizes how much of the outer layers made it in to the final flour, regardless of how it may have been milled, sifted, and blended.

The importance of measuring ash content was immediately obvious to me as I tried to mill and sift at home on my own. An infinite number of possible permutations of grinding and milling could be imagined. For example, I tried grinding very coarsely, then sifting, then grinding the coarser results of the sifting again, then sifting again. Another version was grinding very finely and sifting into more and finer sizes. I also tried grinding coarsely, then regrinding, then sifting. Of course, the possibilities are endless. In each of these cases, flour resulted that made good bread, seemed light in color, and fine in texture. The difference to the eye and the feel in the hand was not great between one and the other, at least not to me, a first-time home miller.

Measuring ash content of my results would make it possible to know at least approximately how much of the outer layers had made it into each type of flour resulting from the various grinding and sifting processes tried. Also, once a given process is adopted and used consistently, calculating the right blend of the various outputs of the milling process to achieve a desired ash content, depending on the type of flour needed, should also be fairly easy.

The Theory

Distilled water doesn't conduct electricity. However, if some salt is dissolved in distilled water, it will conduct electricity. The ions contributed by the salt are charged particles that will travel through the water in the field created by the voltage difference on the electrodes of the conductivity meter to create a flow of electric current. The higher the concentration of salt, the higher the conductivity of the water and salt solution will be. The diverse mineral content in the inorganic matter that makes up the "ash content" of the flour ionizes the water in the same way described above for salt. If the flour has a larger amount of "ash content" it will also contribute a larger quantity of ionizing compounds to water, increasing the conductivity. 

The Equipment

To measure conductivity you need a conductivity meter. In the field of water quality measurement, "Total Dissolved Solids" is a standard measurement, but it is essentially a measure of the conductivity of the water being tested. So, you can use either a "conductivity meter" or a "TDS Meter". In my case, I had obtained a Hanna 9813 pH meter a number of years ago, and it turns out it also had a conductivity meter function. However, it was easy to discover conductivity meters on the internet, by searching on terms like "Conductivity Meter", "TDS", "Total Dissolved Solids", "Water Quality Meter", and so on. One place I found was http://www.technika.com. Also searching on "Hannah Meter" might work, since that's the brand of meter I have that has both pH and conductivity meters, both useful functions for flour measurement.

You might wonder why a standard digital multi-meter wouldn't work. I tried to use one unsuccessfully. First of all, you would have to carefully mount the probes to maintain the same distance apart and total surface area exposed to the water. However, it gets worse. The DC current used by a digital multi-meter to measure resistance causes the ions to build up on the electrodes, so the measurement just goes higher and higher the longer you leave the electrodes in the water. Conductivity meters made for measuring water impurities use AC current to measure the conductivity so the above problem with an ohm-meter doesn't occur, have probes made of less reactive conductors, and are designed to maintain proper spacing of the electrodes.

The Method

I found a couple of papers on the internet describing methods of measuring ash content with conductivity. One was especially useful for home measurements and was titled, "Electrical Conductivity of Flour Suspensions and Extracts in Relation to Flour Ash." published in 1977 in the Journal of Cereal Chemistry. The method described below was derived from the discussion in this paper.

The method is very simple. Mix 100 grams of distilled water (should be distilled water to get good results) and add 5 grams of the flour to be tested in a container. Stir thoroughly to completely hydrate the flour. Periodically stir for about 12 hours. After the flour has settled to the bottom of the jar, measure the conductivity of the water. For the best measurement, allow the flour to settle on the bottom so there is clear water to measure. The clear water will have a higher conductivity than recently stirred and cloudy water. At first the conductivity rises, as the various compounds that contribute to the conductivity of the water dissolve, but at some point the conductivity will stabilize. In my case it took a long time, maybe 12 hours or so, for the conductivity to stop changing. The conductivity measured can then be calibrated by measuring flours with known ash content and fitting a curve of conductivity to the known ash content. In practice it looked very linear, so even a simple proportional relationship would give reasonable results, based on my admittedly minimal sampling.

         ppmuS/cmash %
hmap2150.310.50
home713850.551.05
hmgb4200.601.13
hmww4700.671.70
wrye5300.761.90

The table above shows measured conductivity in ppm, as the meter represents it for TDS or "Total Dissolved Solids" in parts per million salts for a hydroponic solution and also shows conductivity in the more standard measure of milli-Siemens per cm. I don't know the ash content, but based on some flour specification information from Heartland Mill, I filled in rough numbers and then used them to approximate the ash content of my "71% yield, fairly white bread flour" sifted from a couple of passes with my new Meadows 8 inch mill and a couple of siftings with a number 60 sieve in my new SS-100 Econo-Shaker sieve shaker.

The method in the paper heated the samples to boil them for a short period, then cooled and centrifuged the samples to create a clear liquid with the dissolved minerals in it. I didn't want to deal with boiling or somehow obtaining a centrifuge. OK, maybe you could put your jars in bags, tie them to some rope and spin them like Argentine "bolas", but I recommend patience. It was unclear what the effects of boiling were from this paper, but it seemed to affect the measurement in some unexpected way. So, my approach is to keep it simple and just wait for the conductivity and the flour to settle, even if it takes a while.

Summary

You can obtain a reasonable estimate of ash content by mixing 5 grams of flour with 100 grams of distilled water, stirring periodically for a few hours and then measuring the stabilized conductivity and comparing to the same measurement for some reference flours of known ash content. I proceeded to make one of my favorite miche recipes and found this flour to give very comparable results to Heartland Mill Golden Buffalo flour, which is of similar ash content. The difference is I can mill my own version of the Golden Buffalo flour and obtain it absolutely fresh when called for. In addition, measuring and recording the ash content of the output from the various passes of grinding and sifting should allow me to blend the outputs in the right proportions to obtain a desired ash content for recipes that may call for more refined or less refined flour.

marcsababa's picture

Kneading fresh ground flour

November 23, 2007 - 6:30pm -- marcsababa
Forums: 

I have been making bread for a few years. I was happy with the product from store bought whole wheat flour, but since I have been using fresh ground flour from hard red winter wheat I have been having troubles. My dough never seems to knead up into something that is easy to knead. There is always a certain level of stickyness that verges on the unmanageable. Okay I can scrape it up and shape it and it is not that bad, but the problem gets worse when I try using sourdough starter.


I have recently tried three types of bread:

Subscribe to RSS - fresh ground flour