The Fresh Loaf

A Community of Amateur Bakers and Artisan Bread Enthusiasts.

Blogs

dmsnyder's picture
dmsnyder

 I first posted a formula for a naturally leavened  pugliese bread 11 years ago. I fiddled with the formula and procedure a bit over several years, but I haven’t made this bread in about 6 years. Today’s version is different from some of the ones I have made before in a couple respects: First, I use an all-white flour biga rather than a mixed grain liquid levain. And, second, I hand mixed rather than using a stand mixer. 

 The dough had excellent gluten development. It was silky smooth yet quite loose and extensible. It spread a bit when transferred to the baking stone but had very good oven spring.


Total Dough

Wt. (g)

Baker’s %

All Purpose Flour

442

78

Fine Durum Flour

125

22

Water

433

76

Salt

10

1.8

Total

1010

177.8


Biga Naturalle

Wt. (g)

Baker’s %

All Purpose Flour

48

100

Water

24

50

Ripe stiff levain (50% hydration)

29

60

Total

101

210

1. Dissolve the levain in the water.

2. Mix in the flour to hydrate well.

3. Cover and ferment at 78ºF until double in volume.

4. Refrigerate overnight


Final Dough

Wt. (g)

All Purpose Flour

375

Fine Durum Flour

125

Water

400

Salt

10

Biga

100

Total

1010


Procedure

  1. Take the biga out of the refrigerator and warm to room temperature.
  2. Mix the water and flours to a shaggy mass, cover and autolyse for 60 minutes. (Note that Durum flour absorbs water more slowly than AP flour.)
  3. Sprinkle the salt over the dough, then add the biga in chunks. Mix the salt and biga into the dough using the pinch and fold method.
  4. Transfer the dough to a lightly oiled container large enough to accommodate a doubling in volume. Cover the container.
  5. Ferment at 80ºF until the dough is almost doubled with stretch and folds at 30 and 60 minutes. (about 4-5 hours)
  6. Transfer the dough to a floured board and pre-shape as a ball. Cover and let rest for 10-20 minutes.
  7. Shape as a boule and transfer to a floured banneton, seam side down. Place in a food safe plastic bag and proof. (About 2 hours.)
  8. 45-60 minutes before baking, preheat the oven to 500ºF with a baking stone or steel on a middle rack and your steaming apparatus ready to use.
  9. Turn the oven temperature down to 460ºF. Transfer the loaf to the stone (seam side up) and steam the oven.
  10. After 15 minutes, remove the steam source. Bake for another 20-30 minutes or until the loaf is fully baked. The crust should be nicely colored. The internal temperature should be at least 205ºF. The loaf should sound hollow when thumped on the bottom.
  11. Optionally, leave the loaf on the baking stone with oven turned off and the door ajar to dry the crust further.
  12. Transfer the loaf to a cooling rack. Cool completely before slicing. 


The crust was chewy. The crumb was cool, moist and soft-chewy. The flavor was not sour in the least but just a good white bread. I did not detect any distinct flavor contribution of the durum flour. Nice bread, but I do prefer one with 30-40% whole grain flour these days. YMMV. 

 Happy baking!

 David


dtdayan's picture
dtdayan

300g BF

200g Water

30 g leaven

6g salt

2 hr Bulk Fermentation;Overnight retard ref; 30min shaping and rest; 2hr proofing; 240C dutch oven 20min, 25 mi

HeiHei29er's picture
HeiHei29er

It was an experimental kind of weekend.  Two loaves that I've been wanting to try and had a window of opportunity.  Really happy with one and mixed results with the other.

First up...  100% Whole Grain Spelt with RYW
Started with milling 460g of spelt berries on my Mockmill with the stones adjusted so they were just touching.  Flour was sifted with a #40 screen and the bran collected.  When I was done, I had 396g of flour and 60g of bran, which surprised me a bit.  That works out to about 87% extraction.  Does that sound about right?  25g of the bran was used in the levain and the remainder was used in a scald.  The hope was the bran would be softened in both cases.  I used my "sour" RYW and the aromas during fermentation were WONDERFUL!  Can best describe it as a rich buttery smell with an acetic sour tinge.  Basically, buttermilk...

Levain
101g   Spelt flour
25g     Spelt bran
126g   RYW

Soaker
35g    Spelt bran
35g    Boiling water

Final Dough
294g   Spelt flour
147g   RYW
21g     RYW (Holdback)
8.4g    Salt

1)  Prepare levain the night before and ferment for 10-12 hors at 78 deg F
2)  Prepare soaker 2 hours before final mix and let cool on counter
3)  Combine all ingredients for mix.  Let bench rest for 30 minutes to hydrate flour
4)  Bassinage in the hold back water (I used about 10g of the hold back)
5)  Bowl folding to develop the dough.  Kept folds to a minimum to not overwork the spelt gluten.
6)  Bulk ferment at 76 deg F with light bowl folding every 30 minutes.
7)  Preshape and bench rest 15-20 minutes
8)  Shape oval and final proof at 76 deg F for 1.5 hours
9)  Bake with steam at 460 deg F for 1 minute and then set oven for 425 deg F for 15 minutes.  Vent oven and bake at 425 deg F for until done (15-20 minutes).

Mixed results...  The flavor of this bread is really nice.  Had a slice with some butter for dinner last night.  Very happy with that.  But...  Was hoping for something a little more open.  I know it won't be open and airy with 100% whole grain, but this one is pretty dense.  Much more like a whole rye.  Not sure if I was too gentle and didn't develop enough gluten or it was too much bran at 13% or a combination of both.  The progress through bulk and final proof was very nice, so I don't think it was a lack of fermentation.  There just wasn't much spring.  Sliced and ate some before I got any pictures.  :-)


Next up...  Troy's Breakfast Bread
I've started making a multigrain breakfast bowl lately and like the flavor.  Decided to add it to a loaf and see how it turned out.  Really happy with the loaf.  The corn meal aroma definitely comes through and the rolled oats give the crumb that nice soft texture that you'd expect.  For me, this is the perfect bread crumb.  Bread made with a biga type preferment.

Biga
120g   Bread flour
65g     Water
0.4g    ADY

Soaker (Porridge)
24g    Rolled oats
12g    Corn meal
6g      Hulled millet
5g      Flaxseed
5g      Chia seed
5g      Roasted Sunflower seed
4g      Finely chopped almonds
92g    Boiling water

Final Dough
220g   AP flour
20g     Bread flour
40g     Whole Wheat flour
142g   Water
8.8g    Salt
2g       ADY

1)  Combine biga ingredients and ferment at 72 deg F for 10-12 hours
2)  Prepare soaker the night before and leave on counter top to cool
3)  Combine all ingredients for final dough (except salt), biga, and soaker.  Mix until flours are just hydrated.
4)  Fermentolyse for 30 minutes
5)  Fold in salt during first set of bowl kneading.  Bassinage another 1-2% hydration as well.
6)  Four sets of bowl kneading with 10 minute rests to develop full gluten.
7)  Bulk at 76 deg F until doubled
8)  Preshape and rest for 15-20 minutes
9)  Final proof at 76 deg F (1 - 1.5 hours)
10)  Bake with steam at 460 deg (1 minute) then drop oven temp to 425 deg for 15 minutes.  Vent oven and continue with bake at 425 deg F until done (15-20 minutes)


Benito's picture
Benito

Despite the fact that growing up challah was my favourite bread, since I’ve been baking bread for the past three years I’ve only made challah once. My first challah was Maggie Glezer’s sourdough challah which I blogged about last year. I made some changes to her recipe in order to add some whole grain. I also love an eggy challah so also increased the egg. I reduced both the water and the oil to compensate for the contribution of both by the additional egg. This is what I came up with for my test bake.

The dough was stickier than I would have liked so shaping was more challenging than I wanted. I would omit the holdback water the next time I bake this.
Procedures


  1. The night before baking, mix the starter and ferment it at 76-78°F for 8-12 hours.
  2. In the morning, in a large bowl or the bowl of a stand mixer, add the starter then water, then mix in the 4 eggs, salt and honey and mix until completely combined.
  3. Mix in all the flour until it forms a shaggy mass.
  4. Knead the dough on the bench or in a stand mixer until it is smooth and there is moderate gluten development. (Bassinage the hold back water to achieve the desired consistency) The dough should be quite firm. Gradually add the oil, the dough may break down, wait until it comes back together and before you add more. Mix until gluten is well developed.
  5. Transfer the dough to a lightly oiled bowl and cover it tightly. Ferment for about 2 hours. It may not rise much.  At 82°F it rose 20-25% in 2 hours.
  6. To make one loaf, divide the dough into two equal portions, and divide each portion into the number of pieces needed for the type of braiding you plan to do, so divide each by 3 to make 1 six strand braided loaf.
  7. Form each piece into a ball and allow them to rest, covered, for 10-20 minutes to relax the gluten.
  8. Form each piece into a strand about 14” long. (I like Glezer’s technique for this. On an un-floured board, flatten each piece with the palm of your hand. Using a rolling pin, roll out each piece to about ¼ inch thickness. Then roll up each piece into a tight tube. Using the palms of your hands, lengthen each piece by rolling each tube back and forth on the bench with light pressure. Start with your hands together in the middle of the tube and, as you roll it, move your hands gradually outward. Taper the ends of the tube by rotating your wrists slightly so that the thumb side of your hand is slightly elevated, as you near the ends of the tube.). You can consider rolling each rope of dough in two different types of seeds at this point for a decorative effect, or only a few of the strands.
  9. Braid the loaves. Braiding somewhat loosely, not too tight.
  10. Place loaf on parchment paper on a sheet pan (I used a quarter-sheet pan for each loaf.) Cover well with plastic wrap or place the pans in a food grade plastic bag, and proof at room temperature until the loaves have tripled in volume. About 4-6 hours.
  11. If it’s almost tripled and when poked the dough only springs back a little, preheat the oven to 180°C/350°F. Gauge the dough again. Stick a finger lightly in the dough. If it makes an indentation that doesn’t spring back, the dough is ready to be baked. If not, wait a bit more.
  12. Pre-heat the oven to 350ºF with the rack in the upper third of the oven about 30 mins before final proof is complete.
  13. Brush each loaf with an egg lightly beaten with a pinch of salt.
  14. Optionally, sprinkle the loaves with sesame seeds and/or poppy seeds.
  15. Bake until done – 25-40 minutes rotating half way. If baking as one large loaf may take a bit longer, bake until sounds hollow or reaches 190ºF in the middle.
  16. Cool completely before slicing.

idaveindy's picture
idaveindy

May 12, 2022.  5" pizza.

My take on Adam Ragusea's cast iron pan pizza from his video here: https://www.youtube.com/watch?v=uYxB4QBlrx4

Dough, enough for 4 pizza crusts, 5" mini-personal size, cooked in a 6.5" Lodge cast iron skillet.  Dough is divided into 4 portions of about 50 grams each.

 Sauce: tomato paste, chopped fresh tomato, pizza spice (Dangold Pizza Palooza,  from Tuesday Morning).

Toppings: mozzarella cheese, Alef brand beef dry salami, sliced fresh mushrooms.

Procedure:


Another Girl's picture
Another Girl

This is Benny's 100% WW Sourdough Hokkaido Milk Bread. (The link points to his 2.0 version and I'm not positive whether I made that one or another variant.) Anyway, I attempted this bread back in January but got no rise to speak of, undoubtedly because I did not a thing to prepare my rye sour for a sweet levain and enriched dough. I baked it anyway and while it rose a couple inches in the oven, it barely filled half the pan. Still, the flavor and texture were good enough to convince me that this bread deserved my best effort, so I choose to make a new osmotolerant starter from scratch. Any time I’ve tried to convert my rye starter to anything else, it proved stubbornly resistant to change. For this new sweet stiff starter, I followed the recipe in Vanessa Kimball’s Sweet Sourdough and it was ready for baking a week or so later. Unfortunately, I got sidetracked by other projects and didn’t soon have a chance to return to this bread. I’ve been faithfully maintaining the sweet stiff starter with this bread in mind. Finally, Monday was the day. 

The starter was mixed with 100% whole grain, home ground Red Fife. The flour used in the levain and final dough was KAF 100% Organic Whole Wheat. I opted for commercial flour because my current inventory of of red wheat berries is from a new supplier and I’m unfamiliar with its performance. So, having failed miserably at this bread the first time out, I hoped for a modicum of success this time and so went with a flour unlikely to pack any surprises. There were a couple minor changes to the ingredients, which were these: I used 7g salt instead of 6g because I thought my taste buds would prefer it. Also, 20g honey was replaced by 1 Tbsp (I didn’t bother weighing it) brown sugar, again due to flavor preference. Finally, I accidentally omitted the diastatic malt powder. Oops. Maybe if the little beasties had their snack, they’d have risen a little higher for me.

The levain peaked at about 150% in 12½ hours of rise time. I tend to mix my levains late at night because I’m worried they’ll overferment while I’m asleep. With the weather warming here, I was planning for more activity than I’ve been used to over the winter. It’s a strategy that usually pays off, but recently I’ve been making breads such as this one with extended proof times. As I'm learning, late starts can backfire on you with long-proofing doughs and this was one of those times.

The mix went as expected and the bulk lasted 3.5 hours with no discernible increase in volume. For shaping, the dough was very soft and it stuck in spots to the rolling pin, so the pin was lightly floured as needed. The dough was then rolled into scrolls and the pan filled with the scrolls facing alternating directions and not touching the sidewalls of the buttered 9" x 4” USA pullman pan. The pan was covered with a shower cap and placed back in the proofer at 82°F. It was then 6 p.m. My family doesn’t like sourness in high percentage WW bread, so the dough would not be retarded. I was resigned to staying up no matter how long it took.

How long it took turned out to be only 5 hours – which I was thrilled about, because I had been bracing myself for 6-8 hours. It was gently brushed with egg wash and placed into a preheated 350°F oven just after 11 p.m. The bread was baked for 50 minutes at 350°F and then removed from the pan to bake for another 10 minutes at 325°F. This bread didn’t achieve the towering heights we’ve seen in Benny’s loaves but it is tall enough, very pretty, and wonderfully fragrant. A touch of sourness lingers in the finish. It's mild and acidic in a fruity way, not unpleasant, but not my family's preference. Next time, I will probably spike the dough with some IDY to minimize the fermentation time and, hopefully, the remaining touch of acidity. I would also opt for a better tasting home ground wheat. All in all, a lovely, fragrant bread with good body and a perfectly soft texture.

This is a wonderful formula, Benny, sure to be a family favorite. I recall that you spent a long time working on this formula. Thank you for developing and sharing it.


StevenSensei's picture
StevenSensei

Time to try to make a raisin bread...and might as well go to the Whole Grain version....and might as well do sprouted grain as well. To that end I took the recipe from the book and tweaked it a bit and this is the result. 

RECIPE AND CALCULATIONS HERE

A few notes. You might not be able to knead the biga. Just let it soak overnight and it will firm up quite a bit as the flour hydrates. For the final dough you will likely need to add more flour to get the dough to come together and build enough gluten. If you are using the sprouted grain you should be sure to add the vital wheat gluten to help build the needed structure. If you do not have this gluten feel free to sub in flour for the sprouted grains. 

Tasting Notes: Rich and dense. You could even say toothsome. The bake took more time than expected so it has a pretty thick crust. It isn't unpleasant but if you are expecting a lighter softer bread whole wheat is not the answer for you. The cinnamon sugar swirl is not very visible in the cross section nor is it an overpowering flavor. It's more like a nice subtle pop of flavor for a bite here or there. The same with the raisins. I taste them on occasion but the wheat is so strong the kind of get a little lost in the richness of the wheat. And apparently there are walnuts...but I can't tell!

Time/Effort: 4 days - Day 1 begin sprouting. Day 3 Mix Biga and Soaker. Day 4 mix dough, prove, and bake. While it sounds like a long time it's mostly just planning ahead. With just an overnight soaker this bread really comes together in a single day. 

Would I make it again: Yes, but as a transitional bread that uses 50% whole wheat and 50% bread flour. I think the raisins and cinnamon sugar would have a better chance to shine with a less dense bread. It's good but maybe too many good things have made the flavors less clear and more muddled together. 

HeiHei29er's picture
HeiHei29er

It's been a long time coming, but I finally got around to doing a side-by-side comparison of a bake with and without raisin yeast water.  One caveat...  any of you that have followed my posts may remember when my yeast water that I made with honey and raisins went sour and noticeably acetic.  I thought it was the new batch of raisins I had purchased, but it happened again with a brand new YW with new organic raisins. So now, I think it may be the honey.  This should have been a test to see how YW smooths out any sourness, but in this case, it was how it added to it.  :-)  In reality, this worked out well because my starter (all white flour at 120% hydration) lacks any real acetic tones.  It's very yogurty.

On to the bake...

Loaf 1
225g  AP Flour (Wheat Montana)
158g  Bread Flour (Wheat Montana)
23g    Whole Wheat Flour (King Arthur)
23g    Sifted Durum Flour (Janie's Mill)
11g    Barley Flour (Food to Live)
11g    Dark Rye Flour (Bob's Red Mill)
302g  Water (67% hydration)
9g      Sea Salt
18g    Sourdough Starter 

Loaf 2
All the same flours and salt
189g   Water (42% hydration)
113g   Raisin Yeast Water (25% hydration)
13g     Sourdough Starter

Method
1)   Combine all ingredients and mix till fours are wetted.  
2)   Bench rest 30 minutes
3)   Bowl kneading till some dough resistance (24 folds)
4)   Bench rest for 30 minutes
5)   Bowl kneading till smooth dough surface (12-15 folds)
6)   Bulk ferment 76 deg with S&F every 60 minutes until dough is just starting to get "puffy" (7-8 hours)
7)   Continue bulk until dough roughly doubles (80-100%)
8)   Pre-shape, bench rest, final shape
9)   Final proof at 76 deg F for 2 hours
10) Cold retard overnight (6-8 hours)
11)  Pre-heat oven to 460 deg F for 40 minutes
12)  Pre-steam oven, load dough and bake for 1 minute at 460 deg F; lower oven to 425 deg F (15 minutes); vent oven and empty residual water in steam tray; 425 deg F (15-20 minutes).  Bake done when hollow thump on bottom.

Observations
1)   Both doughs were slightly sticky at mix but immediately smoothed out after first kneading
2)   RYW dough was a little stronger/stiffer from initial mix
3)   RYW dough was a little slower in bulk and final proof.  Guessing the amount of RYW used did not compensate for the drop in starter inoculation.
4)   Both loaves had very similar bloom/spring.
5)   RYW loaf has a slightly more closed crumb.  Not sure if that's due to fermentation or slight differences in degassing/shaping.  Would need to do it again to see if it's consistent.
6)   RYW loaf had a more noticeable tang to both aroma and taste (as expected with my "sour" RYW).  Both breads were very good.  I think I liked the tang a little more.
7)   Side note...  I used a pizza stone instead of my baking steel for these loaves.  Have been fighting very tough, leathery bottom crust since starting with my steel.  Had to drop pre-heat temps to 375 deg F to avoid it and then try to ramp temp at the end to get color into the crust.  Not an issue with the stone, and really happy with the bloom and spring on both loaves.

Straight SD loaf left.  RYW/SD loaf on right.

Straight SD

RYW/SD

trailrunner's picture
trailrunner

 Added crumb shot. A tiny compressed place at top where lid caught when I peaked at before putting in oven😩 have to stop peaking! Taste and fragrance are rich and a deep almost chocolate fragrance. Eating it with butter. Could use a bit more salt. Crumb is like a moist cake very pleasant and not gummy at all. No sour present. Very pleased. 

https://www.thefreshloaf.com/node/70103/13%E2%80%9D-pullman-rye-yw-levains

previous bake 86% rye


I’ve made this before for Ian’s post . Watching the fermentation is the key to success. I hurried it once before and the texture wasn’t as fine as the first time I made it. This time I watched for the very first pinhole size bubble on the surface and immediately covered and refrigerated it. Perfect so far. The buttery fragrance is intoxicating. It’s wrapped in towels til tomorrow. 

My YW has been wonderful since it vacationed with me at the beach 😊. I made one levain using stored YW starter added stored  YW unrefreshed and t65 for 1/2 the called for levain and used stored Rye SD starter to which I added the same stored unrefreshed YW and fresh milled Danco Rye. 570 grams of levain total. All the rest of the flour is Danco rye milled fresh fine grind unsifted. My Holy Trinity of olive oil/Palmetto honey from Florida/ buttermilk made up 90g of the liquid. This is a batter poured into very well buttered 13” Pullman smoothed with wet spatula. The dough had 8 ridges showing when it was first put in the pan. This is right before going in the oven. When it came out filled perfectly to top. 


idaveindy's picture
idaveindy

May 7th, 2022. 91st bake.

500 grams of flour, 425 grams water, and 9 grams salt was hand mixed and left to soak for 1 hour.

I used scales to weigh the above, but did not take note of weight of each type of flour.

I wasn't sure how much water would be needed, so I started with 375 grams, then added 25, mixed, and then added 25 more, and that felt right.

I used up the last of my home-milled hard red wheat, and just eyeballed the rest -- Bob's Red Mill WW stone-ground red, Golden Temple red bag durum, Swad brand (gritty) semolina, and some Gold Medal bread flour. But total, to this point, was 500 g flour.

3/4 tsp instant dry yeast, and for good dispersal, this was first mixed in with 2 tbsp Gold Medal bread flour and 2 tbsp Golden Temple red bag durum. This flour was not counted in the 500 grams above.

1 tbsp toasted-ground bread spice. (Spice was toasted, then ground. Measure was taken after grinding.  Pre-toasting volume ratio: 1 part anise, 1 part fennel, 2 parts whole caraway, 4 parts whole coriander.)

1 tsp whole caraway seeds.

Mixed/kneaded by hand.

1 tbsp 3 day old 100% hydration starter from fridge.
1 tbsp 6 day old 100% hydration starter from fridge.
(Water and flour in starters was not counted in above measurements.)

Mixed/kneaded by hand.

A drizzle of olive oil to keep dough mass from sticking to bowl.

Bulk ferment from 2:46 pm to 5:57 pm, with some hand kneading in between.

5:57 pm, start oven pre-heat to 475 F, and fold/shape dough, and put in lined and dusted banneton.

Used a pre-heated Lodge 3.2 qt cast iron combo cooker.

6:43 pm, bake 425 F, covered, 15 min.
6:58 pm, bake 400 F, uncovered, 15 min.
7:13 pm, bake 375 F, uncovered, 15 min.
7:28 pm, done. Internal temp. 205.something.

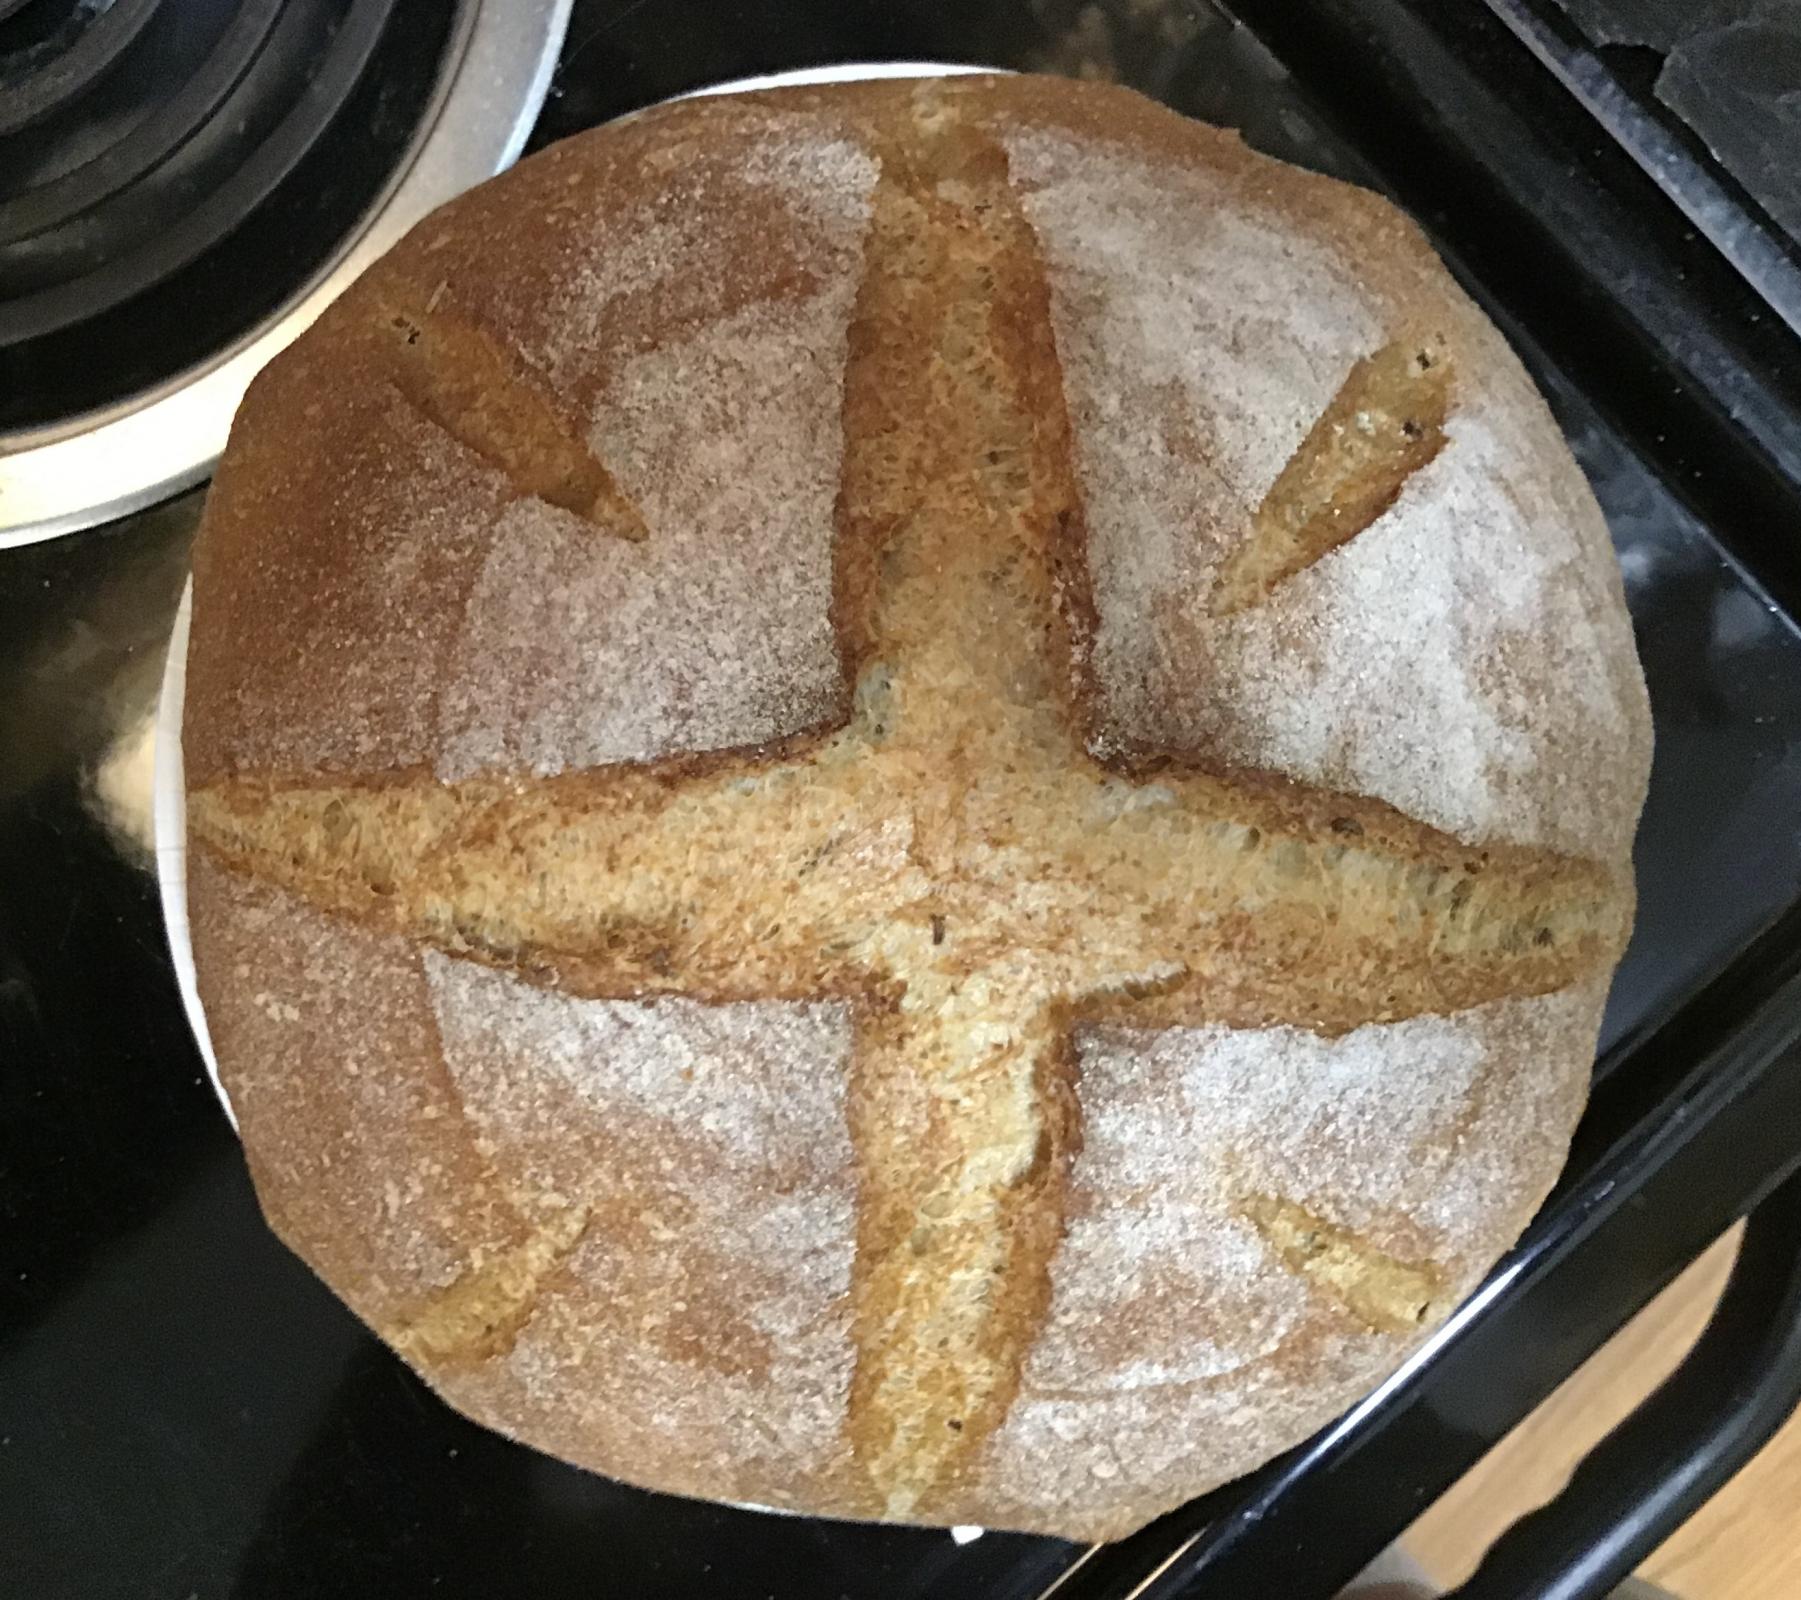
Paper plate is 9" in diameter.

At 9:23 pm, loaf weighed 855 grams.


Pages

Subscribe to RSS - blogs