Edit: Formatting fixed. That's better!!
It's funny how these things come up. I had purchased a Zojirushi Virtuoso about a year and a half ago and have struggled to get a reasonably decent loaf of bread out of it. My most consistent problems are drastic over proofing (to the point of complete collapse of the loaf), and a pale crust. Even with cutting yeast amounts in half and trying an assortment of recipes, results were never all that great. Edible, just far short of what I had hoped for. I had reached the point of relegating it to the basement vs just getting rid of it entirely. Nobody has counter space for appliances that aren't doing anything, me included.
As I was wondering what to do with it, a discussion about a particular brand of bread machine popped up recently here. Comments included suggestions about ways to improve the crust color as well as bake in the machine using a regular loaf pan. Several people (yipee and jo_en here) report improvement by putting a layer of aluminum foil between the glass viewing window and the interior of the machine, to reduce heat loss and improve reflectivity. Jo_en' trivet suggestion here was also helpful. I figured I didn't have much to lose at this point and went ahead with their suggestions.
Putting the foil inside the lid was indeed easy. The Virtuoso has 5 screws: 4 Philips head and 1 torx screw, which required that specialty screwdriver. Hubby had one just the right size at the ready in his shop room - yeah! And we had a trivet that was just the right size. It had come with an air fryer, but I had never used it. I figured if it was recommended for air fryer temps, it would be fine inside the Zo.
I haven't baked a yeasted loaf in nearly forever. My starter had been slumbering in the frig for the past week and I was itching to try out the suggestions. Rather than feed my starter and wait, I pulled up an old yeast based recipe for something similar to our usual SD sandwich bread:
375 gm fresh milled hard red spring wheat
125 gm King Arthur bread flour
350 gm water
2 tsp brown sugar
1 Tbsp safflower oil
9 gm salt
6 gm Instant Yeast
All mixed/kneaded in the Zo for 15 min, then the dough was put in a Cambro for bulk inside the Zo on the trivet. (Not sure I would do that again, it occurred to me if the dough overflows the container for some reason that would be quite a mess to clean up.) It felt nicely strong, not too elastic and not too extensible.... Just right. Dough Temp at the start of bulk: 86f. House temp 74f. The Zo was unplugged to avoid any troubles.
Fortunately, I checked the dough after 45 minutes - it had already doubled in size. I forgot that I usually use less of the SAF yeast than most recipes call for, because it tends to do this. Rationale: In part the yeast loves the freshly milled flour and really takes off fast with it, and in part because we live at 6,000 ft, and proofing can get away from me sometimes. The dough was shaped and put into a Pullman pan (9x4x4) with a parchment sling and covered for final proof inside the Zo, on top of the trivet.
After only 30 minutes, the dough was roughly ½ in above the rim of the pan. I wasn't entirely certain how long I should bake for, so I set up a manual course to just bake for 90 minutes. (Side note for Zo users: the Virtuoso doesn't let you adjust the crust color in the manual programs, you can only do that in several of their pre-set programs... not all of the pre-set ones, just "some".) The dough got a quick brush with a mixture of 1 tsp milk and 1 tsp milk powder, and I pushed "start".
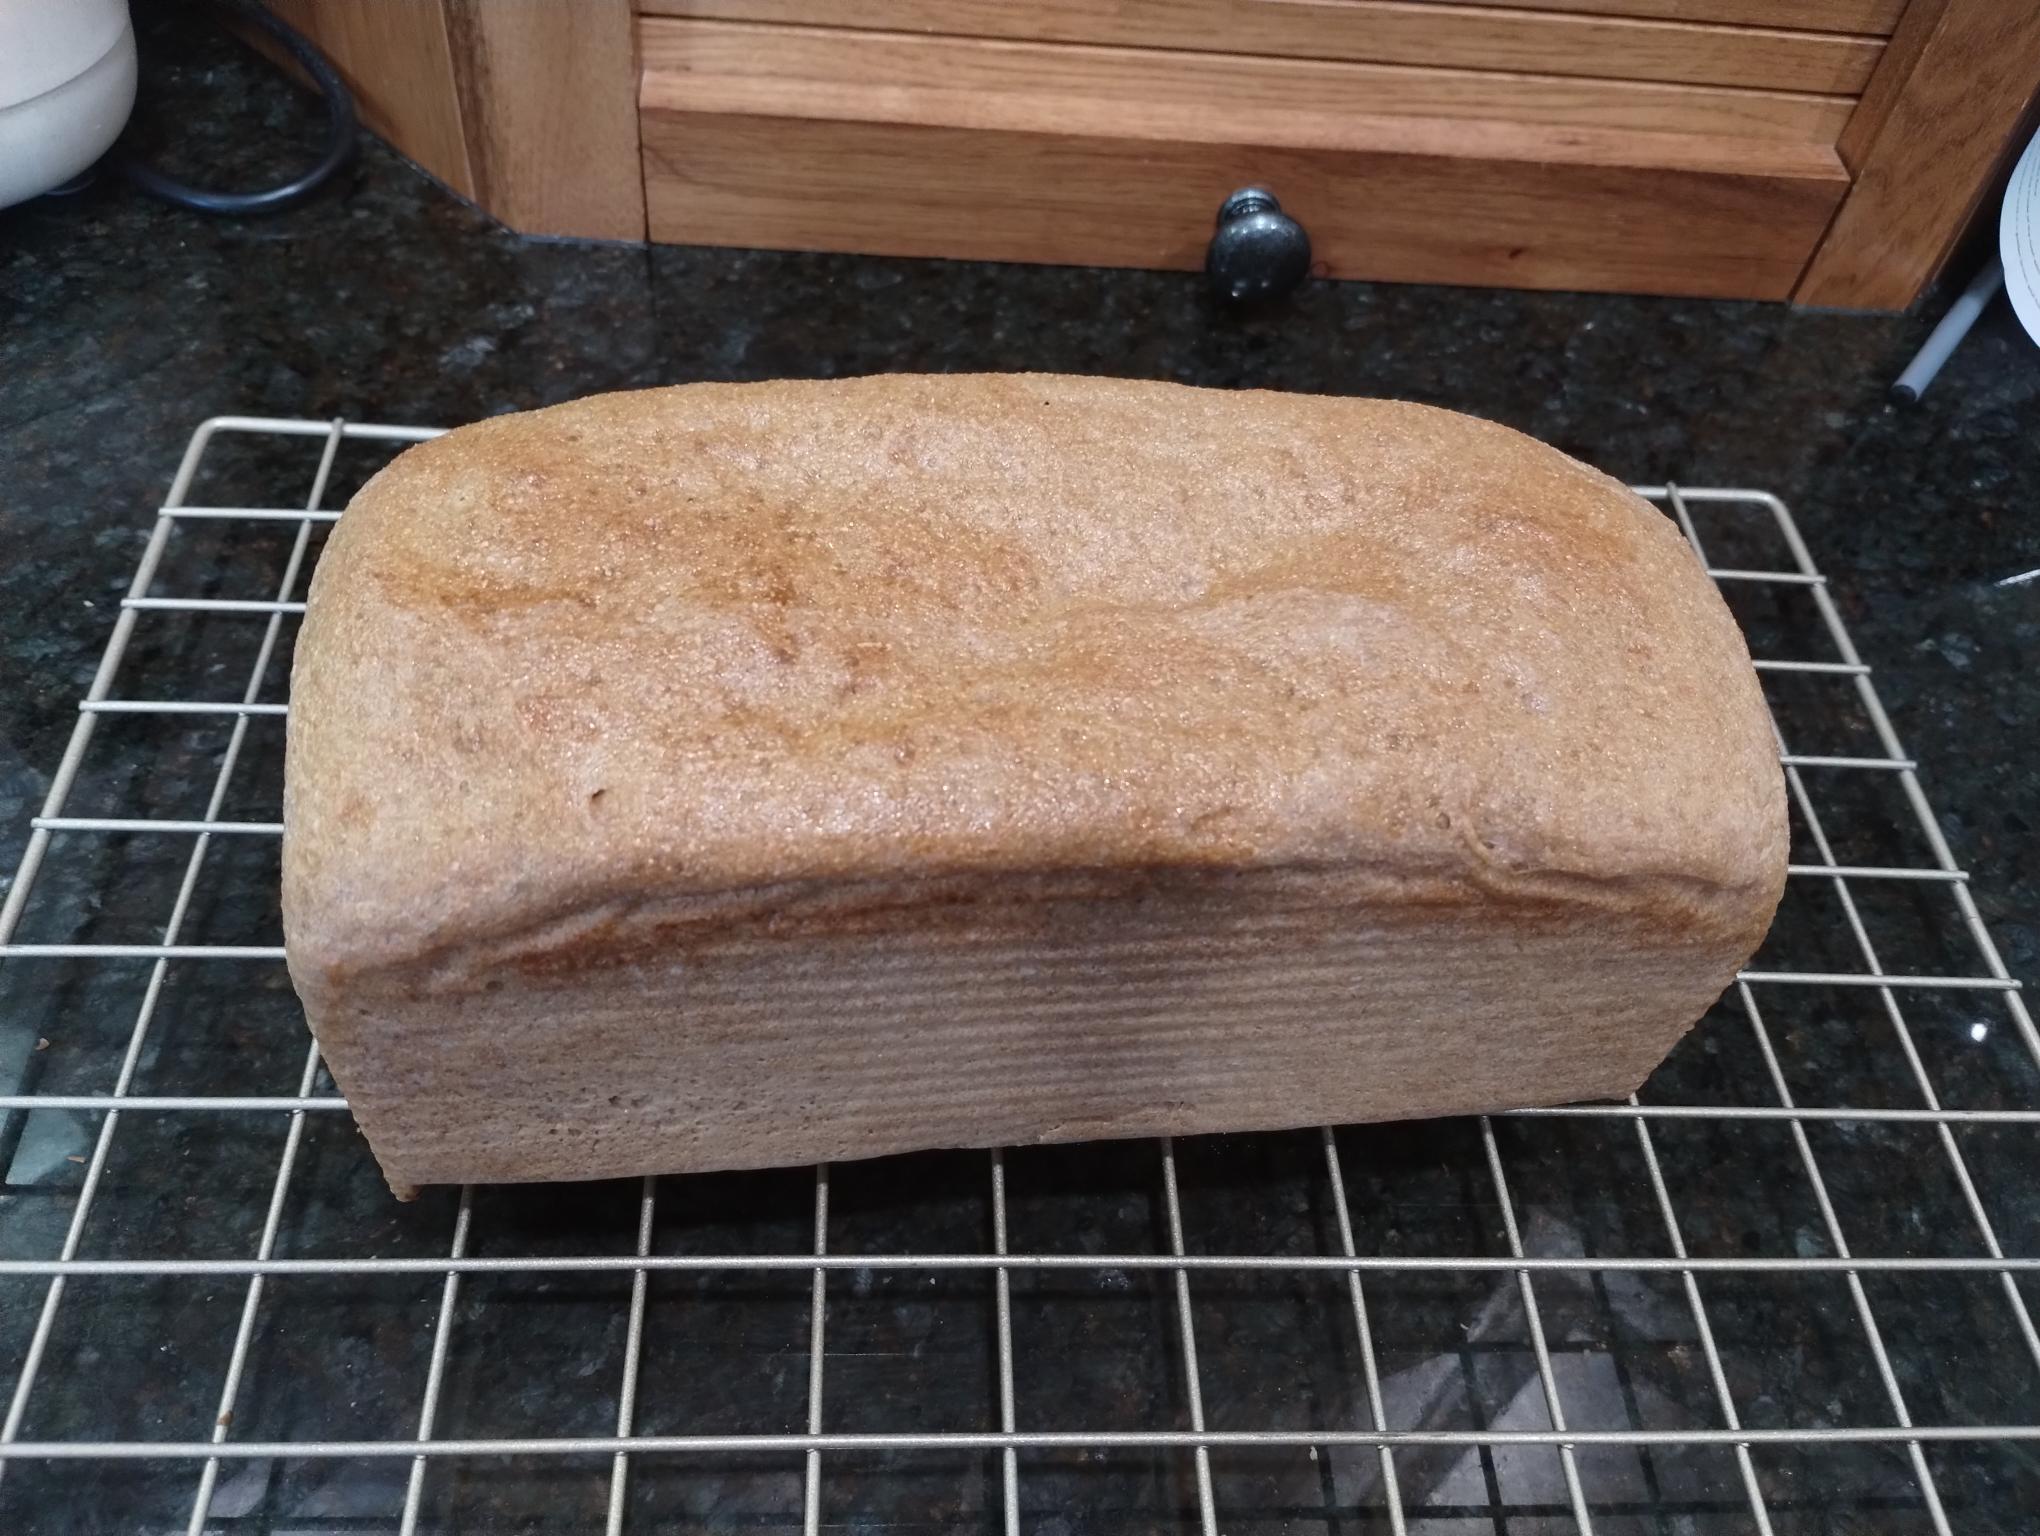
After 1 hour, I barely lifted the lid to give it a quick check.... The crust was a nice golden brown, and it smelled like it was either done or nearly so. Internal loaf temp was 197f (the best I can get here in the oven is 199f). The probe was not dry and not gummy at all.... 5 more minutes bake, then I took it out to cool.
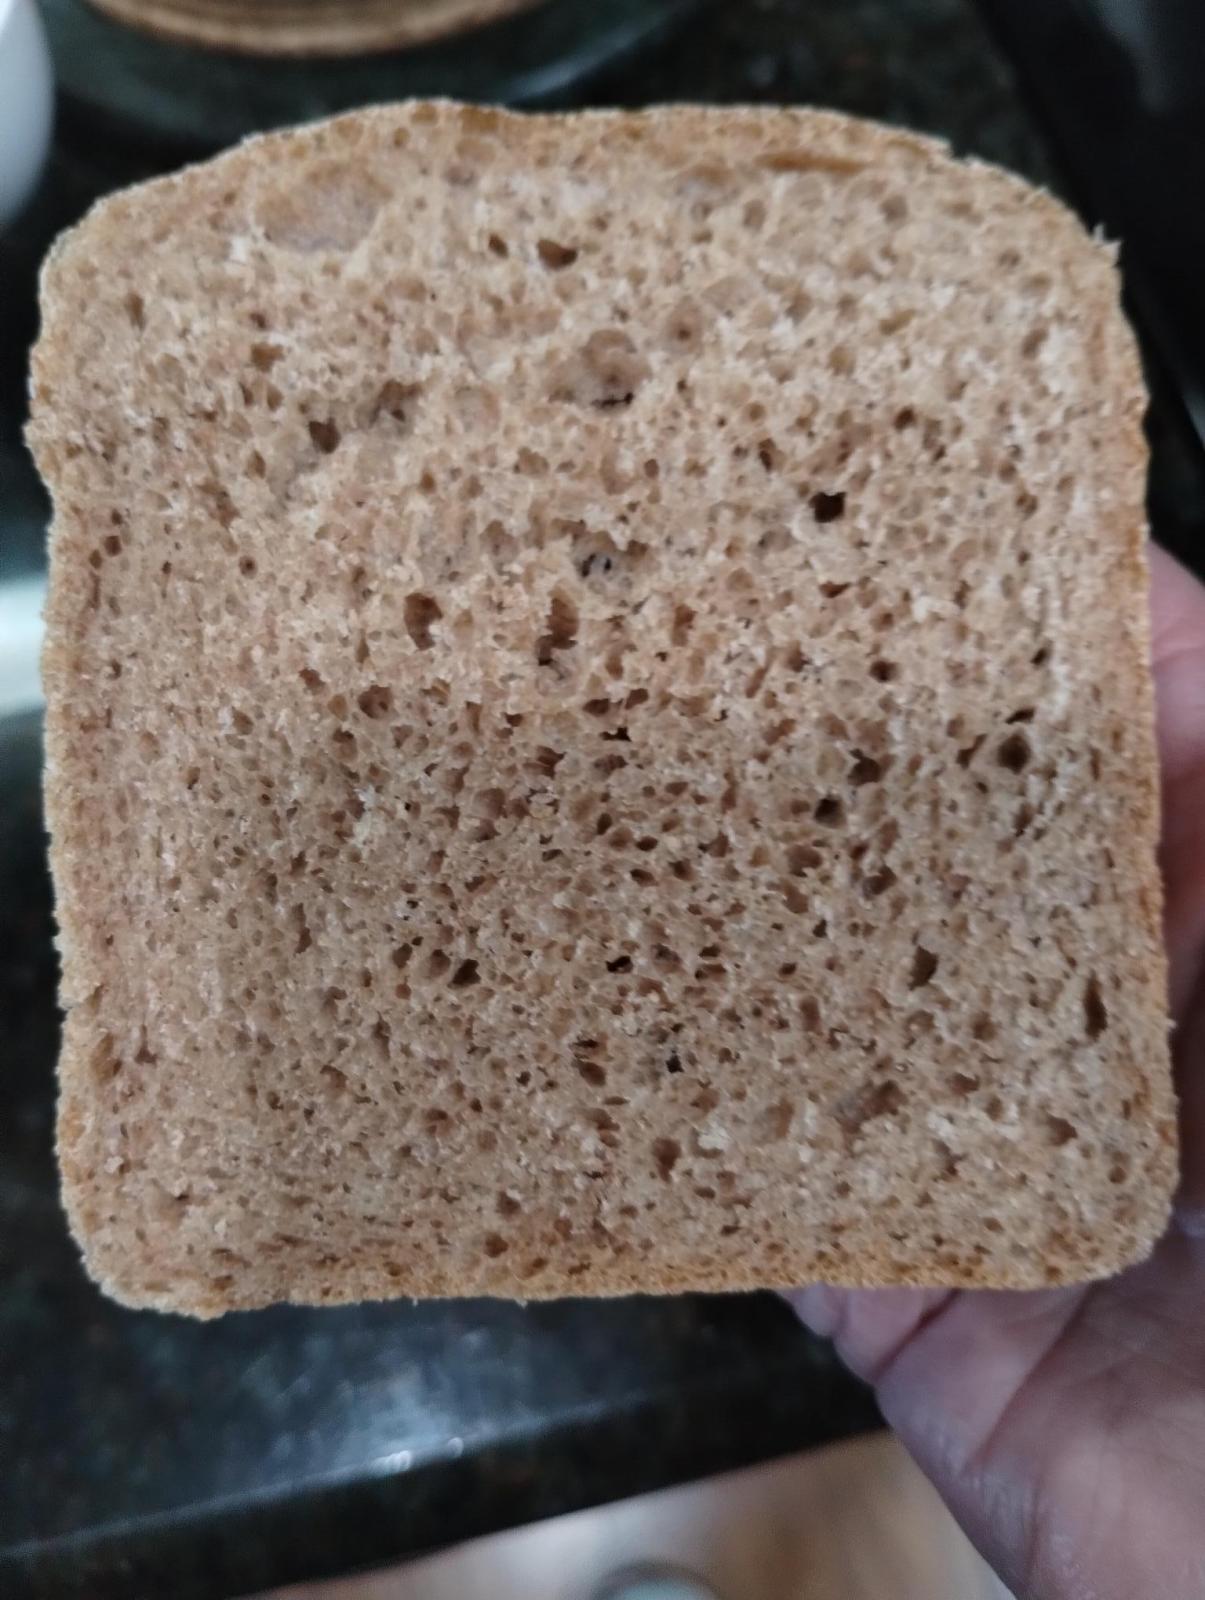
Result: Not too bad! The crumb shot is ~ 18 hours later. I think it is just a little bit over proofed. The top started to droop a bit during cooling, the crumb is fairly crumbly when cut, and the knife has a slight gummy residue which might either be from over proofing vs could have used a couple more minutes of bake time. Still - this is a bit improvement over anything I have made in it so far. The bread tastes fine, though a bit bland compared to our usual (not very tangy but more flavorful) sourdough version.
My initial goal when I got the Zo was to have an alternative way to make bread during hot weather or when I don't have time to make sourdough for some reason (rare). It definitely worked well as far as not heating up the house was concerned. It might also be useful for times when the oven is being used for something else. I'll give it a try with a SD loaf and see how that works out and play with one or 2 other pans I often use.
Pics:
Foil inside window, bulk starting inside the Zo. (I won't do that again, the potential for a serious mess is real.)

After 30 min final proof:

Initial post-bake shot, just starting to cool:

Next day: real life crust color is much better than the photo suggests. It’s the same as the initial post-bake pic:

Crumb shot:
