The Fresh Loaf

A Community of Amateur Bakers and Artisan Bread Enthusiasts.

Blogs

George bakes in Barbados's picture
George bakes in...

Hey, fellow bakers!

I just felt so compelled to share a small moment I had in baking baguettes.

I have to admit I was terrified to start my baking adventures with the baguette for fear of a high hydration dough—something I have never had to work with. Prior to making baguettes, I have made challah (not a total disaster), brioche hot cross buns (these went well!) and milk buns (probably my fave). As great as these enriched breads were, I have always had a soft spot for lean breads—I fondly remember the days of my mother picking up a (supermarket—I know, but it’s all we had in Barbados in those days) baguette and joining me devouring.

I said I would attempt to make it myself and have to admit, it turned out alright! Would love to hear your thoughts or any feedback.

I used a 73% hydration dough with baker’s flour (11.4%) and some spelt flour. Since I have a sourdough starter going, I went for a sourdough baguette—I know, perhaps not the most traditional but I love the slight tang. This was the first time I made a lean dough or even a sourdough, far less one of this hydration level.

I have to work on my shaping and more importantly, my scoring. I used a fresh razor blade but found it wasn’t slicing cleanly—kept snagging. I imagine a lame would probably make it easier to slice into the dough? Also, these were baked on a cast iron griddle in the oven since I don’t own a baking stone or steel (though I do plan to buy one!). Each loaf was 250g but wished I had made them a bit smaller since the griddle is only about 14”. I also used steam generated from lava rocks and wet towels in a gas oven.

They had a nice crackly crust, a chewy inside—really nice. Is it normal for the crust to be less “crunchy/crusty” after a few hours? I do live in a very humid climate. I was wondering if maybe the crust is too thick? If it is, what can I do to correct? I did bake these at 500F—thinking I should have dropped to 475 for 20 min.

I am pretty proud and think they turned out nice but I look forward to hearing what you all may say.Fresh from the oven

Crumb and crust

justkeepswimming's picture
justkeepswimming

I used the same recipe as last time (see blog with details here), but used DanAyo's procedure for baking artisan bread in a loaf pan (his helpful thread is here). 

A "Cliff's Notes" version of what I did, beginning last night (started levain build before bed) thru today: 

Built levain, mixed dough, kneaded 10 min, rested dough 10 min (during clean up), shaped, rose in pan 3.5 hours (Aliquot at ~ 70% increase), baked at 425F (edit, in a 8 in x 4 in pan) for 40 min to internal temp of 208. Now it's cooling, crumb shot tomorrow. 

It was certainly easier and required less babysitting or watching. For everyday sourdough sandwich bread, this couldn't be much easier! My freezer needs replenishing, I may do a whole wheat loaf in a day or so. And next time I may  score it to control where it opens a little better. (That split at the top of where the pan was goes all the way around the loaf.)

And for anyone interested in trying spelt flour, I am currently using this sprouted spelt flour. I found it at our local Sprouts market. I usually prefer to mill my own but decided on a whim to give this a try. My starter really loves it! 

Edit to add crumb shot. Not too bad, though I think the hearth bake for this recipe that I did a few days ago had a little better crumb. The crumb on this one is kind of smooshed on the bottom and a little up the sides of the loaf.

My guess (from the split around the top of the loaf, and the top crust is drier than usual) is the crust set before oven spring was finished. It tastes great - a nice chew, not crumbly at all, and made our late PB&J lunch quite nice. I will definitely do this again, it really simplifies things. Next time I'll try spritzing it with water, &/or scoring before baking. All in all, a successful experiment!

Mary

P. J. Smith's picture
P. J. Smith

Inspired from Jasons Quick Ciabatta, (I've made dozens and dozens of times), I started experimenting with my discard. I've made Ciabatta using Peter Reinharts Biga, Poolish, Jasons Quick Ciabatta, to name a few. Jasons is nice because it's quick, but lacks flavor. Peters is nice because it nails the flavor but takes much time. (Something that's not available to me anymore) This is the best of both worlds. 

When time ran short, I still maintained a twice a day feeding schedule of The Darwin Starter, but was unable to use him proper and consequently, my discard started to get out of control. Thinking about Peters Poolish/Biga, I dumped 200 grams of Darwin into my mixing bowl, knocked off 100 grams each of flour and water from Jasons Ciabatta and used warm water to offset the chill from The Darwin.

Mixing The Darwin, flour and yeast with a plastic bowl scraper then slowly incorporating the water, letting it autolyse for 15 minutes, adding the salt then aggressively mixing it, has proved to be the most efficient way for me to make this. It took 10 minutes of mixing with the paddle on 6, then another 2 minutes with the dough hook on 6 to have it ready to proof. This is where you need to be patient. I don't go so much by double or triple as I'm using a bowl and can't tell how much it's risen. What I do look for is a big,bubbly mess of slop that almost looks alive in the bowl. At this point The fun begins.

There is no "Iron Fist Velvet Glove" phase in this bake as frankly, I have no desire to fondle this mess. I don't want to Degas the dough. So I use a bench knife to shape and after a 45 minute rise, I place parchment paper next to the loaf and use my bench knives to "flip" the dough on the parchment paper. Slide my peeler under the paper, load it on the steel and 20 minutes later, it's done.

The oven is set up for steam, pictures below. I preheat it at 550 deg and after I load it, drop it to 500 deg. After 10 minutes, I pull my steam pans out, turn the loafs 180 deg and drop the oven to 450. 

From start to finish is between 4-5 hours and is without a doubt the best tasting ciabatta I've ever had, let alone made. Think lazy mans Poolish. (or time challenged)


200g 100% Hydration (Liquid) Discard

400g KABF

375g Warm Water 95-100deg

2 tsp. Instant yeast

15g Salt


1. In mixer bowl, add discard, flour and yeast. Lightly mix discard and flour with a spoon until discard is well mixed in.


2. Mixing on "Stir" add 1/2 the water and mix until incorporated. Add a bit more water, mix until incorporated. Do this in increments until all the water is incorporated and you have a wet mess.


3. Autolyse, (let sit) for 15 minutes.

4. Stir in the salt with the mixer on low. Once incorporated, crank it up to 6. In about 10 minutes, it will start pulling away from the sides and gathering up on the paddle. Switch to the dough hook and with it on 6, mix another 2 minutes or until it starts climbing the hook and pulling away from the sides.

Once it pulls away from the sides, "Pour the dough into a bowl sprayed with oil". And by pour, I mean literally pour the dough into the bowl. Cover with plastic and wait about 2.5 hours.
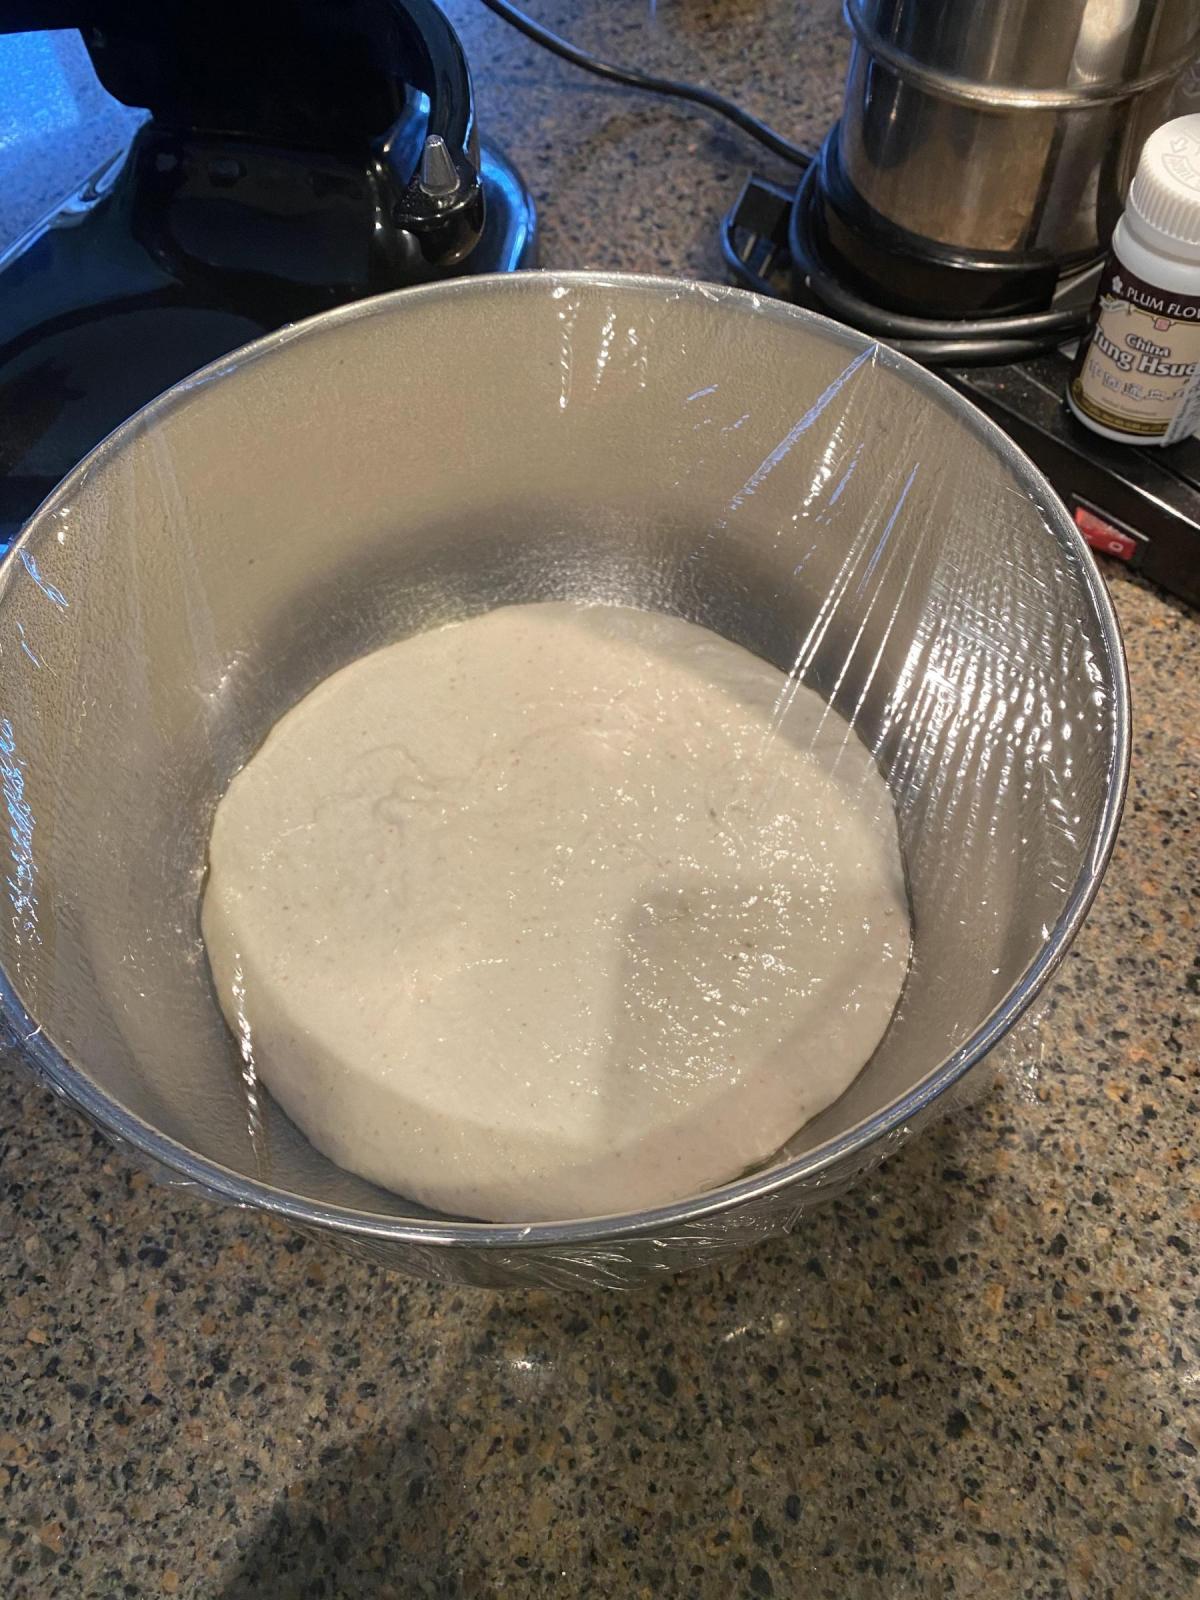
5. After roughly 2.5 hours or when your dough looks like it's alive,

Pour this living thing onto a well floured surface, being careful not to de-gas it.

Divide into 2 pieces and shape with an oiled bench knife. There is no need to touch the dough with your hands, simply split the dough and shape it using the bench knife into two loafs. (or 4 smaller loafs)


Scrape the excess flour up under the loafs,
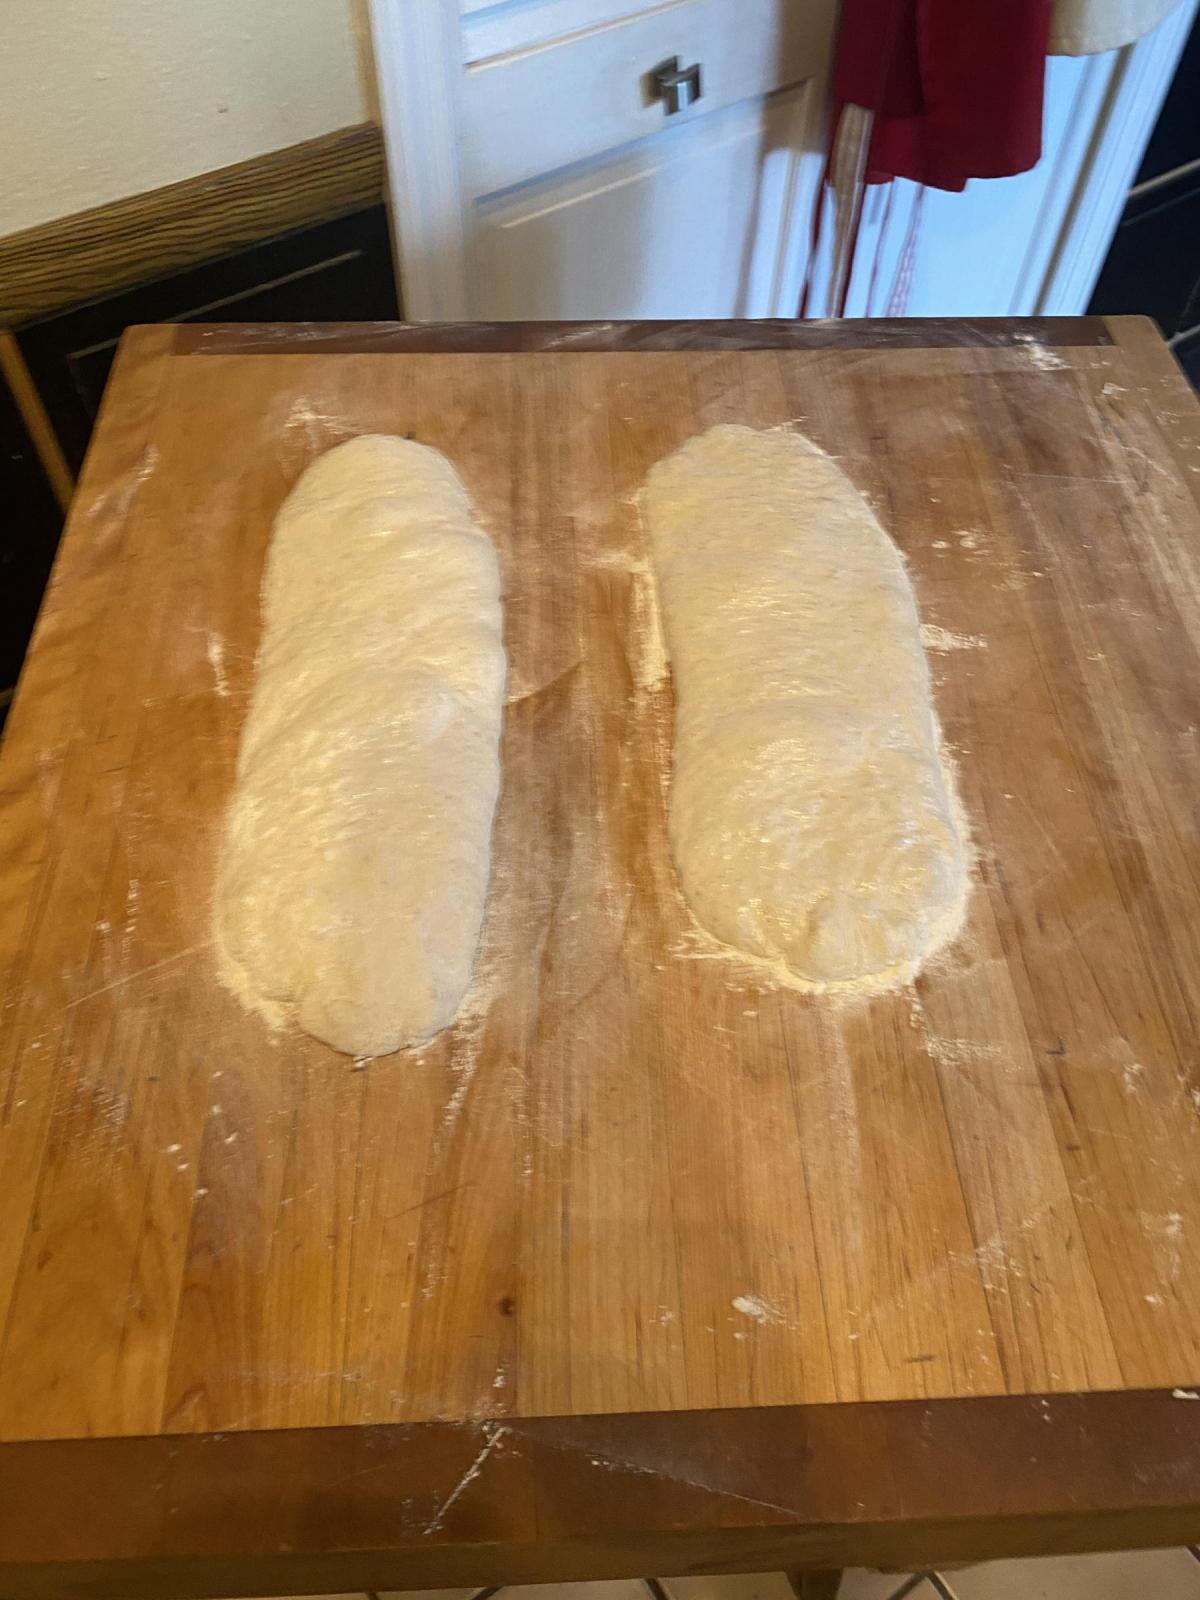
flour the loafs well and cover loosely for about 45 minutes. 

6. In the meantime, setup your oven with a steam pan or two and your steel/stone and preheat as high as it will go. Mine preheats to 550 for 45 min - 1 hr.


7. Sprinkle Corn Meal or Semolina on the top of the loafs and using a couple of Bench Knifes, flip the loafs onto some Parchment paper. (The top is now the  bottom) Gently reshape the loafs by pressing and dragging the bench knife alongside the loafs)

Load the loafs onto your Peel

Slide onto your steel/stone, pour hot water into your steamer pan and drop the oven temp to 500 deg.
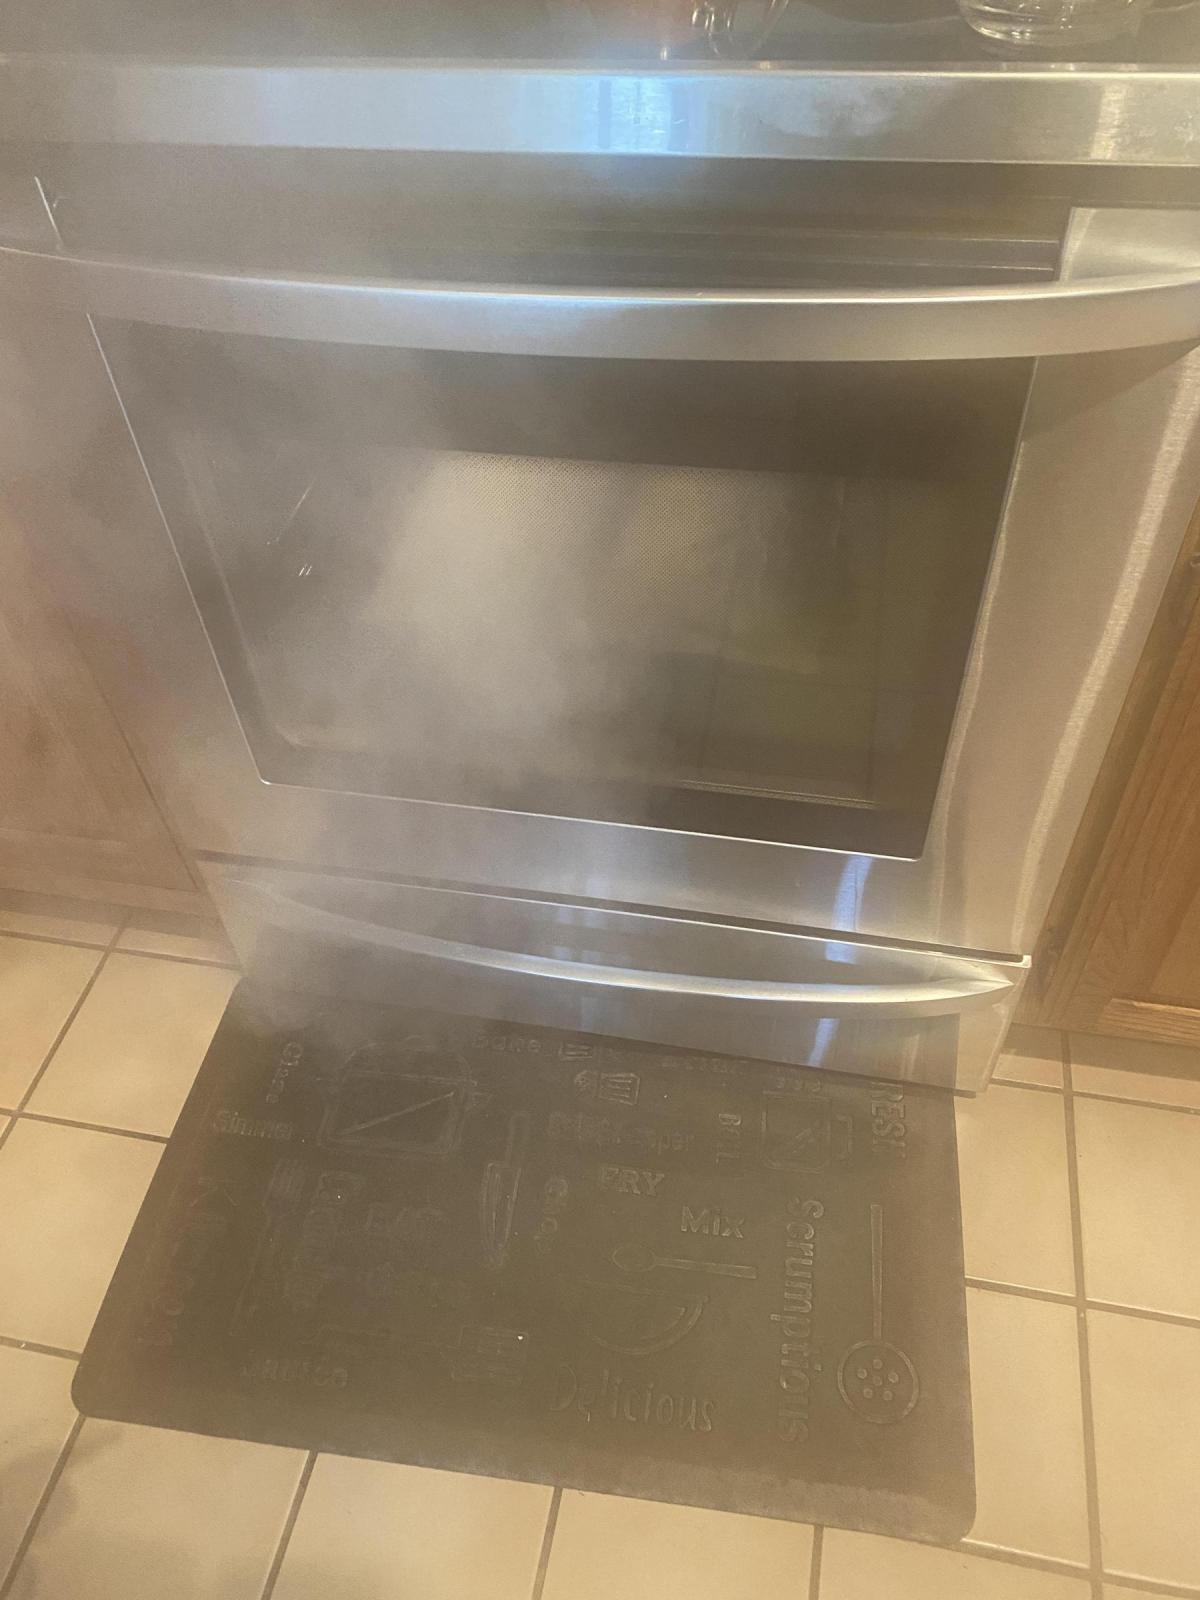
After 10 minutes, open the door, rotate the loafs 180 degrees, (I use a couple of gloves and handle the loafs directly, it's faster), drop the temp down to 450 degrees and give it another 10 minutes ish.

Put on a rack and cool.
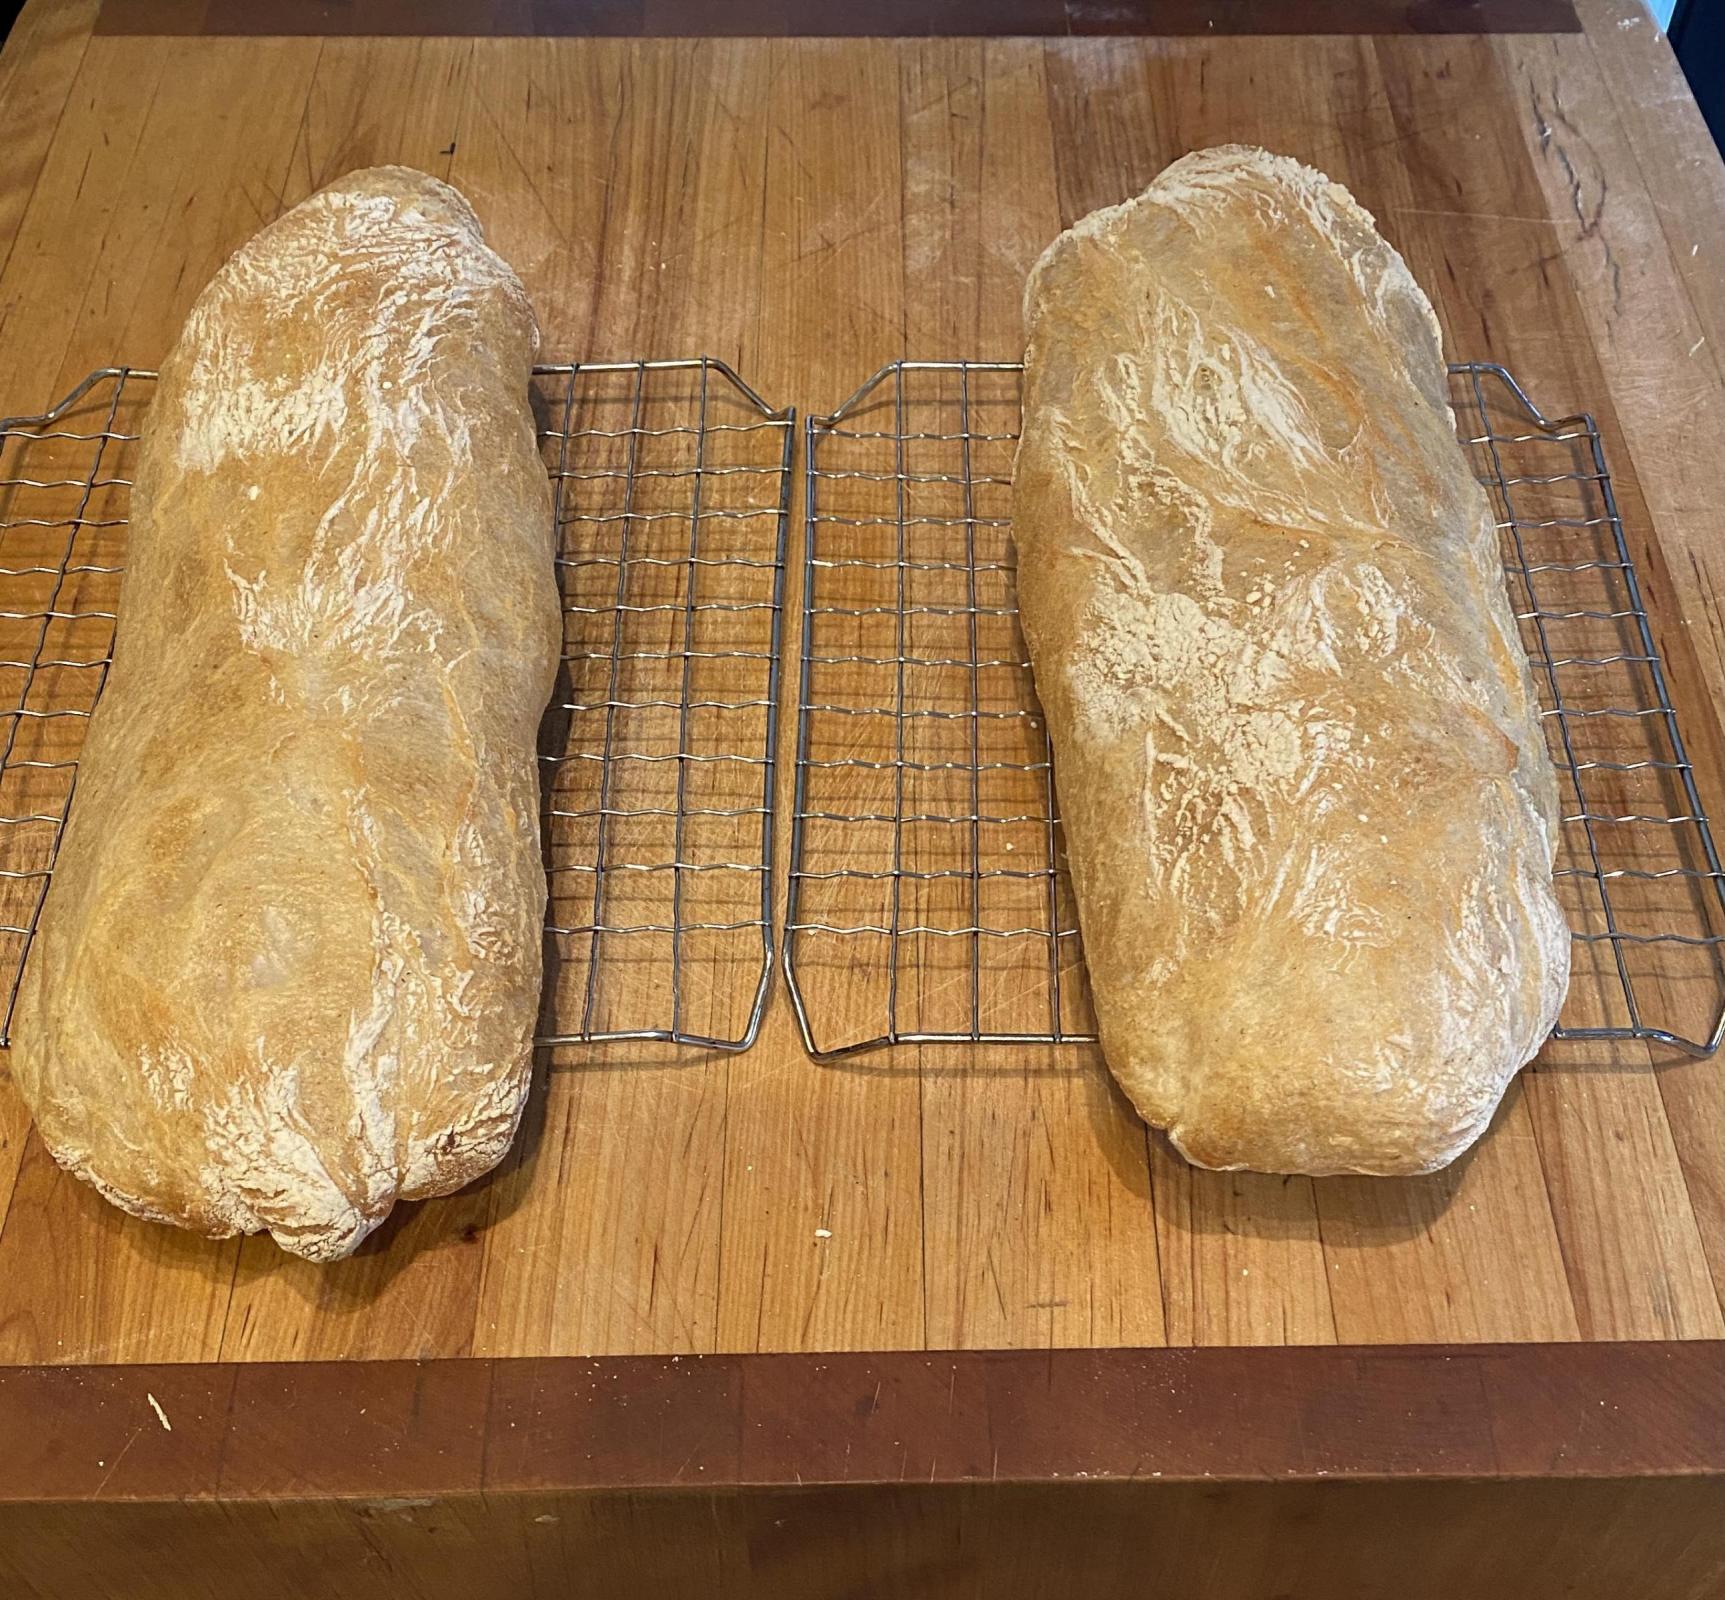
Cool and Slice to serve.

 Hope you enjoy this, I certainly do. :)

dablues's picture
dablues

This is the type of pan I use for Ciabatta rolls.  I let the dough proof in each pan, and then bake in the same pan. I bought mine at a Restaurant Supply House a few years back.  Works great.  The pan is a small steam pan you see in Buffets   

justkeepswimming's picture
justkeepswimming

My first entry in the No Comfort Zone community bake: Berry focaccia with meyer lemon olive oil.

I have never made focaccia, mostly because I haven't been sure what to do with one after I bake it. There is just 2 of us, and we already are on the outer edges of how much bread we can eat without needing to buy larger clothes.And then I got inspired by watching this Italian Grandma make focaccia. Whether or not you ever make focaccia, she is well worth watching - she's the real deal, lol.

I started to write out my recipe/process, but then realized it is the same as many other focaccia recipes. The main differences are that I chose to use frozen berries. And instead of EVOO, I used this meyer lemon olive oil . (They are local to me, and their in store price when I bought this wasn't this high. I am not affiliated with them, we just shop there once in a while.). Dusted with a light dusting of powdered sugar just prior to serving (no photos).

The frozen blueberries held up very well. The raspberries kind of disintegrated and got mushy in the oven, but still tasted great. The crumb photo looks like it came out gummy, but that didn't seem to be the case for most of the focaccia. It may have been an artifact of the juicy raspberry or photo. And the berry flavors combined with the meyer lemon oil made my mouth do quite a happy dance. It is a more rich flavor than lemon zest would have provided. After we grazed our way through half the pan between last night and brunch this morning, I froze the rest. I'm not quite ready to go out into the real world and try on clothes, lol.

Mary


kendalm's picture
kendalm

The one on the left is a torpedo shape and the right a teardrop.  I prefer the teardrop shape but what I am most happy with is the crumb today.  Dropped hydration a little and also scored vertically which seems to help getting double grignes.  Also did a 2 hour autolyse this time which really reduces the mixing so we'll know soon if that had a positive impact on flavor.  Otherwise, I feel like breakdancing ! 

Ilya Flyamer's picture
Ilya Flyamer

Due to *life* my levain for Maurizio's "best" sourdough I wanted to bake got too ripe, so I improvised a different recipe: more wholegrain (using einkorn), slightly lower hydration: https://fgbc.dk/1gf8

Simple procedure: mixed, slap&folds, stretch&folds, bulk until increased volume and jiggly, shape, cover in sesame and poppy seeds, retard, bake.

Not huge oven spring, but sufficient to be really pleased with the look (got very nice surface tension by stitching, and scoring angle was on point, so a beautiful ear). Like the crumb as well, and tastes great.

Benito's picture
Benito

I found this recipe at Eater.com and since it had yuzu in it, I had to make it.  It uses the Yuzu Honey Tea which is essentially a yuzu marmalade.  These can be found in Korean grocery stores.  For those unfamiliar with yuzu, it is a type of lemon grown in Japan and Korea, it is quite delicious and has a distinct fragrance and flavour.


This cake turned out really well, we both loved it for dessert tonight.


Lemon-Yuzu Cake

Yield: One 9-inch round cake

Ingredients:

For the cake:

¾ cup plus 2 tablespoons (120 grams) all-purpose flour

½ teaspoon baking powder

½ teaspoon baking soda

½ teaspoon kosher salt 

1 stick (½ cup) unsalted butter, softened to room temperature

¾ cup (150 grams) granulated sugar

1 or 2 teaspoons lemon zest, depending on how much lemon flavor you like

2 large eggs, at room temperature

¼ teaspoon almond extract (optional)

1 teaspoon freshly squeezed lemon juice

2 teaspoons jarred citron (yuja) tea, such as this one (strain out the peel and seeds before measuring, and reserve the peel for garnish)

½ cup (120 grams) full-fat sour cream, at room temperature

Scant ¼ cup (40 grams) whole milk, at room temperature


For the yuja cream:

1 cup heavy whipping cream, cold

3 tablespoons citron (yuja) tea (strain out the peel and seeds before measuring, and reserve the peel for garnish)

Pinch of kosher salt

For the topping:

Yuja peel from the jarred tea, reserved after straining

Instructions:

Step 1: Preheat the oven to 325 degrees. Lightly grease a 9-inch round cake pan with nonstick cooking spray, line the bottom with parchment paper, and grease the parchment. Place the cake pan on top of a baking sheet.

Step 2: In a medium bowl, whisk together the flour, baking powder, baking soda, and salt. Set aside.

Step 3: In a large bowl, beat the butter with an electric hand mixer or in a stand mixer fitted with the paddle attachment until smooth. Add the sugar and lemon zest and cream the mixture until light and fluffy, about 2 minutes. Scrape down the bowl with a rubber spatula.

Step 4: Add in the eggs one at a time, beating after each addition until combined. Scrape the bowl once more, then beat in the almond extract (if using), lemon juice, and strained yuja tea until smooth.

Step 5: Sift half of the dry ingredients over the butter mixture and beat until just combined (a few flour patches are fine). Carefully beat in the sour cream and milk, then sift in the rest of the dry ingredients and beat until just combined and the batter is smooth. Take care not to overmix.

Step 6: Pour the batter into the prepared pan and smooth the surface with a small offset spatula or rubber spatula.

Step 7: Slide the pan and baking sheet carefully into the oven and bake for 35 to 45 minutes, rotating the pan halfway through, until a toothpick inserted in the center comes out clean. Let the cake cool in the pan for 15 minutes, then gently loosen the edges by running a small offset spatula or paring knife around the edge. Carefully invert the cake onto a cooling rack.

Step 8: While the cake is cooling, make the yuja cream: Combine the heavy cream, strained yuja tea, and pinch of salt in a large bowl. With an electric hand mixer or in a stand mixer fitted with the whisk attachment, whip the cream until soft to medium peaks form, about 1 to 2 minutes.

Step 9: When the cake is completely cool, spread the whipped cream on top and garnish with the reserved yuja peel.


Note: If you plan on consuming the cake over a few days, I recommend keeping the unfrosted cake at room temperature tightly wrapped in plastic wrap, then slicing and assembling with the whipped cream and garnish when ready to serve. If you do refrigerate the assembled cake (covered), allow it to soften at room temperature for 45 to 60 minutes before enjoying.


Carlo_Panadero's picture
Carlo_Panadero

Base Recipe by Patrick Ryan of Firehouse Bakery

500g Strong white flour

65g Brown Sugar

12g Salt

5g Ground Cinnamon

5g All spice

5g of vanilla extract

Orange zest - 1 whole!!

200g Stiff starter

300g milk

1 large egg

65g unsalted butter

200g dried fruit(Marinade with orange and lemon juice with cinnamon and clove overnight) drained and save juice for glazing.

Cross paste - this may need to be adjusted(too hard after baking)?

100g plain flour-Colour or flavour

40g icing sugar

60-70ml milk

In a mixer Mix all ingredients except butter and fruits, once everything is mixed gradually add the butter, mix until gluten is developed, took about 20 minutes mix on medium to high speed with one 5 minutes rest a total of 25 minutes.

Leave to rest for 1 hour, after resting add fruits by folding onto the dough. Bulk ferment for 8 hours @ 23-24c deg. 


After bulk fermentation divide the dough approx 80 - 85g each and shape into a ball placing it onto a prepared tray(with baking paper preferred) 

Let it proof/prove for about 9-10 hours @ 24c Deg 

Pre-heat oven to 220c deg, add your cross paste when oven is ready, load onto the oven and drop the temperature to 200c deg and bake for 12 minutes, then another 20 to 25 minutes at 180c deg.


Use the left over juice from the fruit marinade and add approx a teaspoon of sugar then mix and brush on top while hot..


HeiHei29er's picture
HeiHei29er

The request for a loaf to go with dinner tomorrow was "something Italian".  So...  Semolina Pain au Levain bake #2.

This one went well and was easier than the first one.  I didn't worry quite so much about degassing while rolling in the toasted sesame seeds, and I think I got them on better.

Starter pre-shaping at 75%.  Didn't degas as hard as yesterday's sandwich loaf, but patted it down enough to make sure I didn't have any big gas pockets.  The crust colored up nice.  Wish I would have made the side scores a little longer and deeper, but that's being finicky.

Will see if this one makes it till tomorrow before it gets sliced.  Those toasted sesame seeds smell good!


Bubbly poolish


Taking the lid off


EDIT: Crumb added...

Pages

Subscribe to RSS - blogs