The Fresh Loaf

A Community of Amateur Bakers and Artisan Bread Enthusiasts.

Blogs

Floydm's picture
Floydm

Tried a whole wheat sourdough for the first time with my current starter.


Certainly not the kind of crumb I can get with regular bread flour, but not bad for something purely leavened with a starter.


Anonymous baker's picture
Anonymous baker (not verified)

I made my very first Rye loaf today, and it turned out wonderful! I used a recipe from "The Practical Encyclopedia of Baking", which someone let me borrow. The bread turned out moist and not too heavy which has been a problem with some heavy grained breads.

Anyway, the only changes I made to the recipe was to do it all by hand- without a bread machine or mixer. I prefer the way completely handmade loaves come out. The rise is usually better and the taste is extremely superior.

Here is the recipe, as well as pictures should any of you like to try it out =)

rye


3 cups Whole-wheat flour

2 cups Rye flour

1 cup unbleached, enriched flour

1 1/2 teaspoons salt

2 Tablespoons caraway seeds

2 cups warm water

2 teaspoon active dry yeast

2 Tablespoons molasses*

1. Put the flours and salt in a bowl. Set aside 1 teaspoon of the caraway seeds, and add the rest to the bowl.

2. Put HALF of the water in a bowl with the yeast, let sit until frothy.

3. Mix yeast mixture and molasses into the flour mixture. I used my hands to mix until it was shaggy.

4. Knead for five minutes or so until it is smooth and elastic. It is a heavy bread so the texture will be slightly grainy. Let rise until doubled.

5. Divide dough into two pieces and roll into two 9 inch logs with slightly flattened tops. Place on a greased baking sheet or stone. Brush lightly with water and sprinkle with the remaining caraway.

6. Cover and let rise until well-risen (app. 40 minutes) Place in a preheated 450 degree oven and bake for 30 minutes until they sounds hollow.

* I used unsulphured, organic black-strap molasses. You probably could use regular molasses, but the flavor might be slightly different.

</break>

JMonkey's picture
JMonkey

Well, my first attempt with 100% whole wheat flour was pretty much a bust. But I thought I'd give it one more shot with sourdough and regular bread flour.

Wow. As you can see, my daugther is proud of her work (she helped me mix, which, with this technique, is about 75% of the work):
Sourdough bread

I've never had an "ear" like that on a loaf, and I've never had such a wonderful, crunchy crispy crust. Here's a shot of the crumb:
Crumb shot
Nice and open, but without big "mouse holes." As for flavor, it was a mild to medium sourdough flavor, buttery with a slight tang and a long aftertaste. Crumb was chewy and light. Very nice.

Here's how I made it. My formula:
Final dough of 90% white bread flour, 5% whole rye, 5% whole wheat, 1.9% salt, 72% hydration.
5% of the flour was prefermented sourdough starter at 100% hydration.

Below are the actual weights of ingredients I used to get 1.1 kilograms of dough (strange, I know, but I was trying get the right size to fit my cloche): Mix together:

  • 569 grams bread flour
  • 32 grams whole rye flour
  • 12 grams salt
  • Dissolve 63 grams whole wheat starter at 100% hydration into
  • 424 grams water. Pour the water into the flour mix, and stir until it comes together into a dough.
    Cover and let it sit for 17-18 hours at room temperature.
    Flour a board copiously and then give the dough one stretch and fold. Wrap it in a well-floured towel or sheet of baker's linen and let it sit for two hours.
    Pre-heat the oven about one hour before baking to 500 degrees. Make sure that the covered pot, dutch oven or cloche is in the oven to warm up. I used a cloche. They're not cheap. With shipping, they'll run you north of $60, but that's a lot less expensive than most dutch ovens, which seem to run $175+ for a big one of decent quality. I was given the cloche as a gift and don't have a dutch oven or a big covered cassarole.
    Slash the dough if you like, though it may be too wet. Luckily, mine was perfect for slashing.
    Carefully open the container to flop the dough inside, seam or slash side up. Close the oven door and lower the heat to 450.
    Bake for 30 minutes covered and 10-20 minutes uncovered. (I baked mine for 15 minutes).
    Let it cool on a rack for about an hour.

    I don't make white-flour bread very often, but when I do, this will be the technique I'll use, though I may actually shape it next time. The dough had surprising strength and, after the fermentation, though the dough was sticky, it was by no means a batter. It kept its shape well. Amazing bread.
  • beanfromex's picture
    beanfromex

    This last batch of the NYT bread has worked out wonderfully for me. Kitchen temp a brisk 26C.

    I used 3 cups AP flour and 1 cup WW.

    1 1/4 tsp salt

    1/4 tsp yeast

    1 7/8 cups of room temp water.

    Mixed as per the video,then into oiled bowl and covered with plastic and refrigerated 24 hours. 

    Removed from fridge and brought to room temp for three hours.  

    Folded twice at 1.5 hour intervals., after the above 3 hour climatizing.

    Preheat the oven to 550F. Place dough onto cormeal covered baking sheet (non stick). Minimal shaping. Bake for 15 minutes, brush with melted butter. Return to oven bake another 10 at 450 F and then 20 minutes at 350F. Remove to rack and cool before cutting.

    The bottom crust was crunchy and wonderful. The top crust was the best browining I have had in awhile due to butter, and temperatures that I am able to get now in my oven since the gas people removed a blockage. Previously 425F was the best I could hope for, and that was unstable and did not last. The oven spring was great.

    The bread was full of holes and reminded me of a crumpet taste and texture.

    Ramona, my husband and myself really enjoyed this version and will continue to make it. I found the ration of WW and white to be perfect . 


     Hasta luego..

    JMonkey's picture
    JMonkey

    This week, one of my colleagues volunteered our team at work to host the monthly Happy Hour. Thanks, bud. Anyway, it was a Thanksgiving theme and since I'm "The Bread Guy," they wanted me to bake something. I thought it would be a good excuse to convert the Bread Baker's Apprentice's Cranberry Walnut Celebration Loaf into whole wheat. So I did. Here's how it turned out:


    I think I've pretty much got this whole wheat thing down. Converting from a white bread recipe usually involves:

    1) Increasing the recipe by about 20-30 percent in order to get the same volume.

    2) Increasing the hydration by 10-15 percentage points to get the same consistency.

    3) Either let the dough soak overnight (with a bit of salt to control enzymes) or knead for 20 minutes. If you soak everything and use a biga (highly recommended, as it really helps eliminate the bitter, dry taste that so many people find unappealing), you'll only need to knead until the soaker and biga / starter are well combined.

    4) Use buttermilk. Man, buttermilk works wonders with flavor and loft.


    The taste was definitely "Holiday" and it's an impressive presentation, though you can tell I was a bit sloppy with the egg wash. My wife's reaction upon tasting it was, "Wow! This is like fruitcake, except good!" And that's pretty much true. Reinhart recommends using either orange or lemon extract -- I went with orange, though I imagine lemon would not elicit the "fruitcake" comparison.


    In any case, I'll be making this again come Christmas, for sure.

    Thegreenbaker's picture
    Thegreenbaker

    Well I tried the Bagel recipe, and they flopped. Big time. :(


    I use spelt flour so I already know that it alters the breads texture.

    I think the dough was too wet. The recipe said that the dough will be stiff, but mine was wetter than normal dough. The bagels also didnt cook well.  Even after they had cooled they were very moist and even uncooked in some places. :(  Thats what makes me think the dough was too wet.  I am determined to try again and again until I get them right! Next time with more flour or less water.


    I am going to do the lesons.

    I am not very experienced with Bread baking but I am great in the kitchen, so doing the lessons will be good for me.  I am looking forward to the time when I make a great Sourdough loaf-and bagels that look like bagels.


    back to the drawing board :)


    Its fun learning though :) 

    breadnut's picture
    breadnut

    I recently ordered both BBA and Crust and Crumb. I haven't received them yet. I guess I should have asked this question before ordering them. Anyway, my question is whether these 2 books are similar. Does anyone have both of these books and if so, are they similar? I definitely want BBA but was wondering if crust and crumb is to close to BBA, and if so, I would assume it would be better to get a different book instead. Thank you

    breadnut's picture
    breadnut

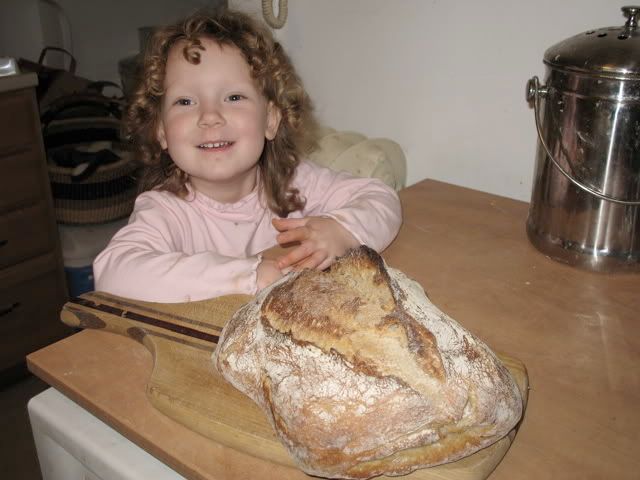
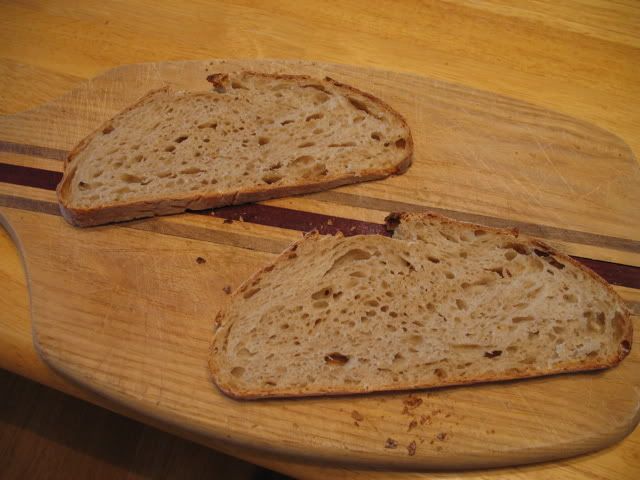
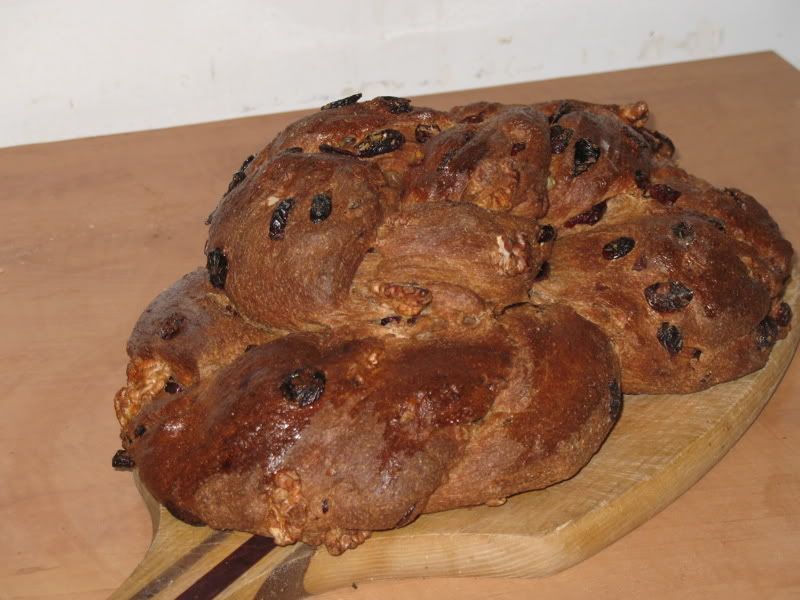
    I've been  making bread for a while. Yesterday for the first time, I saw the dough cracking while beeing fermented and proofed. Never had that problem before. All the steps I took yesterday have been done before, but I cannot for the life of me figure out why it happened (well maybe because of mixing, but not sure). I took pictures of the process and I will post them.

    The recipe: Starter (very active), flour (70%), Rye flour (30%), Water, Salt. Hydration was 68%. I've baked with hydration levels before ranging from 60% to 85%.

    I followed one of Dan Lepard's methods (which I've also done before).

    Here are the steps and pictures of the process.

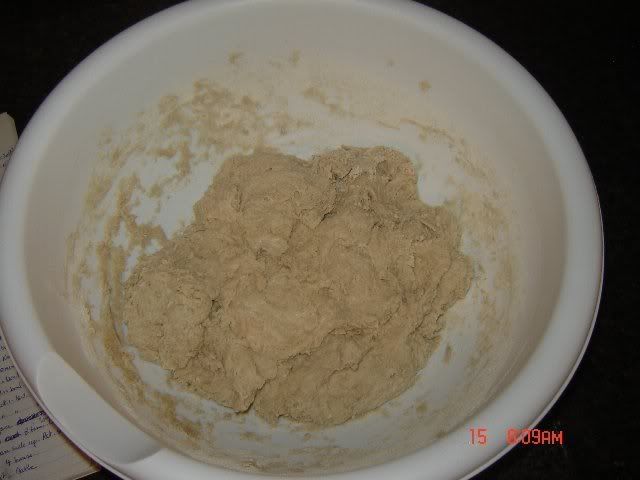
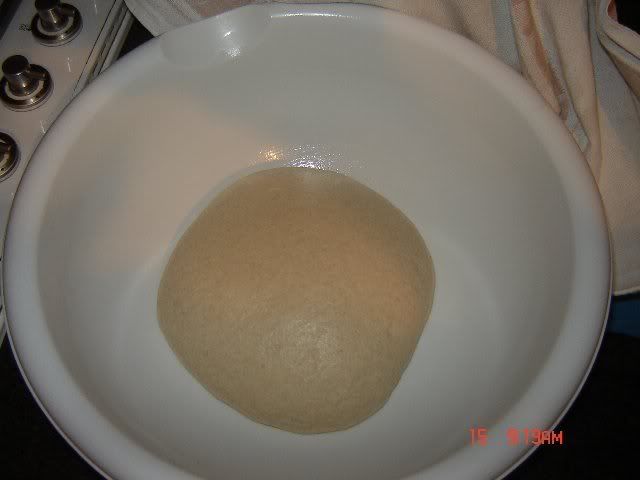
    1. The dough at initial mixing. (starter, water, flour). No salt was added yet. Mixed for a few minutes by hand. Covered and let autolyse for about 1 hour (I've done this autolyse time before and never had problems).

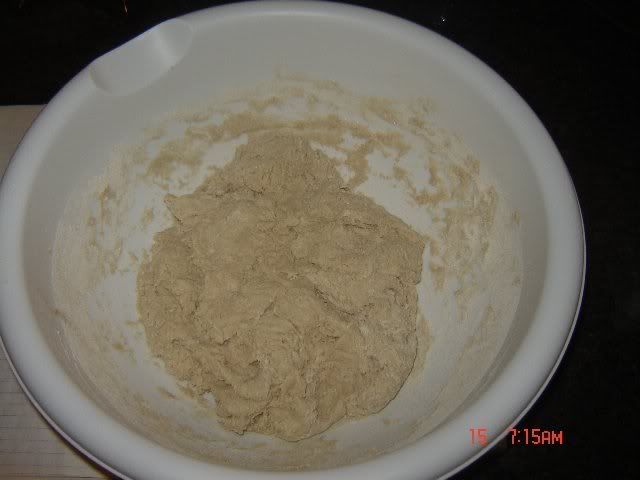
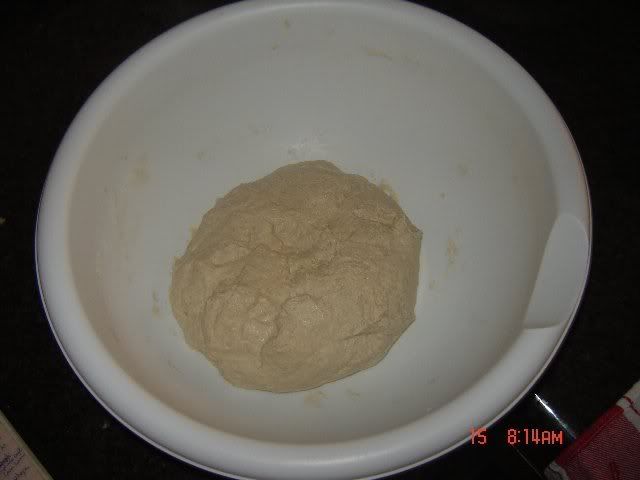
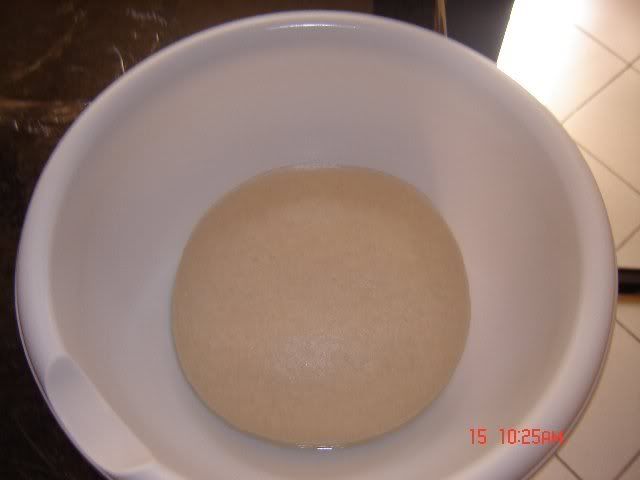
    2. Here's the dough after 1 hour Autolyse

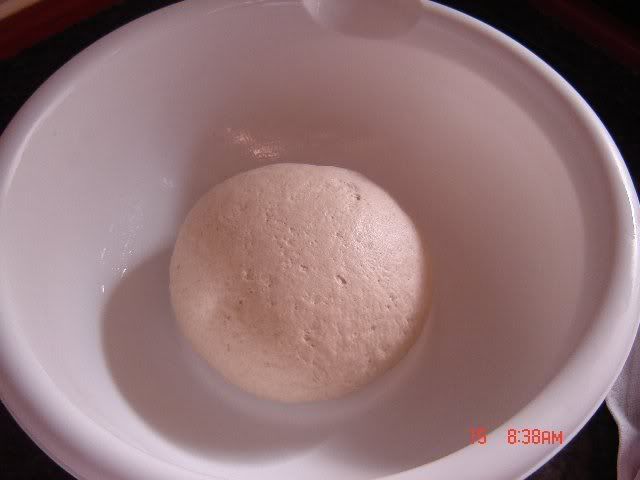
    3. Added salt and mixed a couple of more minutes. It looked like this

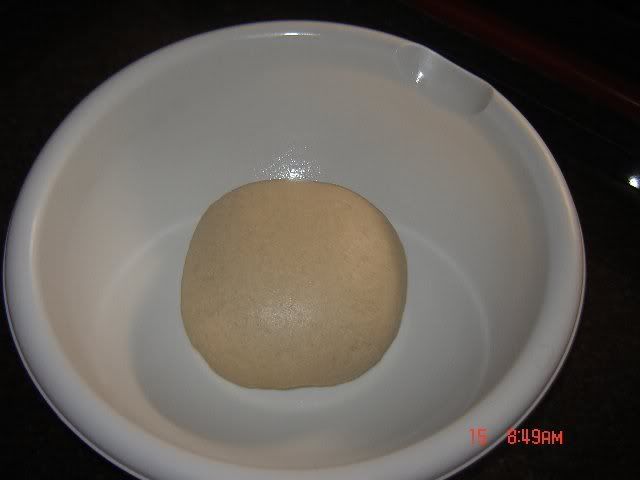
    4. Covered for 10 minutes. then turned out on a lightly oiled surface and kneaded for about 15 seconds, covered for another 10 minutes and kneaded again for 15 seconds and put the dough back in the bowl. Here's what it looked like then.

    5. Covered it another 10 minutes, briefly kneaded and back in bowl.

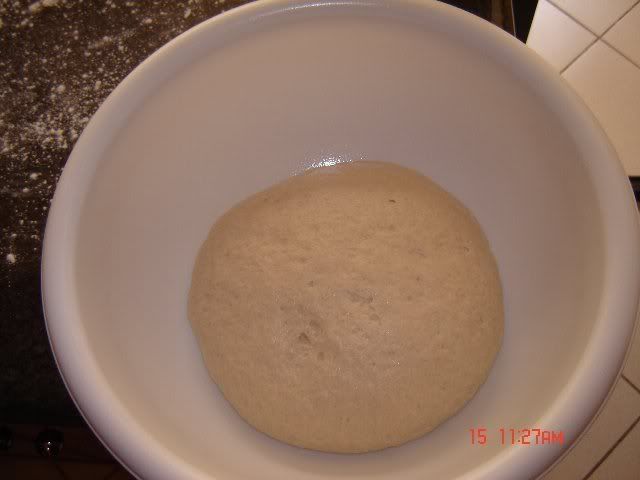
    6. What it looked like after 30 minutes

     7. Same procedure. brief knead, back in bowl and covered 1 hour

    8. Same as before for another 1 hour (This is where the dough started cracking)

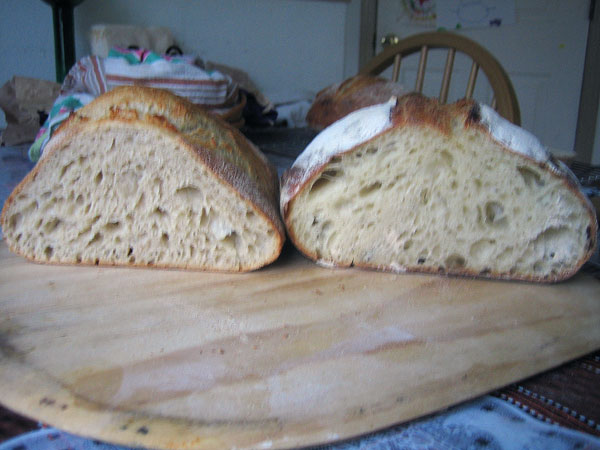
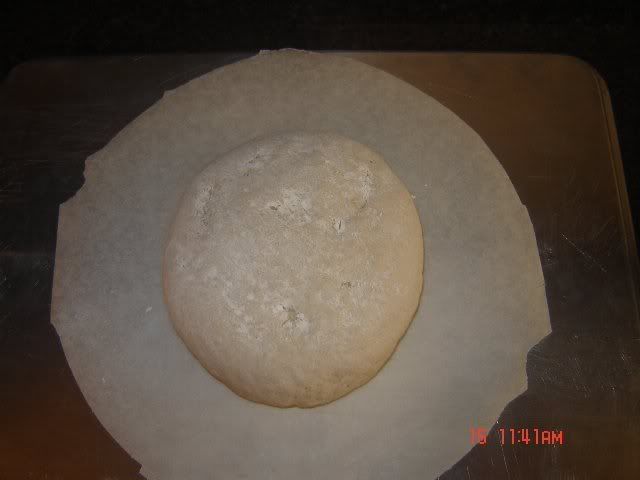
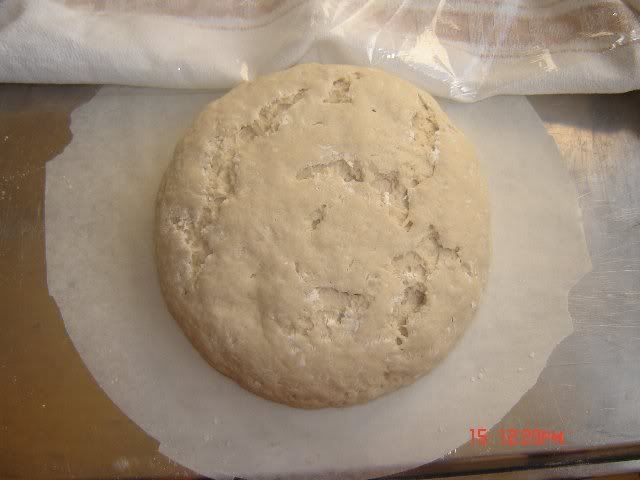
    9. Didn't make much of it. I figured it will be ok when shaped, but it didn't work out like that. this is what it looked like when shaped

    10. I let it be. I wanted to see what was going to happen in the final proof. Final proof was supposed to be about 4 hours. This mess below was only after 40 minutes.

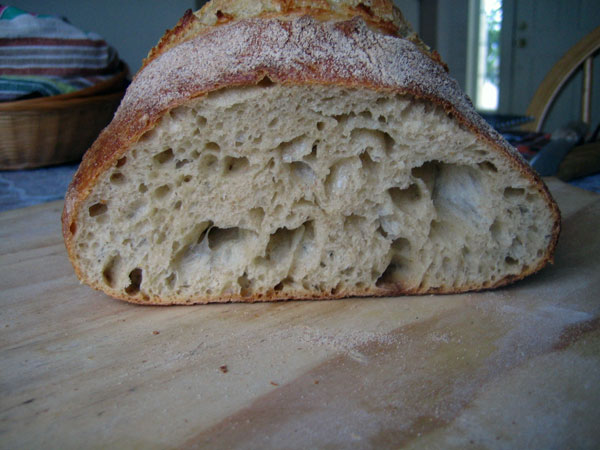
    At that point, I was not going to pursue it any longer. I couldn't figure out why it was doing that, so I improvised. I put the dough back in the bowl added a tablespoon of water and mixed it real well this time. I was digging deep to try to get it cohesive. Then I covered it for 20 minutes, put it on an oiled surface, gently folded it, put it back in bowl for another 20 minutes, folded it again, and back in bowl for a final 45 minutes. It seemed to be working fine. The dough was not cracking and it was looking good. So I shaped it and covered it for 1 1/2 hours. About 30 minutes after shaping, It cracked again, so I waited until it was proofed and threw it in the oven. I wasn't going to bother with it anymore. It turned out a mess. Real ugly looking, but I expected that.

    The only thing I'm thinking that might have contributed to this disaster was the fact that the initial dough was undermixed. I normally go through about 6-8 minutes of hand mixing, then autolyse 30 minutes to 1 hour, add salt and mix about 3 minutes. This time. mixing time was less than usual, and by reading the handmade loaf, Dan suggests to barely mix the dough and cover it and let it do its work (unless I misunderstood what he said). Maybe this is what cause this to happen, or maybe it is another factor that I can't figure out. By the way, the dough was raised in the same place it always rises, there was no draft, or wind to cause it to dry out and crack. So I don't think it was the environment. If anyone has any clues as to why this happened, pleaaaaaaaaaaaaaaase let me know. Any comment, feedback or idea is really really appreciated. Thanks a lot.

    Floydm's picture
    Floydm

    I baked another batch of sourdough today using my normal method (extra hot oven, steam in an iron pan, pre-heated baking stone). It is interesting to compare the loaf from today with the loaf from yesterday that I baked with the French oven method from the NY Times article that we've been discussing:

    Sorry it isn't a great picture, but it is the best I got before it started getting dark here.

    The French oven one is on the right, traditional on the left. Today's has around 5% whole wheat flour and 5% dark rye flour. Both loaves are very good, but of the two I think today's has superior crust and got better oven spring. If anything, it was less developed going into the oven, but, boy, did it pop. In the French oven it popped some.

    I do have to add that one plus of the NY Times approach is that you don't jeopardize your oven's electronic system while trying to steam the oven. I haven't had any problems with my oven, but many folks here have.

    One other odd thing to mention about today's loaves.

    My starter yesterday smelled a little... weird. I was thinking cheesy, but when I took a whiff this morning it came to me what it smelled like: mustard. Like mustard, it was acidic but... not a sharp, crist acidic smell, more of a chubby, umami-ish kind of acidic. It is hard to explain. Anyway, it didn't look bad, it rose extremely well, and the loaves taste great, so I'm not too worried. I just thought it was odd.

    beanfromex's picture
    beanfromex


    This is Ramona proudly showing her first ever loaves. Nobody in her family has ever made bread this way. Mexico is not a country where loaves would have been easily accesible some years ago. The corn tortilla reigns. This is now changing with more people having access to stoves, and wheat.

    Ramona has now cooked bread at her mothers home in Macuspana. She is eager to learn and cant wait to experiment with the loaves .

    This recipe is from "the joy of cooking" Basic white bread.

    Pages

    Subscribe to RSS - blogs