The Fresh Loaf

A Community of Amateur Bakers and Artisan Bread Enthusiasts.

Blogs

justkeepswimming's picture
justkeepswimming

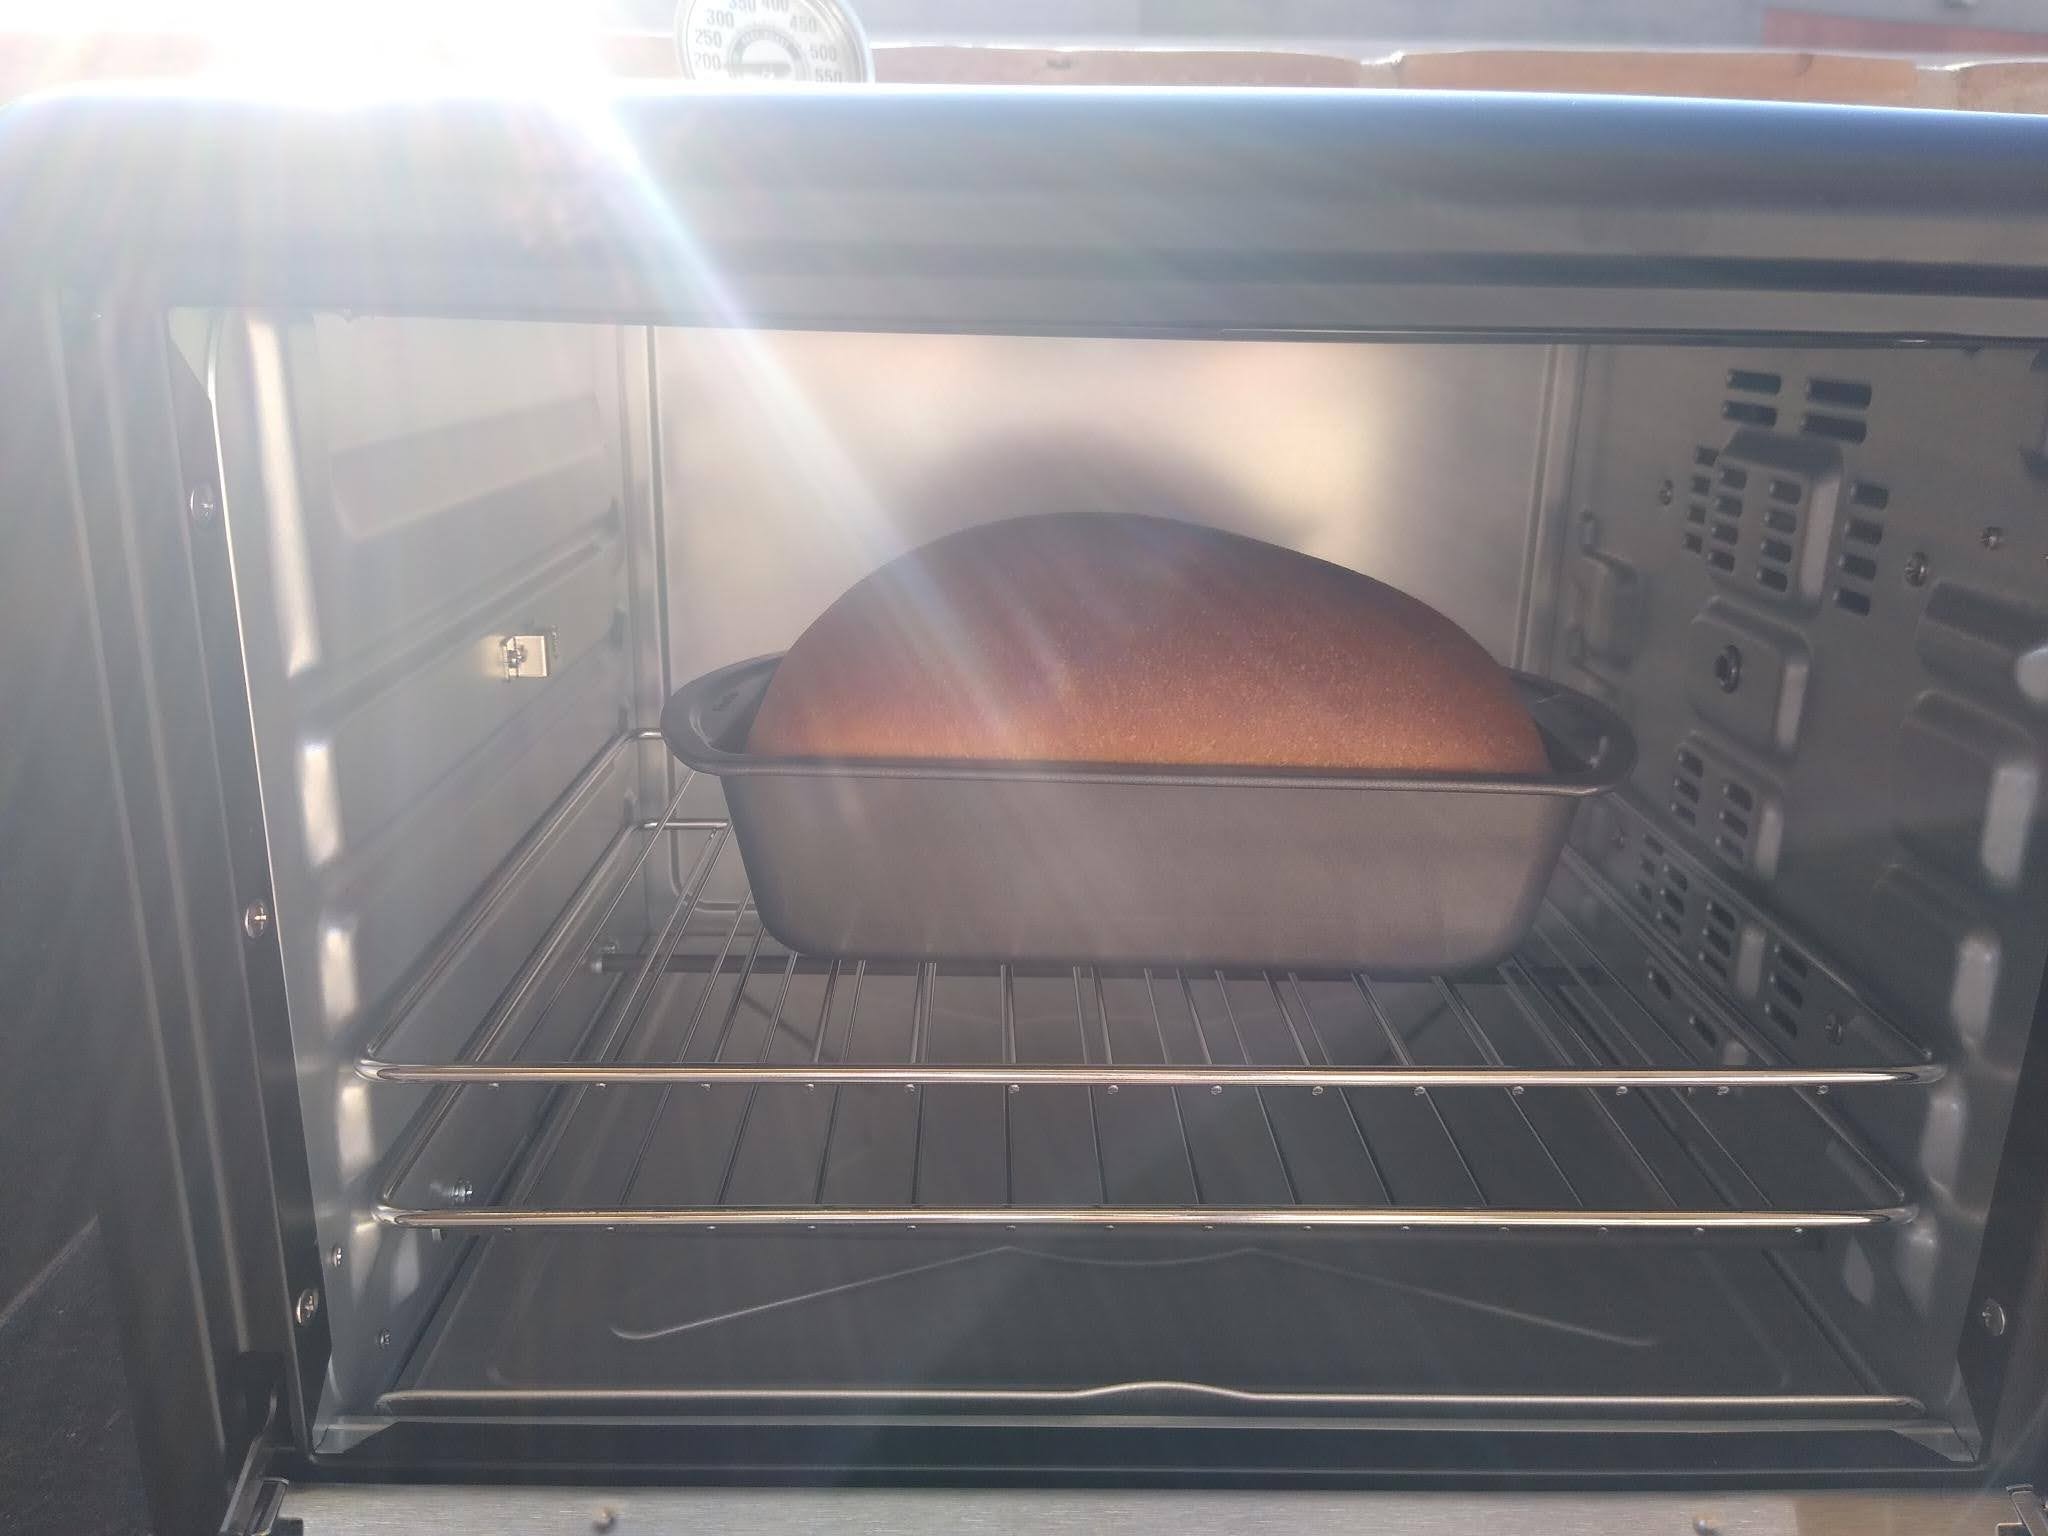
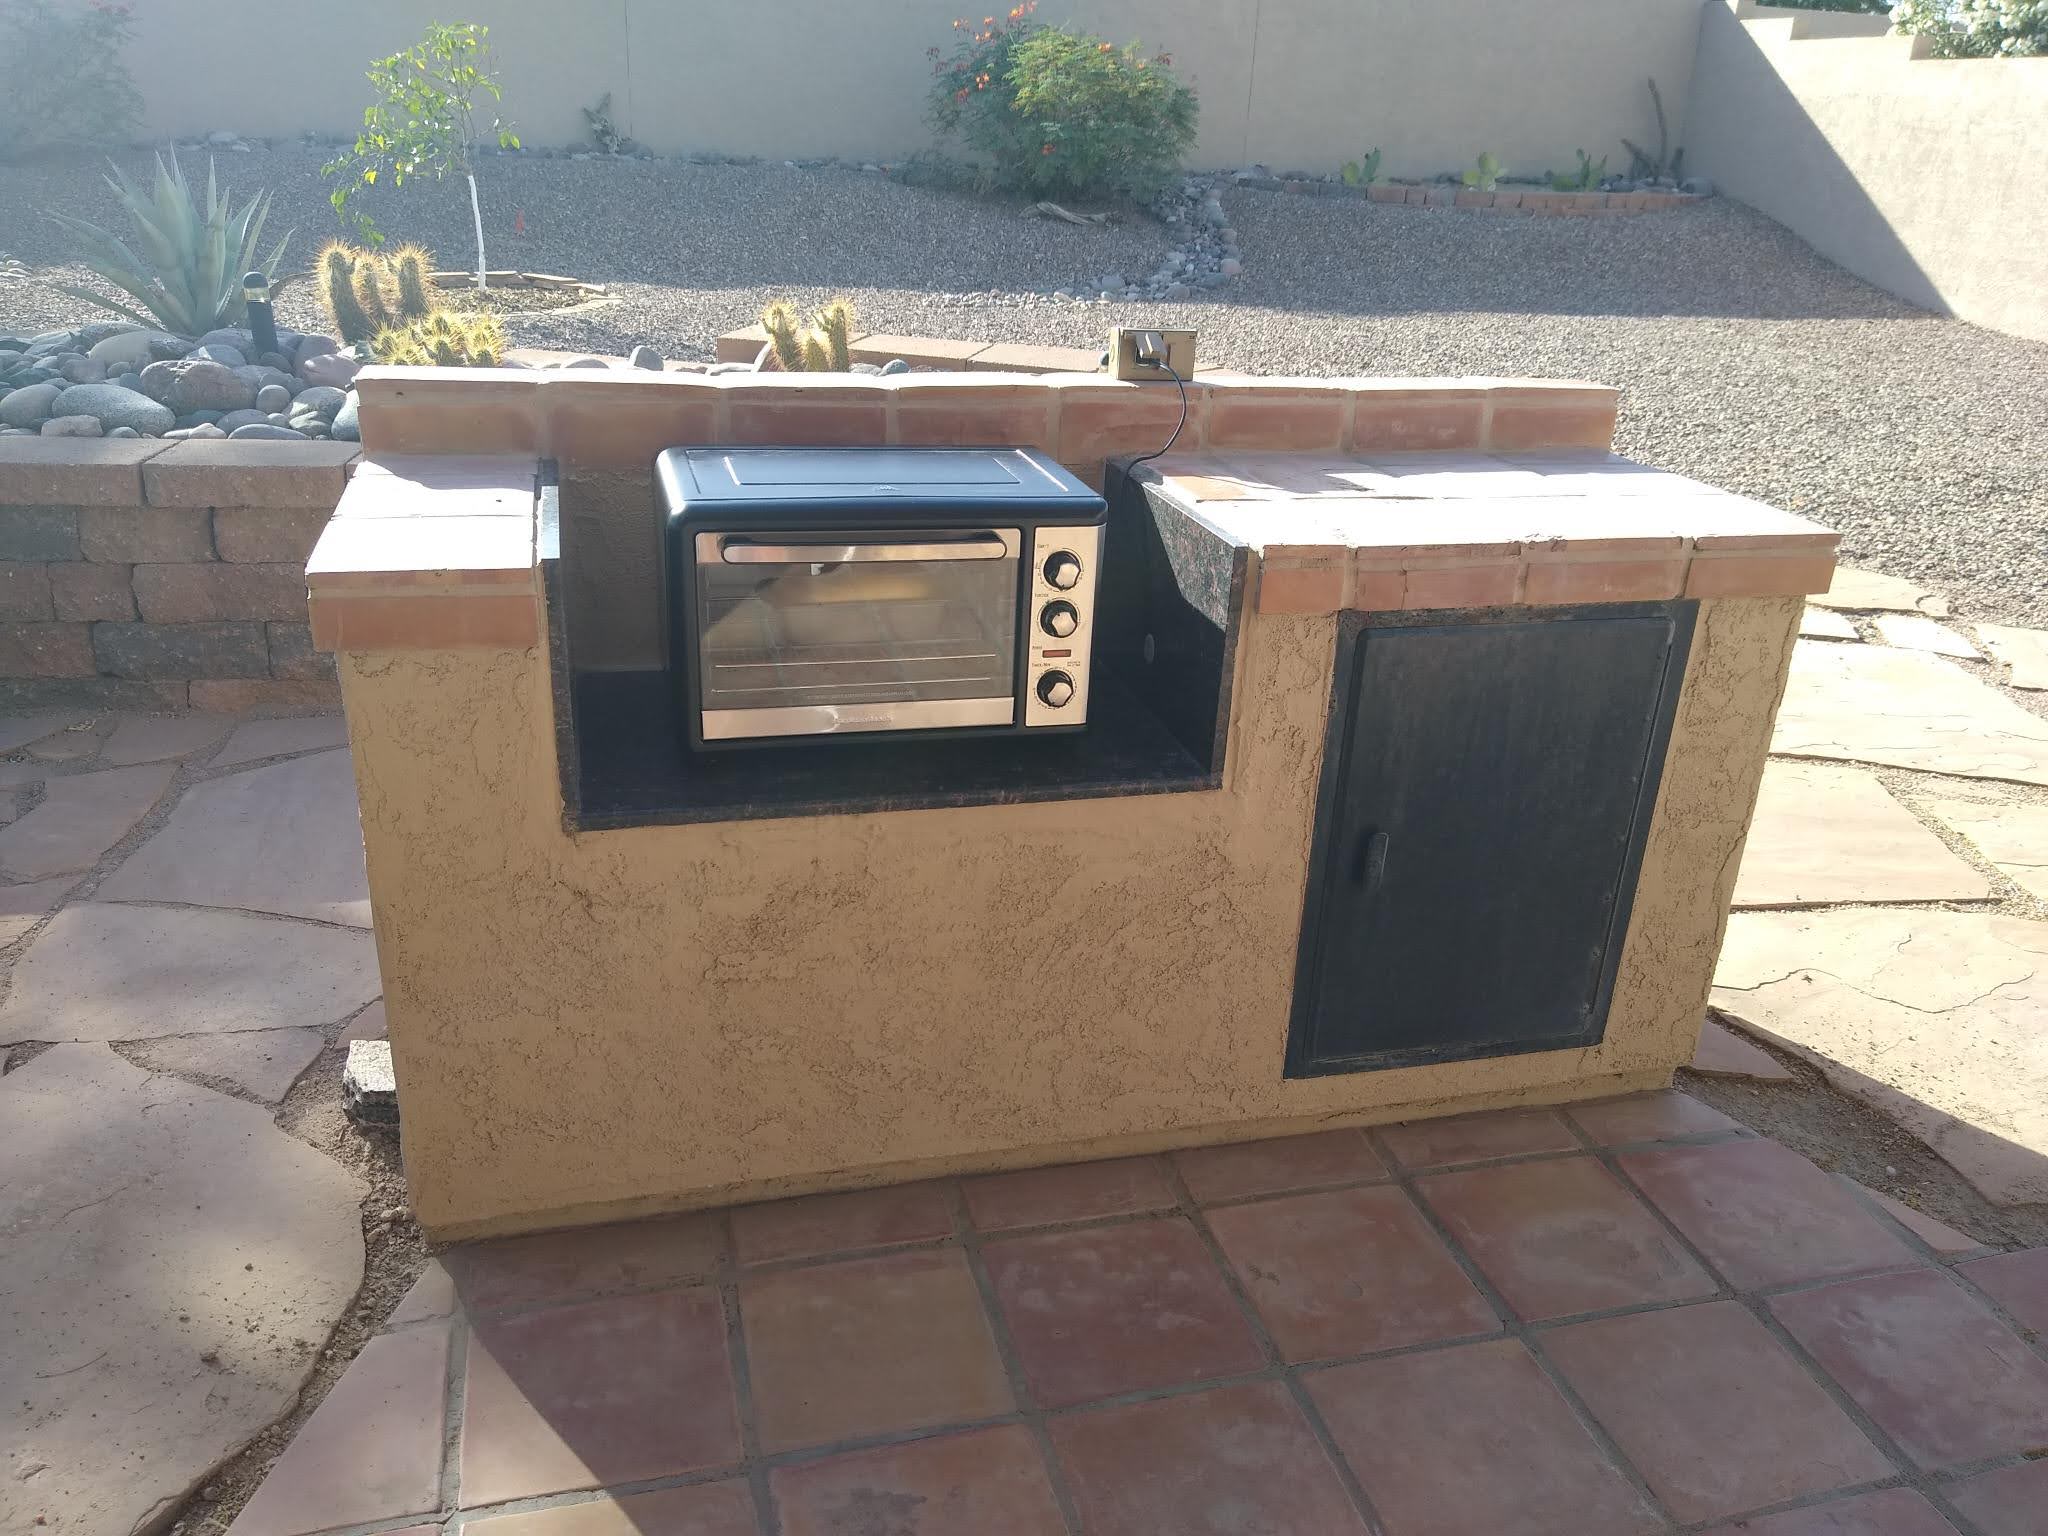
A former owner of our home had this BBQ enclosure built by the back patio. We never wanted to use it for it's originally intended purpose, because we didn't want bbq smoke etc accumulating on the painted ceiling of the patio cover. My very talented husband ran power out to it, and now I have an official summer kitchen. Just the thing for baking in the hot AZ summer! I did a test bake today. 

Toaster oven is a Hamilton Beach XL model. It has the ability to bake in convection mode, but I chose to not turn on the fan since this was my first attempt at this. 

Bread is a simple straight dough recipe from KAF (recipe here) though I did change the flour a little:

75% whole wheat (200gm home milled hard red winter wheat, 100 gm home milled hard spring white wheat)

100 gm KAF bread flour

238 gm h20

50 gm oil

85 gm honey

2.5 tsp IDY

28 gm dry nonfat milk

1.25 tsp salt

Hand mixed, (edit, cold rest in frig for 30 min, initial dough temp was 92F, down to 76F after rest), kneaded 10 min

Bulk 90 min

Proof 50 min

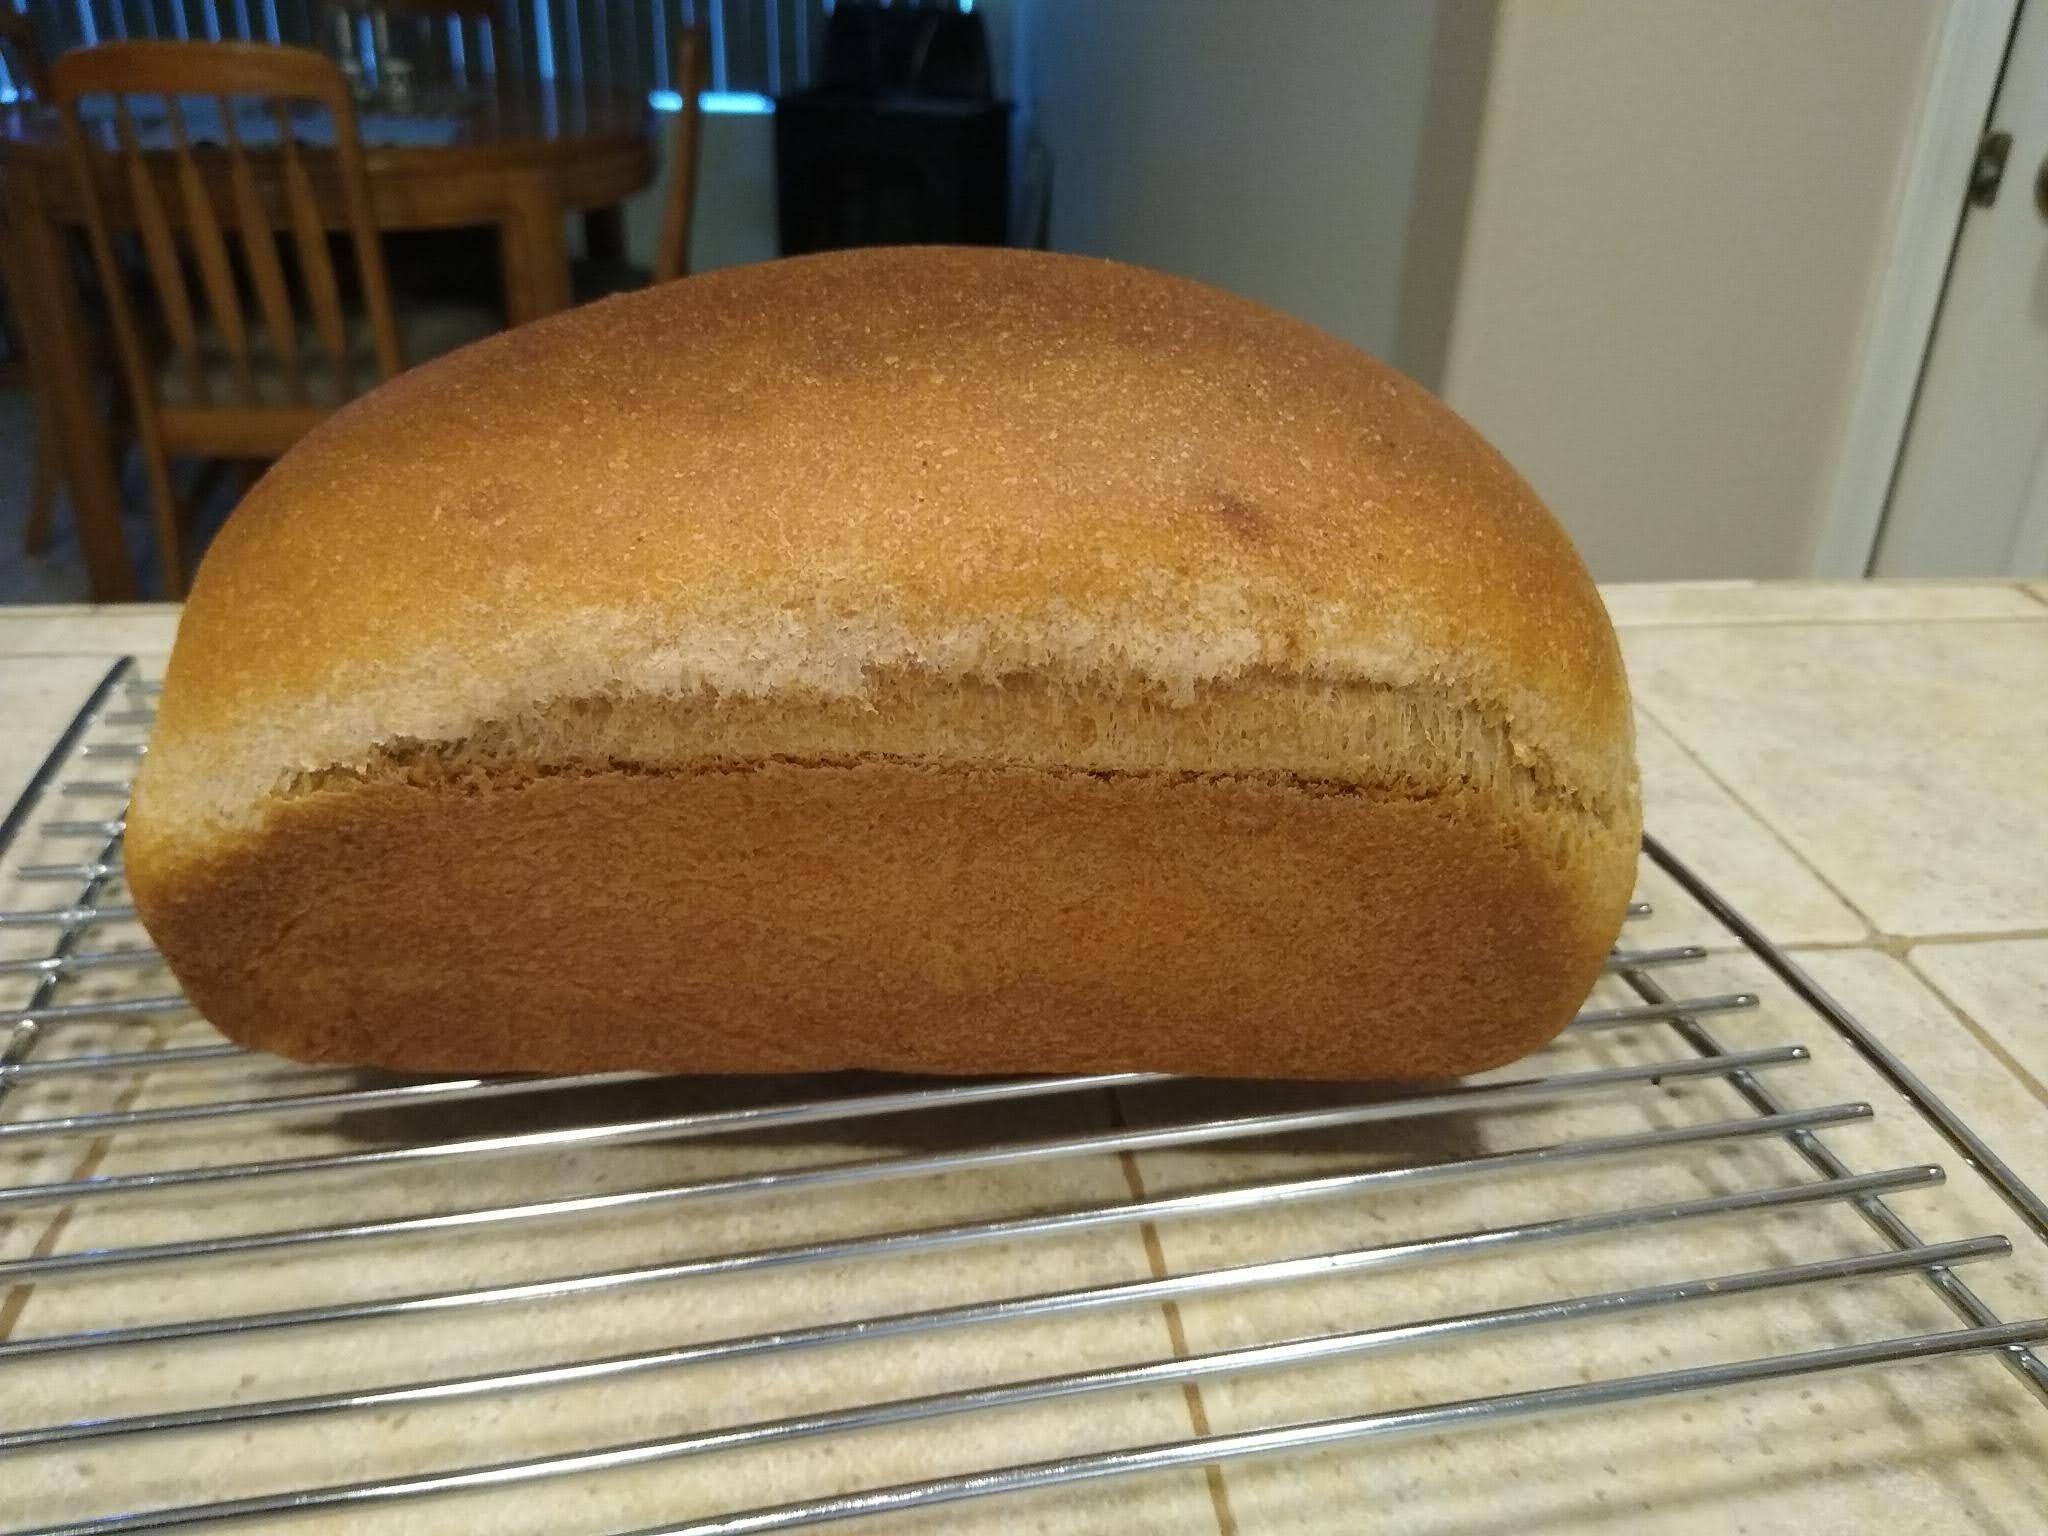
Baked at 350F x 20 min, loaf turned 180 degrees and covered w foil, baked another 18 min to internal temp 192F. It's still cooling, crumb shot tomorrow.

Some day I will figure out how to shape a loaf that isn't so short on the ends and tall in the middle. 😂 I even pat it down a little in the pan, trying to get it to be more even end-to-end. Ah well, it tastes the same. I did notice when I spun the loaf that it had baked more toward the back of the oven than the front. The side with the oven spring was towards the front at the beginning of the bake. Next I'll have to make sure it's positioned evenly front to back, and see if it happens again. I may be getting more heat loss through the glass door than elsewhere.

Overall I think this is going to work really well. It kept the kitchen from heating up, and I suspect used much less power than heating up the oven. Thanks to @minioven, you were part of the inspiration for this project. 

Mary
 

k2005's picture
k2005

Hey guys!

This is my first post on the site. I started baking sourdough during lockdown and then I moved to a flat with a gas oven and it completely destroyed every loaf I made (burnt bottom, not enough oven spring, not cooked all the way through). Back at my mum's and decided to bring my starter with me to try and bake some bread to see if it was actually my fault or the ovens fault. 

I've gotten quite 'lazy' in my sourdough making, just kind of doing what I can when I can, but I reckon that you can make a pretty good loaf pretty simply. 

350g tipo 00 flour (the only white flour my mum had)

150g strong wholemeal bread 

50g starter

350g filtered water

9g salt 

autolyse 30-45mins, add starter and salt, combine and let rest for 30 minutes, S&F, let rest, do some coil folds if I felt like it and the dough had relaxed during the first 2 hours of bulk fermentation, let bulk ferment for around 10 hours until it had risen around 1.5x, windowpane test passed, one last coil fold, preshape and let it rest, then shape and put into a banneton (in my case a floured teatowel and a loaf tin), then it was put into the fridge for 10-12 hours, baked the next day 20mins in a cast iron pot with the lid on and then 20mins with the cast iron pot lid off and a 'ban-marie' in the oven. 

the loaf has a nice taste and is definitely one of the softest crumbs I have ever made! I was wondering what contributes to this? I usually bake the loaf for 25 minutes after taking the lid off so perhaps that was too long and I am better off baking for less time

would appreciate any criticisms, tips and any comments on how my crumb looks vs how it should/could look! 

alfanso's picture
alfanso

Two words I had never thought of stringing together before yesterday.  

But just for the fun of it I hand mixed the Bouabsa dough at its normal 75% hydration with it's quite low iDY at 0.16%.  Modifying the remainder of the method, the dough was BF'ed for ~100 minutes with "ciabatta-like" folds in the vessel at 30 60 & 90 minutes.  Then off to retard for ~20 hours.

Today the dough was pulled from retard and allowed to warm up for ~100 minutes.  Treating the dough as I would for ciabatta I emptied onto a floured surface, folded it in half alla Cyril Heitz and then shaped it as I do for the Scott MeGee version I adhere to, and couched seam side up.  A tad sloppy on the shaped ends.  45 minutes to prove and then stretched onto the baking peel.  15 minutes with steam at 480dF, then rotated for another 13 minutes and finished off with 2 minutes venting.

For a first time out of the gate I'm pretty pleased with this experiment.  The first two slices off the end yielded a tight crumb, which for even a Bouabsa baguette is unusual.  But the further into the loaf I cut, the more open the crumb became.  The crust carries the coloration that I crave.

Considering the minuscule amount of IDY I can't say anything bad about it.  My next bake will be the same but with a significant boost of IDY, but not nearly as much as a typical IDY ciabatta takes.  I should be able to better emulate a more traditional ciabatta dough with more oven spring.  At that point it will no longer be a Bouabsa ciabatta, rather a Boufanso ciabatta.

500g x 2 ciabatta loaves

yozzause's picture
yozzause

i recently mentioned the need to get a new donor starter as mine was unreliable and was destined for the compost tumbler. Several member of the local bread enthusiasts group kindly offered me some of theirs. i chose someone close by  and put it to work straight away. i decided to mix the dough well and do the bulk ferment undisturbed for its entirety. Things didnt go quite to plan and a family emergency meant the dough was needing to be retarded, i chose the back verandah as the nights have been getting cool and i didnt want fridge temps. In the morning the dough was shaped  and proved in a banneton and then baked in a heavy pot slow cooker insert  initially with the lid on,i did have to remove the plastic knob and just covered the hole with some foil. i do have some metal knobs in the shed somewhere that i will use to make lid removal easier.

The pot worked really well and pleased with the way the loaf came out. also pleased with the adopted starter.


The dough was from the Bourke street Bakery,  The ultimate baking companion and its their standard S/D 

Yippee's picture
Yippee

For my reference-so that I'll remember which is which. Hope it's useful to you, too. 

Kistida's picture
Kistida

I remember clearly when I wrote down the ingredient list that I was to use coconut milk in this bread. But I mixed 2% milk instead 🤦🏻‍♀️ Still it came out as a fragrant tasty bread! I braided the 5-strand loaf too tightly too. 

  • 140g sourdough discard (100% hydration)
  • 100g coconut milk 
  • 2g instant yeast
  • 30g whole wheat flour 
  • 250g all purpose flour 
  • 50g sugar
  • 6g salt
  • 2 large eggs
  • 40g coconut oil
  • Optional: 1/2 tsp coconut extract 


The other bake was a spelt + coconut loaf. I made it small just to see how this flour feels in a dough. The dough was very soft and I think maybe the hydration should be lower for the next bake. We love the nutty fragrance and taste of spelt + coconut now. 

  • 120g sourdough starter
  • 210g water
  • 300g spelt flour
  • 6g salt
  • 30g brown sugar 
  • 20g coconut oil
  • 1/2 tsp coconut extract 

JonJ's picture
JonJ

Joy Ride coffee has a YouTube channel with what, for me, are quintessential quarantine videos. Videos often have a transporting sound track, and the visuals usually include beautiful tracking shots of Romanian scenery which have transported me out of lockdown. His quest for lacy crumb has been quite 'infectious', if you'll excuse the covid pun.

In his latest video there is an appealing technique for shaping directly from dough that has been coil folded. No banneton is used.

The method relies on dough preparation that included a lamination and gentle coil folds. Good dough strength is required, with the dough proofing under tension. It can include proofing in the fridge too.

Instead of performing a traditional shaping and transfer to a banneton he does something different. Dough that is already highly fermented and has already doubled in volume (at least) is gently inverted from the dish in which coil folding was being done onto a lightly floured surface. It is then gently folded over, as you would fold over an omelette in a frying pan and sealed around the edges. It is then lifted a quarter turn by means of a dough scraper to give a shape more like a batard, and transferred onto a parchment for baking. Finally, it is left for an hour covered with a tea towel before baking, although I do wonder if this additional settling is actually required.

It makes sense that this gentle shaping with very little degassing could create a better crumb. Plus, the resultant loaf has a shape that looks more or less like a traditional batard produced using a banneton.

I played around recently making a loaf with the method, but since my dutch oven is round I added an extra manipulation for pushing the batard shaped dough into a boule shape. After making the batard shape, and working my way around in a circle, I pushed in from the side moving down to the bottom, cinching the dough to the base as I went. I used two dough scrapers for this -  taking turns with each dough scraper to free the dough scraper trapped underneath the dough. Working this way I managed to get a round boule too, but as you can see from the pictures the crumb was quite unusual - there were these elongated and vertically oriented alveoli clustered near the base, almost certainly created as an artifact from my additional step of transforming the dough into the boule shape. I suspect that if I'd stopped at the batard shape without doing that last step it would have had a more regular crumb, and been more successful.

Hope this post gives someone ideas! It is exciting to try out a completely different method sometimes. What I like about it is that it has the potential to produce a better crumb and maybe even simplify the process of bread making. The number of steps could be reduced. An it might be a neat way to make bread after an overnight counter ferment.


-Jon

After removal from Pyrex dish used for coil foldsAfter removal from Pyrex dish used for coil folds

Then folded over as you would fold over an omelette in a frying pan, and sealed around the edges.

Given a quarter turn, then rounded using two dough scrapers, as described in text.

The boule shape is retained.

The additional rounding to make a boule shape seemed to result in these vertically oriented elongated alveoli. Will try again and leave it in the basic batard shape next time as I think that will work out much better.

idaveindy's picture
idaveindy

May 1, 2021.

This was an experiment to see if a 1000 g 93% WW dough could be baked in my low profile toaster oven.

I used a 10.25" diameter Lodge cast iron pan with two short handles.

I took out the toaster oven's rack, and used a smaller 7" diameter Lodge cast iron serving griddle/plate as a stand-off to hold the 10.25" pan off/above the heating elements' shields.

I baked it for 11 minutes at 450 F, and 23  min at 400 F, with bottom heat. Then 7 minutes at 400 F with bottom and top heat to brown the top.

The bottom was burned, and the rest slightly undercooked/wet. I did not bake off enough water,

I had rushed things, and it was underfermented too.  It was edible, but not pleasant.

The geese on the canal in Broad Ripple liked it.

HeiHei29er's picture
HeiHei29er

Week #2 of working on my list of TFL'er bakes I've been wanting to try.  This week was one of Ilya's rye bakes.  Well, not exactly one of his bakes, but with his guidance and tips, I tried this recipe from Rus Brot.

Overall, the bake went really well I think.  Each step of the process went according to the video, and I had similar results.  My only difficulty was proofing temperature.  My maximum temp is 84-85 deg F, so I was a little low on the final dough fermentation and the final proof temps.  However, everything progressed just fine even at the slightly lower temps.  I also had a to guess a little bit on the consistency of the final dough, and I added 10g of water above what's listed in the method below.

It looks like I maybe blistered the crust, and I think it happened on the second misting towards the end of the bake.  My guess is it should have been a light mist, and I moistened it quite well.

This was a great first bake for high rye, and the bread smells great!  Giving it at least a day before slicing it.


Ilya Flyamer's picture
Ilya Flyamer

Baked again the formula I shared previously almost identically, and again the flavour is so good! Just wanted to share again. Formula: https://fgbc.dk/1j1t Hydration around 78%, but probably could be increased a little without issues.

Mixed everything, left for 30 min to get not sticky, developed gluten well with slap&folds, left for 30 min, then, uncharacteristically for me, decided to do a lamination fold - and then just left in a straight sided container at ~27C until around 50-60% rise (despite low inoculation, only took around 6 hrs! again, this dough rises really nicely). Gently preshaped, left for around 30 min to relax, then shaped and left for 30 min at room temp in the bennetons, then refrigerated for around 12 hours. Looking at the crumb, probably could push the fermentation even further. Baked on the steel, around 20-25 min with steam @260C, then without steam until good colour @230C.


Love the colour of the crust I got this time!

Very flavourful bread, with a clear tang, but not too sour. Really like this formula for a mostly whole grain bread.

Pages

Subscribe to RSS - blogs