Pain a l'ancienne - First BBA bread!
- Log in or register to post comments
- 11 comments
- View post
- lolo's Blog
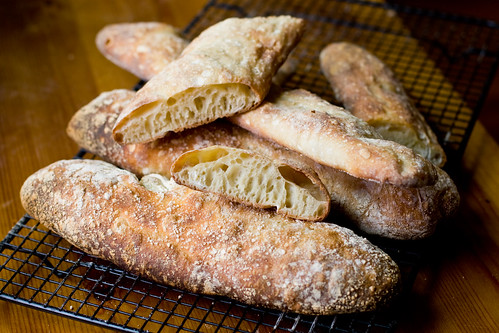
 baguette farcie

Nury's Light Rye

Nury's Light Rye Crumb
Mmmmmm .....
David
With the loaf shown below I have managed to solve a couple of recent problems.
 [/center]
After weeks of angst with babying my jar of wild yeast, feeling I would never be able to bake a loaf of bread that WASN'T sour (not to mention the several times I was going to throw in the towel altogether), I have achieved my goal.
Not only was it not too sour; it wasn't sour at all! And it was light!! Light as a feather!!
And here's how I did it: I virtually started over with feeding.
[/center]
After weeks of angst with babying my jar of wild yeast, feeling I would never be able to bake a loaf of bread that WASN'T sour (not to mention the several times I was going to throw in the towel altogether), I have achieved my goal.
Not only was it not too sour; it wasn't sour at all! And it was light!! Light as a feather!!
And here's how I did it: I virtually started over with feeding.So, for my last baking experiment of the weekend, I chose another bread I've baked many times - the Sour Rye Bread from George Greenstein's "Secrets of a Jewish Baker."
Here's my first loaf using Bay State Milling's Bouncer. (Premium high gluten flour made from the finest high-protein spring wheat.) Smiling nicely, isn't it?
Dough made with this flour felt softer than with the GM All Trumps I've been using, and less stretchy. I was worried that my usual 70% hydration would be too high, but I don't think it was. The crust seemed a bit thicker and, boy, did it sing when it came out of the oven!
There was no real reason to switch from All Trumps to Bouncer; I just wanted to try out different flours.
We have had a stimulating and instructive discussion of methods of replicating the effects of commercial oven steam injection in home ovens. (See http://www.thefreshloaf.com/node/7192/humidity-versus-steam#comment-36522) I found it interesting that many home bakers have found coving the loaf during the first half of the bake to yield the best results - better oven spring, crisper, thinner crust, etc. So, I had to try it.
For the last few days I have been preparing two different sourdough breads, one is the basic recipe in Nancy Silverton's Breads from La Brea Bakery and the other one is my own concoction using the old dough technique from a piece of sourdough that a friend gave to me. It dates from 1993 and has a very disctinct, delicious aroma. Many of her friends tell her that her bread smells like "pain d'épice" which is a spice cake. I'll explain what I did and then I have some questions to ask you all.
Nancy Silverton's sourdough bread
I had reported with shock that my tap water had chloramines in it. The spring water was behaving more like reverse osmosis water, so I'd started using tap water. Mike Avery's plaint about his overly-soft tap water got me curious and I inquiried of our public works director about our water. He said that due to the distance it travels from its source (from the Sacramento Delta to Morro Bay, a couple hundred miles at least and not what I'd consider a positive environmental situation), its treatment produces long-lasting chloramines. Mike asked me to try making a starter