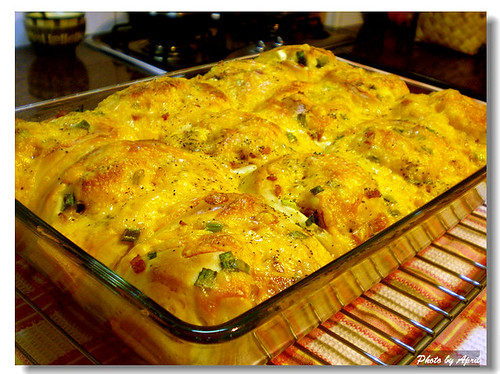
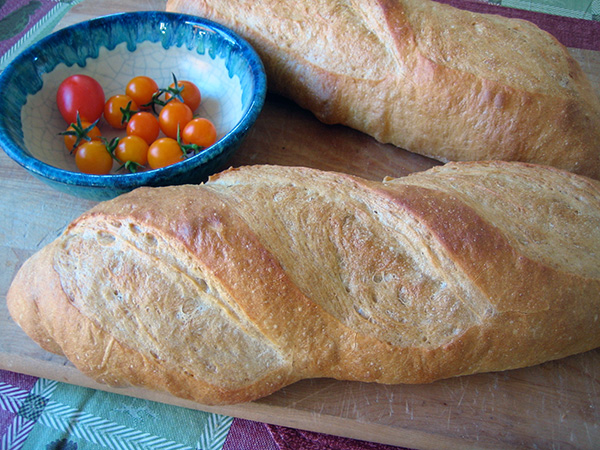
The Fresh Loaf

A Community of Amateur Bakers and Artisan Bread Enthusiasts.

Blogs

AnnieT's picture
AnnieT

I had to babysit tonight and was invited to eat supper with the family - I work cheap. There was a very nice little loaf on the cutting board, crisp crust and holey tender crumb. Imagine my surprise when my d-i-l told me it was one I had baked and she had retrieved from the freezer! I didn't recognize it and I'm still not sure which bread it was. Could have been Will Wraith's baguette, judging by the crumb. Also heard from my friends who received their loaf today in the mail. It was the whole grain sourdough from Breadtopia and got rave reviews. Pretty spendy to mail it so it will only be a special treat once in a while, A.

Noodlelady's picture
Noodlelady

My interest in the 19th century comes from researching my family history. Four of my ancestors were soldiers during the American Civil War (1861-1865). This peaked my interest in doing more than just researching names and dates. I have been participating in living history events and reenactments (with my Civil War reenacting unit) and teaching the ways of a typical 19th century Pennsylvania German woman since 2000. I dress the part and strive for authenticity by using reproductions or originals items.


Preparing and cooking 1800s-style food (mostly Pennsylvania German food) became my passion. I first began by making homemade noodles (hence the nickname Noodle Lady) and drying herbs at my tables. Now I can prepare an entire meal using my cast iron dutch ovens and fry pans using a wood fire and coals. At first, I always made some sort of bread at home and brought it with me. Then I began baking potato rolls at events, which are now a staple with my beef vegetable stew, but I've always wondered about the homemade yeast my ancestors would have been using during that time period.

 Potato rolls baked in the Dutch Oven.

Potato rolls baked in the Dutch Oven


Sticky Buns

Sticky Buns (of course the "sticky" is on the bottom!)


So this year I began my first sourdough starter and read through almost every sourdough post on theFreshLoaf! Now a “teacup of yeast” in those old recipes makes sense! In June I was brave enough to take my starter with me to an event and bake a couple of loaves. People were fascinated. It sparked a lot of conversations. The loaves came out great. I had to have rye straw baskets to proof the dough in, so I took a class and made my own. This year I even grew my own rye straw to continue making baskets.

Dutch Oven Sourdough

Dutch Oven Sourdough


Sourdough in Rye Basket

Sourdough in Rye Basket


Of course I can't do a Pa. German impression if I don't have some kind of rye bread. I've made the recipe for Pumpernickel from P. Reinhart's book, "The Bread Baker's Apprentice" and received the greatest compliment...a German exchange student visiting one of my events tasted the bread and remarked that it reminded her of home. I was thrilled!

I now also have the opportunity to do cooking/baking demonstrations at the hearth in a farmhouse at a historic site. It's much better and more controlled when I'm not battling the wind or rain.

Hearth

Hearth


I continue to learn as I bake and feel more connected to the family members who came before me. And my collection of old cookbooks and "receipts" continue to grow!

In "Early American Cookery–The Good Housekeeper–1841" the author says, "There are three things which must be exactly right, in order to have good bread–the quality of the yeast; the lightness or fermentation of the dough; and the heat of the oven. No precise rules can be given to ascertain these points. It requires observation, reflection, and a quick, nice judgement, to decide when all are right...the woman who always has good home-baked bread on the table shows herself to have good sense and good management."

usta's picture
usta


Authentic Ramadan Pide (www.40firinekmek.com)

In my country, arrival of Ramadan is easily noticed by the long lines in front of the bakeries and the tempting smell of pides wafting into the streets. It is a special type of flatbread with an incomparable aroma and flavor. This recipe will yield the delicious authentic pide made by the bakeries during Ramadan time. Enjoy!

Ramadan Pide

Ingredients:

4½ cups bread flour

1 teaspoon instant yeast

1 tablespoon molasses

1 teaspoon salt

1½ cups water, lukewarm

½ cup milk

3 tablespoons olive oil

For Decoration:

1 egg yolk

1 teaspoon yogurt

1 teaspoon water

1 teaspoon nigella seeds or sesame seeds  

3 pides (8" diameter)

Directions: 

1.   In a bowl, combine ¼ of the yeast and 1 cup of the flour and stir to mix. Add ½ of the water and form a a soft dough. Cover with plastic wrap and let rise in a warm place until doubled in volume, about 1 hour.

2.   Put the dough in a container with a lid and place it in the lowest shelf of the refrigerator. Leave the dough overnight.

3.   Take the dough out of the refrigerator and let sit at room temperature for about 2-3 hours.

4.   If making by hand, mix the rest of the dough ingredients in a large mixing bowl and stir to mix. Add in the fermented dough. Knead well for 10 minutes. The dough will be very soft and wet which might make it a little hard to handle.

5.   If using a mixer, fitted with the dough hook, mix the rest of the dough ingredients and add the fermented dough. Knead for 6-7 minutes. The dough will be very soft and wet which might make it a little hard to handle.

6.   Transfer the dough to a bowl, cover with plastic wrap and let rise in a warm place until doubled in volume, about 2 hours.

7.   Place the baking stone on the lowest rack of the oven; remove any other racks to ease access. Pre-heat the oven to 500 degrees F (250 degrees C).

8.   With a spoon, carefully tip one-third of the dough at a time on to the pizza peel generously dusted with flour.  Using floured hands, roll out into a 8" (20cm) circle about 1/2" (1 cm) thick, making sure dough does not stick to the peel. Leave to rise in a warm place for 30 minutes. Make two more pides in the same way.

9.   Using the opposite end of a wooden spoon make deep indentations on the dough as in the picture. Mix the egg yolk, water and the yogurt for the glaze and brush over the pide. Decorate with nigella seeds or sesame seeds.

10.  Place an oven-safe pan with boiling water in the oven to create steam.

11.  Place the pide carefully on the hot baking stone. Bake for 10-15 minutes or until golden and crusty and place in a towel as soon as it is out of the oven. If the top bakes too quickly, cover loosely with aluminum foil.

12. Serve warm.

breadnerd's picture
breadnerd

Continued from an earlier entry....


We let the first layer dry a few days, and some fairly big cracks started to form. I decided to pull out the sand to give the oven more room to shrink as needed, and to help it dry out faster. I cut a smaller door than the final size, you can see the final door scored into the surface:

http://farm2.static.flickr.com/1239/1443314684_81e061fa2b.jpg?v=0


We ended up letting it dry for a couple of weeks due to rainy weather and other activities. It was covered with a tarp and opened up when the weather permitted to dry out. Next came the second layer. The first layer is just sand and clay—the second is cob: sand and clay mixed with straw.

http://farm2.static.flickr.com/1368/1443313710_f479fba985.jpg?v=0


The second layer goes on much faster, but as it's 6 inches thick you use up a lot more material as you go. We made LOTS of batches of this.

http://farm2.static.flickr.com/1260/1442449505_b5cda095e2.jpg?v=0


Almost there:

http://farm2.static.flickr.com/1182/1442450317_7efc87c836.jpg?v=0


Refining the doorway:

http://farm2.static.flickr.com/1208/1443313758_b3154e54b5.jpg?v=0


Our door, made from glued-up 4 x 4s, and shaped with a sawzall. Did I mention I have a very handy assistant?

http://farm2.static.flickr.com/1244/1442450793_11879b0dcc.jpg?v=0


We lit some small fires at this point to aid in drying, and after a couple of weeks started using it. The first few attempts had a big learning curve, and I think I joined the fresh loaf soon after that and documented my later bakes.


The oven was built in May and June, and we left it without a final protective plaster because we were undecided on what to do. We would cover it with a tarp when not in use. Finally, we decided just to make a roof over it, so there is no final plaster layer. It made it through a winter and another summer without much damage. Here’s the final oven with it’s roof:

http://farm2.static.flickr.com/1435/1443313790_6629aee699.jpg?v=0


Many thanks to Kiko Denzer for a great book--its a wonderful way to give wood-fired hearth baking a try without a huge amount of investment (well, if you don't count your time!). I also have the Bread Builders book which I found useful as well, I just didn't have the right location and finances for a masonry oven, and I think after a few years using the "mud hut" I will know better my needs and desires for any future ovens.


breadnerd's picture
breadnerd

I finally got up the gumption to move my construction photos over to my flickr account. Here they are in the entirety, I tried to make the titles fairly self-explanatory:

http://www.flickr.com/gp/7541655@N03/aX31kR


Here's a condensed version with some commentary:

First off is the foundation. Our frost line in in theory 48 inches, so we dug down quite a bit. We hit a VERY large rock, which made us decide the hole was big enough, and which we figured would act as a foundation in itself.

http://farm2.static.flickr.com/1012/1443314626_31ba338401.jpg?v=0


Next, we filled the hole with gravel and started building a foundation from rather unattractive landscaping bricks we already had from another project. We added a layer of lava rock for insulation, Kiko’s new edition has a lot of better ideas for this, but this has worked okay for us.

http://farm2.static.flickr.com/1410/1443314822_1f6502d8de.jpg?v=0


Next sand is added, packed, and leveled, and we laid the oven floor bricks. A string was used to draw a circle as large as we could fit on the floor, as our guide for the sand mold form.

http://farm2.static.flickr.com/1367/1442450837_2025385af8.jpg?v=0


The sand form took a lot longer than I thought it would, but it turned out nice.

http://farm2.static.flickr.com/1110/1443315018_c94673ba68.jpg?v=0


Because of this, we didn’t get very far with our first layer before dark, but you can see the width of the walls, and how compact it was. We were probably overly persnickety with this first layer:

http://farm2.static.flickr.com/1319/1442451223_365f1a3e72.jpg?v=0


We covered it in plastic, and resumed the next day.

http://farm2.static.flickr.com/1331/1442450183_71089d3c3f.jpg?v=0


Final first layer, wacked with a 2 x 4 and scored for the next layer to stick:

http://farm2.static.flickr.com/1162/1442450281_d233d47f01.jpg?v=0


more to come....


zainaba22's picture
zainaba22

I post this recipe before for JMonkey, you can see it here.


1 Tablespoon yeast.
1 Tablespoon honey or sugar .
2 1\2 cup warm water.
3 cups white flour.
1 1\2 cups whole wheat flour.
2 teaspoon salt.
2 Tablespoons olive oil.

1)Preheat the oven to 550 degrees.

2)Combine yeast,honey and 1\2 cup water in bowl,cover,stand in warm place about 10 minutes or until mixture is frothy.

3)place all ingredients + yeast mixture in the bowl of mixer ,beat 10 minutes to make a soft dough.

4)Divide dough into 12 pieces.

5)Shape each piece into a ball .cover,let rise in warm place until doubled in size ,about 1 hour.

6)Roll each to a 16 cm round.

7)The old method i bake Pita Bread on hot baking surface for 1 minute per side.

8)The new method I bake pita bread on wire rack over baking pan for 2-3 minutes.you can see it here.

zainab

http://arabicbites.blogspot.com/


AnnieT's picture
AnnieT

Today I baked the sourdough wholegrain bread from Breadtopia, and this time I used my ss dutch oven. I treated the dough like the NK bread and proofed it in a parchment lined banneton so I was able to score it before lowering it into the pan. No scorched bottom crust and in fact the loaf looks great. This is the one I am going to mail to San Diego, and the frustrating thing is that I won't know what the crumb looks like. Maybe my friends will send a picture - I have my fingers crossed that it is as good as it looks, A

susanfnp's picture
susanfnp

This flax seed-currant bread is similar in texture and technique to ciabatta. It was really fun to make and tastes delicious. The recipe and more photos are here.

Flax seed - currant bread Flax seed - currant slices

Susanfnp

http://www.wildyeastblog.com

breadnerd's picture
breadnerd

Still working on the nuances of oven temperature. It’s really a comedy of timing between two ancient processes—bread making and fire building. It seem like if I get it over 600 degrees at the start, it takes a good 45 minutes to reach a more comfortable 550 for bread baking, but then it holds the temps nicely for hours. Handy if you have multiple batches, less handy if you were hoping to cook your dinner at 350 degrees anytime soon. I do crack the door to bring the temp down a bit quicker.


Common occurrences when firing your mud oven:

  • If you think the fire is not hot enough, it will be MUCH hotter than you think.
  • If your oven is ready, and your bread is not, it will only get HOTTER if you wait to pull the coals out, and you will spend even more waiting for it to cool down. Fortunately, this will give your bread plenty of time to catch up!
  • By the time your oven cools to 350 degrees, you will be too tired and/or stuffed with bread and other roasted goodies to bake that last batch of cookies that you had planned.

Improvised proof box: Sunshine + moisture to keep it from getting a skin. Worked fine in a pinch...

http://farm2.static.flickr.com/1260/1425173125_fb0d261355.jpg


Like opening a package, it’s always a thrill to open the door and discover loaves like these:


http://farm2.static.flickr.com/1129/1426058300_6a233fae2d.jpg


I guess there’s always this thought in the back of my mind that the loaves will be charred black, or pale little lumps with no oven spring. Even though it’s not that much different in the end than using my indoor oven, there’s something magical about baking in my little mud hut. It also smells better. Also? The low-angled sunlight of fall doesn’t hurt the aesthetics.


http://farm2.static.flickr.com/1311/1426057062_b5f6f233a1.jpg


http://farm2.static.flickr.com/1311/1426056540_4941d7432f.jpg


http://farm2.static.flickr.com/1038/1426057642_e30d6f40cb.jpg


http://farm2.static.flickr.com/1124/1426057916_bf9ab49a10.jpg

I just did a bit of bread this time--a batch of Columbia and some Multigrain loaves. After the bread came out (well actually, while the last multigrains were still in—I was hungry) I made a pot roast and some baked potatoes. Also roasted a butternut squash to make soup out of the next day.

Floydm's picture
Floydm

Struan, banana bread, crumbbum's miche.

I got much closer on the timing with the miche. Real nice oven spring and pretty nice crumb.

Pages

Subscribe to RSS - blogs