The Fresh Loaf

A Community of Amateur Bakers and Artisan Bread Enthusiasts.

Blogs

The Roadside Pie King's picture
The Roadside Pi...

Pretty nice looking Brooklyn N.Y. style Pizza Pie today! Even at the ultra-thin 550-gram skin at 18" it can still support the toppings and hold a nice Brooklyn fold!

breadforfun's picture
breadforfun

That's a lofty title for a pretty basic post like this. The title actually refers to the name a book. But I'm getting a bit ahead of myself here.

For the past few years I have been fortunate enough to be able to attend the Slow Food Cheese festival in Bra, Italy. It's a biennial event where cheese-makers from all over the world are invited to share (and, yes, maybe sell) their artisan cheese. In 2019, the last time I went, they had a book pavilion where you can purchase many titles about the Slow Food movement. Among the books, tucked away in a corner, I found a book entitled "Il Mondo del Pane," which I translated (with my limited Italian-language knowledge) as The World of Bread.
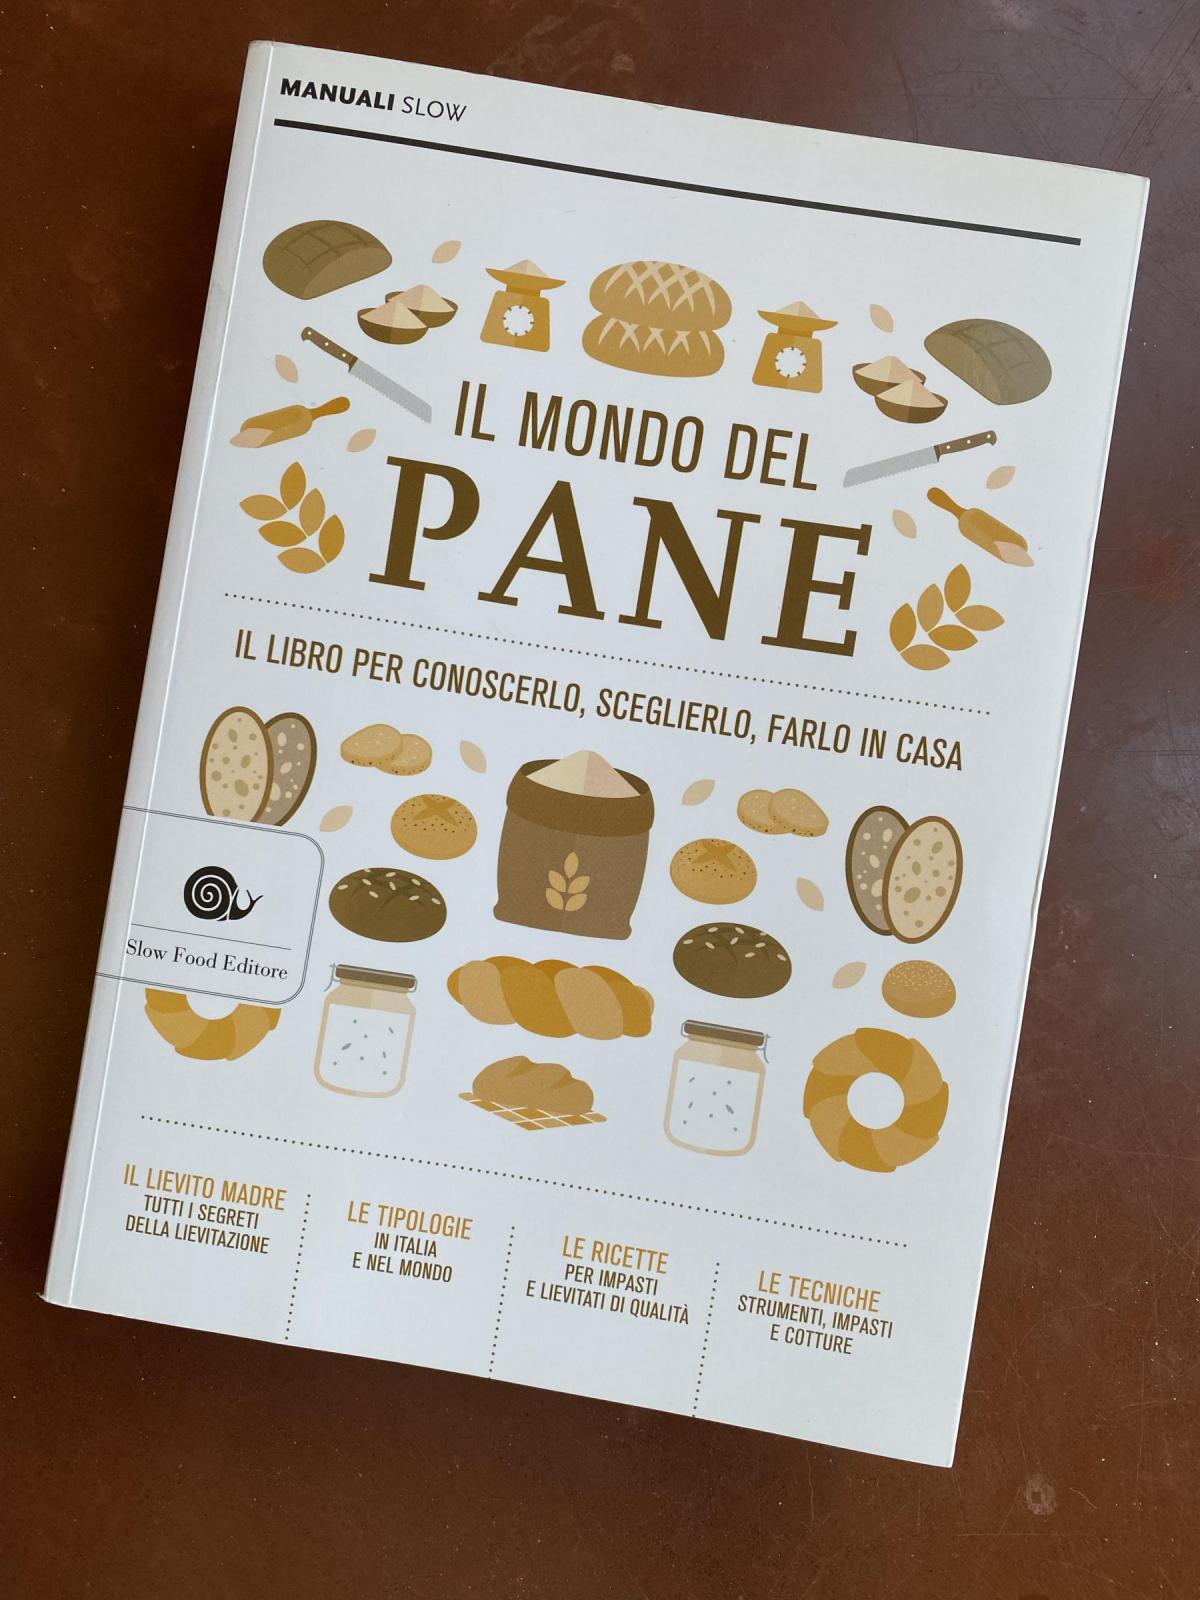
The book is divided into several sections, each discussing different aspects of bread making like flours, methods of leavening, etc., as most bread books are. The largest section has brief discussions of breads from different areas, mostly in Italy, but some from the rest of the world, too. I think what intrigued me about the book was this section, which features a photo of a bread, followed by a description that generally includes the type of flour and leaven used. The breads that are described are not artisan bread, but are your everyday breads from local bakers that are available in each specific region. 
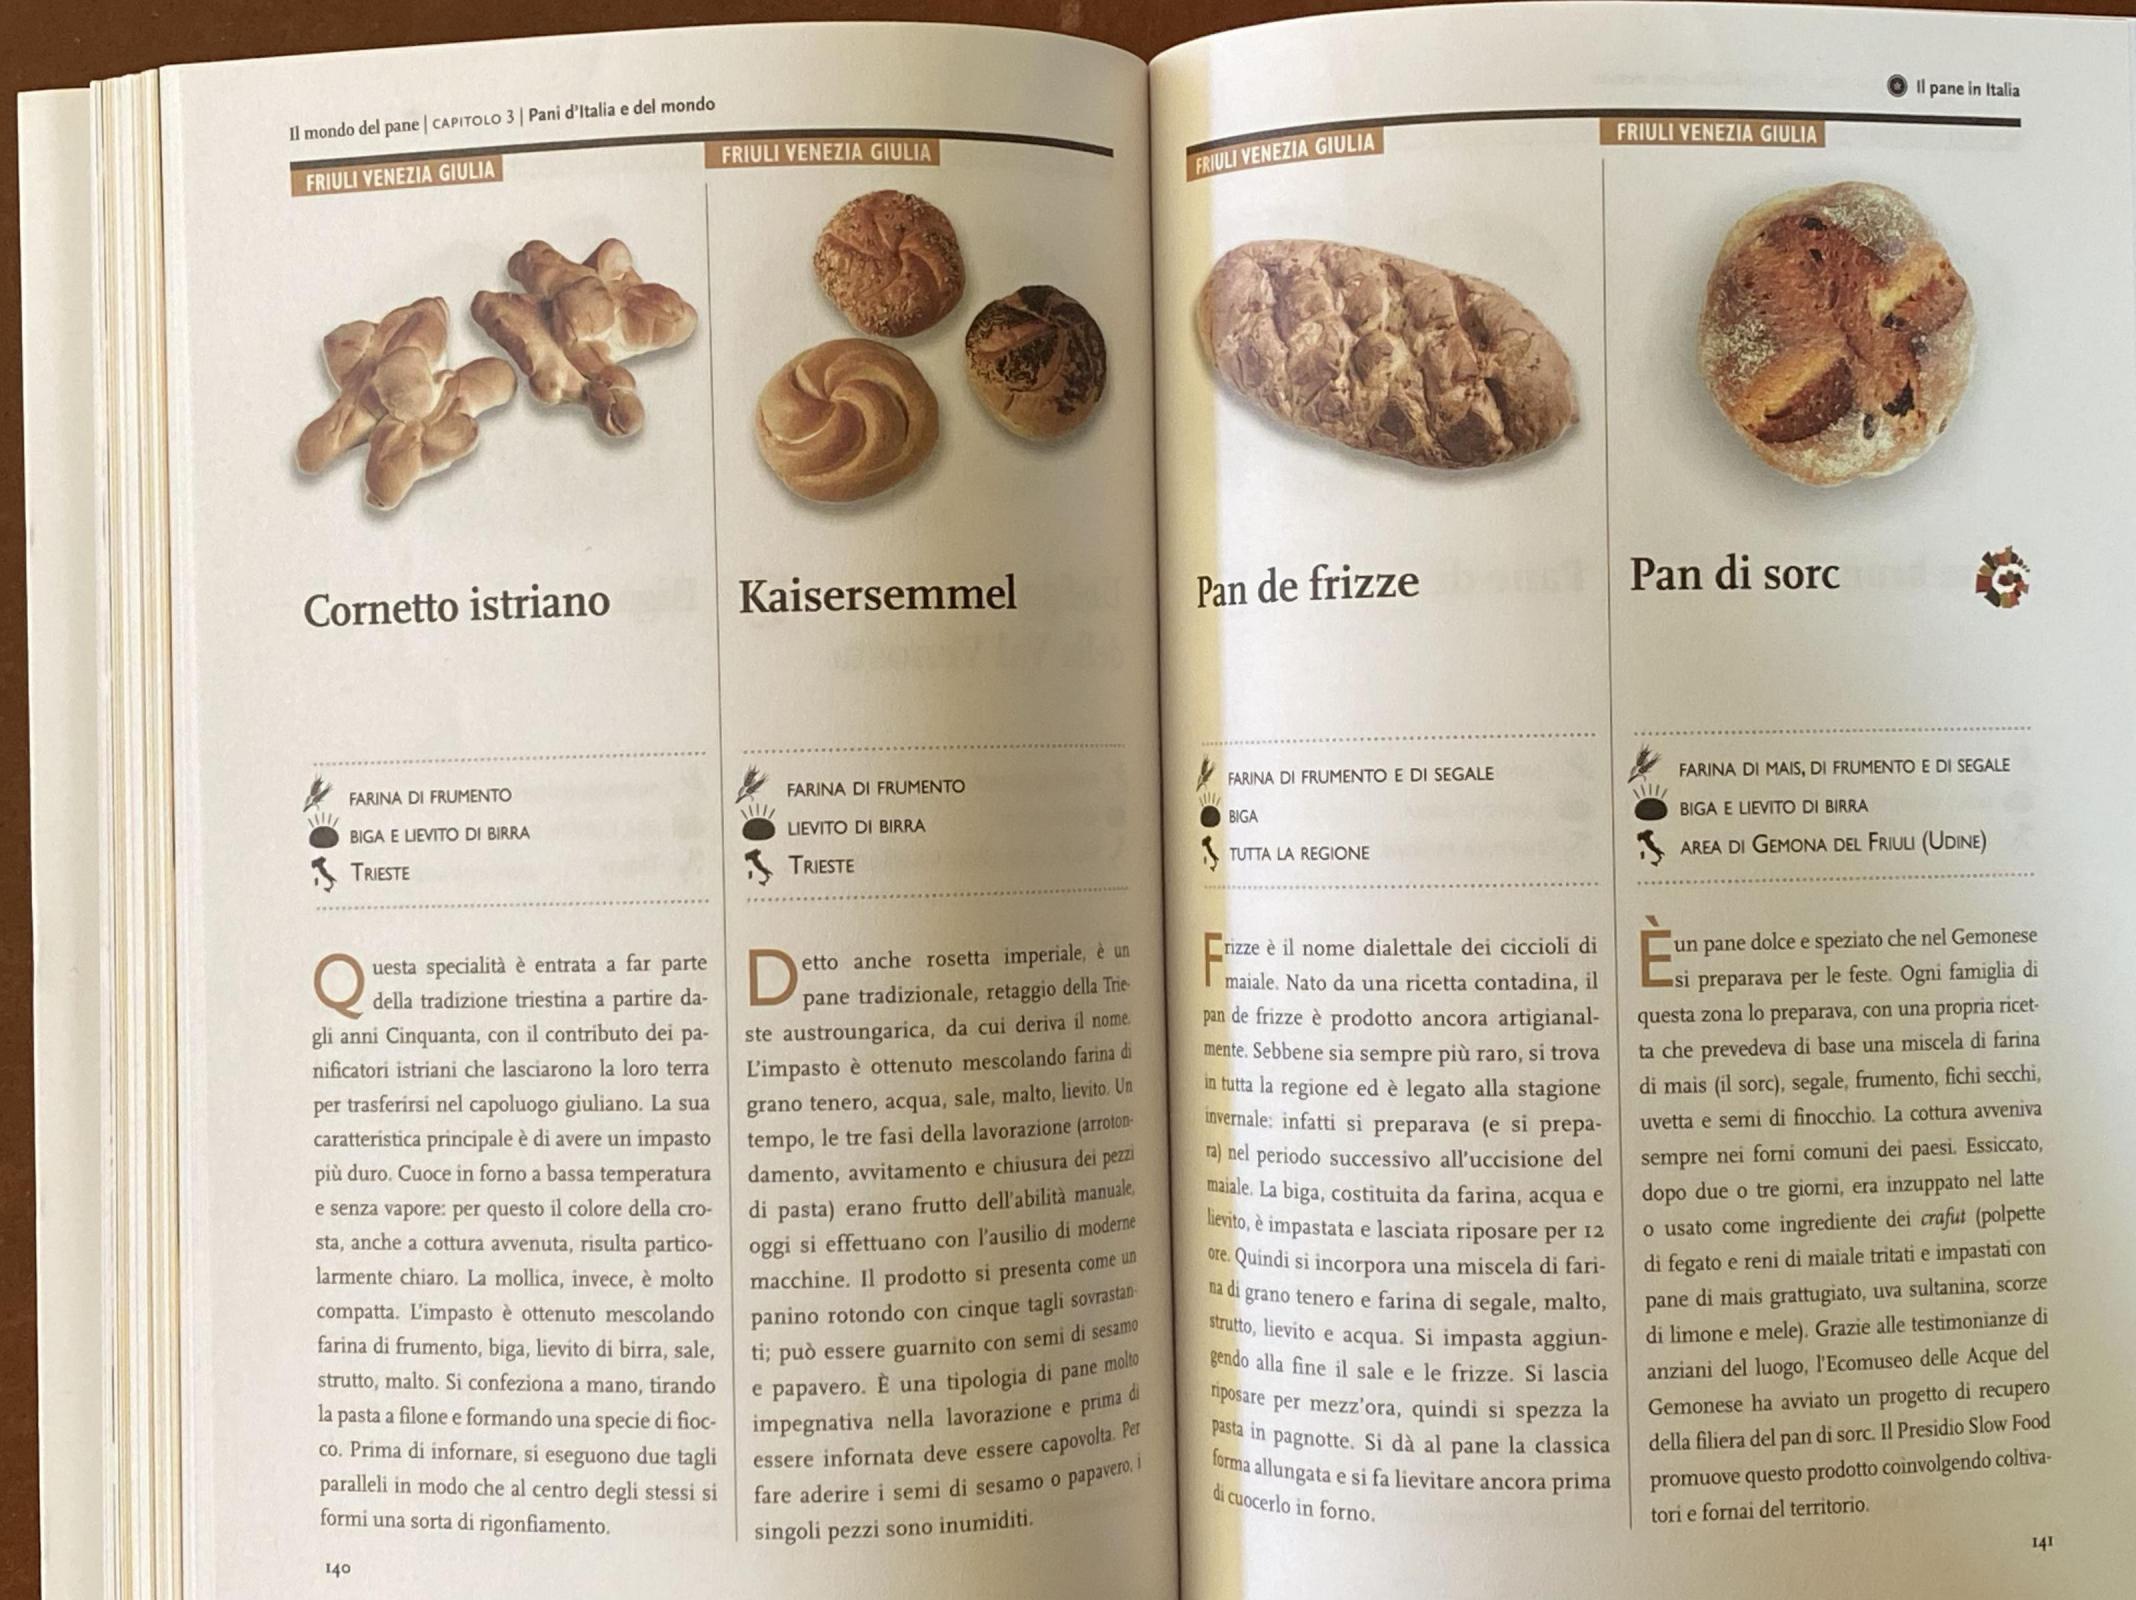
Since I got the book almost 2 years ago, my Italian language reading skills have improved to the point where I can understand much of what is written. I decided to try my hand at making one of the few recipes that are in the book, Pane Pugliese. You may have seen recipes for this bread before. Peter Reinhart has one in his book Crust and Crumb, and a slightly different version in The Bread Bakers Apprentice. Both use a large portion of biga (around 100 bakers-%). In the former he uses 100% bread flour. In the latter, he's a bit more loose suggesting a blend of bread flour and durum flour, ratio unspecified. 

For those who don't know (and forgive me if I'm stating the obvious here), Pugliese means "from the region of Puglia," often spelled Apulia in English. It is in southern Italy, the coastal region from the spur to the heel of the boot. There are many famous breads from the region including my favorite, Pane di Altamura, and its very close cousin Pane di Matera (which is actually not in Puglia but right over the border in Basilicata). The predominant grain in the region as in most of Southern Italy is durum wheat, Semola di Grano Duro. 

The recipe in Il Mondo del Pane is from the coastal town of Brindisi. It's only 6 sentences long.  It calls for 100% durum and a lievito madre (natural leaven) instead of a biga, plus just a pinch of commercial yeast. 
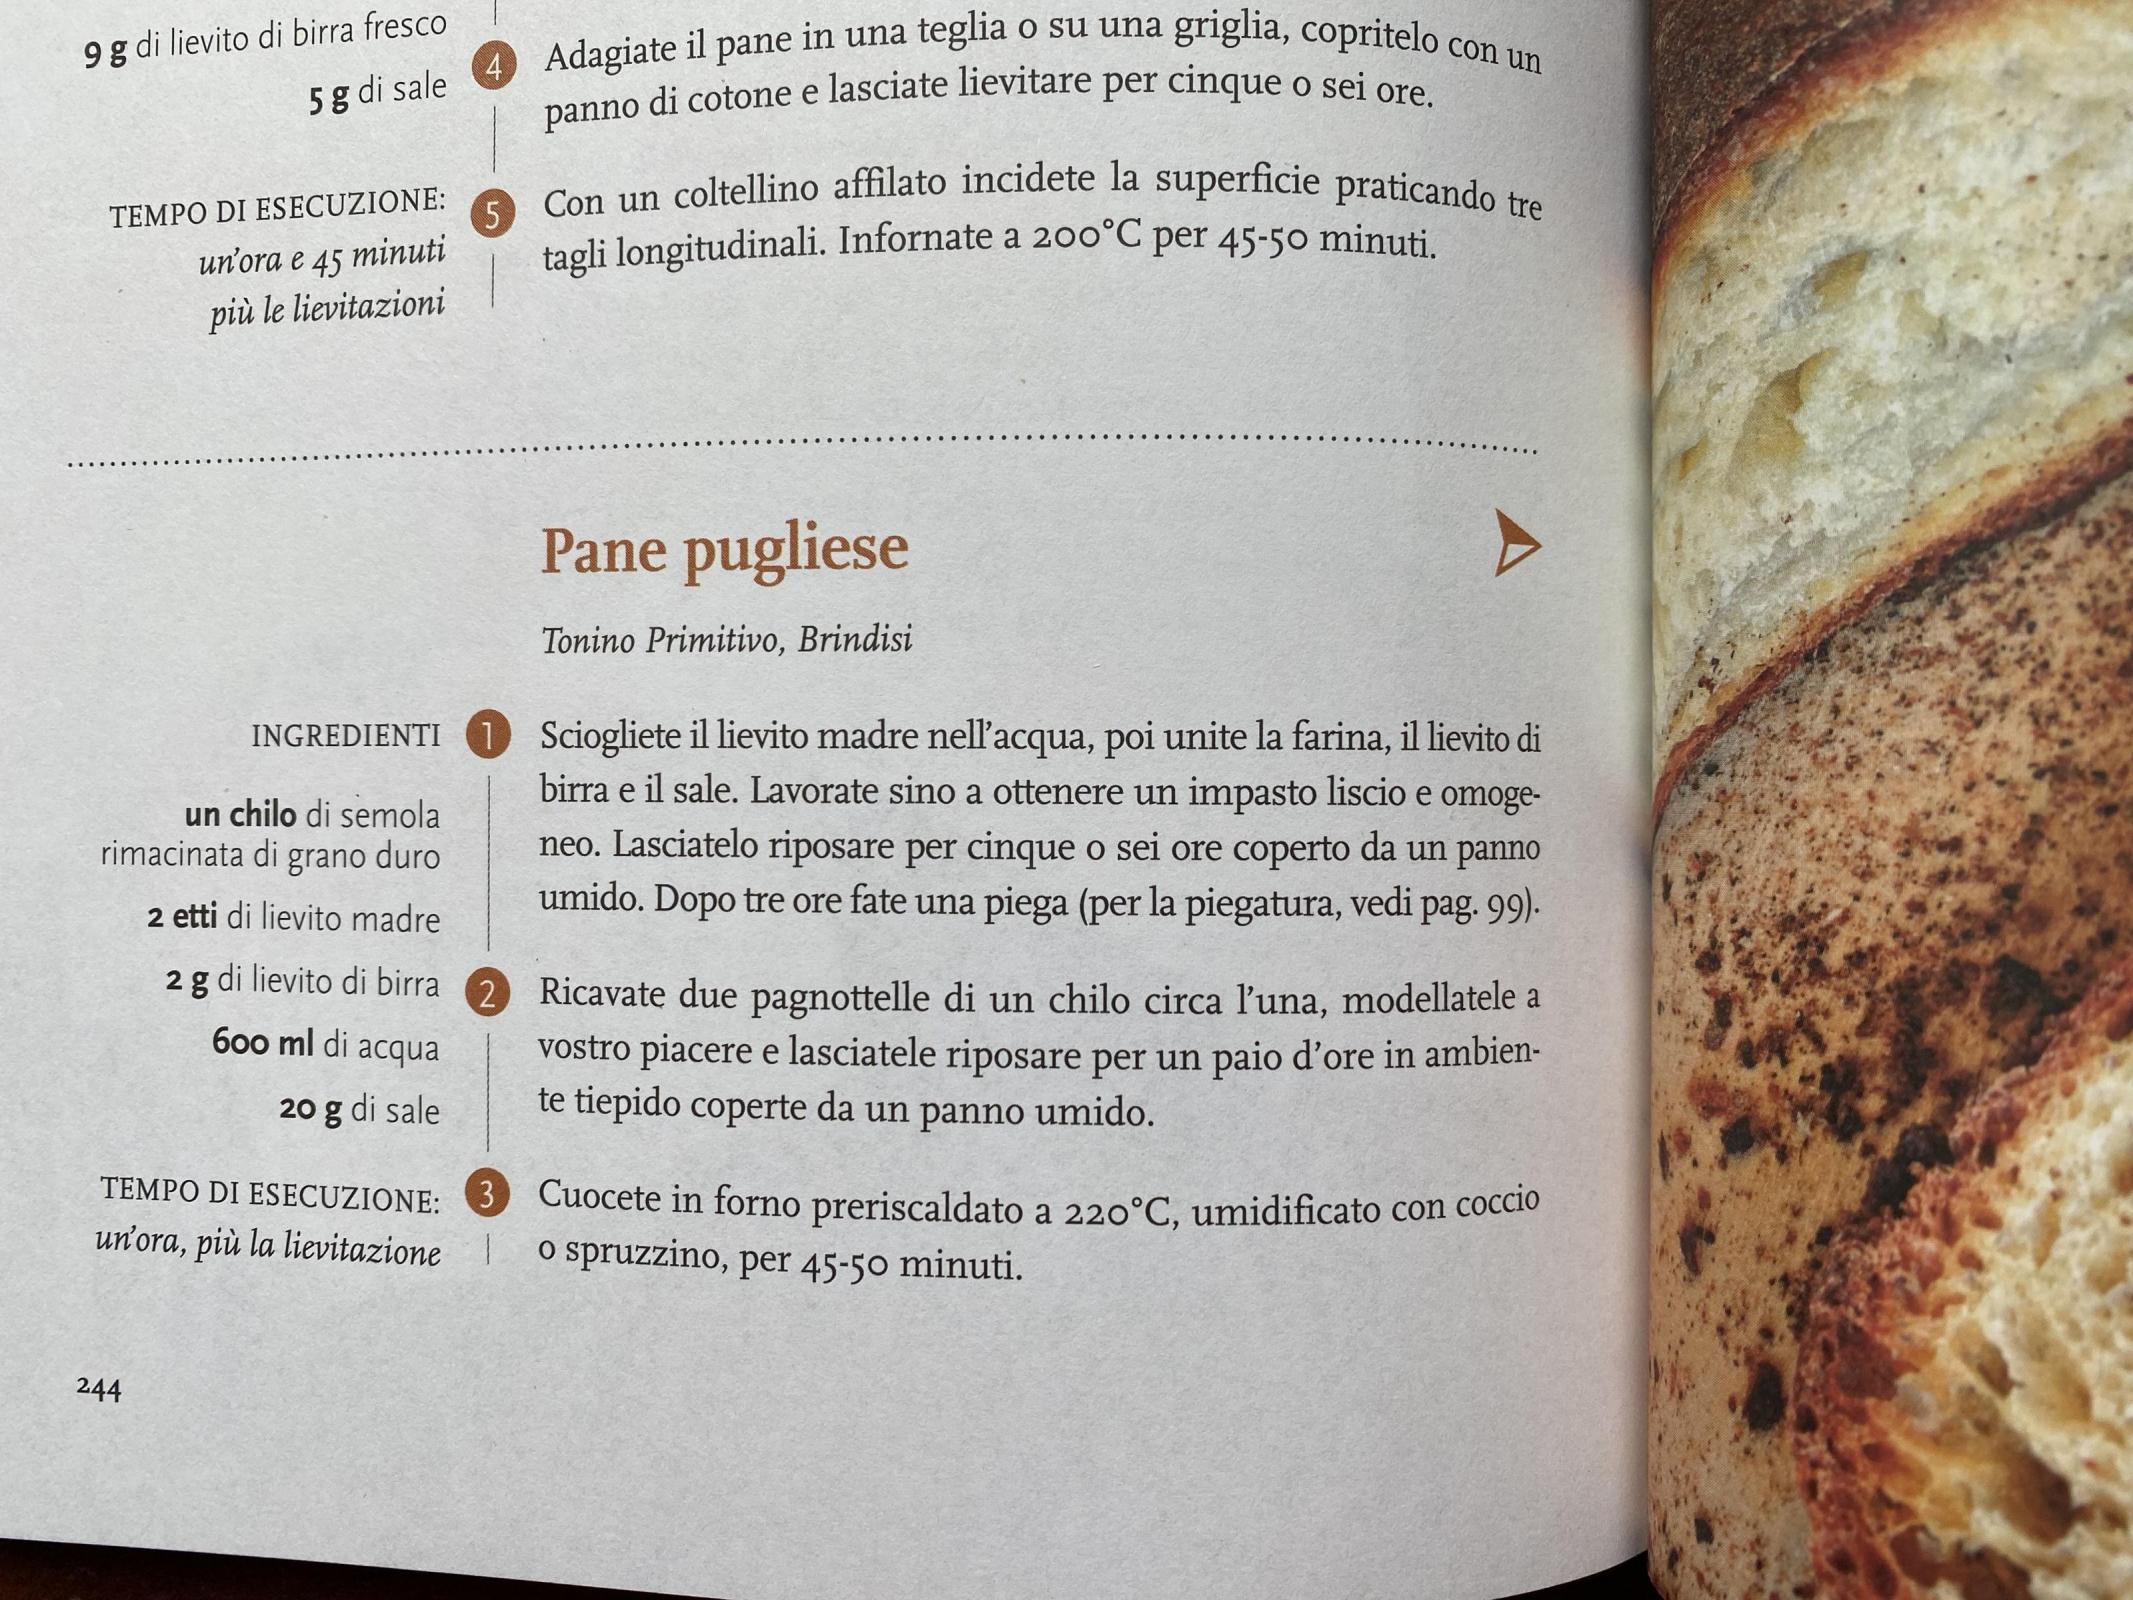
The simple recipe states:

  • Dissolve the lievito madre in the water, then add flour, yeast and salt. Work until you get a smooth and uniform dough. Leave to rest for 5-6 hours covered with a damp cloth. After 3 hours perform one fold.
  • Divide into 2 pieces about 1 kg each, shape as you like and rest for two hours at room temperature covered with a damp cloth.
  • Bake in an oven heated to 220˚C (430˚F), using a clay pot or spraying with water for steam for 45-50 min.

Since the recipe is written for Italian flour, which I have found to be much less thirsty than the Extra Fancy Durum from Central Milling that I use, I adjusted the hydration upwards.  The hydration of the lievito madre is not specified, so I randomly chose 100%. I made the lievito madre the previous night using my normal wheat-based starter that I keep at 67%H 1:10:10 and left it to ferment at room temperature for about 12 hours. Although it does not say so, I added an autolyse because EFD behaves much better with a long hydration time, in my experience. I worked the dough in a KitchenAid for about 10 min. using the dough hook and did the bulk ferment at around 72˚F. It makes two loaves which I preshaped gently, rested 15 min. then shaped into logs about 14-inch long. The final proof was at 72˚F, loaves sitting directly on a semolina-coated peel. The loaves baked for about 47 min. in a 430˚F oven on a stone with steam the first 12 min.
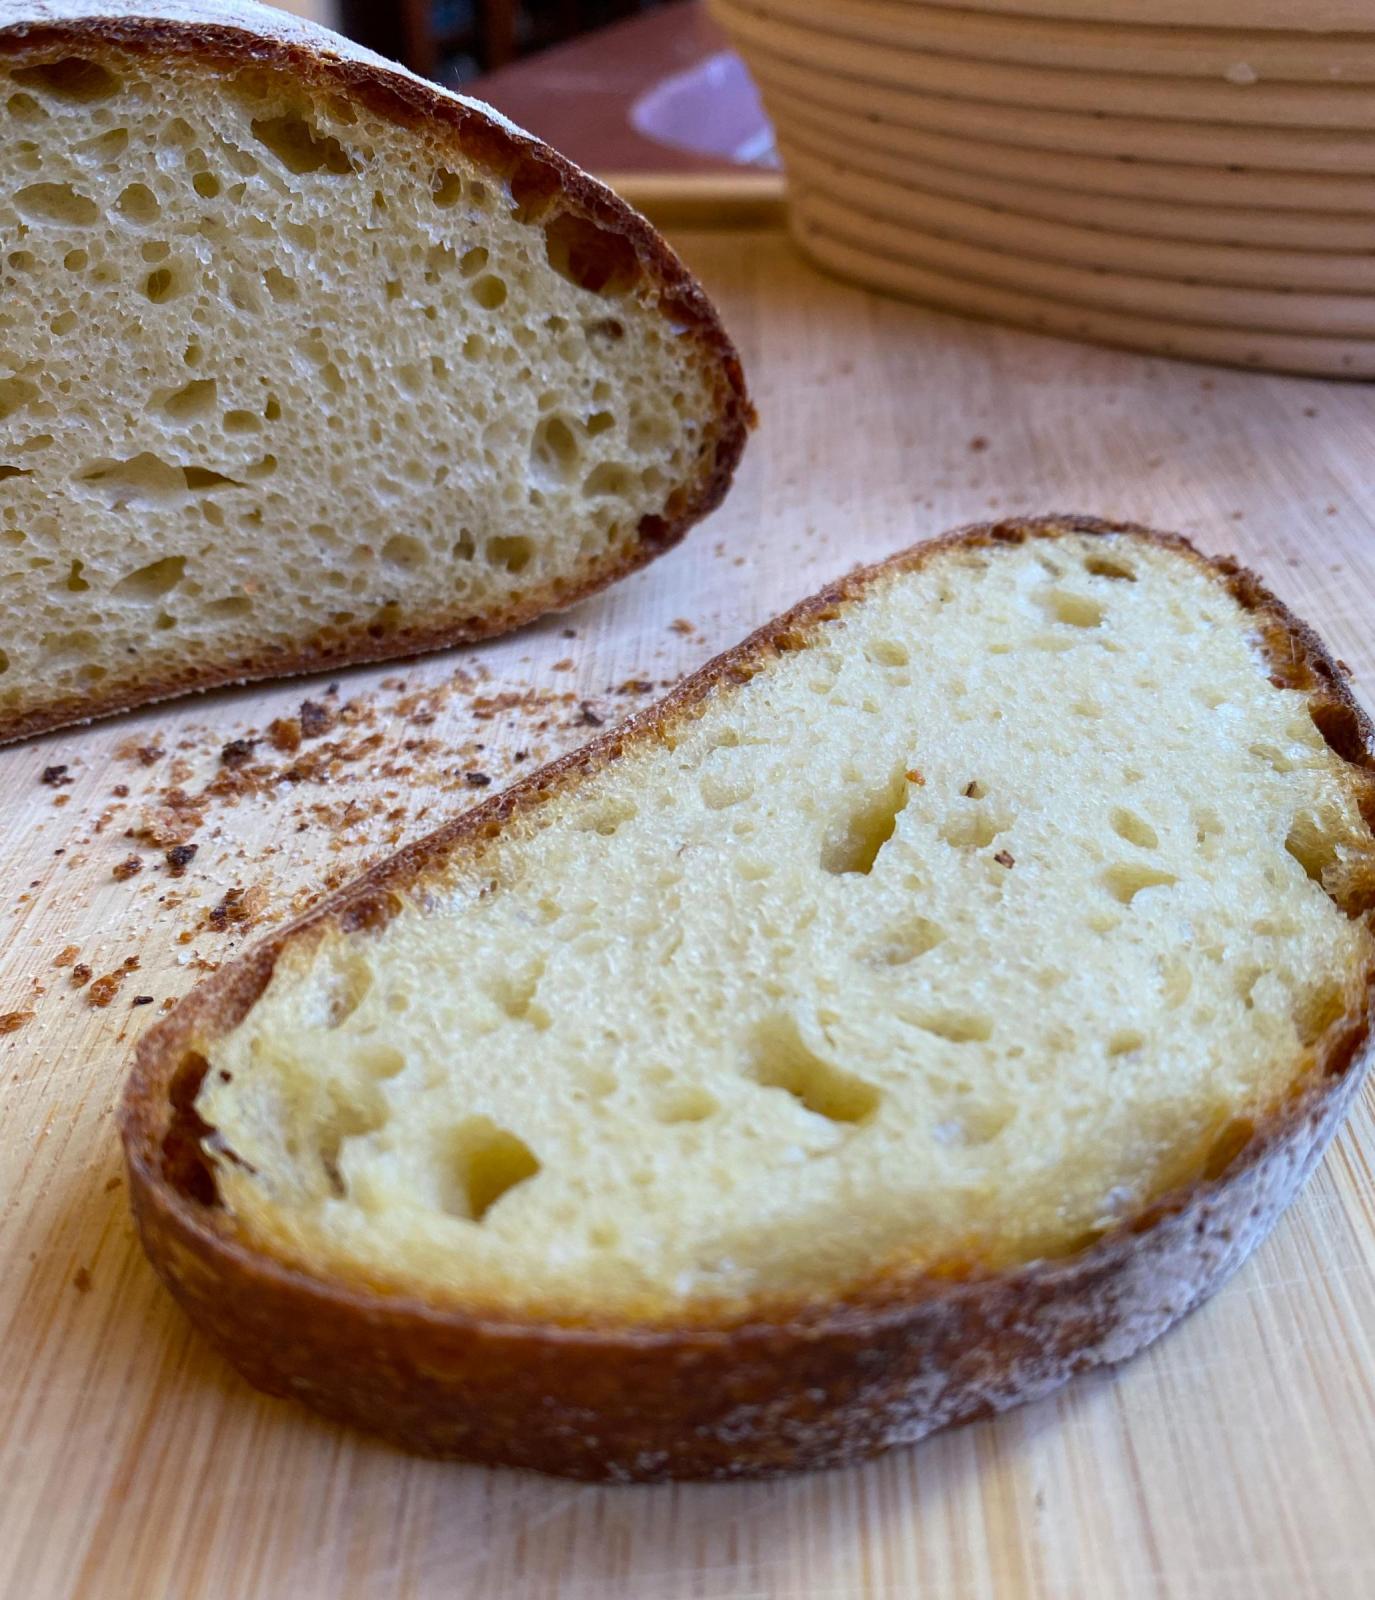
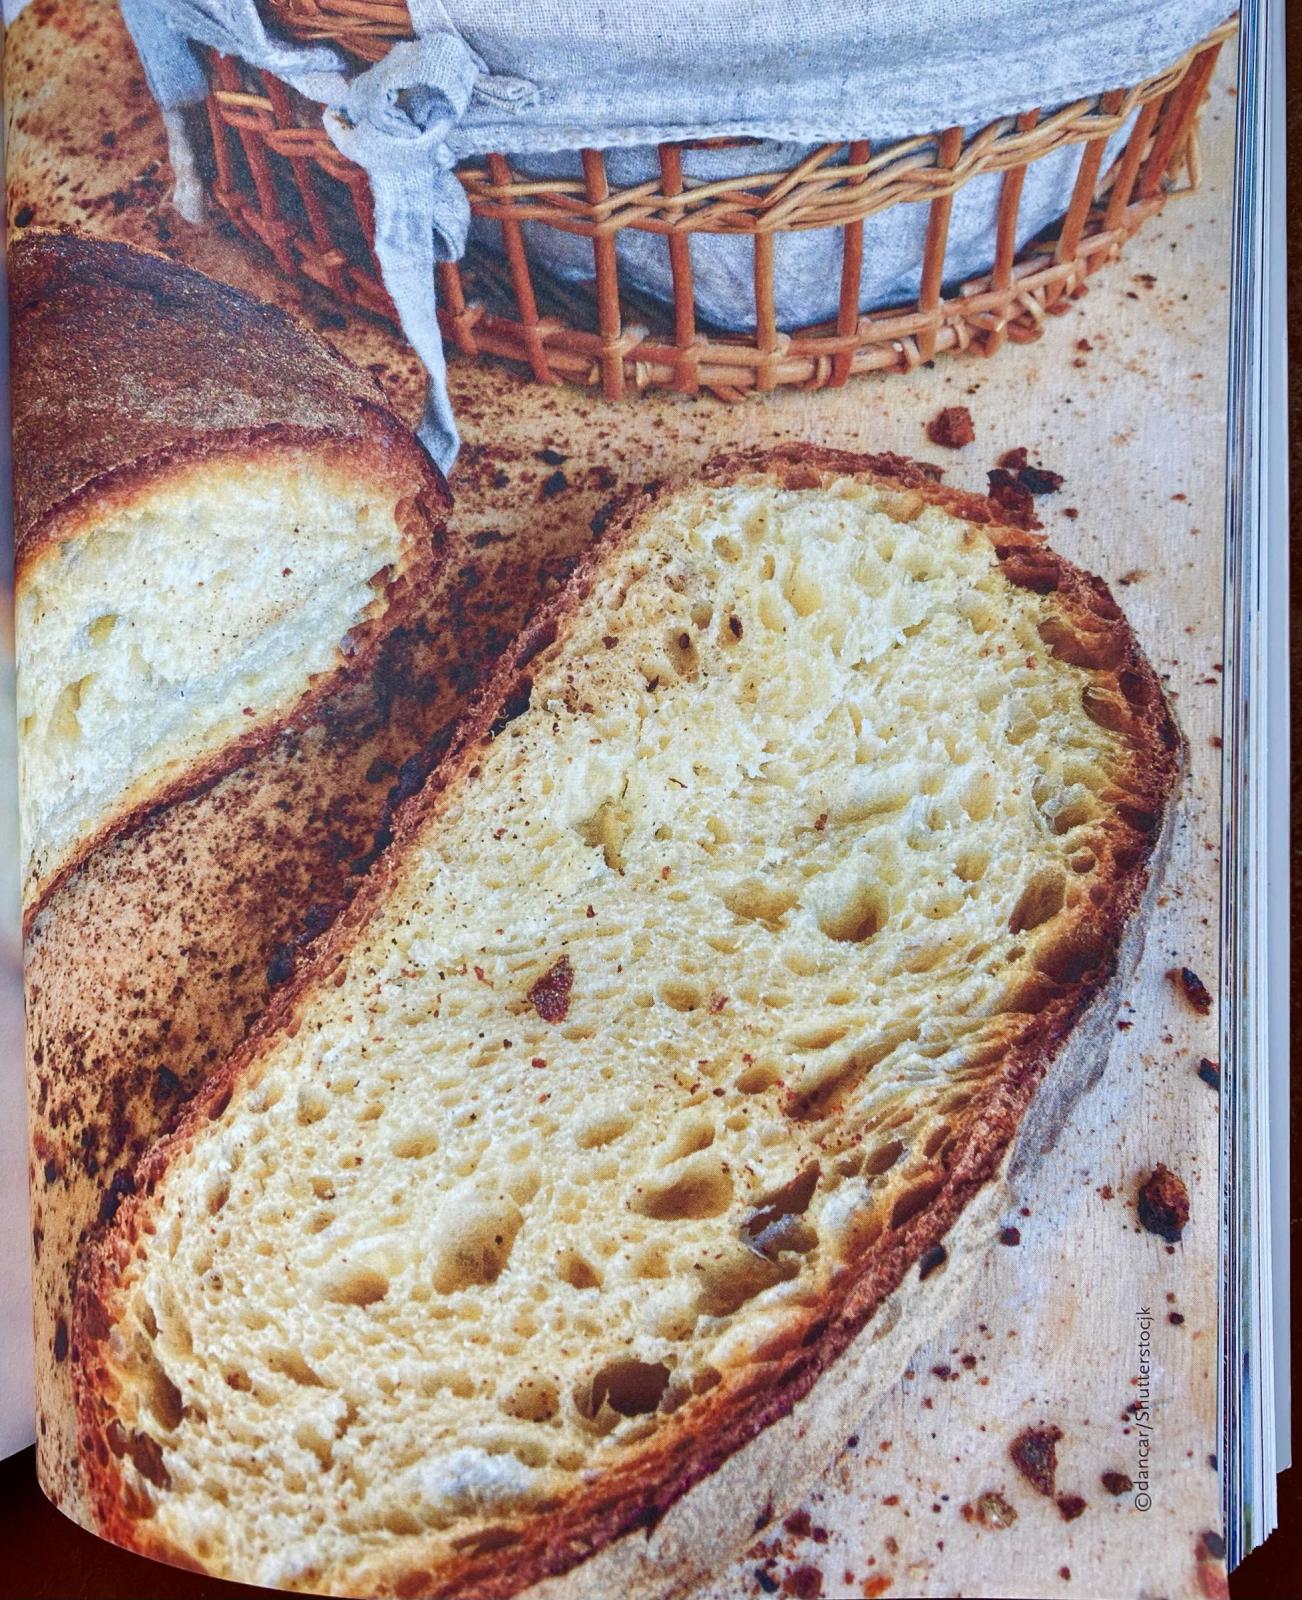
First cut of my loaf  

                       The first cut from my loaf                                           The loaf as pictured in the book

I think next time I will proof it in a couche. I considered it this time but was worried that the dough was too sticky. I shouldn't have worried, though, as an adequately floured couch would have been just fine. In retrospect, I should have baked them a little longer since the hydration was significantly higher than the written recipe, and that would have given a crispier crust. But overall, considering the relatively minimal information I started with, I'm quite happy with the bake.

And not incidentally, it tasted great!

-Brad
 

Yippee's picture
Yippee


To learn more about concentrated lactic acid sourdough (CLAS), please see here and here


Another whole-grain dessert bread! You may already notice that I  sweets. Eating wholesome sweet bread as a snack is much healthier than eating candies! Made with CLAS, this whole-grain cinnamon raisin bread is a delicacy! Try CLAS, making delicious bread has never been easier!


Pre-dough

5% whole rye CLAS

95% fresh white whole wheat flour, ground by Vitamix

60% scalded full-fat milk

16% eggs

12% water

0.15% gold yeast

DT 30C/86F-ish

28C/82.4F x 240mins


Dough

pre-dough

0.6% gold yeast

1.5% salt

2.5% Vietnamese cinnamon

10% butter

7% water

76% raisins (unsoaked; briefly rinsed right before mixing)


Bulk

32C/89.6F x 60mins


Shape

9x4x4 pullman

total dough weight ~1100g


Proof

32C/89.6F x 45mins


Bake

191C/375F x 10 mins w/ steam

177C/350F x 50 mins w/o steam


Oopsy! Just noticed some slices are "redder" than the other - I probably did not evenly mix the cinnamon in the dough cos I dumped it in the mixer all at once😛😛😛


Ilya Flyamer's picture
Ilya Flyamer

Finally decided to take the plunge and make a 100% whole wheat bread. I used the Balcaskie landrace flour from Scotland the Bread. Here is the formula I used, with 81% hydration and a little honey: https://fgbc.dk/1nmi

I thought 81% hydration was low for purely whole grain dough, and was ready to add more water, but it turned out if anything, it was too much! The dough at first felt almost like rye, or like porridge - no structure at all. With a bit of time and a few gentle folds it got a little strength, but it was barely enough to even shape as a pan loaf. When in the pan, I let it almost double, at which point placed in the fridge since I had to go out for some time. I was actually worried I had overproofed it, since with such weak dough doubling might be a bit ambitious, and the dough had a few pinholes on top - like rye does when it's ready to bake. After a couple hours in the fridge I preheated the oven and baked with steam.


Essentially had no oven spring, just enough to smooth out the top. The result was surprisingly good! Very tasty, and a nice crumb structure. No bitterness like one can get with whole wheat dough. The only thing is deeper into the loaf it has a bit of a tunnel on top, I am not sure what could have caused that:

Regardless, the flavour is really nice and I am happy with my first 100% whole wheat bread :)

Ilya Flyamer's picture
Ilya Flyamer

I've made pitas a few times, but never posted here. Freshly baked pitas are absolutely delicious, I never knew they could be so tasty when I used to have them from the supermarket.

Basically, I make them using sourdough, with 20% whole grain (and I think I've only used spelt in this case), and 65% hydration, some olive oil and a bit of sugar. Here is the formula: https://fgbc.dk/1m2j

I mix all ingredients except for oil and develop a little strength, and then knead in the oil. I doubt it's really necessary and the oil can probably be kneaded from the beginning with no problems. I then let it rise until nicely puffy, and due to the nature of this bread there is no specific volume increase or any other target - just until looks and feels good. Then, since I mostly use them for breakfast with hummus, I just put the dough in the fridge until morning. In the morning I start by turning on the oven with the baking steel in and preheat on the highest temperature for about 30 min. While it's preheating, I scale and ball up the needed amount of pitas (the formula above makes about 8 generously sized 115 g pitas). If I feel like it and have enough space in the container, I might ball up all of the dough and put extra balls back in the fridge to save time next day. The dough keeps in the fridge exceptionally well, I've certainly kept it for 3 days with no issues.

After 15-20 min of preheating, I roll out the pitas into thin rounds (or whatever shape I manage). From reading some old discussions here and from my experience, nice balling up like for pizza, and careful rolling out is very important for good inflation. Letting the dough rest at either the ball or the flat stage also helps a lot, and for me roughly 30 min total time works well. When ready to eat, I just place one or two pitas on the steel at a time and switch on the grill. Then hopefully the pitas puff up like balloons, and the top gets a little nice browning from the grill (but it is easy to overcook them and make the top too dry). Here is a video of the cooking in real time: https://photos.app.goo.gl/dPH1Mn74NrhHwUSq7 (I started it a few seconds after placing the dough on the steel, and the time needed to turn on the camera already was enough for a lot of bubbling!). (The picture on top is from a different batch a while ago.) The flavour is fantastic.

The only minor issue is that I get a much thinner and less fluffy inside top relative to the bottom of the pita, like so:

I wonder what I could do to make them more even? I am really happy with the results every time nevertheless.

As a bonus, it seems cooking them on the grates instead of the steel produces Greek-style pitas, which are more fluffy and don't have a pocket. But that needs more experimentation, I've only done this once when I brought this dough to a barbecue hoping to cook on the grill, but due to weather it was moved indoors and I cooked on the grates in a gas grill oven.

The Roadside Pie King's picture
The Roadside Pi...

Ya Mon, Jamaica Mon!

Meat hand pies were brought to Jamaica by the English. Pasties. The word evolved into "patty." The hand pie evolved into a decidedly unique Jamaica food.

Keeping with the tropical vibe, I submit an old-time banana Chiffon pie.


Danni3ll3's picture
Danni3ll3

I’ve been working on strengthening my starter for the last two weeks. I found fascinating info from Doc Dough on determining when a starter was ready for a feed or to be used. Link here: https://www.thefreshloaf.com/node/67214/2-weight-loss-method-judging-levain-maturity 


Long story short, your starter including the container should lose 2% of the weight of flour added for the feed. I’ve been using this to judge my feeds and my starter has more than doubled each time. I also no longer have that acetone smell when it came to the next feeding. Feeds were generally 12 hours apart as I left very little in the container and fed between 40 and 50 g of some rye and mostly unbleached flour. 

Now that my starter seems back up to speed, I fed it pure rye and put it in the fridge. I made it a bit thicker but not as thick as Doc Dough stated in his post as I plan to do builds with it rather than using it right away. I’ve learned my lesson about neglecting my starter! Never agsin


Recipe


Makes 3 loaves


Add ins

130 g Kalamata Olives, sliced

40 g Sun Dried Tomatoes, chopped, not in oil (See note in recipe)

100 g crumbled feta

30 g olive oil 


Dough

700 g unbleached strong baker’s flour

200 g freshly milled Red Fife flour

100 g freshly milled Spelt flour

50 g freshly ground flax seed

700 g tomato soaking liquid/filtered water

21 g salt

250 g levain (Procedure  in recipe)


The afternoon before:

  1. Take 2 g of refrigerated starter and feed it 4 g of filtered water and 4 g of wholegrain flour. Let sit at cool room temperature for the rest of day. 


The night before:

  1. Mill the Red Fife and  Spelt berries. Place the required amounts in a tub. Add the unbleached flour to the tub. 
  2. Grind the flax seeds in a bullet and add to the flours in the tub. Cover and set aside.
  3. Soak the sun-dried tomatoes in 300 g of lightly salted (pinch of salt) hot water until the skin is easily pierced with a knife (~2 hours). Place in the fridge overnight.
  4. Feed the levain 20 g of water and 20 g of wholegrain flour. Let that rise at cool room temperature for the night. 


Dough Making day:

  1. Early in the morning, remove the tomatoes from the fridge and let warm up on the counter. 
  2. Feed the levain 100 g of filtered water and 25 g of wholegrain flour as well as 75 g of strong baker’s flour. Let rise until doubled (about 6 hours). 
  3. Two hours before the levain is ready, drain the tomatoes but be sure to save the tomato water. Put the tomato water in a stand mixer’s bowl and add filtered water until you have 700 g. Add the flours from the tub.  Mix on the lowest speed until all the flour has been hydrated. This takes a couple of minutes. Autolyse for at least a couple of hours at room temperature. 
  4. Chop the olives and crumble the feta if needed. Add to the tomato mixture (no point having a million bowls out). 
  5. Once the autolyse is done, add the salt, the olive oil, the olives, the drained tomatoes, the feta, and the levain to the mixing bowl. Mix on the lowest speed for a minute to integrate everything, then mix on the next speed for 9 minutes.
  6. Remove the dough from the mixing bowl and place in a lightly oiled covered tub. Let rest 30 minutes in a warm spot (oven with light on). 
  7. Do 2 sets of stretches and folds at 30 minute intervals and then 2 sets of sleepy ferret folds (coil folds) at 45 minute intervals, and then let the dough rise to about 25-30%. This took about another 45 minutes on this particular day.It should have irregular bubbles visible through the sides of the container and bubbles on top as well. 
  8. Tip the dough out on a bare counter, sprinkle the top with flour and divide into portions of ~800 g. Round out the portions into rounds with a dough scraper and let rest 30 minutes on the counter. 
  9. Do a final shape by flipping the rounds over on a lightly floured counter. Gently stretch the dough out into a circle. Pull and fold the third of the dough closest to you over the middle. Pull the right side and fold over the middle and do the same to the left. Fold the top end to the center patting out any cavities. Finally stretch the two top corners and cross over each other in the middle. Roll the bottom of the dough away from you until the seam is underneath the dough. Cup your hands around the dough and pull towards you, doing this on all sides of the dough to round it off. Finally spin the dough to make a nice tight boule.
  10. Sprinkle a  mix of rice flour and all purpose flour in the bannetons. Place the dough seam side down in the bannetons. Let rest for a few minutes on the counter and then put to bed in a cold (38F) fridge overnight. 

Baking Day

1. The next morning, heat the oven to 475F with the Dutch ovens inside for an hour. Turn out the dough seam side up onto a cornmeal sprinkled counter. Place rounds of parchment paper in the bottom of the pots, and carefully but quickly place the dough seam side up inside. 

2. Cover the pots and bake the loaves at 450 F for 25 minutes, remove the lids, and bake for another 22 minutes at 425 F. Internal temperature should be 205 F or more.


I can’t complain about these loaves considering the amount of add-ins. I’m quite happy with the oven spring. 

Benito's picture
Benito

Trying to learn more about pH guided sourdough baking I decided to bake another 100% Semola Rimacinata bread.  Last time I felt that the dough didn’t hydrate as well as I remembered when I last baked this for the CB so I upped the hydration from 81 to 83%, I think I could have gone further given the high protein of this flour.

With this bake I followed pH during bulk and aimed to get the dough into cold retard by a pH of around 4.0, the thinking being that the pH would fall further by about 0.2 during the first hours of cold retard as the dough slowly drops in temperature to 3ºC.  I won’t post all the details of the formula because I did that for the last bake and the only change is the increase in hydration.

The black sesame seeds were added during lamination and the white sesame seeds are on the bottom of the loaf.  The white ones were added when the dough was in the banneton.  This should keep things tidier when slicing the bread while still giving us all the sesame flavour.

peacecow's picture
peacecow

I realized I'll never to to post if I wait to organize my pictures, so just wanted to note down my recent oat porridge experiments.

My friends really like Maurizo's oat porridge loaf, and I used it to try out a couple things I've been wondering.

Round 1

Out of laziness, I wondering if soaking the oats overnight in cold water, or boiling water could compare to just making the porridge.

One thing in hindsight that seems obvious to adjust for is the hydration. The cold overnight soak was much too watery. Boiling water seemed comparable to making the oat porridge. Both overnight soaks were comparable in taste. Oat porridge definitely made a difference. It was sweeter and had more noticeable oat flavor.

Round 2

I was also curious about the difference between using oat flour vs rolled oats when making the porridge. The oat flour was a bit more flavorful. I was surprised I saw no difference in texture and crumb. I'm not very consistent with that though, so I want repeat this.

After all this, I realized I'm essentially doing a tangzhong or scald and adding it to the bread. I really want to explore this more with some different grains. Found this post on scalding helpful. https://blog.benchandbowl.com/2020/01/13/scalding/

headupinclouds's picture
headupinclouds


Two desem bakes with home milled Red Fife (my previous attempt used a converted starter). 

This differs from my previous attempt in that it uses:

  • a home grown desem (from the same Red Fife wheat)
  • a lower percentage of PFF (10%)
  • higher hydration (79% and 81% (this would have been problematic with the previous starter))
  • retarded overnight final proof
  • shorter 1.5 to 2 hour soaker (based on comments in a TFL community whole grain bake about long autolyse)
  • ambient temperature of roughly 80F

The home grown desem effort was motivated by Mariana's comments.

The lower PFF was motivated by Debra's comments on inverse relationships between PFF and hydration levels as well as the lower PFF used by Jennifer Lapidus for her desem section in her book Southern Ground (former apprentice of Alan Scott), and mdw's success at low hydration with his converted starter (and most TFL bakers in general with whole grain sourdough baking (idaveindy, etc)).

I had assumed a high PFF and a hot final proof were requirements of desem baking, but above discussions make me think it is mostly the starter itself, as there is quite a lot of variation in the approached presented in LKBB, The Bread Builders, Bread, and Southern Ground (the latter using the popular cold final proof at higher hydration).  

Basic formula: https://fgbc.dk/1na0

I ground Red Fife berries (from breadtopia) 1 click back from ticking in a single stage and used a fairly short 1.5-2 hour soaker.  I used a warmish room temperature BF to roughly 60% for the first one and a slightly lower 50% in the second one after getting a flatter loaf than I like in the first attempt.  The final proof ran overnight in the fridge with a measured final temperature of close to 40F.  I baked covered for 35 minutes (Challenger pan) and uncovered for 5 minutes.  I left the oven dial at 400F (which gives me a temperature somewhere between 450F and 475F).

First one (81% hydration (slightly flat)):

Second one (79% hydration):


I'm quite happy with the result using the new starter and this approach.  Unfortunately, with hot temperatures arriving in NYC, I'm doing much less baking in the apartment now.

Pages

Subscribe to RSS - blogs