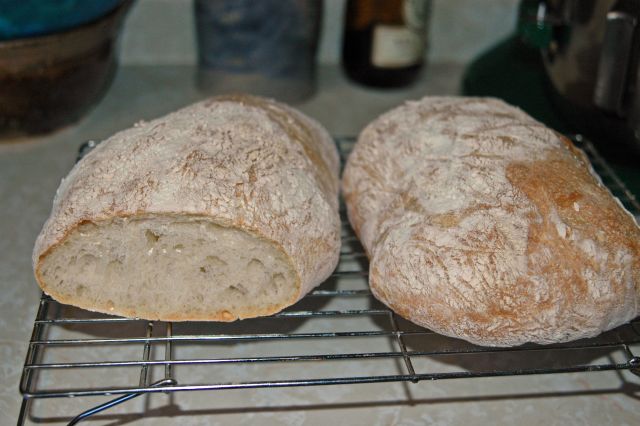
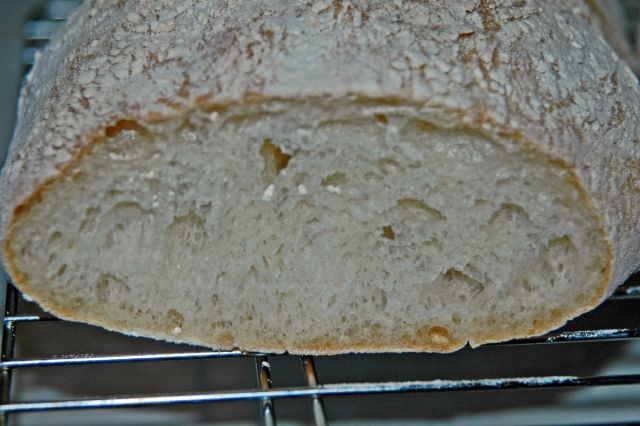
The Fresh Loaf

A Community of Amateur Bakers and Artisan Bread Enthusiasts.

Blogs

dmsnyder's picture
dmsnyder

Last week, I made baguettes using Pat's (proth5) recipe. They were good. I was amazed at the open crumb I got from a 65% hydration dough. See my blog entry:

http://tfl.thefreshloaf.com/node/10852/baguette-crumb-65-hydration-dough

Today, I made them again, but included an overnight cold retardation during bulk fermentation. The dough was mixed last night and refrigerated. It expanded little, if at all, overnight. I decided to let it double before dividing and shaping. After 6 hours at room temperature, it had only expanded by 50%, although I could see lots of little bubbles through the glass of the 2 quart measuring cup in which I was fermenting the dough. So, I decided to go ahead and divide it. I preshaped and let the pieces rest for 15 minutes, then shaped the baguettes and proofed them for about 70 minutes. Scored, loaded and baked at 460F.

Being a sourdough kind of guy, I found the increased sourness more to my liking than the batch I had not cold retarded. The crumb was a bit less open, no doubt due to the less complete dough expansion during bulk fermentation. I will try this again but do the cold retardation of the formed loaves next time.

David

dmsnyder's picture
dmsnyder

My usual sourdough starter is semi-firm. I make it at a 1:3:4 ratio of starter to water to flour. Many of the sourdough bakers on TFL favor a 1:2:2 ratio, but fewer seem to use a true "liquid levain" which is more like 125% hydration. I was curious to try a pain au levain using a liquid starter and found the Pain au Campagne recipe in Leader's "Local Breads."

This recipe calls for a 50% hydration dough to which you add 62% (baker's percentage) liquid levain, ending up with a moderately tacky dough. The levain is added after the flour and water are mixed and allowed a 20 minute autolyse. The autolyse mixture is very, very stiff, and it takes a lot of mixing to get the very liquid levain incorporated into the dough. 

The resulting bread has a very nice flavor, but not significantly different from the pains de campagnes I make with my usual starter.

Of greater interest was the final shape of the loaves. They are formed as boules, and I proofed them in round, linen-lined wicker bannetons. I scored them with 3 parellel cuts, as Leader recommends. The loaves took an oblong form even before I could load them in the oven. This is a graphic illustration of the effect of this pattern of scoring on loaf shape, as described by Suas in "Advanced Bread and Pastry" and referenced in my Scoring Tutorial. (See the TFL Handbook.)

http://tfl.thefreshloaf.com/handbook/scoring

David

dmsnyder's picture
dmsnyder

SusanFNP of www.wildyeastblog.com fame posted a photo of her "Semolina bread with fennel, currants and pine nuts" on TFL in November, 2007. She provided a link to the recipe on her Wild Yeast blog. I immediately added this bread to my "to bake list." Well, my wife could tell you, I seldom throw out anything, and that includes my to do lists. Sometimes it takes me a little while to get around to a particular item, and today I got around to baking this bread.

Mine didn't turn out as pretty as Susan's, but this is a delicious bread. The combination of flavors and textures is wonderful - The contrasting sweet currents and savory fennel seeds and the soft crumb and chewy pine nuts and currents. Wonderful bread. 

This is snacking bread. I ate a couple slices while I was making dinner and could have finished the loaf right then and there. Yummy!

The recipe can be found at:

http://www.wildyeastblog.com/2007/11/06/semolina-fennel-currants-pine-nuts/

David

dmsnyder's picture
dmsnyder

Today, I baked SusanFNP's Currant, Fennel and Pine nut levain, Pain de Campagne from Daniel Leader's "Local Breads" and another batch of proth5's baguettes (with cold retardation).

David

Smo's picture
Smo

First, the finished loaf with accompaniment (the soup is carrot soup with ginger, from here.

The finished loaf next to its accompaniments.  That's carrot soup!

Onto the process.  So, I set out Wednesday night to mix a batch of NYT no-knead bread, the recipe that I've been playing around with lately.  I decided to do things quite a bit differently; since my last, all bread flour no-knead loaf turned out pretty chewy, I figured I could lower the gluten content.  Rather than switching to AP, I kept it at bread flour and just changed a high percentage to lentil flour.  Turns out I stretched a bit too far.

Initial Mix:

215 g KA bread flour

130 g lentil flour (ground in my nutrimill from brown lentils)

30 g rye flakes

30 g barley flakes

25 g wheat germ

360 g water

1/4 tsp yeast

5/4 tsp salt


This sat at room temp overnight.  About 18-hours later, I went to do a stretch and fold and . . . the dough didn't stretch.  Rather, it broke apart. Clearly I didn't have enough gluten to perform the no-knead method.  I took a long look at my dough, and I decided that, while it was earnest, and eager, it just didn't have what it takes to be a no-knead loaf - lots of gluten.  But that's ok!  Because I could rebuild it.  Make it stronger, faster, uh . . drier!  An enriched loaf, with butter and honey and kneading!


But I didn't have time to do that, so I stuck the dough in the fridge.

This morning I took the dough out of the fridge in anticipation of the days events.  I didn't feel like waiting around 2 hours for the dough to warm to room temperature, so I looked around my kitchen for help and found . . . the microwave!

And I don't mean putting a cup of warm water in with the dough.  Rather, I put the dough in the microwave, set it to power level 3 out of 10, and zapped it for 5-10 minutes, stopping periodically to take its temperature.  Once most of it was between 70 and 80 F, I decided that it was warm enough to add:

1.5 Tb melted butter
3 Tb honey
2 tsp yeast
60 g bread flour

I mixed all this in and kneaded for about 5 minutes, adding a fair bit of extra flour in the process - probably another 10-15 grams.  After the gluten was developed enough to get a mediocre windowpane, I gave it a 5-minute rest, kneaded another few minutes, and called it good.

The result?  It was a monster!  About doubled in size in 40 minutes.  So I divided it into two loaves, formed one into a batard, and the other into an epi.  Preheated my oven with baking stone to 450.  After 30 minutes they hadn't risen too much but seemed proofed, so I put them in the oven anyway; I try to err on the side of under, rather than over, proofing.

After a bit of cooling I tore off a chunk of epi and the crumb was dense, but not brick-like; still soft and chewy.  And the flavor was delicious and more complex than anything I've made thus far.  I'll definitely be trying to duplicate the flavor again, but maybe in a less crazy way next time.

Here's a close-up shot of the crumb:

Crumb shot!

proth5's picture
proth5

For the few and the brave following this march to insanity, I did a second milling of white flour today.

This time, I followed the same process as in the first milling run, but after removing about 20% of the bran weight, cranked the mill down to its finest setting and milled what remained.

I then sifted through my #100 sieve (0.06" openings) and got a tiny bit of pure white flour.  I returned what remained in the sieve to the mill and remilled it (at the same setting).  After six passes this way, small flecks of bran began to sift through and I stopped the process.

What did I get for this? Pure white flour.  Looking at it and feeling it, I am unable to tell it from my King Arthur All Purpose - which may be good, or not.

For this I paid a price.  I was only able to get 15 oz of flour from 2 pounds of wheat berries.  What was left behind was not all bran, but it was milled to a silky texture.  I believe the French term for this is remoullage.  And that's certainly what I did - I remilled it.

Again, we wait.  Despite folklore on "within 72 hours or then it must be aged" the explanation that I accept about flour aging seems not to support this practice.  If we are trying to get oxygen to bond with certain molecules in the flour, I don't know why they would get an exemption from this for 72 hours.  Be back in 4 weeks...

Anyone with suggestions on how I might change my process to get a higher yield is most welcome to comment.  After all - I'm just making this up as I go along.

Now I really must get to milling the high extraction flour for my bake this week.

Happy Milling!

Floydm's picture
Floydm

Peter Reinhart is in Portland this weekend.  I was able to get together with him for coffee this morning at little t american baker in SE Portland.

Tim Healea, the head baker, was kind enough to show us around the bake room. 

It is a small space, but they have an awesome 5 rack oven and bake many types of bread every day.  While we were there they were making naan and pulling... plank bread out of the oven (I think that is what they called it... It was something like a focaccia, sprinkled with thyme, rosemary, and sea salt and full of olive oil).  We tried a rustic ciabatta-like roll with carrot and polenta in it while we were there that was wonderful and one of their pastries, which was delicious too.

I, however, was a space cadet and left my good camera at home (well, I had the camera but I forgot the battery), so these phone pictures were the best I could get.  I will, however, try to come by Tastebud tomorrow around 11:30-12 to see Peter and any TFLers who show up there, and this time I'll bring a real camera.


Debra Wink's picture
Debra Wink

Pineapple juice is a simple solution to a problem that many people encounter while trying to start a sourdough seed culture from scratch. Oftentimes, a new culture will appear to start off very strong, only to die a day or two later. The early expansion is caused by a prolific gas-producing bacterium which many mistake for yeast. Pineapple juice can be added to flour instead of water at the beginning, to insure against unwanted bacteria and the problems they leave in their wake. It doesn't change the end result, but it does seem to keep things on the track to finish on time. Part 1 tells the story of where the pineapple remedy comes from and how it was conceived. The rest of the story probes deeper into how it all works. But first, here is a recap of the key patterns revealed by notes and data collected during experimental trials:

  • When starters expanded significantly on the second day, a period of stillness followed, and the appearance of yeast was delayed.
  • Gas-producing bacteria stopped growing when the pH dropped to 4.5, but yeast growth didn't begin until the pH fell to around 3.5, accounting for the period of stillness.
  • Lowering the pH in the initial mixture, by adding ascorbic acid or by replacing the water with pineapple juice, kept gas-producing bacteria from growing and brought about a more timely and predictable result.

But it wasn't enough just to find a fix. The problem-solving efforts of my team were creating a buzz which we hadn't anticipated and this thing, like the seed cultures we were creating, was taking on a life of its own. Some were jumping to premature conclusions, and speculation seemed to be spreading as fact. It made me very uncomfortable, because I'd rather be dispelling myths than adding to them. I wanted to find some real answers, and find them fast, so I started making phone calls. I found two local labs that could help me out. One had the capability to identify leuconostocs, and the other to detect lactobacilli and other bacteria of interest. I submitted samples of a day two starter during the big expansion. Both labs found that there were three organisms growing. But there were no lactobacilli or yeasts found, which supports what I observed time after time on microscopic examination. My gas-producer was identified as Leuconostoc citreum. At the time, I couldn't find much information specific to this organism, although it seems to share many characteristics with other Leuconostoc species found in foods. Most will not grow below pH 4.8, and this one doesn't appear to be an exception.

Until recently, I could only theorize that the Leuconostoc may actively hinder the process, because the pattern supports it, and because it's not uncommon for microorganisms to produce substances which inhibit competitors. But in updating this article, a new search of the scientific literature finally uncovered the piece of the puzzle I was looking for. Who would have thought the answers would be found in kimchi and sake? It turns out that kimchi fermentation has a lot in common with sourdough development, and mirrors the early days of the seed culture process. Leuconostoc citreum plays a dominant role in the early and mid-phases of fermentation where it causes a slow and prolonged drop in pH, and retards the growth of other lactic acid bacteria.[1] In a study on sake fermentation, Leuconostoc citreum was found to produce bacteriocins (bacterially-produced antibiotic proteins) which inhibit the growth of similar lactic acid bacteria (i.e., lactobacilli).[2] It appears that these bacteriocins linger for a time even after the organism stops growing, although their effect is diluted through successive feeding. A dosage effect would explain nicely the apparent relationship between the vigor with which this bacterium flairs up initially, and the number of days the starter remains still afterward. The higher the rise, the longer it seems to take to recover.

In addition to Leuconostoc citreum, there was also a large amount of Aerococcus viridans. The first lab I visited found Leuconostoc to be in the greatest quantity, but Aerococcus was multiplying so fast that it soon passed the Leuconostoc in number. That is important, and could very well have contributed to the delayed progress. Even though Aerococcus doesn't produce gas, and so was not responsible for any of the expansion, it is not much of an acid producer either. So while it was using up a large share of the available sugars, it was not helping the pH to fall. Aerococcus is an occasional spoilage organism in unpasteurized milk, which is the extent of information that I have found on its involvement in foods. Its lower limit is not given in my reference books, but since pineapple juice seems to keep it at bay, I suspect that it must be in the same ballpark with leuconostocs. I'm still not sure how big a part each of these organisms plays in slowing the progress of a seed culture, but lowering the pH at the outset seems to be a blanket fix.

I mentioned in Part 1 that some of the bacteria were flipping, twirling and zipping around under the microscope. Those were Enterobacter cloacae. Enterobacter produces gas, but since it was present in only a scant amount compared to the others, I think it safe to say that the Leuconostoc was responsible for the majority of it. However, Enterobacter contributes to an unpleasant odor, as do Aerococcus and Leuconostoc. Because some people report a very stinky smell and others not as much, I'd have to say that even among starters that grow Leuconostoc, not all necessarily have the same combination of bacteria. There are others that can grow as well. Results vary from flour to flour and year to year, because the number and species of microorganisms are influenced by conditions relating to weather and grain crop production.[3] I wish I could have all the organisms identified at every stage, but there aren't any laboratories in my area that are equipped to identify wild yeasts or sourdough bacteria. And even if they could, the cost would be prohibitive. I was fortunate to be in a position to have two of the organisms identified as a professional courtesy.

With the additional information, and having watched the drama unfold under the microscope, I started seeing the seed culture process not as good guys out-competing bad or gradually increasing in number, but as a natural succession of microorganisms that pave the way for "the good guys" in the way that they transform their environment. There are bacteria in flour that prefer the more neutral pH of freshly mixed flour and water (like Leuconostoc and company). They are the first to start growing, some producing acids as by-products. This lowers the pH, and other bacteria begin to grow; they produce their acids, lowering the pH even more. It soon becomes too acidic for the first batch and they stop growing. One group slows down and drops out as the next is picking up and taking off. Each has its time, and each lays the groundwork for the next. It's much more like a relay than a microbial free-for-all. The baton is passed to the next group in line as conditions become suitable for them. The acidity increases a bit more with each pass, and the more acid-loving bacteria can eventually take over. The appearance of yeast seems to be tied in some way to low pH---maybe directly, maybe indirectly, but the correlation shows that it isn't random in the way that "catching" yeast from the air would be, or their gradually increasing in number.

In the late fall/early winter of 2004, I was coaching a group of women on Cookstalk, Taunton's Fine Cooking forum, and I noticed something else. My starters sort of liquefy the day before yeast starts to grow. Gluten disappears, which shows the work of proteolytic enzymes. At first I thought it signaled the appearance of lactobacilli and their proteases. But now I think it was simply an indicator that the pH had dropped low enough to activate aspartic proteinases, pH-sensitive enzymes abundant in wheat.[4] Because I prefer to seed a new culture with whole grain flour for at least three days, there are more cereal enzymes present than in a starter fed with white flour (most of them are removed with bran in the milling process). But either way, it is a good sign of Lactobacillus activity, whether by production of bacterial proteases or by the organism's effect on pH and activation of cereal proteases.

The starters were developing a little more slowly this time around, which inspired me to describe the different stages that a new culture transitions through, rather than try and pin it to a time frame. Room temperature is different from one kitchen to the next, as well as season to season. Sometimes rye flour finishes faster, sometimes whole wheat is faster. Sometimes a culture doesn't start producing its own acid for the first two days instead of one. Because this process involves variable live cultures under variable conditions, it doesn't always work in a prescribed number of days, but it follows a predictable pattern. While this has been a discovery process for me, it is not a new discovery:

"There has been nice work done in Rudi Vogel's lab on the microflora of a freshly started sourdough: first, there are enterobacteria (Escherichia coli, Salmonella, Enterobacter), highly undesirable organisms that stink terribly. Then there are homofermentative lactobacilli (good lactic acid producers, but they don't produce gas or acetic acid), then acid-tolerant, heterofermentative lactobacilli that make lactic and acetic acid, as well as CO2. I think this took about forty-eight hours at 30ºC in Vogel's study. The stink at the beginning does not matter as the organisms will be diluted out or die eventually. No L. sanfranciscensis appears by forty-eight hours, though: these will occur only after repeated refreshments. Peter Stolz told me that it takes about two weeks of repeated inoculations to get a good 'sanfranciscensis' sourdough."[5]

That paragraph didn't have any special significance for me until I had gotten to this point. But when I read it again, I had one of those aha moments. Not only did this describe a succession, but it filled in some of the blanks, and I could see clearly how all these microorganisms related to the four phases I had defined. Here is the updated version marrying the two. You don't need a microscope for this, because there are outward signs which serve as useful indicators of progress.

The First Phase:
For the first day or so, nothing really happens that is detectable to the human senses. It doesn't taste any tangier or develop bubbles. It remains looking much the same as when it was mixed, except a little lighter in color if an acid was used, and a little darker if not. While nothing appears to be happening, the first wave of bacteria (determined by pH and the microflora in the flour) are waking up, sensing their new environment and preparing to grow. This phase usually lasts about one day, sometimes two.

The Second Phase:
The starter will begin producing its own acid and develop a tangy taste (although it might be difficult to distinguish from pineapple juice). Lactic acid bacteria are actively growing at this point. When using only water, this phase represents two waves of microbes---first Leuconostoc and associates, followed by homofermentative lactobacilli and possibly other lactic acid bacteria. By controlling the pH, you can by-pass the leuconostocs and other "highly undesirable organisms that stink terribly," and skip to the second wave. It will get bubbly and expand only if the pH is not low enough to prevent growth of gassy bacteria, otherwise there won't be much to see. There probably won't be much gluten degradation, and it may smell a little different, but it shouldn't smell particularly foul unless started with plain water. This phase can last one to three days or more. If it is going to get hung up anywhere, this is the place it usually happens, especially if it is put on a white flour diet too soon. If after three days in this phase, it still doesn't become more sour and show signs of progress, the best thing to do is switch back to whole grain flour. Whole grain has a much higher microbial count to re-seed the culture and get it moving again. If that doesn't do it, skip a feeding or two to allow the acidity to build.

The Third Phase:
The starter will become very tart like lemon juice---an indication of more acid production by more acid-tolerant bacteria. The gluten may disappear and tiny bubbles become more noticeable. These are signs that heterofermentative lactobacilli have picked up the baton. Once a starter becomes really sour, it usually transitions into phase four within a day or two. Note that lactic acid doesn't have much aroma, and so smell is not a reliable way to judge the level of sourness. If it gets stuck here for 48 hours or more, make sure there's still enough whole grain in the mix and give it more time between refreshments.

The Fourth Phase:
Yeast start to grow and populate the starter relatively quickly at this point. It will expand with gas bubbles all over and begin to take on the yeasty smell of bread or beer.

This pattern suggests that wild yeasts are activated by low pH. Or perhaps the activator is something else produced by lactobacilli, but it happens predictably at this point for me, as long as the whole grain flour has not been diluted out. There may be some variation among wild yeasts as to the exact pH or activating substance. I have been unable to find the answer in scientific literature, and my contact at Lallemand did not know. I have only found studies done with cultivated strains of Saccharomyces cerevisiae, which don't seem to require much more than a fermentable sugar (and may explain why seed cultures take off much quicker in a bakery environment where baker's yeast is everywhere). The most useful information I have found on the subject is this, about microbial spores in general:

"Although spores are metabolically dormant and can remain in this state for many years, if given the proper stimulus they can return to active metabolism within minutes through the process of spore germination. A spore population will often initiate germination more rapidly and completely if activated prior to addition of a germinant. However, the requirement for activation varies widely among spores of different species. A number of agents cause spore activation, including low pH and many chemicals... The initiation of spore germination in different species can be triggered by a wide variety of compounds, including nucleosides, amino acids, sugars, salts, DPA, and long-chain alkylamines, although within a species the requirements are more specific. The precise mechanism whereby these compounds trigger spore germination is not clear."[6]

What this means is that for dormant cells to return to active growth (germinate), they need to break dormancy (activate) which is initiated by different things for different species. In the case of these wild sourdough yeasts, if all they needed were food or oxygen, which are there from the get-go, then they would start growing immediately. The fact that they don't, is probably why many people think they need to be caught from the air, or that large quantities of flour must be used to round up enough of them. There are enough dormant cells present even in relatively small quantities of whole grain flour, but it's like a game of Simon Says. You can try to coax them into growing, with food and all the things you may fancy to be good for actively growing yeast. But they're not active. They are dormant, and will remain so until they receive the right message from their surroundings. Compare this to the plant seed that sits in soil all winter long, waiting until spring to sprout, when conditions are most favorable. Is it a survival mechanism? I don't know, but waiting for the pH to drop does increase the likelihood that the yeast will wake up in the company of lactobacilli, with which they seem to share a complex and mutually beneficial relationship. It is also important to point out here that active sourdough yeasts thrive in a much wider pH range than what appears to be required for activation of dormant cells. The point to keep in mind is that active and dormant cells are physiologically and metabolically different, and so their needs are different.

This pattern of growth is not unique to the formula in the Bread Baker's Apprentice. I have seen the same progression, in whole or in part, with all the starter formulas I've tried. And it doesn't really matter how much flour you start with. In fact this can be done with very small quantities of flour. All else being equal, it proceeds just as fast with a teaspoon as it does with a pound. Procedures that call for two or three feedings per day, or large refreshments before yeast are active, can actually get in the way of the process. Overfeeding unnecessarily dilutes the acid, which slows the drop in pH, and keeps it from moving through the succession of microorganisms in the timeliest manner. But while it can take up to two weeks or more this way, with Mother Nature as the driving force, things do fall in line eventually. It's just a question of when. Three to five days is about all it really takes to reach the yeast activation stage at average room temperature, somewhat longer if Leuconostoc and associates grow. The strategy is quite different from reviving a neglected starter, which is likely to have an overabundance of acid, and a large population of yeast and sourdough bacteria, however sluggish they may be.

So, what can we do instead to facilitate the process? Start by providing conditions for the first two to three days which are favorable to lactic acid bacteria. A warm spot if you can easily manage one (but not too much higher than 80ºF), and a reasonably high hydration (at least 100%). Use pineapple juice if you like, to bypass the first round of bacteria. (Or use water if you prefer, and don't mind the odors and delay.) Feed with whole grain flour until yeast are actively growing, not for the wider spectrum of sugars it may offer, but for its higher numbers of yeast and lactic acid bacteria to seed each phase in its turn. Don't feed too much or too frequently, so as to allow the acids to accumulate and the pH to fall more rapidly. The ideal feeding quantity and frequency would depend on the temperature, hydration, and how fast the pH is falling. However, I usually recommend once a day at room temperature, simply because it is the easiest to manage, it works, and the daily manipulation helps to keep mold from getting started. Mold is the biggest stumbling block for procedures in which a young mixture is allowed to sit idle for two or three days at a time. Turning surface mold spores into the center by re-kneading or stirring and scraping down the sides daily, is the best way to get around it. Mold is not inhibited by low pH or pineapple juice, and anti-mold properties don't fully develop until sourdough is well established.

While you don't actually need a formula to do this, no article on making sourdough starter would be complete without one. This procedure was designed with simplicity in mind, to be efficient, effective, and to minimize waste. It was developed with the participation of four willing and very patient women whom I worked with online---DJ Anderson, Karen Rolfe, Deanna Schneider and the still-anonymous 'lorian,' whose plea for help is what renewed the quest to find a better way. I learned a great deal from the feedback they and others gave me as we worked out the kinks, and this formula is a tribute to them.

There is nothing magic about the two tablespoons of measure used throughout the first three days. Equal weights didn't provide a high enough ratio of acid to flour to suit me, and equal volumes did. Two tablespoons is enough to mix easily without being overly wasteful (and just happens to be the volume of an eighth-cup coffee scoop, which is what I kept on the counter next to the flour and seed culture for quick, easy feeding). If you insist on weighing, make it about 15 gm flour and 30 gm juice. These first few days don't really benefit from being particularly fussy with odd or precise measuring, so make it easy on yourself. Keep it simple, and let Mother Nature do the rest.

Day 1: mix...
2 tablespoons whole grain flour* (wheat or rye)
2 tablespoons pineapple juice, orange juice, or apple cider

Day 2: add...
2 tablespoons whole grain flour*
2 tablespoons juice or cider

Day 3: add...
2 tablespoons whole grain flour*
2 tablespoons juice or cider

Day 4: (and once daily until it starts to expand and smell yeasty), mix . . .
2 oz. of the starter (1/4 cup after stirring down -- discard the rest)
1 oz. whole grain flour* (scant 1/4 cup)
1 oz. water (2 tablespoons)

* Organic is not a requirement, nor does it need to be freshly ground.

On average, yeast begin to grow on day 3 or 4 in the warmer months, and on day 4 or 5 during colder times of the year, but results vary by circumstance. Feed once a day, taking care not to leave mold-promoting residue clinging to the sides or lid of your bowl or container, and refer back to the different phases to track progress---particularly if it gets stuck in second phase or shows no progress for 3 or more days. Once you have yeast growing (but not before), you can and should step up the feeding to two or three times a day, and/or give it bigger refreshments. Before yeast, don't feed too much; after yeast, don't feed too little. You can feed the starter/seed culture whatever you would like at this point. White flour, either bread or a strong unbleached all-purpose like King Arthur or a Canadian brand will turn it into a general-purpose white sourdough starter. Feed it rye flour if you want a rye sour, or whole wheat, if you want to make 100% whole wheat breads. If you're new to sourdough, a white starter is the best place to start.

This is the point at which I generally defer to the sourdough experts. There are several good books on sourdough which address the topic of starter maintenance and how to use it in bread. There are many different approaches. Just keep in mind that the first days of the seed culture process have nothing to do with developing flavor or even fostering the most desirable species. The object is simply to move through the succession and get the starter up and running. The fine-tuning begins there. Once yeast are growing well, choose the hydration, temperature and feeding routine that suits you, and the populations will shift in response to the flour and conditions that you set up for maintenance.

One more thing I have found is that with regular feeding at room temperature, new starters seem to improve and get more fragrant right around the two week mark. Maybe this coincides with the appearance of Lactobacillus sanfranciscensis mentioned previously, or another highly adapted sourdough species. A Fifth Phase, and beyond? Obviously, there is still more to learn.   -Debra Wink

References

1. Choi, In-Kwon, Seok-Ho  Jung, Bong-Joon Kim, Sae-Young Park, Jeongho Kim, and Hong-Ui Han. 2003. Novel Leuconostoc citreum starter culture system for the fermentation of kimchi, a fermented cabbage product. Antonie van Leeuwenhoek  84:247-253.

2. Kurose, N., T. Asano, S. Kawakita, and S. Tarumi. 2004. Isolation and characterization of psychotrophic Leuconostoc citreum isolated from rice koji. Seibutsu-kogaku Kaishi 82:183-190.

3. Doyle, Michael P., Larry R. Beuchat, and Thomas J. Montville. 2001. Fruits, Vegetables, and Grains, p. 135. Food Microbiology Fundamentals and Frontiers, 2nd ed. American Society for Microbiology Press, Washington, DC.

4. Katina, Kati. 2005. Sourdough: a tool for the improved flavour, texture and shelf-life of wheat bread, p. 23.VTT Technical Research Centre of Finland.

5. Wing, Daniel, and Alan Scott. 1999. Baker's Resource: Sourdough Microbiology, p. 231. The bread Builders. Chelsea Green Publishing Company, White River Junction, VT.

6. Doyle, Michael P., Larry R. Beuchat, and Thomas J. Montville. 2001. Spores and Their Significance, p. 50. Food Microbiology Fundamentals and Frontiers, 2nd ed. American Society for Microbiology Press, Washington, DC.

7. Arendt, Elke K., Liam A.M. Ryan, and Fabio Dal Bello. 2007. Impact of sourdough on the texture of bread. Food Microbiology 24:165-174.

------------------------

This article was first published in Bread Lines, a publication of The Bread Bakers Guild of America.
Vol. 16, Issue 2, June 2008.

Related Links:
  The Pineapple Juice Solution, Part 1 | The Fresh Loaf
  Lactic Acid Fermentation in Sourdough | The Fresh Loaf 
  Basic Procedure for Making Sourdough Starter | Cooks Talk

rhag's picture
rhag

Todays Bake included the Five grain bread, Pain Au Levain, semolina baguettes and the vermont sourdough (no pictures sry) out of hamelmans book. But upon looking at the 5 grain recipe i only came up with 4 grains. If anyone could clarify for me that would be awesome. I stuck with the batard shape as i will be picking up a few wicker baskets soon. al so if anyone has any ideas on loaf shapes let me know! enjoy comments questions and whatever else are always welcome. ( sorry about the medicore pictures they came off my iphone.)


Pain au Levain Crumb


SylviaH's picture
SylviaH

This is the half of dough I saved from yesterdays Basic Italian Loaf...I put it in the frig. overnite and shaped it while slightly cool.  Gave it my rolled in the soft floured linen for final proofing...which helps me to achieve a rounder loaf!  It was then placed under my steaming pan and given a 5 second burst of steam.  The oven stone and lid were preheated 500F. Placed the loaf in and  turned down to 485 for 30mins...lid removed and continued to bake aprox. another 5-10 min. till nicely browned.

Snug as a Bug!

Rolled out onto a flat cookie sheet with parchment paper a little underproofed!

Just out of the oven and doing a little singing!

Got some nice Cracks!

What a difference from yesterday's loaf baked in the La Cloche!!  Plus the added flavor from and overnite in the frig.!

I was happy with the crumb and crust!

Sylvia

Pages

Subscribe to RSS - blogs