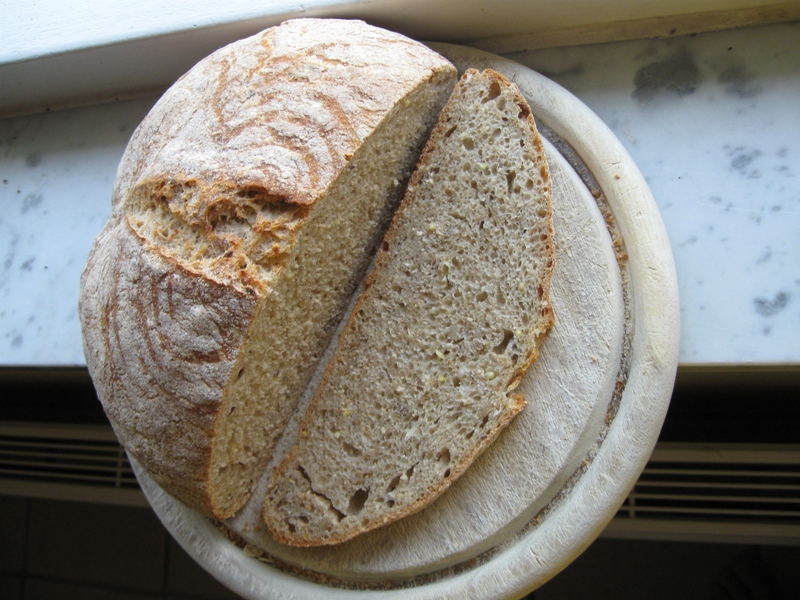
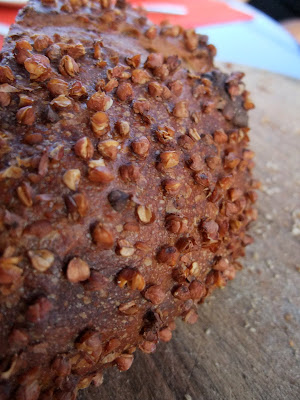
The Fresh Loaf

A Community of Amateur Bakers and Artisan Bread Enthusiasts.

Blogs

AnnieT's picture
AnnieT

After a spell of no baking (tree pollen allergies) I needed a loaf for supper with the family. What else but Susan's Trusty Sourdough? This time I added 1/4 cup of steelcut oats and 1T of flaxseed meal and it made a beautiful loaf. Being a slow learner I was probably the only member of TFL who didn't know that 3 parallel slashes across a boule will transform it into a batard! It was so popular that the "gannets" took the rest of it home with them, along with the pasta! Thanks yet again, Susan, A

Marni's picture
Marni

I realized that I've been a member here for a year now, and can hardly believe it!  The old saying "time flies when you're having fun"  couldn't be truer.  I've learned so many helpful techniques here - and I'm so thrilled to have my healthy active starter.  (It's also about to have its first birthday! ) 

I decided that as I've reached this one year mark, it's a good time to start a blog and learn how to post pictures here. Wish me luck, I'm pretty hopeless with the computer.

Thank you to all who share their knowledge here and make this such a great place to learn.

Marni

ejm's picture
ejm

Rose Levy Beranbaum has put together a step-by-step guide to making bread, plus essential equipment and ingredients and 8 classic recipes for Epicurious. The primer looks good. Except for one part. I would revise the list of "essential equipment" for bread baking by including only the following:

Absolutely Essential:

  • Measuring Cups and Spoons
  • Large Wooden Spoon
  • Bench Scraper
  • Large Mixing Bowl with lid (doubles as a Dough-Rising Container)
  • Cooling Rack
  • Cookie Sheet
  • Parchment Paper

essential equipment cooling racks

Optional but Nice:

  • Scales (Spring and/or Digital)
  • Proofing Boxes (oven with only the light turned on works well)
  • Banneton (any old basket or colander lined with a tea towel works)
  • Baking Stone
  • Loaf Pans (including a Cast-Iron Pan)
  • Long Bladed Serrated Knife
  • Baking Peel
  • Broiling Pan
  • Pump Spray Bottle (for water)
  • Thermometer
  • Timer

Completely Unnecessary:

  • Stand Mixer, Bread Machine, or Food Processor

Hand mixing is very easy to do, especially if you have a nice large wooden spoon or paddle. Hand kneading is equally easy, especially with the help of a bench scraper. And now, of course, there are many "no-knead" bread recipes that completely eliminate the need (no pun intended) for putting dough onto the board at all.

Other gadgets (scales, bread stones, thermometers, etc. etc.) are nice to have but are definitely not necessary. I gather that electric mixers are very nice as well. But I can't really say as I don't have one; nor do I have any desire for one. (No counter space.) All bread bakers, even novices, can produce wonderful bread in their kitchens with just these few items.

One More Absolutely Essential Item:
Oh yes, and one more thing that is absolutely required for baking bread:

  • a heat source....

An oven or barbecue will do the trick. :-)

-Elizabeth

~~~~~~~~~~~~~~~~~~~~~~~~~~~~~~~~~~~~~~~

This is a partial mirror of a post on my blog that covers all aspects of food. Read the full post here:

And here is the link to Beranbaum's Bread Primer:

Stephanie Brim's picture
Stephanie Brim

Adapted from the recipe in Bread Baker's Apprentice by Peter Reinhart

I'm finding the sweet dough as he made it too sweet. 6.5 tablespoons of sugar is just too much to me. I reduced it a little in my final dough, but just by 1/2 a tablespoon. The next time I make this it will be with the amount I show here.

6 tablespoons butter, shortening, or margerine (I used butter, but that's a taste thing)
4.5 tablespoons sugar (evaporated cane juice here)
1.5 teaspoons salt (slightly course sea salt)
2 eggs
1 pound flour
2.5 teaspoons active dry yeast
1 cup buttermilk

Cream first 3 ingredients. I proofed the yeast in about 1/4 cup of the buttermilk, lukewarm, then added that with the rest of the milk with the rest of the ingredients. I mixed for about 10-12 minutes by hand until the dough was starting to come together really well and the gluten had started forming, then did 2 stretch and folds at 40 minute intervals, letting the dough have an hour before shaping and proofing. I filled the rolls with 1 tablespoon of cinnamon to 6 tablespoons dark brown sugar and proofed them for about an hour before putting them in a 350 degree oven for about 35 minutes.

This produced the lightest, flakiest cinnamon rolls I've made to date. I really love them. I have a feeling that this may become my go-to sweet dough.

Sorry about the no picture thing. Maybe tomorrow if they're not all gone. :)

dmsnyder's picture
dmsnyder

The Roasted Potato Bread from Jeffrey Hamelman's "Bread" is another bread that has been on my "to bake list" for a long, long time. It is a yeasted, lean bread made with pâte fermentée. It uses a mix of bread and whole wheat flour, and, of course, roasted potatoes.

I made these in the recommended, traditional "pain fendu" (split bread) shape. It looked cool in the pictures and gave me an excuse to buy yet another wooden rolling pin, because my others are too thick, and the dowling I have is too thin. I'm sure you all understand.

This is a very good bread, considering it's not a sourdough. The crumb is cool and tender, yet a little chewy. It has a lovely, straight ahead wheaty flavor. There is no potato taste per se. It would make a wonderful sandwich bread or toast. Hmmm ... or bread to soak up sauce.

David

mountaindog's picture
mountaindog

I decided to revive my dormant Carl Griffith's 1847 Oregon Trail starter last week, so I had a lot of nice ripe starter by the end of the week on hand that I wanted to use up. I used an excel spreadsheet I made up for Flo's 1-2-3 sourdough to use up any amount of excess ripe sourdough starter, except in this case, I needed to increase the hydration since I was using all whole wheat flour in the final dough, so it became 1-2.25-3 bread (78% hydration final dough). The reason I made this as 90% whole wheat is simply because the excess starter I had was made up of about 25% whole wheat and 75% AP, so even though the final dough is all whole wheat, there is about 10% AP in the overall formula due to the large amount of starter.

One other thing that I got away with that I don't usually do is that all the starter used in this formula was actually ripe the day before I made the dough, but I got busy and just put it in the frig, so it was not as strong as it could have been since it was past peak, but the bread still came out with great flavor and a nice soft open crumb, chewy dark golden crust, not at all dense.

This is also the first bread I've made with my new big bag of organic Meunerie Milanaise flour from Quebec, and I notice a distinct difference in taste compared to either the King Arthur WW or Bob's Red Mill WW that I usually use (it handled very differently as well, very extenisble and silky dough). The Milanaise flour had absolutely no bitter whole wheat aftertaste, it was sweet, I imagine this must be what freshly-ground whole wheat flour tastes like, and this bag was milled on January 8 I think (thanks to Tete au Levain's tip on how to determine the milling date on the bag I had).

After mixing the final dough with my dough whisk just long enough to get everything incorporated, I let it rest 30 minutes, then did about 2-3 minutes of folding in the bowl with dough scraper, rest another 30 min., then 2 stretch & folds 30 min. apart, then just left it in it's bucket to bulk ferment overnight in my 62F basement Thursday night.  Friday morning before I left for work, I shaped the loaves and placed them in a couche in my 50F basement refrigerator until I got home from work, then baked them as soon as the oven was preheated. They came out flatter than I had hoped, but since it is a wet dough, and mostly whole wheat, that may be expecting too much. To me the most important thing was the open crumb and great taste these had, much better than the desem bread I attempted 2 years ago.

I am happy enough with this result and the taste that I plan to make this our weekly bread from now on, since I'd like to reduce the amount of white flour we are eating these days. The Oregon Trail starter is a very strong and fast riser, so I was hoping it would do well with whole grains, and I think it did. I will try this formula again with my home-made starter to see if it does as good a job rising this dough as "Carl" did. I also hope using a starter that is at peak (as opposed to older discarded starter past peak as used here) will improve the volume.

Susan's picture
Susan

Susan's "Faux Deli Rye"


75g firm starter

210g water

25g rye flour

275g high-gluten flour (if using bread flour or AP, adjust the water)

1 tsp caraway seed powder (optional, but good)

1 tbsp caraway seeds

6g salt

Mix starter and water, add the rest and mix, wait 20 minutes, *fold in the bowl, wait 10 minutes (3 or 4 times from *), cover and refrigerate overnight.  Remove from fridge, flatten on counter, *envelope fold, cover with bowl, wait until dough relaxes, maybe 15 minutes (3 or 4 times from *), let rise until when snipped with scissors you see a holey network (thanks, Dan Lepard, for that hint).  BTW, the last two times the dough is folded, round it up well.  Turn the dough ball to create surface tension, let rest for 5 minutes to seal the bottom, then overturn into a banneton.  Let rise for ~3 hours at room temp.  Triple Slash, spray with water, load into 500F oven, cover, bake for 20 minutes, remove cover, lower heat to 460F and bake for 10 minutes.  Turn off oven and leave for 5 minutes. Remove to a rack and rub butter over the loaf for a leathery crust rather than a crisp one. 

As everyone's dough is different, use your judgment concerning timing.  My room temperature is around 70F today.

Susan from San Diego

Jw's picture
Jw

it is funny how new recipes or experiments later on turn into 'production bread'. I have making rustic bread almost in production now, trying to become a week-baker instead of a weekend-only baker. That is one of the current challenges.


I have tried sourdough, but the result was a bit rustic too. The smell is ok, the looks are terrible. Hardly any ovenrise. Don't know what the problem is, maybe the master is not yet ready. I will keep trying. I am quite new to sourdough, so that is were the real fun is these days. I will keep trying, Any suggestions? Thanks in advance. Jw.

SylviaH's picture
SylviaH

I'll have to give this sourdough recipe another try...it is very tasty!  I bulk fermented it overnite in my very cool bathroom!  Though I did not succeed in this loaf turning out the way I felt it should...I think it definately deserves a little more effort next time! 

I used a mixture of Dark and Golden Raisins.  With a light sprinkle of brown sugar and cinnamon!

Pan a little large!

Huh....not what I wanted!

Worth another try!!

Sylvia


Floydm's picture
Floydm

A busy morning today.  First up was a birthday party for my son at a local rollerskating rink.  The high point was the Spy vs. Spy theme cake that dstroy decorated:

Based on this image.  Note that the wick of the bomb was a candle.

After that it was over to Tastebud, where Peter Reinhart was meeting with a bunch of Portlanders who are testing the recipes for his upcoming book.

I met a number of his testers and tried a few of their creations, which were all good.  As I said in my previous post, I'm looking forward to trying the new set of recipes they are coming up with.

We also tried some of the wood oven bagels that they make at Tastebud.

Delicious, dense, shiny, and chewy, definitely the best bagels I've had in Portland. 

Tastebud is walking distance from the apartment I lived in in college and where we lived when we got married.  Sigh... if only it had been there when I lived in the neighborhood, back when "weekend mornings" meant "brunch," not "cartoons."  Oh well...

Pages

Subscribe to RSS - blogs