The Fresh Loaf

A Community of Amateur Bakers and Artisan Bread Enthusiasts.

Blogs

ArtisanGeek's picture
ArtisanGeek

As promised, I have added another tool to my "Bread Baker's Toolbox" for anyone to use. I call this one "The Custom Batch Formula Tool". You use this one when you have a bread formula with the ingredient quantities already specified by weight and you want to create a custom batch size. The software does the math, calculating the Baker's Percentages and displaying the results for your custom batch in both grams and ounces (US). I chose these units because they are the most common used in bread formulas by the home baker. Some large batch formulas will use pound (lbs.) and fractions of pounds. This is simple enough to solve; If you want a custom batch for 5  pounds so you can have 5 one pound loaves, just multiply 5 x 16 to determine total ounces for your custom batch. Anyway, I've put this tool through the paces...its very fast and accurate. Sometimes the final dough weight will equal 699 ounces when you specified 700...this is because each ingredient is rounded to 1/100 of and ounce or 1/100 of a gram. (you don't want to work with numbers that look like this: 234.34453040304004). Give it a try and let me know if you have any questions or suggestions for improvements. Trust me, I can take the critical comments. As a software developer, I know that the product is never good enough for everybody and I can live with that....I just do my best:) Go to breadmagic.com and follow the link. You can now choose between the Volume Conversion Formula  Tool and this new Custom Batch Formula Tool.

Custom Batch Formula Tool

Anonymous baker's picture
Anonymous baker (not verified)

California seems to have an abundance of fresh cherries in the markets right now. Since fresh cherry pie is one of my favorites, I just haven't been able to resist the urge to work on my recipe.

I assembled the pie dough first using the Vodka crust recipe from Cook's Illustrated. It was easy to work with. I thought the top crust came out very flakey and flavorful but was a little disappointed in the bottom which was a bit on the soggy side.

While the crust was chilling in the fridge, I pitted the cherries which took about 45 minutes.

I sprayed my working surface with pan-spray and then sprinkled it with flour. This proofed to be an excellent surface for rolling out pie dough. (I got this tip from Debbie Wink, who, I think, read about it in Shirley Corrihers' BakeWise.) 

The cherry mixture consisted of 6 1/2 cups pitted cherries, 3/4 cup sugar, 3 tablespoons of tapioca, and the rind and juice of 1 small lemon.

I baked the pie at 400º for 25 minutes then turned the heat down to 350º and let it bake another 35 minutes.

--Pamela

naughtyprata's picture
naughtyprata

My sourdough starter had been doing quite fine the past few days,as I had been paying closer attention to refreshing it lately. It was so lively yesterday morning I decided to make one of the recipes in Reinhart's BBA. 

I was driving like a mad-man to get home from office (as best a mad-man Singapore's traffic laws would allow) anticipating my bread-baking adventure. I had to make a quick stop-over at the grocery as I had wanted to get some sharp cheddar cheese.

My wife was wondering why I had gone into the kitchen and started to mise en place in my shirt and tie. I brought out my starter from the fridge to take off the chill before I changed clothes. After which, I dove into my baking.  And here is the result...

I was so pleased with the results, I nearly ate half as soon as they cooled. I brought one to the office today and  was quickly consumed by my team with a few gulps of coffee. Seeing how my staff enjoyed it was even far better than great taste of the bread itself.

Very satisfying indeed!

carrtje's picture
carrtje

My three-day, rotational, Country White dough...and first attempt at blogging.

I bake this bread every third day or so, and it pretty much always turns out the same.  The original recipe is the basic white dough from Richard Bertinet's "Dough", which I absolutely love.  I stumbled upon this process one day by accident.  

I woke up early one Saturday and decided it was a good day for some fresh bread.  After mixing up the dough, and putting it in the oven to rise (I usually use the oven with the light on trick), my wife reminded me that we had to get ready to leave for the day...oops.  I slid the dough into an oiled plastic bag, and popped it into the refrigerator.  

Well, as we all know, life happens fast.  I kept remembering that dough ball in the fridge, but didn't seem to have time to bake it.  Finally, a few days later I had the crazy idea to use it like a starter.  I have since read that this isn't a crazy idea, but a pretty common one.  Now it's become my bread of choice.  Every few days I take the bag of dough out of the fridge, chop it into thirds, and make three batches of the original recipe, adding a third of the old dough to each.  I've even gone as far as a week and a half between baking, which makes a deliciously sour loaf!

A few days early, mix up this dough and stash it in an oiled bag in the refrigerator:

18 oz white bread flour

12.5 oz water

2 tsp kosher salt

1.5 tsp instant yeast


When you're ready to bake, here's what I do.

First, take your dough out of the refrigerator, and divide it by weight into three equal portions.  Take one portion, and cut it up into little strips or balls about an 1x1 inches.  The smaller it is, the easier it is to mix into the dough.  Measure out your water.  If the dough is really cold, I use pretty warm water.  Plop your old dough into the water and let it hang out while you measure out your other ingredients.  You end up making the recipe three times, so I like to get all the old dough in separate water portions, with three bowls of dry ingredients ready, too.

Old dough in water

I pour the first batch of water / old dough into the Kitchenaid bowl with the paddle attachment, and mix on low for a few minutes until it's pretty well homogeneous.

I mix the flour, salt, and yeast in a bowl by swirling it with the dough hook by hand.

Next, I pour the dry mixture on top, replace attachments with the dough hook, and turn the machine on to level 2 for two minutes.  If it doesn't seem to be picking up the flour as well as I like, sometimes I stop the machine, and scrape the bowl with the hook a few times.

After two minutes, I turn the machine up to level four for seven minutes.  Notice it's a nice, wet dough.

I turn the dough straight out onto a floured surface, and tri-fold it into a ball.  I put this in a floured bowl, and place in the oven until risen double.

After the first rise, I gently pull it into a square, and tri fold it again.  I put it back in the bowl, and rise it in the oven for a second time.

After this rise, I square it, and form the final loaf.  I put it on a floured tea-towel.  I put a 12 inch dutch oven, with lid in the oven and preheat it to 525F

Pretty much by the time the oven is pre-heated, I take the dutch oven out and set it on a cutting board.  I flop the dough into it, put the lid on, and put it back in the oven for 20 minutes.  

After 20 minutes, I remove the lid and bake for 15 more minutes, or until it's nice and golden brown.

Now, just do it again.  The third batch I bag up and save in the refrigerator for next time.

This bread makes really yummy, crispy toast.  We ate it just this afternoon as chicken salad sandwiches.  It's our all-purpose bread.

blackbird's picture
blackbird

1st try croissants
I used the "short method" from the Sunset book but next time I'll use the layered way as in the Sunset book or Jacque Pepin's "The Art of Cooking, Volumne 2".  

I think the oven should have been hotter (such as 425F instead of 325F).  I should have made more folds to try to get better layers but they are crunchy, chewy, and tasty........and like a magician, they  dissappeared.


1st try poolish
I think I got some oven spring, didn't over proof, I'm certain, must be doing something right, even if I'm not sure how I did it or what I did.  That's the fun part, eh?

Sunset's Sponge-method Peasant Rye Bread formula was the idea I based my loaf on, with a few changes.  I reduced the quanity by one-third.

One cup rye, one cup water, a little instant yeast, make the sponge (or poolish).

The basic idea was to compare the formula in an old Sunset bread book and ideas in Peter Reinhart's BBA book.  The Sunset book starts the mixing with a sponge but this seems to be matching the description of a poolish in Peter's book.  After 6 hours the aroma was very faint but pleasing.  At 24 hours the aroma was wonderful.

After 24 hours, two-thirds cup rye flour, one cup water, caraway seeds, are added along with a little salt, mixed well, and about three cups AP flour are added slowly. 

Knead for about ten or 15 minutes until smooth, adding AP flour as needed (pun intended).

Next a little oil to cover the dough, then cover the bowl with plastic wrap.  Let rise till doubled, or so, then knead (I did stretch and fold 2 cycles).

I tried a banneton for the final rise which didn't take long while the oven was pre-heated to 450F.  Two deep scoring cuts were added.

A small pan of hot water went into the oven, then the loaf, then fine water spray, close the oven for 40 minutes maximum for an internal temperature of 202F.

I'm a hopeless loafer, always have been a loafer. hope to be a better loafer, when I grow up. 


Yippee's picture
Yippee

I'm grateful to the people here who have helped me advance in my bread making techniques.  I want to share my joy of success with them and the rest of the community. Even though my projects are not perfect, I've always made progress. Given time and practice, they will continue to improve in the future.

In this project, credit must go to dmsnyder (David), for his thorough write-up of the formula here and instruction/illustration on scoring; to MC, for her detailed explanation and encouragement on shaping; and to SteveB, for his video demonstration which makes the baguette shaping process vividly clear. 

I followed the Anis Bouabsa's baguette formula posted by David almost to the letter, except for the retardation part.  This dough had been given a cold shoulder in the fridge for six days.  Therefore, a hint of sourdough flavor has developed.  It lost its priority on my to-do list due to my hubby's recent grumbling about dwindling variety of good foods in the house since I started baking bread a few months ago.  "Bread again?" has been a frequent moaning I hear lately.  Therefore, I have diverted most of my energy and focus back to cooking in the last week or two, to appease all the 'hungry' mouths in the house.

And here's the link to my latest creation:

http://www.flickr.com/photos/33569048@N05/sets/72157619796084657/


I've seen many TFL members' creations posted on YeastSpotting! and I think I'm going to give it a try this time.


Shiao-Ping's picture
Shiao-Ping

Making breads must be a disease like any other addiction.  You don't want to stop once you get going.  


We just planted a baby avocado tree in our backyard.  A big storm last November uprooted one of our jacaranda trees and there was a spot available.  It will be years before our avocado bears fruit if it survives, but I am getting ahead of my game and practising my skill.  

Hass avocado is our favorite variety of avocado here in Australia.  Apparently in the U.S. it accounts for more than 80% of the avocado crop, including 95% of the California crop.  So, plenty is available.

I once made an avocado moose with orange cream and the kids loved it.  I haven't tried avocado in breads.  The tricky part would be how to let the sourdough shine - would the oil in avocado interfere with the sourdough culture? and, how to preserve the vibrant green color?  I know I will need the help of a little bit of instant yeast.  As well, I am pairing orange with avocado as avocado on its own may be a bit bland.  There may be one too many flavors but this is just my first try.


Formula

 250 g starter (refreshed last night at 75% hydration)

 485 g King Arthur Flour Sir Lancelot white bread flour

100 g water

100 g orange juice (about 1  1/2 navel oranges)

10 g very fine orange zest (about 1  1/2 navel oranges)

20 g honey

1.5 g instant yeast (1/2 tsp)


the avocado mixture

150 g roughly mashed avocado (about 1  1/2 medium size avocado)

10 g lemon juice (about 1/2 lemon)

11 g salt


I was aiming for a final dough hydration of around 63.5% and I figured the oil/liquid in avocado is anywhere from 40 - 50% its weight. 


              orange zest                                                                       mixing with avocado


I first mixed the starter, flour, orange and honey (for no more than 30 seconds), and while the sticky mess was being infused in orange flavors in resting, I prepared the ingredients for my avo mixture.  I chose the avocado slightly under ripe as I find if avo is too ripe it tends to oxidise too quickly once it's open.  I left it to the last minute to cut open my avo, mashed it with lemon juice and salt - the mixture is great to eat as is - then, chucked it right into my bread machine and turned it on at low speed.  I had to help the machine as the avo was swept aside and not being mixed in.


The rest of the procedure is pretty standard.  Today the weather was warmer than yesterday (around 21C); the first fermentation took 4 hours.  I divided the dough into two pieces and shaped.  Proofing was another 1 1/2 hours.  And here is today's bake:


The boule


The...(what do you call this shape?)


                                         The bread basket


The crumb was a little bit on the dense side, but the aroma!... the orange fragrance really comes through the crumb!  The avocado was also there. The crumb color was a pale olive green (somehow the crumb photo below does not show the color accurately but the open sandwich picture further down is more true).  We sliced the bread after 30 minutes from the oven (couldn't wait any longer), the first thing that hit us was orange, then a slight hint of avocado.  The interest thing was, after the bread rested for another hour and a half, the sourdough taste comes alive.   It was only then that all flavors and sourdough have come together nicely. 


The crumb


There is definitely room for improvement on the crumb.  I am sure Sir Lancelot flour was not the right choice of flour as it is a high protein, hard wheat flour.  I used it because I've only just received it from America and wanted to try it out.  For a more open crumb I should have used a lower protein and more balanced flour.   Nontheless, for the moment, I am happy to have it on its own or in a sandwich...


The open sandwich


The forefathers in 18th century Paris making sourdough breads in their little dark dungeons in the wee hours of the morning, had they had access to ample fresh avocado supply, and fresh oranges supply, would they not have tried the combination?

I've got to finish reading S L Kaplan's book before I get any older.                 


Shiao-Ping


Anonymous baker's picture
Anonymous baker (not verified)

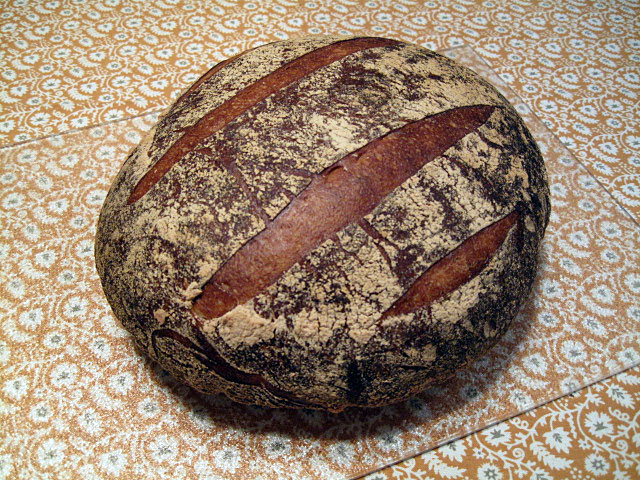
I made David's famous Pain de Campagne AKA San Jaoquin Sourdough today. I followed his excellent instructions exactly making one large batard. I baked the loaf on a stone in the center of the oven which proofed to be the wrong rung for my on-the-small-side wall oven as the loaf got a little too brown.

pain de campagne

The crumb is nice and open, and the flavor has a lot of sour and complexity to it. I'm not sure why I only have a hint of an "ear" but perhaps I didn't get enough surface tension when I was shaping.

pain de campagne


Thanks, David, for this and all the other wonderful variations on the theme!

--Pamela

Anonymous baker's picture
Anonymous baker (not verified)

I was refreshing my starter to make pain de campagne when I saw this post. Your Italian bread is beautiful inside and out. I decided to try this and was VERY happy with the results. A really delicious bread, we ate half a loaf already.


I doubled the recipe to make four batards. The only thing I did different is I used Barley Malt Syrup instead of the powder because that's what I had. Next time I'd mix it with the water first because it was hard to mix in. I don't have a mixer so I did stretch and folds and a couple of minutes kneading. My crumb is not as open as yours. The first two loaves overproofed a little because my grandkids were getting ready to go home just as the loaves were ready to go in the oven. By the time we said our goodbyes I knew the bread had gone too long. You can see which two they are. The second two had time to sit and ferment while the first two were baking and by the time I formed them they had lots of air bubbles. I formed carefully and only let them proof for a little more then 30 minutes. Absolutely delicious! After all the lean breads a litte bit of sugar and oil were very tasty. I like the lean breads for toast and this Italian will be a favorite sandwich bread. Thanks for the post. 

Jw's picture
Jw

I have been making a lot a lazy bread lately. Takes me 20 minutes (incl. cleaning up, excl. baking time) for two breads. I always add seeds, makes the taste much better.

For flour I use 2/3 white, 1/3 rye or 1/3 five grain flour. I have tested the different percentages, mostly I go with 1/3 en 2/3.

The round bread: I was trying to make a bread for a bigger party. This would make cutting a bit easier (and it did).

The eary bread is pain de provence (I believe). I used wild yeast instead of instant for these.

I like this close-up!

The piggy bread is full rye. Very heady and solid, didn't rise very much. Great taste with a brettlejause! (just a table with good food, bread, sausages, cheese etc),

I'll have some more exiting pictures next time, finally got a new camera.

Happy baking!

Cheers,
Jw.

Pages

Subscribe to RSS - blogs